When sewing or embroidering, you use a variety of stitches to create and design your work. Doing each of them is an art worth learning.
Decorative and finishing seams are designed to create a pattern, decorate, and connect parts in a special way. Videos of their implementation seem incredibly difficult, but it’s worth a try, because the result is irresistible.
Cross, half-cross and tapestry stitch
Cross stitch has been a popular form of creativity for many years. Manufacturers offer a wide variety of embroidery patterns and even entire kits, which already contain everything you need to create a picture or decorative element. Cross stitch is based on the stitch of the same name and its modifications (half cross, 3/4 cross).
The traditional “cross” or “Russian cross” stitch consists of two oblique stitches crossing each other. It is most convenient to embroider on a special canvas; the stitches on it are neat and of the same size. It is important to ensure that the intersection of stitches is strictly in the center, otherwise the pattern will look sloppy
On specialized forums there are heated discussions about the stitch technique itself. However, in fact, the differences between them are quite insignificant, and we recommend choosing the one that is most convenient for you.
In cross stitch patterns, half-cross and 3/4 crosses are often used. These seams create the contours of the image and smooth out the corners. A half-cross can be used to separate a pattern from the background; in this case, it is necessary to ensure that the direction of the stitches of a half-cross seam does not coincide with the direction of the top thread of a regular cross. Note that the half-cross is used on a thin base. If the base is of normal thickness, the seam is made with wool or acrylic threads, which will completely close the entire cage.
The tapestry stitch is used in the embroidery technique of the same name. This seam is almost impossible to distinguish from a half-cross seam: the finished products will look identical. There are minor differences in the technique of making both seams, but they do not affect the final result. For example, a tapestry seam is performed from left to right; another design in the classic version of the seam is not allowed. In order to distinguish the two seams, you need to look at the reverse side of the fabric. A half-cross seam on the reverse side is characterized by horizontal or vertical stitches, while a tapestry seam does not have them.
Thus, mastering the “cross” and “half-cross” stitches is enough to create magnificent embroidered interior items: paintings, panels, pillows, tablecloths and napkins. You can read more about cross stitch for beginners here. The main thing to remember is that every person is a creator in his essence and you will definitely succeed!
View ready-made cross stitch kits
Counted seams
With counted embroidery, the types of seams are not so varied. The main type of embroidery when counting is a cross, hence the types of seams:
- vertical cross;
- cross diagonally;
- horizontal cross.
The formation of these embroidery stitches is carried out during the embroidery process and depends on the direction of movement of the crosses.
Vertical cross stitch
Diagonal cross stitch Horizontal cross stitch
The same type includes square and painted seams. Both are performed with elements forward of the needle, while the pattern is formed after a double pass over one place.
Seams “forward needle” and “back needle”
In addition to cross stitch, the satin stitch embroidery technique is very popular. At first glance, mastering it requires a lot of time and effort. However, this opinion is wrong - it is enough to master just a few basic stitches, and you will already be able to embroider your first work using this technique. For inspiration and confidence in your abilities, we recommend that you read this article.
The simplest decorative stitch to perform is the “forward needle” stitch. Many of us know it not even as a decorative stitch, but as a popular connecting seam.
When embroidering with satin stitch, it is used to create the contours of a design; similarly, it can be used in cross stitch. The seam is made along the outlined lines of the pattern, the needle moves forward all the time. It is a mistake to think that only straight lines can be embroidered with a needle-forward stitch; it is used for any lines: wavy, round or complex patterns.
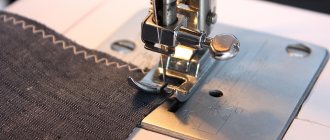
The “back needle” stitch is performed from right to left, and looks like a stitch made by a sewing machine. When making both types of seams, it is important to ensure that the length of the stitches is the same. It is not difficult to achieve accuracy in making stitches: at the first stage, you will really have to carefully monitor the length of the stitch, but with the accumulation of practical experience, the need for constant concentration will disappear.
Despite the simplicity of making seams, they can be used to create very impressive patterns, especially if you use double-fold thread: this way we will add additional volume and texture to the image.
Types of seams
The seams are:
- simple;
- looped;
- embroidery
Simple seams
Similar types are used to connect parts and in cases where they will be visible on the finished product.
The stitch forward with the needle is the simplest, the needle goes forward, leaving behind an even line of thread.
Stitch back with a needle. The needle at work passes beyond the point where the thread exits from the wrong side. The stitch on the outside goes in the direction opposite to the direction of the seam. The result is a convex thin seam, double on the wrong side.
Stem seam. The technology is exactly the same as in the previous one, only the stitch comes out on the front side approximately at the middle of the height of the previous one. The front stitches are long, as if lying on top of each other, the purl stitches are also inclined, but short.
The zigzag seam is carried out using the technology back to the needle, but the entry to the wrong side is carried out alternately on two levels.
The corner seam is made in the same way as the previous one, but here the stitches are repeated twice, due to which the result is voluminous. Triangles are formed by passing through two different heights.
Padded eight. They are formed from two parallel lines of stitches. They are performed forward, but with a transition in height. On the reverse side we get schematic figure eights.
Seam “forward needle” Seam “back needle”
Stem seam
Zigzag seam Corner seam Figure Eight
Blind seams, both machine and hand-made, are very often used; they are simply necessary for sewing parts, parts and parts of the product.
Looped
Chain stitch
Decorative seams of this type are formed thanks to convex loops. The loops cling to each other, to the working thread or to the warp in various ways, forming various patterns.
Chain stitch. A loop is embroidered, the ends of which are located close to each other. Along the back side we pull the thread to the edge of the loop, bring the thread out and form the next loop. As a result, we get wide decorative seams from loops extending from each other.
Seam "Loop"
To create decorative elements, decorative stitches are used:
- a loop;
- half loop;
- eight on the vestibule;
- all kinds of buttonhole seams.
The loop stitch consists of separately lying large loops. The thread entry and exit points are located nearby. The body of the loop is attached to the base. The loops are empty and can be positioned as needed. With the help of such loops you can form various patterns.
Half-loop seam
A half-loop stitch is created from a semicircle from a loop. To do this, the entry and exit points are spaced to the desired width. Half of the loop remains, attached with a cross stitch.
If the tambour loop stitch is made in the form of a closed circle, then cross figure eights can be formed at the centers of the loops. It is carried out like a backing eight with the difference that the eights pass along the front side.
Palestrina loop stitch. First, an inclined long stitch is made, after which a loop is wrapped around the bottom. The second loop wraps around the top. The thread goes to the wrong side and the next inclined stitch is made at the same height as the previous one.
Seam "Palestrina"
Seam "Palestrina"
Seam "Palestrina"
Seam "Palestrina"
Another subtype of buttonhole stitches is the rare buttonhole stitch. The needle passes from top to bottom, exiting the front side just above the lying loop. Each next stitch holds the previous one.
The spine seam is made in the same way as the previous one. The difference is that the needle is inserted from different sides of the already created loop, creating stitches in different directions from it. Such spines can consist of two, three or more stitches. If there are a lot of them, the spines become like stars or snowflakes. If you perform it in 4 stitches and connect the stitches of adjacent spines together, you will get a pattern in the form of a row of diamonds, such a stitch is called a diamond.
The knot stitch is made by wrapping the working thread around the needle. The needle comes out to the front side and goes back at almost the same point, leaving behind a twisted bundle of thread. These types of them look like a sequence of nodules, hence the name.
Rococo seam. The needle makes a small stitch from the wrong side, remaining in the fabric. Several turns of thread are wound onto the tip of the needle. The working thread is pulled through these turns. A second pass of the thread through the turns, passing through the underside, secures the stitch.
The loop seam with the flooring is performed in 2 stages. The first step is to embroider 2 parallel stripes of the base. Embroidering occurs using the backward needle method. There should be no gap between the seams. The second stage involves laying the loops perpendicular to the strips. The needle goes along the wrong side, coming out under the base lines and securing the loop of the previous stitches. We get a convex strip of decorative trim.
Rare loop stitch Spike stitch
Seam "Knots"
Seam "Rococo"
Loop seam with flooring
Stem seam
The very name of the seam speaks about its purpose - it is used to embroider stems on canvases with plant motifs. The main contour stitch in satin stitch embroidery. The seam is formed by oblique stitches, pressed tightly together. There is no single rule for making a seam: it can be embroidered in any direction. This seam is used to fill in complex motifs and irregularly shaped details.
The stem stitch is widely used in embroidery with ribbons and beads. With its help, magnificent textured elements are obtained.
The stem stitch is often used to embroider capital letters in inscriptions and initials. We recommend that you hone your stem stitch technique by embroidering plant stems in simple patterns.
What is important to consider when working on stitches?
The easiest way to master hand stitches is by embroidering with floss threads on a special fabric. This is the best option for training beginners. If you want to hone your crafting skills, you can start by marking your stitches with a water-soluble marker. Then it will be much easier to make an even, beautiful and smooth seam. Do not forget that the aesthetics of the finished product depends on the equal length of the stitches and the appropriate distance between them.
Special attention should be paid to working with knitwear. This popular material tends to shrink after washing. Therefore, before cutting, it is recommended to wash the fabric in advance and take this feature into account when leaving allowances. Dozens of patterns and samples of hand stitches for knitted and other fabrics are available in special books and on the Internet. Mastering sewing skills depends only on your desire and perseverance. Here, as in many other activities, it is important to systematically hone your skills.
Chain stitch
The chain stitch is a chain of loops that sequentially emerge from one another. Outwardly it resembles a crocheted chain. The seam is universal. Using this technique, you can either outline the drawing or completely fill the space. Using a chain stitch, you can sew an applique to clothing and make an invisible hem at the edge of the product. It is most in demand for satin stitch embroidery, where more than a dozen of its varieties are used.
Fern stitch
It is one of the popular decorative seams and has a magnificent appearance. The stitch got its name based on its appearance: three straight stitches very much resemble a fern branch. Using a fern stitch, beautiful patterned lines are created. Most often, various plant elements are embroidered with it: tree branches, leaves, sea vegetation.
Satin stitches
There are several types of stitches: fastened stitch, flat stitch, shadow stitch, covered stitch, artistic stitch. Products made with any of the listed seams have a special charm.
The stitch stitch is used to fill large areas of the pattern with threads of the same color or similar shades. Performs an auxiliary function: most often used when the design is already embroidered with flat satin stitch.
The satin stitch with the flooring is performed on a previously applied flooring, which is made with a thicker thread. This way we get a more textured pattern.
Various plant elements are embroidered using flat satin stitch; accordingly, flooring is not used. Flat satin stitch is universal - used for embroidering both wide and narrow elements.
Experienced craftswomen use artistic satin stitch to create color transitions. It is made with threads of different shades of the same color. Art satin stitch is a single row of stitches of varying lengths, partially covered by rows of longer stitches.
View ready-made satin embroidery kits
Basic rules for choosing threads and needles
Currently, there are many types of needles and threads, so it is worthwhile to carefully imagine and study what will be useful in your work.
Types of needles by purpose:
- Handmade. These needles are universal for use, come in different sizes and are suitable for all types of fabrics.
- Stitch. Short with a round ear.
- Knitwear. Needles with a rounded tip, easy to use as they do not damage the loops.
- Decorative work with thin fabrics. Blunt, short with a wide ear.
- Masking holes. Long needles with a large eye for threading several layers.
- Embroidery. With a blunt or blunt end (depending on the type of embroidery) and a large oval-shaped eye.
- Leather and leatherette. Triangular tip.
- Beads and seed beads. Thin and flexible needles of different sizes with a narrow eye.
- Furniture and decorative fabrics. Straight or curved with a large eye for threading thick threads.
When choosing a needle, it is worth considering the following points:
- The ease of stitching depends on the quality of the needle. Poor quality needles may be bent or have jagged edges along their entire length, which will damage the fabric as you work.
- The thickness of the needle depends on the thickness of the material. For example, a thick needle will leave holes in thin fabric, so a thin and sharp needle is suitable for it.
- The thickness of the thread and needle must match.
- Rusty needles stain and make holes in the fabric, while bent needles affect the evenness of the stitches. For accurate work, do not use such needles.
- Select a needle in accordance with the planned type of work.
Threads should also be selected according to the type of work. For temporary basting, regular thin cotton threads are suitable, as they break easily.
To firmly sew the parts together, use strong synthetic materials. Decorative threads are excellent for embroidery; floss is a popular thread.
Split seam
Another name is split seam. In the technique of volumetric embroidery, it denotes the contours of the image. To make a seam, it is necessary to use a thread in two folds. Having made a stitch similar to the “forward needle” stitch, you need to return the needle to the front side at the end of the stitch between the two threads. Using this technique, we “split” the stitch into two parallel lines.