The need to sew a jacket appears quite often. The reasons may be different. When preparing for the autumn-winter season, you may find that last year’s item was too small or, on the contrary, a size too large.
Sometimes the volume of a jacket no longer corresponds to fashion trends, although the condition of the item allows it to be worn for many more years.
A similar problem often arises when purchasing something new that you like but does not match the required size. The solution may be to contact an outerwear repair shop , but this requires time and material costs. A cheaper way is to remake the item yourself.
At the same time, if you do not have the appropriate skills, then it is better to give the item to the Mobile Tailor studio, whose specialists will do everything to the highest possible quality.
Basic Rules
IMPORTANT ! You can only reduce your jacket by one or two sizes.
Before you start work, you need to take care of the necessary sewing supplies. The house should have everything you might need:
- Sewing machine;
- Scissors;
- Chalk;
- Threads to match the jacket;
- Contrasting color threads;
- Tailor's centimeter or ruler;
- Non-woven fabric.
It is recommended to sew a jacket one size only in the place where it is too big.
How to sew a jacket at the waist?
This is the simplest option for tailoring a jacket to your figure. You just need to add new stitches along the side seams at the waist.
To do this, you need to rip the lining at the bottom of the jacket to open free access to the side seams. The location of new stitches must be determined in advance by trying on the jacket over the corresponding clothing, and mark them with chalk or contrasting threads.
The marked seams must be sewn on a machine with a stitch width the same size as on factory seams.
Similar work must be done with the seams on the lining.
After this, you need to try on the jacket and, after making sure of the result, smooth out the seams and sew on the lining.
Remaking things in the studio
To be comfortable in a warm product, it must fit your figure well. If suddenly such a thing has become large, and there are doubts that you will be able to redo it yourself, then it is better to trust the specialists.
Typically, the studio accepts products of all styles and types, with any filling, from various materials. Specialists adjust the item to your figure, adjust the fit of the sleeves, the volume in the chest, waist and hips. Sometimes the zipper is replaced.
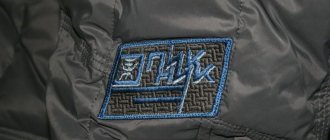
Any finished item has its own characteristics - decor, type of stitching, tags.
Specialists will not only be able to adjust the product to size, but will also transfer all elements, for example, pockets. The studio adjusts the item according to the client’s height, and also eliminates wear defects. At the request of the customer, the item can be completely altered. The inspector assesses the complexity of the work and, together with the client, selects the optimal solution. After that, he announces the final cost of the work. If the contract has not yet been signed, the client has the right to refuse services. Many studios accept urgent orders, which are completed fairly quickly, depending on workload.
If we talk about the cost of services in the studio , it will be much lower than buying a new product. The end result will be great and the down jacket will fit perfectly.
How to sew a jacket on the back?
This option for altering a jacket is a little more difficult than the previous one, but it is also quite possible. You should first determine which seams the new stitches will go through and the scale of suturing.
The jacket and one of the sleeves must be turned inside out. At the seam of the lining sleeve, you should rip a section 15-20 cm long. Through the resulting hole, you need to pull out the main material of the jacket. Now you can lay a seam of the optimal width in the center of the back, then smooth it out and tuck the elongated section of the jacket into the hole in the lining.
Next you need to put the lining in order. The sections of the torn area must be aligned and carefully stitched or sewn by hand with small even stitches.
And finally, you can turn the jacket right side out, straighten it out and try it on.
Before performing all this work, keep in mind that they require a certain level of professionalism. Therefore, if you are not confident in your skills, we recommend entrusting this to the professionals from Mobile Tailor.
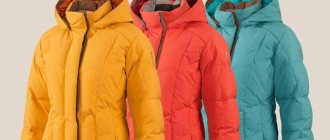
Fitting a down jacket to your figure
With the onset of cold weather, we begin to take warm things out of the closet. It often turns out that they are small or large. For this reason, you have to change clothes by buying new ones. For example, a down jacket may suddenly turn out to be 1-2 sizes larger, and what to do in such a situation?
There are several options to solve the problem:
- buy a new thing;
- take it to a studio to have it tailored to your figure;
- sew it in with your own hands.
If the item was purchased recently, then there is no point in purchasing a new down jacket. It is much easier to take it to a workshop. There specialists will be able to quickly and efficiently stitch it in . However, such a service from professionals will cost a hefty sum.
There is also a third option - sew the down jacket with your own hands. According to experts, fitting a down jacket to your figure is not much more difficult than other wardrobe items. However, for this you need to have certain sewing skills.
How to hem the sleeves of a jacket?
If the sleeves of the jacket are a little long, they can be shortened. The bottom of the sleeve must be opened, the cuffs removed and excess material cut off. The size of the part to be cut must be determined in advance, and allowance should be made for allowance. As a rule, reducing the length by one size is minus 1.5-3 centimeters.
The sleeve lining is shortened in the same way.
Next, the cuff is combined with the front side of the sleeve and attached. To complete the work, the lining is sewn on with an exact match along the seam.
How to sew a jacket in several sizes?
If the jacket is several sizes too large, it is better to entrust its alteration to the jacket repair from Mobile Tailor. But if you have enough free time, you can try and cope with the problem yourself.
You need to attach tracing paper with a pattern to the jacket and mark the location of future seams, as well as the suturing lines. Turn the jacket inside out and rip out the lining. Use a sewing machine to make new seams, then use scissors to carefully rip apart the factory stitches, cutting off the excess material so that there is an allowance of about one centimeter wide.
Likewise, the lining must be reduced to fit the new dimensions of the product.
The jacket and lining must be aligned at the seams and the ripped seams on the lining must be sewn.
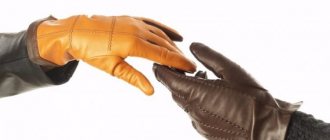
How to sew a leather jacket?
If you still decide to alter a leather jacket yourself , then you should first prepare a pattern. The product must be opened and laid out on the work table. Place the pattern on the skin and trace the contours of each part with chalk.
Attention ! It is necessary to leave allowances 1-2 cm wide at the top and sides, 2-3 cm along the bottom line.
Natural leather must be cut with sharp scissors exactly along the intended contours. Each part must be reinforced with non-woven fabric. When working with leather, keep in mind that needle marks remain on it, so basting cannot be done.
To ensure that the leather does not move during stitching, you need to install a special Teflon foot and a thick needle on the sewing machine. It is better to sew the skin with stitches of three millimeters.
After completing the operations, the jacket must be turned inside out and ironed. The allowances are glued and left to dry.
Stages of work
Once you have decided how many centimeters you need to sew on your down jacket, you can begin to work directly.
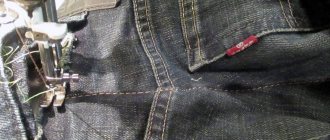
Sew on the sides
- Turn the jacket inside out. Using a sharp object (small scissors or a special seam ripper), open the side seams and carefully remove the old threads. Some modern products are factory-treated with adhesive tape. If this is present, then it is necessary to peel off the hem allowance and, if possible, remove the sticky layer from it. Fabric soaked in glue will be more difficult to stitch.
- Afterwards you will need tracing paper or other thin paper. Some housewives use thicker paper, for example, wallpaper, but for inexperienced seamstresses we recommend tracing paper, on which you can easily stitch . Place it on the side seam and draw a taper line along it, then mark half the distance from the taper line to the edge. Connect the marks. Do not skip this step so that in the future there are no gathers and constrictions on the front side of the product. Now use your sewing machine to make one stitch along the drawn line directly on top of the tracing paper, then remove the paper.
- The next step is to remove the factory threads using scissors using upward movements. The allowance must be cut at a distance of 1 cm from your stitching. If the seam was taped at the factory, then repeat this action using non-woven fabric and an iron. Apply the hot iron for a couple of seconds and remove the hot iron: the material sticks very quickly.
- At the end, open the seam on the lining fabric, sew it along the side seams according to the size of the front fabric. After this, you can connect the lining to the outer material. Next, you just need to sew the cut and turn the down jacket inside out. All that remains is to try it on!
Shortened into a jacket
If you think that the down jacket is too long and you decide to cut it yourself, then follow the instructions:
- open the bottom seam of the product and remove the factory threads;
- open the lining material by 15–20 cm;
- Carefully cut the length you need with scissors. If feathers or fluff get on the cutting line, it is better to carefully remove them so that they do not come out when sewing ;
- form a hem from the outer fabric, turning the top 0.5 cm of the fabric inward, and sew an even seam;
- trim off the excess lining and sew to the inside of the down jacket.
How to sew a sleeve with your own hands?
If you are not satisfied with the length of the sleeves on your down jacket, then shortening them will not be difficult. Here you need to follow the same pattern as when cutting the bottom. By the way, now the current sleeve length is just below the elbow. If you wear this jacket with long gloves, you get a stylish and fresh look. If you are not satisfied with the fit, armhole or width of the sleeve, then it will be much more difficult to recut and sew it yourself. This is possible if you have sewing experience. If you decide to do this, then pay attention to the following tips:
- do not rip off the sleeve immediately. Try using a coat hanger. If the result does not satisfy you, carefully open the side seam of the product, open the sleeve;
- find a pattern (you can find a diagram on the Internet or use a sleeve from an old jacket that suits you), attach it and trace it with chalk along the contour. Draw a new armhole line, first adjusting the side seam line;
- if necessary, decide on the sleeve width
- sew the side seam of the down jacket (see above for how to do this), then sew the side seam on the lining and the sleeve itself;
- fit the sleeve correctly. Using chalk and pins, carefully mark fit reference marks on the sleeve and jacket itself, pin the pieces together and begin basting. It is important to ensure that the head of the sleeve does not begin to wrinkle ;
- turn the sleeve inside out, straighten the lining, carefully sew the rest of the seam;
- Turn the sleeve right side out.
Do not try to re-cut a sleeve without a pattern. Even professional seamstresses always use it so that the sleeve does not twist or wrinkle when worn.
Sewing a down jacket is quite possible if you have at least minimal sewing skills. The main thing is to take your time: once you cut off the excess, you won’t be able to put it back. The quality of your work determines whether you will wear this item in the future.
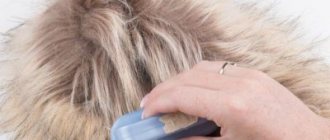
How to remove pills from a sweater?
What fillers are there in down jackets?
Useful tips and tricks
In order for the item to be altered neatly and fit well on the figure, you need to use the recommendations of tailors from the Mobile Tailor studio:
- Follow the correct sequence of actions: first, turn the jacket inside out, and then rip it open.
- Do not attempt to correct the fit of the shoulder or sleeve armhole. This can only be done by re-cutting the sleeve.
- Leave the lining slightly larger than the body size for a loose fit.
- Make sure that the length of the armhole and sleeve cap match perfectly.
- Secure the connection of parts with pins.
- Place the darts on the back closer to the midline.
- For a wide waist, sew on another button.
Instructions
Specify the required length of the future shortened product. It is recommended to cut a down coat to mid-thigh - this is the classic size of stylish modern jackets. This way, outerwear can protect you well from the cold. Carefully open the bottom factory seams with a special sharpened seam ripper or small manicure scissors. Remove any scraps of old thread. Open the lining of jacket to a height of about 15-20 cm from the bottom edge so that it is comfortable for you to work. When shortening a coat with scissors, provide a fairly wide hem - about 2-2.5 cm high. Be careful not to gut the compartment filled with down and feathers. If the cut ends up on it, remove the filler from the hem line. Otherwise, when sewing, the fluff will come out with pins and needles, and the edge will turn out to be artisanal. From the front fabric, form a hem for the bottom of the down jacket , folding the top 0.5 cm of the fabric inside. Iron folds unless the clothing manufacturer's label says ironing should not be used. Typically, the top of modern down products is made from synthetics such as polyester or a mixed material. These fabrics can be ironed at medium temperature through moistened gauze. Pin the hem and try rehearsing the machine stitch on a cut piece of material. If you choose the wrong needles and threads, puffs may appear on the surface of the fabric; The work cloth under the foot may not slide well. Try making a straight stitch right along the strips of tracing paper, and then remove the paper between the stitches. It is so convenient to work with water-repellent synthetic and mixed materials of down jackets if the device is “capricious.” It is recommended to select thin pointed needles No. 60 to 100, reinforced threads and sew the down jacket at low speed. If you have successfully shortened your down coat, all that remains is to trim the lining and sew it to the wrong side of the product.