Markers for textile types of needlework, if used correctly, can significantly simplify the life of craftswomen, improve the quality of their work, and eliminate problems with the application and further removal of markings. After all, today not only indelible markers are produced for working on fabric, giving a lasting, clear design, but also those that give a temporary outline.
Types and purpose
Modern needlewomen can use markers quite widely:
- for embroidery;
- patchwork (patchwork);
- sewing;
- applying copyright logos or designs to clothing;
- batik (painting on fabric).
For the last two types, you need durable, indelible markers (permanent). With their help, you can draw a clear, graphic outline without dirt or streaks. They are suitable for working with both natural and artificial and synthetic fabrics. They are produced with tips of different shapes and thicknesses, which makes it possible to apply lines of various widths and densities. The thinnest felt-tip pen is suitable for creating neat outlines or precise markings; thicker markers can be used to draw individual details.
Types of markers:
- for dark fabrics;
- for light fabrics;
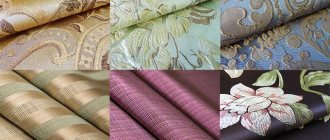
- for fine textiles;
- for a thicker fabric;
- covering (for applying a design over another marker or paint);
- disappearing (washable, water-soluble, phantom, sublimate) - for applying temporary markings when cutting or embroidering, as well as temporary sketches when painting;
- felt-tip pens with glow effect (fluorescent, luminescent);
- with velvet effect;
- with volume effect, etc.
Purpose of fabric markers
The modern chemical industry has reached unprecedented heights. Today, for sewing and other types of needlework, you can use various types of markers intended exclusively for textiles. They are not only convenient for marking, but also for making indelible inscriptions, logos or drawings, and even for basting cut elements. Let's look at the purpose of fabric markers, how and how they can help in the work of a craftsman.
It should immediately be noted that according to the nature of interaction with tissue, markers can be divided into two groups:
- Permanent - do not wash off, intended for artistic painting on fabric.
- Temporary (phantom) - which are easily removed or disappear on their own.
Temporary markers for marking fabric
Before cutting the fabric, the details of the future product are transferred to the fabric with tailor's chalk or a special marker. Many people use chalk the old fashioned way, but working with it has a certain inconvenience. Using a marker is much more convenient and practical.
There are several options for markers on the market for marking on fabric:
- Bilateral
– one side with a writing rod, the other with an eraser that can be used to remove markings.
- Self-disappearing
– the drawn line disappears after some time, usually after 24-72 hours.
- Flushable
– markings are removed with a damp sponge or after washing the product.
The STAYER washable marker with a thin ceramic tip has proven itself to be excellent in work. The rod gently and effortlessly draws lines on the fabric. It is convenient for them to draw out the details of the cut, as well as small elements for appliqués, patchwork and other textile techniques.
Note! Never expose the marked fabric to direct sunlight. You should also not iron the marked part, as the marked lines may become fixed.
A useful recommendation is that before marking the fabric, you need to test the marker on a small piece of the same material.
Using a fabric marker, you will create clear, neat markings that will disappear on their own or can be easily removed with a damp sponge.
Permanent markers for artistic painting on fabric
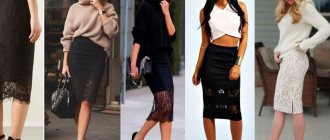
Recently, designs on textiles have become a popular form of creativity under the elegant name of the batik technique. If you wish, you can decorate your entire wardrobe.
Permanent inscriptions are used for marking children's clothing (they sign things in kindergarten or school).
Permanent markers for painting on fabric form clear, neat lines without any flaws or streaks. They are ideal for applying designs to any type of textile. It doesn’t matter what fabric you plan to decorate – cotton or synthetic.
Permanent markers are available in a variety of refill thicknesses. Some allow you to draw very fine lines, others wider.
Benefits of permanent markers:
- draw a clear outline, the design does not float or smear across the canvas;
- have a rich multi-color palette;
- wide range of line thicknesses (from 1 to 4 mm);
- dry quickly;
- odorless, non-toxic;
- interact well with textile dyes and pencils.
Note! A permanent marker can penetrate through matter. To prevent material from getting on the second layer, place thick cardboard or any other protective element under the working surface.
STAYER permanent marker ink dries instantly. It allows you to draw clear, neat lines that won’t smudge when touched. This is the ideal tool for applying logos to personalized projects.
Not all permanent markers dry on their own. Some designs applied to fabric with a marker require heat treatment. Depending on the manufacturer's recommendation, they should be ironed with a hot iron without steam or blown with a hairdryer.
If during the work the master made an error in the drawing, then it can be corrected with a damp sponge until it dries.
It should be noted that items with artistic painting with a marker should be washed at a temperature of 40-50˚C without bleaches or stain removers.
What are the benefits of markers?
With such diversity, the possibilities for creativity become much wider, which cannot but please craftswomen. In addition, fabric markers have many obvious advantages over other tools:
- the contour does not smear on the fabric;
- markers give a rich color and are applied in an even layer;
- dry quickly;
- give line thickness from 1 to 4 mm;
- if necessary, before drying, the design error can be washed with ordinary cold water without detergents;
- do not have a toxic odor;
- Can be used in conjunction with fabric outlines and paints.
Advice
Indelible markers often soak through the fabric when working, so place thick cardboard under the fabric layer so as not to spoil the bottom layer or work surface.
Disappearing markers are also easy to use. The trace of them disappears within a few days after application (a washable marker just needs to be soaked in cold water or treated with a damp sponge, and to reduce the amount of work, it is better to apply the contour pointwise). Often, for convenience, such markers are equipped with a tip that allows you to erase the applied outline if there is an inaccuracy or there is no time to wait. Or you can use a special corrector to combine such markers.
Advice
Washable markers are not recommended to be left on the surface of the fabric for a long time. Therefore, if you are planning extensive work that will take several months, it is better to use a disappearing felt-tip pen. Otherwise, there is a high risk that the paint will penetrate into the fabric and marks will remain. However, a disappearing felt-tip pen also has its own tricks: it is important to have time to work on the marked area before the pigment disappears.
How to draw on fabric. Washable, self-disappearing fabric marker, fabric pencil - my reviews
Hello!
Today I want to tell you about what I use to draw on fabric while cutting. Which pencils, felt-tip pens and markers do I like and which ones don’t. I'll tell you why I don't like them. I will also give you some recommendations on how to remove such difficult-to-remove marks as pencil and chalk, especially colored chalk. They are convenient for drawing, but getting rid of them later is a real problem. Sometimes completely insoluble. Well, let's begin.
Textile marker
Previously, to draw and draw on fabric during cutting or sewing, they used either chalk or soap, which were not always convenient on all fabrics. Often, on the contrary, they created problems.
Either the line is not removed, or a trace of soap remains. Now things are much better and simpler. Need a water-soluble marker - please. If you want it to disappear on its own after some time, no problem. What about a disappearing marker under the steam of an iron - whatever your whim, just cut and sew.
Water Soluble Fabric Marker
My favorite thing to do is use a fabric marker that washes off with water. Well, I don't like this ability.
If you need to remove a water-soluble marker, you need to wet the entire product, and I don’t like to wash new, freshly sewn products. They lose their presentation.
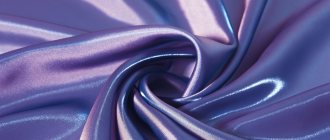
Of course, you can wet only the necessary areas. But then the water is likely to leave a halo on the fabric, especially silk ones. He will need to be fought.
By the way, I do this with a damp cloth (not wet) and a hair dryer. Try it, it works very well for removing halo.
Does the marker really come off from fabric? Yes, but, unfortunately, not from everyone. Sometimes the structure of the tissue does not allow it to disappear.
So before using it, I’ll try it on a scrap or on the edge of the material to see if it will disappear.
These are not all markers for drawing on fabric or making patterns. Let's meet the others.
Disappearing fabric marker
Among the disappearing markers, I would include a self-disappearing fabric marker that disappears when exposed to hot steam.
SELF DISAPPEARING MARKER disappears on its own after some time. Also a good thing. There is no need to concentrate on it; remove it with water or steam. I drew a line and forgot about it - it will disappear on its own.
But only I once had an interesting self-disappearing marker. Yes, he disappeared on his own without a trace, but he appeared again, it was enough to walk through the place where they were drawing with an iron with steam. After the fabric cooled, it disappeared again.
Flaw? Yes, but tolerable.
I also like the marker that disappears when exposed to hot steam. They are different, but I use red for light fabrics and white for dark ones.
The red marker is simply wonderful to work with. I tried it on different canvases.
The lines are thin and bright. They clean up great with steam.
It left a barely noticeable mark on only one silk fabric, so before work it is worth checking for compatibility with a particular material.
Well, the white marker just surprised me. I have never seen anything like this before.
You draw a line, at first it is not visible and only after a few seconds it begins to appear on the fabric. The ferry also cleans well. But standing around waiting for a line to appear in order to draw another one... Not a very good property of a marker!
Fabric pencil
I really like the fabric pencil, it's what I like to work with the most. Just don't think I'm talking about a drawing pencil. No, under no circumstances should you use it at work. It is very difficult to remove, and on thin white things it will show through on your face.
I'm talking about white fabric pencil now. It is comfortable to hold in your hands. He paints beautifully on colored fabrics. Lasts quite a long time, especially on cotton fabrics. It can be easily removed by friction and steam from a hot iron.
For me, this pencil is ideal for working with any fabric.
How to remove pencil from fabric
Unfortunately, it is very difficult to remove a simple pencil from fabric. Pencil lead is a layered form of pure carbon. It does not lend itself to any solvents.
It is difficult to remove with gasoline and other cleaning agents. Although this can be partially done with white spirit and a toothbrush.
There is no need to talk about water at all. The pencil will not react to it in any way.
The only way to remove a simple pencil from fabric is by rubbing, for example with an eraser. But such friction can end sadly for the material itself. And this won’t work with every material.
You can, of course, try a soap solution of 10% ammonia, and then rinse with water. But you need to be careful with him.
Soap and chalk
Well, in conclusion, let's talk about the good old soap and tailor's chalk.
Soap is always at hand - this is its advantage, but it has many disadvantages.
One of them is traces of glycerin, which is present in soap. This drawback makes it impossible to use soap on the front side of the material or cut details. The second disadvantage is that it cannot be used on light and white fabrics. Well, the third drawback is that if you do not sharpen the soap regularly, the lines will turn out to be very thick, which is not always good when working.
The same goes for chalk. Not all fabrics can be removed from both the face and the back.
It seems that there is a wrong side there, no big deal. But a well-made product must be perfect on all sides, so you also need to fight for the cleanliness of the reverse side.
If we talk about cleanliness, then soap, or rather, a trace of it, can be easily removed with water by wetting the desired area or washing the entire product.
This number may not work with chalk.
How to remove tailor's chalk from fabric
Any chalk can be removed from fabric only by washing the product with laundry soap. This applies to both white and colored chalk. But, again, it depends on the composition and color of the fabric itself. On light and silk colors the effect may be zero.
Of course, there are drastic measures to remove chalk, but you need to be very careful with it.
Since chalk is calcareous in nature, it can be removed with a limescale remover. BUT I INSIST, CHECK THE TISSUE'S REACTION TO THIS MEDIUM!
After rinsing and drying, see if the color is preserved. Has the fabric become stiff or torn?
You can also try ammonia, acetic acid or turpentine. Try, but very, very carefully.
In general, as they say, choose a tool to suit your taste. All pencils, felt-tip pens, markers, and even soap bars have their advantages and disadvantages. The main thing is that before work, check them for compatibility with the material you are using. Then everything will be fine, and you won’t need to look for a solution on how to remove their marks from the fabric.
Good luck!
I think as an addition you will be interested in reading:
- What kind of fabric is diving crepe? Photo, description, video
- Warp and weft thread. How to identify them in fabric
Subtleties of work
Once applied to fabric, a permanent marker doesn't always have to just dry. It often requires fixing it with a hot iron without steam (on the inside of the product) or with a special hairdryer. If an error was made during the work, it can be removed with a simple damp sponge before the paint dries and the product is washed with powder or ironed. Products painted with permanent markers should be washed at low temperatures (40-50 degrees) without the use of bleaches.
Before using such tools, it is recommended to first test on an unwanted piece or an inconspicuous part of the product to see the result. Like any markers, they should not be left uncapped for long periods of time.
It has become very easy to create a unique handmade product that no one else will have because it has an exclusive design - special felt-tip pens are used. The main thing is to follow simple rules and take your time. Then the result will definitely please you.
Textile markers for working with felt
Today I’ll share what markers I use to draw some applique elements in felt names.
There are many types of textile markers. There are ones for light fabrics, some for dark ones, and some that are universal. There are markers with a velvet effect and a voluminous effect. Fabric markers come in a variety of colors. And they differ in the thickness of the rod. There are also markers that, after being applied to the fabric, must be fixed with an iron. But there are those who do not require this.
I tried drawing on felt about three years ago, I had only one brown textile marker, which I bought like a typical hamster - “just in case it comes in handy.” First, I tried to draw some appliqué elements instead of embroidery. And so it went. Then I bought a black marker, since it is universal and most often I drew the outlines of appliqués (especially for realistic cartoon characters). I didn’t have the task of completely replacing the embroidery; I still embroider many elements. And with markers I draw contours around the perimeter of the application and small details. A little later, I purchased a set of multi-colored markers. I use them to draw mouths, irises and other appliqué elements (Crayola).
Previously, I only worked with Chinese felt; it has a loose structure and because of this, the marker spread across the felt, forming wide, uneven lines. A year and a half ago, when I started working with Korean hard felt, I felt an obvious difference in the application and fixation of markers. Korean felt has a very good, uniform and dense fall; it is a pleasure to work with it (this is in general, and not just about the experience of drawing on it with textile markers).
One of the difficulties that arises when applying a textile marker is that the refill is too thick; it produces wide lines, which is not very attractive. Therefore, I try to apply the marker lightly touching the felt with the very tip of the rod. But there are also markers with thin rods. I want to show you one of the types, I bought it at a hypermarket for creative supplies. I will not rewrite the name and manufacturer, everything is readable in the photo.
As you can see, the tip of the rod is very thin and shaped like a brush.
And they can be used to make neat, thin contour drawings on felt.
Like here, for example. In addition to drawing around the perimeter, I drew with markers the curls, wings, eyelashes and contours of the pony's eyes.
I would like to note that the marker needs to be given some time to dry, at least 30 minutes. And then I fix the drawing with an iron. But you need to iron the felt through a cotton cloth so that it does not stick to the sole of the iron. And the ironing mode is no more than “2”. In some cases, the drawing procedure can be repeated or adjusted, since the dye is absorbed into the felt and the contours become less visible. Some manufacturers of textile markers recommend ironing through paper.
And here, with multi-colored markers, I drew reliefs on dinosaur figures and veins on palm leaves. It's much simpler and looks more elegant than embroidery. Saves a lot of time, and is much more realistic (considering that the figures are quite small, from 7 to 10 cm).
If you decide to replace textile markers with ordinary felt-tip pens, then: they are not fixed to the fabric either by time or by iron, your fingers will always get dirty on the finished appliqués.
PS Besides the fact that I use textile markers for work, my daughter and I paint her white T-shirts with various patterns and texts. For example, a T-shirt for physical education is marked with the inscription “I love physical education!” Our painted items stand up well to repeated washings.
Experiment and love what you do! Oksana Rozhkova. Felt names.