One of the most striking accessories that makes a significant impression is the cowl collar. The collar pattern begins with the selection of material, at this stage you should concentrate on how it will be positioned. The material should drape easily and be wrinkle-free. The collar can be made as a continuation of the product or be sewn into this product.
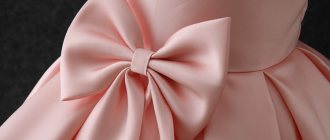
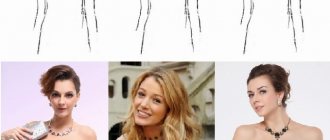
What does a cowl collar look like?
It’s interesting that in the post-Soviet school of clothing design, a “collar” is a draped or slightly free-falling stitched collar. Literally speaking, the word “collar” means a product worn around the neck. This can be either a folded stand-up collar or a wide, voluminous, knitted or knitted collar.
Tailors and couturiers in other countries are giving collar workers more opportunities for “self-expression”: now by collar they mean any kind of drapery in the neck area. In the modern world, a collar refers to both a high collar and fabric folds falling onto the chest, while the height of the collar also varies significantly. This is all directly related to the history of the “cowl neck”, which we will briefly discuss below.
A brief excursion into the history of the clamp
The word “cowl” (from English - “hood”) came to us from Latin. Today's collars, in their image and likeness, resemble the hoods-capes of Catholic monks from the Middle Ages. The modern version of such capes involves a conventional, beautifully draped hood hanging from the head and creating coattails on the neck, shelves and back.
That is why in the English-speaking world, a collar is considered both the collar itself and the method of draping the neck of the product, but in the Russian language these concepts are separated.
In post-Soviet countries, coattails cut out in one piece along the front are called “swings,” and a short collar, strictly speaking, is called a “collar.”
At the beginning of the twentieth century, the Frenchwoman Madeleine Vionnet invented the bias cut, which she actively used to create designer dresses with flowing collars. Thanks to her, ten to twenty years later, sliding and enveloping silhouettes with a draped neckline won the sympathy of fashionistas.
Knitting pattern
In a simple version, knitted collars with knitting patterns look like a rectangular fabric that is sewn into one piece, or decorated with a special button and zipper, or has another fastening option.
To create such a thing, you first need to cast on the knitting needles the required number of loops for the optimal width of the fabric. The fabric can reach the height of the collar if it is created of a single type, or be several times wider and larger if the scarf includes several layers.
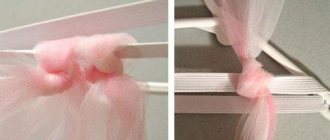
Scheme of how to knit a collar collar with knitting needles:
First you need to mark the wrong side of the product. The first row after casting on the knitting needles is knitted with purl type loops. Second row - knit stitches. In this case, you need to start working with the first edge loop not knitted and removed onto a working knitting needle. Afterwards, garter stitch is carried out (the loops continue to be made with knit stitches), in stockinette stitch (all even rows of knit stitch, odd rows of purl stitch). You can also use an elastic band with the following ratios (1 to 1, 2 to 2, 3 to 2)
When choosing a specific pattern, it is important to remember that garter stitch is much denser than stockinette stitch. These two patterns look good when created with fluffy yarn, as well as with knotted yarn and with the addition of individual beads. After reaching the desired length of the product, the smaller sides of the rectangle are sewn on the reverse side. Next, the finished collar is crocheted and carefully steamed with an iron so that its surface becomes smoother and the material can be leveled.
All knitting features will depend on the specific pattern used. For this you can use:
- pearl pattern;
- rice;
- large rice;
- large pearl.
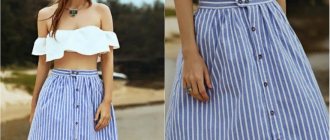
Features of cutting and sewing
When creating products with a cowl collar, we recommend adhering to the following recommendations.
- When choosing fabric for sewing, give preference to knitwear. It easily forms neat folds, lies softly in the neckline and practically does not wrinkle.
- Before proceeding directly to cutting the clamp, check whether the head will easily fit into the neck of the finished product. Make sure that the collar fits comfortably, does not pinch and, conversely, does not hang down too much.
- We recommend cutting exclusively on the bias for good stretching of the collar (a product with such a collar will be easy to put on over the head and fit loosely around the throat).
- The cut piece must be subject to heat treatment, which includes steaming with simultaneous stretching - in this way, we form a neat collar and lay a soft lapel.
- Do not iron the collar along the fold line!
- It is most convenient to sew in the collar in parts: first, sew the lower part inside the product, then cover it with the upper edge of the trim.
If you follow these simple rules, your products with a cowl collar will always be beautiful and neat!
Now it’s time for us to move from theory to practice!