In this article we will look at a master class on how to make and attach a fur trim to a hood.
To decorate your jacket or coat, you can use various accessories. But it is the fur trim that gives it a solid and expensive look, favorably emphasizes the silhouette, making the image seem perfect and complete. In addition, the edge warms well and protects from wind and frost. And you can easily make a fur edge yourself, even without having a large amount of fur material at your disposal.
How to work with flesh and what it is
A little theory. The fur is attached to the skin (in professional language this is called mezdra). When sewing together several plates of the mesh, many sew with a regular seam over the edge; subsequently, such a seam breaks, simply because when tensioned, the thread cuts through the mesh and the seam unravels. Also incorrect in use is an overcast seam, which tightly connects the core plates, but does not itself stretch along with the product, it tightens the seam, the seam becomes noticeable from the face of the product, often the product still needs to be pulled on a block or on a pattern. So there is a very simple seam that solves all the important problems when working with the delicate flesh of fur products.
Step-by-step instructions for sewing fur trim to the product
- The first stitch is a regular overstitch.
- And the next stitch (also over the edge), BUT not into a new hole, but into the same hole that was made during the first stitch.
- We make the third stitch in a new hole, the fourth in the same one. It looks like a zig-zag over the edge.
And thus, every second stitch is made into the previous hole:
The seam remains elastic. At the same time, it tightly connects the membrane and does not separate. The threads do not cut into the interior and allow the product to be pulled. Even if the thread breaks during operation, THE SEAM WILL NOT FALL AWAY! The thread does not creep; it is pressed tightly by the adjacent stitch.
Important tips when working with real fur!
Also, a little advice to everyone who has never sewn fur onto a fabric product before.
First, sew bias tape to the fur along the entire contour (with a furrier's stitch, of course), then tuck the tape inward (under the fur). But you need to sew the binding to the product, grabbing it close, close to the seam with the flesh. Thus, there will not be a large load on the mesh during use and it will tear when the fabric stretches during use.
In the photo I am sewing a strip of fur trim, which will later live on the hood.
Good luck everyone! I hope I helped with advice for everyone who decided to sew natural fur for the first time. Now you can sew a trim to your favorite jacket, hat, dress and other things!
In conclusion, I would like to invite you to watch a video on how to sew a stole of fur onto a silk scarf:
[Total: 11 Average: 2.7/5]
How to make a fur trim sewn directly to the product?
Above were shown the simplest ways to make a fur trim on a hood. But it can also be sewn without lining or sewn directly to the main product. Although these methods seem very easy, they have their own nuances. And the main disadvantage is that it will need to be sewn every time before washing.
- Take a piece 70 cm long. If you are making from two pieces, then make sure that when sewing, the pile faces one way!
- With this seam, placing our flesh on the front side, we touch the middle of the hood. And we begin to sew with a hem stitch, but working up and down, not in one direction! That is, they grabbed the skin and made a seam into the fabric, then vice versa - they grabbed the fabric and made a seam into the skin. This option is somewhat similar to a hidden seam, when you only grab the edges of the material.
- We sew the edge along one side, after which we cut off the excess pieces, if any. We remind you that this can only be done from the flesh side and with a sharp blade. Using scissors you will damage the pile itself!
- Next we sew in the same way on all sides. The fur will cover all seams and possible irregularities.
Tip: If you want to make the edge more luxuriant, you can put a thin layer of synthetic padding inside for volume.
Algorithm
How to sew fur pelts by hand stitching
Fur parts, unlike leather, are joined either by hand or on a special furrier's machine. Sewing fur on a conventional sewing machine makes the seam stretched and of poor quality, and besides, the leather fabric of the fur may tear from this method of joining. There are several techniques for joining fur skins by hand; I suggest you study one of the options for a manual furrier’s seam with a “double puncture”.
First, the edges of the two skins to be sewn are folded with the hair inward so that the hair is not visible during sewing. The needle should pierce both skins towards itself, that is, from the reverse side, but you can start from the left edge or the right, whichever is more convenient for you. The main thing is to figure out how to make such a stitch.
Flower nursery Green Gate
Do you like indoor or garden flowers? At the Green Gate nursery you can buy rooted cuttings and divisions of various domestic and perennial garden flowers. We have a constantly updated collection of anthuriums and hibiscus. Flowers and plants are sent by mail.
The furrier's hand stitch is made with simple stitches across the edge from right to left with a small step between stitches. Stitch forward, stitch in place, into the same holes from the needle, and again stitch forward, stitch in place, etc. Experienced furriers always repeat the stitch, that is, the needle always goes through the same hole twice. Stitch density (0.3-0.5cm) and stitch height (0.3-0.8cm) depend on the thickness of the leather fabric. The thicker the fur pelt, the higher the stitch, and vice versa.
After joining the fur skins with a furrier's seam, both parts are unfolded, the seam is straightened by tapping along it with a small hammer from the side of the leather fabric. The seam is smooth, flat and strong, and the edges of the connected parts are positioned end-to-end.
A slight difference in the hair length of the two skins being sewn together can be evened out by moving the edge of the skin with the longer hair upward. In this case, the stitch should be tightly tightened. By the way, when performing a hand furrier's stitch, you should not tighten the thread too much; it is enough to simply “pick up” the slack in the thread. It is much more important to maintain the same thread tension in each stitch.
Video on how to repair a bald spot on a fur coat, this method is called the “fish cut.” A very simple way to save on fur coat repairs. All you need is a needle and thread.
What can you sew from faux fur with your own hands?
Warm, beautiful outerwear from fur coats to vests, durable and wear-resistant hats, visually very attractive decorative items and individual elements of any textile products (for example, fur sewn to the hood or on the collar of a coat, or pieces of fur in the trim of skirt pockets) - here only a small list of models that require synthetic fur on a knitted basis. Do you want a jacket? Please! Would you mind giving up a sheepskin coat, a fur coat and a coat? There are a lot of options for sewing warm and spectacular models.
Choosing hood fur to replace artificial fur
My coat, it seems, will get dirty quickly (this kind of material), but it can be washed often, the fur trim of the hood can be unfastened, we won’t wash it. I thought for a long time about which fur to choose to replace the one I had, and settled on seal. With it, the rain is not scary, and the coat is not too warm, we have rain in winter, but real cold, snow and severe frost are very rare.
Nerpa will do just fine. I got the fur rectangle sewn together from two parts. It would probably be better to make a seam in the middle, the material allowed, but I had it a little on the side, in my opinion, it also worked out well.
Initially, the edge was attached to the hood of the coat using small loops and buttons; I didn’t invent anything and for the new edge I used the same loops and buttons, at the same distance from each other, that were on the original. After all, fish fur will probably no longer need buttons.
The fur itself is already very old, it was a sheepskin coat from my aunt, who is now in her eighties. She wore this fur coat when she was young, then my mother saved the most decent unworn remains, which, after lying around for another twenty years at her house, finally went to me. Now, after so many years, I have found a use for them!
There are a couple more pieces - we need to think about where else they can be used.
You can replace the collar in the same way. Everything is simpler here, you don’t have to sew it, but find a good ready-made collar (in stores or buy it) and perhaps change the position of the loops for attaching to outerwear.
You may be interested in:
Sheepskin fur vest - sewing from pieces
A very interesting idea is to make an original warm thing for the winter cold with your own hands - a sleeveless vest or “shower jacket” with small sleeves. Finishing, as well as connecting parts of the pattern, is carried out using a crochet hook and yarn. How does this happen, since the flesh of sheepskin is quite dense? Follow the link and find out.
Scarf with fur on head: outfit for cold winter
Fur is a versatile material that never goes out of style. Fur always looks rich, luxurious and at the same time elegant. The combination of a scarf and fur in general has recently been on the wave of fashion trends. Moreover, such a scarf does not have to be worn on the head; original capes, vests and ponchos are made from them. Let's talk about how to sew a fur-trimmed scarf yourself.
First stage: preparation
Creating such a headdress opens up a wide field for imagination: color, shape, selection of combinations.
First, you need to decide on the shape of the future hood. Here the choice is limited: either square or triangular.
Shawl with fur trim
Then you should decide which part of the scarf will be trimmed with fur . It can be completely sheathed along the edge, but in this case it is worth keeping in mind that such a product will be more convenient to wear on the shoulders. The rich fur trim of the bonnet makes it very heavy and bulky, so tying such a scarf on your head will be difficult.
Shawl with fur trim
The most popular option is a partial trim, so that the fur in a tied scarf only frames the oval of the face . You can take the creative ideas of some designers as a basis and trim not only the area around the face, but also make beautiful stripes or patterns throughout the entire canvas. The choice of fabric is also quite simple. It is enough to decide what time of year the product will be worn. If it is severely cold, then, naturally, it is better to choose a woolen scarf: it will both warm you and protect you from the wind.
Light, natural fabrics are perfect for the spring-autumn period. Fur, by the way, can be used from the hood of a jacket or down jacket that has not been worn for a long time. Typically, mink, sable, arctic fox or fox are chosen for edging scarves.
It should be noted that it is necessary to take into account the color combination of the scarf with fur. The finished product should look harmonious, and the fur on it should be expensive and elegant.
Pay attention to the width of the fur strip: it should not look like a pile of fur covering both the fabric of the scarf and the face.
Second stage: cutting and sewing
Usually they take a ready-made scarf, bought ahead of time in a store. You can, of course, sew it yourself from start to finish. Fortunately, this does not require any special skills or deep knowledge of sewing. The pattern for the future scarf can be found here.
Pattern of a scarf with fur
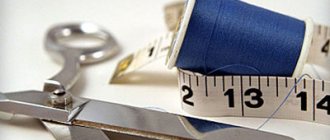
Tools
To work with a scarf with a fur trim you will need:
- Tailor's scissors.
- Tape measure.
- Sewing machine.
- Overlock.
- Furrier's needle.
- A sharp knife for cutting fur.
- Chalk or bar of soap.
- Iron.
The first step is always measurements. Using a regular measuring tape, measure the required length and width on an ironed piece of fabric. All measurements are marked on the fabric with a piece of soap or a special chalk. If the choice was made on wool, then it is better to wash it first so that the piece becomes softer. Don’t forget to make 1 cm indentations on each side, which will later go into folds. After this you can start cutting.
The length of the fur strip should also be measured and marked on the scarf where the trim will begin and end. Then a piece of the required width and length is cut out of the skin. If it is not possible to cut out a whole strip, it can be sewn from several pieces.
Note : fur is a delicate material and can be worked either manually or using a special sewing machine. It is better to cut out a fur strip with a special sharpened knife. Using scissors, you can accidentally cut off hairs and thereby damage the future edging.
First, on a cut piece of fabric for the future scarf, the edges are processed using an overlocker. Then the folds are thoroughly ironed and stitched using a sewing machine. Sewing the fur and scarf is the most important stage in the entire work. It is best to join fabric and fur by hand. It is worth keeping in mind that the seam should be zigzag. A straight seam will cause too much tension and additional stress on the “underside” of the fur, better known as the mesh. Ultimately, such a scarf will not last long: in places of strong tension along the seam, the edge will simply tear.
The presence of a lining between the fur and the fabric is mandatory. It can be fleece, special lining fabric or another thin scarf. It is best to use a long and thin needle.
Afterword
The most common type of scarf with fur is the Pavloposad one. It is used not only as a headdress, but also as a basis for creating other accessories: stoles, mittens, vests, capes. A characteristic feature of Pavloposad shawls is considered to be rich ornamentation combined with luxurious fur . All this splendor looks rich and beautiful.
However, the Pavloposad factory was never limited to creating the same type of products. The shawl manufactory has a rich history: from the creation of shawls with ancient pagan symbols as the basis of the ornament to revolutionary products with flashy patterns during the formation of Soviet power. The factory even has its own museum of scarves, through the exhibits of which you can, like Ariadne’s thread, follow the path of fashion development.
Even in bitter frosts and heavy snowfalls, a woman tries to look beautiful and elegant. Since time immemorial, Russian women have always had scarves in their wardrobe. Fashion constantly amazes with its new products, and at the end of the last century, fashionistas began to flaunt shawls trimmed with fur. Initially, these were scarves of bright colors with geometric patterns. Today, scarves are preferred in classic floral colors.
How to make fur trim on snaps or buttons?
If you want to make a removable fur trim, but don’t want to bother with a zipper or this option doesn’t suit you, then it’s even easier to sew it simply with eyelets.
- A hat elastic band works best as eyelets. The extreme loops should be located 2 cm away from the edge, provided that you left 1 cm for allowances.
- The distance between the loops can be determined by measuring the middle, and then placing marks at your discretion. The most optimal and convenient distance is considered to be 10 cm.
- The hat elastic needs to be cut into small pieces of approximately 3 cm, so that the finished loop is 1 cm long.
- In order for the edge to be fuller and more voluminous, in addition to the lining, you can put a layer of insulation between the two layers. Insulation with a density of 200 grams is sufficient. It must first be sewn to the lining, and then to the fur.
- The loops should be basted to the lining fabric, so you should first place marks and then attach the loops with clips. Then sew them on by machine and trim off the excess tails. After this, it’s worth sewing the parts together, just like in the case of the zipper. And if necessary, sew buttons to the hood.
Scheme
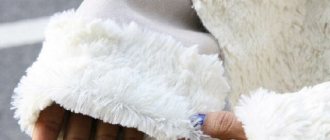
How to sew fur to gloves: basic requirements
For finishing, you can use any fur, but more beautiful things are obtained from the thick and long hair of arctic fox, fox and raccoon. A rabbit is a good budget option, but you can also use faux fur. Of course, mink will also look good, especially in the form of cuffs. But it is important not only to sew fur onto the product correctly, but also to arm yourself with several important rules.
You can sew fur onto gloves yourself
- When cutting fur trim, keep in mind that you cannot cut fur with scissors! To do this, use a furrier's knife, a stationery knife or a blade in a special holder. In this case, you do not need to put too much pressure on the fur - you can touch and trim the fur on the other side. We work with light movements. Only rabbit fur or artificial material can be cut with scissors. But you still need to work carefully!
- The connection of fur trim to the product can be done in different ways - both directly and using a lining. In principle, the fur on gloves is not subject to such great deformation as, for example, pockets. But when creating a cuff, it is still better to duplicate the parts - this will increase the wear resistance and strength of the material. The following dubbing materials for fur are distinguished: non-woven fabric, as the most economical option with adhesive application. It is important to take low-temperature material so as not to burn the flesh;
- dublerin with drops of glue on one side is also worth taking only low-temperature. This type is suitable for leather and fur. And just a little advice - this material is much stronger and not as elastic as non-woven fabric. Therefore, craftsmen often choose it, especially when sewing expensive and large products;
- there is also a sideboard. Satin, chintz, bias tape or simple braid are similar. These materials do not stretch and keep the fur from stretching. Sew strictly along the edges of the product.
How to duplicate fur
- You can add fur to the gloves themselves: sew them with a hand stitch
- sew on a machine with preliminary spacer of the parts in the right place
- glue
Important: If you put fur on a web, then keep in mind that you still need to duplicate it onto the tape and manually sew the product to this tape from the wrong side.
- It is worth highlighting this glue for sizing fur: PVA for leather
- Nairit
- Dismocol glue
- ordinary moment
Single sided tape
- The threads used for sewing mezdra must be very strong. But keep in mind that they should not cut the flesh! Don't use cotton threads! The best option is polyester.
- It is better to take a furrier's needle No. 40.
- For sewing fur parts, goat, zigzag or furrier stitches are used. The last type is the most durable and is suitable if you do not have a furrier at home. After all, on a regular machine, some seams can go in waves. In addition, it is more convenient to sew onto gloves using a hand seam. Its big advantage is that each stitch is closed and when the thread breaks, the seam does not come apart. It is performed obliquely, and then duplicated into the same hole with the needle directed towards you.
The seam
How to make a fur trim on a hood with your own hands with a zipper: how to insert a zipper?
To make a fur edge, you need to prepare all the necessary materials, tools and take measurements correctly. Using a measuring tape, measure the distance along the edge of the hood from one end to the other. Basically, this length is from 65 to 70 cm. The width should be at least 10 cm. At the same time, do not forget to add 1-2 cm for allowances.
After measurements you need to do the following:
- Using a blade, carefully cut out a rectangle of fur that matches the size. Do the same with the lining fabric;
- Place the lining on the wrong side with the front part of the fur, install a zipper between them. Please note that the zipper will be inside between the fur and the lining. And you stitch it with a furrier’s stitch by hand or on a special machine. At the same time, do not forget to tuck the long pile of fur inside so that it does not get into the seam;
- If you want to perform this procedure on a regular sewing machine, then sweep everything first;
- Sew everything on the other sides as well, carefully straightening everything out. In this case, you need to leave a small area so that you can turn the product inside out. After you have turned out the edge, you should sew the area up by hand.
With a zipper
How to insert a zipper into a fur garment?
This pattern is also suitable if you don't want to use a lining. You can make a chic fur trim with a zipper even easier!
- To do this, sew one part of the zipper between two pieces of fabric.
- Then sew this part to the fur, folding the right sides of the product together. That is, you sew one piece of fabric to one side of the fur, and the other to the opposite side. At the same time, there is lint inside!
- Sew up one side part, turn it inside out and sew the second part from the side by hand.
How to insert a zipper?
Some seams need to be taped
Some areas of fur clothing need to be duplicated, for example, hem, collar, hem and others. Duplicating with cushioning material will protect them from stretching and give them the required shape. It is imperative to strengthen connecting seams such as armhole seams, neck seams, and shoulder seams. These areas are subject to stretching and the tape sewn into the seam strengthens and strengthens it. In sewing accessories stores you can buy regular cotton tape 1.5-2cm wide and use it for these purposes. There are also special adhesive tapes, which furriers call “amplifiers”. They are also used when sewing products made from genuine leather. The tape is placed on one side.
Technology for cutting faux fur at home
Let's decide on the set of necessary tools: to cut the fur, you must have fairly sharp cutting scissors or a stationery knife. Cutting should be done from the inside out, exclusively in the direction of the pile. There is no need to cut the lint - we only cut the knitted base without touching the lint, removing the lint with the objects used for cutting. Long pile can be pulled apart with a regular comb. If you are cutting with a knife, do not use a cutting mat to avoid accidentally cutting the pile. Avoid applying excessive pressure to the base when cutting.
The pattern is transferred to the fur base with special felt-tip pens, chalk or pins on the reverse side. To cleave parts, it is better to use long and strong pins with bright rounded heads - with such support it is easier to sew parts together.
General nuances of working with faux fur
• Choose the simplest models without darts, gathers or folds. Even experienced seamstresses do this - fur is completely self-sufficient. • When making clasps, avoid welt loops, opting for cord or leather loops, hooks or clips. • Duplicated faux fur loses its plasticity, so it does not need to be duplicated with adhesive materials. How to insulate synthetic fur models correctly? We recommend using a lining made of a layer of synthetic padding and fabric with a windproof effect. • Sometimes the pile becomes wrinkled; to smooth or straighten it, you can use a dry iron at low temperature through an ironing machine. • If the fur on the item is matted, use a brush or comb to return it to its original shape. Now you know how to work with trending material. Our catalog presents different types of textile materials that imitate natural fur, foreign production, as well as other fabrics for the manufacture of outerwear. Every crafter will find here the right materials for any sewing project - we can handle any request!
Where to start modifying a fur coat
At the beginning of work on shortening a fur coat, you need to prepare the necessary items so that during the repair process you will not be distracted while looking for the necessary item. All you need is:
- strong contrasting and fur-colored threads;
- centimeter;
- needles;
- flat chalk or soap;
- sharp scissors, blade.
Visually, it is very difficult to determine the length of a fur coat so that it turns out to be optimal. Therefore, you need to straighten it, comb it and definitely put it on. The mirror should provide a full-length image. During the fitting process, it is extremely important to use shoes with which the reconstructed mink coat will be worn in the future. If new boots are just in your plans, shoes whose heels match the desired height of your future purchase will also work.
How to choose the right fur skins
Working with fur has one important advantage - you can always add a missing piece to any part or replace a section of fur skin with another, since the connecting seam will be hidden in thick hair.
The fur pelts of any fur-bearing animal are never exactly the same. They differ in size, hair height, shade, and sometimes some skins have “bald spots” and other defects. In general, selecting fur is the most important skill for which a good furrier is valued.
The correct selection of fur will make the fur coat “monolithic”, as if sewn from one large skin, without focusing on the joining of skins of different quality and shade. A good master furrier, like a sculptor, feels the fur and sculpts a real work of art from different pieces, which is why sewing fur products is the most expensive service of the atelier. It is difficult to give any specific recommendations on the selection of skins, but when sewing, for example, a fur vest, place the best pieces of skin (back) on the center of the front and back. It is advisable to install the side parts of the skins in other places, for example, in the side seams. When connecting different pieces of fur skins, pay attention to the height of the fur and its shade. Attach them to each other and compare, if they fit, connect them together.
How to sew and make a fur trim from pieces and tails?
Yes, you can make a fur trim from ponytails or leftover fur. You will spend a little more time, but the result will exceed all your expectations and efforts!
- We open our ponytails, as in the example, or smooth out the existing pieces. As a result, we should get even stripes. For smoothing we use an elastin solution. It is more convenient to use a spray bottle for uniform spraying.
Important: Do not use ordinary water! Once dry, the skin becomes very rough.
We comb every piece well!
- Now we cut off pieces of leather or natural suede to the required length, but no more than 1 cm in width! If you make a larger distance between the pieces of fur, then the edge will end up like an accordion with creases at the transition points.
- The example shows working with ponytails, but the situation is similar with any pieces! You sew on a strip of fur, a strip of leather. And so you alternate until the desired length (about 70 cm).
Important: When sewing pieces together, pay attention that the fur must be in the same direction!
Make sure you get an even rectangle!
Tip: If you don’t have enough fur, you can cheat a little - cut the pieces or tails in half. And sew them together, alternating with pieces of fabric.
If there is not enough material
- Then you cut a rectangle of the required width or simply cut off the irregularities. And now you insert a zipper, make eyelets, or simply sew it onto the hood!
- If you have thick and fluffy fur, then you don’t need to use the lining. Fold the fur in half, sew a piece of fabric on both sides to the fur rectangle. This segment can be from 0.5 to 1.5 cm in width. The longer the fur, the larger the section so that the zipper does not “chew” the pile every time it is opened.
We only sew the zipper onto fabric!
- And already sew a zipper onto these pieces of fabric. As if you insert it between these pieces of fabric. Ideally, they should match the color of the top product.
Making changes to the style of a fur coat
You can improve the style a little, which will change the mink coat and become fashionable again, with your own hands. There is no need to go to a studio and pay a fairly large amount for simple work.
There are several methods to give a modern look to a fur coat, which can be done at home:
- trim the hem;
- shorten the sleeves;
- change collar;
- make trims from other fur at the cuffs, collar and hem.
Otter fur is considered the most wear-resistant.
Fur skins have a standard of wearability. Otter fur is considered the most durable and resistant to waterlogging. It is the otter that has the honor of being the standard for all fur-bearing animals, and the fur of fur-bearing animals is compared against it. Even sable fur is inferior to it in strength and wear resistance.
So, if otter fur is 100%, then sable has 80%, mink - 70, arctic fox - 65, astrakhan fur - 60, fox - 50, muskrat - 45, squirrel - 30, ermine and weasel - 25, rabbit - 12, mole and gopher – 10, hare – 5.