How to beautifully tie a bow so that it not only looks unique, but also becomes a real decoration, adding notes of femininity, sensuality and romanticism to the overall intended bow? Stylists advise doing this in several ways, differing from each other in that they allow you to tie a variety of bows, both flat and voluminous.
Where to place the bow on the dress?
A decoration made of a satin ribbon in the form of a lush knot has not lost its position for many centuries, and during this time the bow has decorated shoes, bags, skirts, gloves and even underwear. But most often it can be seen on dresses and this is not surprising, because the bow looks elegant both in everyday and evening wear.
Now beautiful bows are flashing on fashion catwalks during shows of such famous designers as Chanel, Oscar de la Renta and Vivienne Westwood. They are made from different fabrics: organza, guipure, silk and satin, but they place the part in any place you like:
- neckline;
- sleeves;
- belt line;
- dress straps;
- back;
- neck and shoulders.
The ideal place is selected based on the width of the braid. So, if it is already 5 cm, then it is placed on the shoulders and chest. Thick bows look more organic on a belt, so they decorate belts or use them as an independent decorative element. This season, designers recommend tying a bow on coats, wide shorts, long dresses and shirts. The form of dyeing can also vary from a neat butterfly to stylish asymmetry.
Varieties of bows
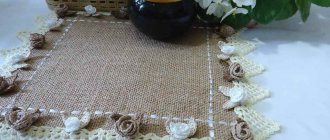
There are many materials that can be used to create bows. The most popular are satin ribbons, lace, and braid. Having chosen the appropriate fabric, you can sew the bow yourself.
A ribbon with a shiny texture will suit your evening look. One of the important points is the choice of its width, location, and color. If you plan to make a satin belt with a lush bow, you should first measure how much fabric is needed to make it. You can also use thin ribbons to decorate the dress. Bows from them are usually sewn on with threads of a suitable color.
An additional decoration is a combination of ribbons of different colors. The skirt or bottom of a short dress can be decorated with a large number of small satin bows. Lace is a delicate decor, suitable for creating a romantic look. A lace bow looks beautiful on a wedding dress with a full skirt.
The tape should be used with caution. It has a voluminous texture, so it looks heavy on thin fabrics. Well suited for ethnic patterns, including placement on sleeves and skirts. The braid has its own pattern, so there is no need to apply additional decor.
In addition to ribbons, scarves, belts, and sashes can be used to create bows.
How to beautifully tie a satin ribbon bow on a dress?
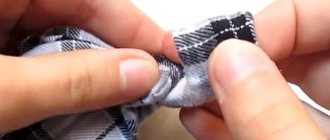
Satin ribbon is sold in almost any craft store, but keep in mind that it is not suitable for a bow in which the ears must keep their shape. Most often it is used to create a beautiful and flowing decor. In addition, the edges of the fabric must be carefully burned with a match so that the ends do not fray.
The easiest way to tie a regular bow on a belt. To do this, make a knot, form two loops and cross them with each other. Then thread one of the loops into the hole formed and tighten the braid. There is another method for creating a beautiful bow with your own hands.
- Make a knot.
- Form a loop and use the second fabric to wrap and thread through the knot.
- Tighten the satin ribbon to finish the bow.
Advice! To keep the bow from wrapping and to be stronger, tie first a pioneer knot and then a classic bow.
From the belt
Many women wear sash belts, but not everyone knows that they can be effectively decorated in the form of a bow.
We will consider a holiday option. Doing it is no more difficult than tying shoelaces:
- Take the sash, cross the ends so that they are different in length.
- Cross the long end of the belt over the short one.
- Place a loop made from the short end over the long end of the sash.
- Thread the large end through the loop and tuck it inside.
A stylish decoration made from a belt will also decorate outerwear; for example, it will look original on a raincoat.
How to tie a bow step by step
The edges of the bows do not necessarily have to be perfectly smooth, because in some cases an asymmetrical design looks very stylish.
Those who have mastered the classical technique can tie a bow with four loops. Take a long braid, make a regular bow, and from the hanging ends, form 2 more loops. Depending on the length of the ribbon, you can make a triple bow, but remember that the more petals, the more the product will sag. Therefore, try not to pile up knots.
You can make a double bow correctly using a needle and thread. Tie 2 regular bows and sew them together, you can also add corners. True, it should be admitted that the first method is much simpler, but bows made in this way can be sewn to a T-shirt, sleeves or the hem of a dress.
You don't have to tie a ribbon bow at all, you can even use a scarf. To do this, twist the fabric, wrap it around your waist several times and tie the ends.
Do-it-yourself half bow step by step
If you want to create something original, use the instructions and learn how to properly make a half-bow from fabric.
- Place the belt behind your back and around your waist so that the edges are again in front of you.
- Place one end of the fabric on top of the other and bring them inward in a smooth upward motion.
- Bend the top edge down along the outside and place it under the bottom sheet.
- Step back 10–15 cm from the intersection, make a fold and thread it into the knot.
By experimenting with different ribbons, belts, belts and scarves, you will diversify your wardrobe with your own hands and bring a touch of freshness and elegance to it.
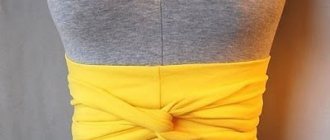
From the belt
Very cute, fashionable bows are made from a belt, no matter how strange it may seem. A knotted strap gives the usual accessory a completely different look:
- Take a thin belt made of quality soft leather and wrap it around your waist.
- Thread the tip through the buckle and make two turns, pointing the strap down.
- Thread the unused ponytail into the resulting loop located near the buckle.
- Make one more turn around the belt towards the buckle.
- Hide the dangling tip inside. This item is not necessary if the belt is very long - it can be left hanging freely in front.
As an alternative, you can use a textile woven belt, which will also look good.
How to tie a bow on a belt step by step
And also needlewomen make something like a flower out of fabric.
- Make a half-bow, grab the end from the inside and slide the edge under the knot.
- Repeat the same with the second side.
The loops transform into graceful arcs with folds and will resemble a flower. To prevent the structure from falling apart, secure it with a pin.
Many girls often do not know how to tie a belt on a coat or dress with their own hands, but in fact it is much easier than it seems.
- Make a standard knot.
- Fold one of the edges of the fabric in half and wrap it around the other end.
- Slide it through the loop and tie a bow.
This method is suitable for any clothing from shorts to office blouses.
Making a two-color bow from satin ribbon
To make the bow not only beautiful, but also voluminous, arm yourself with scissors, glue and two ribbons of different colors and sizes.
- Cut a wide ribbon (measure the required length first).
- Glue its edges together to form a circle or oval.
- Do the same with the narrow braid and attach it to the wide piece.
- Cut another piece of thin ribbon and tie it around the middle of the bow.
The finished product can be sewn to a satin ribbon and tied around the dress with this improvised belt.
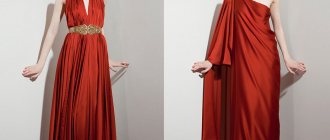
A beautiful bow for a wedding dress step by step
It is important that the ribbon for such an important event is made of high-quality fabric and matches the color of the dress. Most often it is red, beige, milky or bluish.
The bow should be tied not in the middle, but on the side.
- Prepare a wide ribbon.
- Tie it around your belt and pull the ends back.
- Cross the ends and bring them to the side.
- Tie a single knot and form a loop from the top end, and then circle it with the second edge, which should be threaded and brought out.
- Flatten the core.
A corrugated bow will look even more impressive on an evening dress, but keep in mind that it can only be tied with a long ribbon.
- Wrap a belt around your waist, place 3-4 folds on it, bring the right edge up and twist it.
- Fold it down and slide it under the overhanging edge.
- Tie a knot.
To make the bow look even more expensive, decorate it with a brooch with crystals and rhinestones. All these methods will highlight your style and help you move away from the ordinary. A beautiful bow will complement any look and give it a special touch. Knowing how to properly tie a bow on a dress with your own hands, you can elegantly decorate your outfit for an important event.
Choosing a mounting location
Want to decorate your dress with a bow? It should look harmonious on the outfit. Remember that such an element becomes the “highlight” of the image and attracts attention, so it is important to choose the right place for it. The following five options would be appropriate.
- On the back. A playful element will add a romantic touch to the image. Slender young ladies with royal bearing can afford to wear a dress with a cutout on the back ending with a bow. In this outfit you will be the star of the party! In order not to look vulgar, you need to follow a simple rule: expose only one part of the body. If the back is open, the neckline is taboo.
- On the chest. Do you want to focus on the décolleté area? A small bow will help with this. This element looks beautiful in tandem with a deep round neckline. This option is especially suitable for busty beauties. If the bust is not a source of pride for you, then create an “optical illusion”: with the help of a large bow you can visually increase the volume of your breasts.
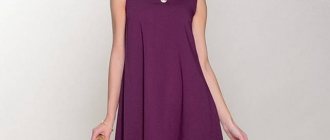
- At the waist. A bow is knitted both front and back. The element located in the front makes the image playful, sweet, and a little naive. Young beauties should take note of this option: in a short dress with a fluffy skirt and a bow at the waist, it’s easy to become a prom queen. Take this idea to heart if you need to decorate your daughter’s dress for a day in kindergarten. A bow belt tied behind your back will make your evening outfit original. There are no age restrictions for such a decision, the main condition is a slim figure, because a decorative element is an accent, and there is no point in focusing attention on shortcomings. For plump girls, it is better to attach a small bow to the high waistline: this way you can visually “stretch” your figure.
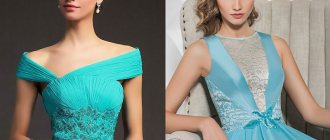
- On the neck. This option is ideal for formal dresses. The bow looks elegant, complementing the high-neck model. With the help of a wide element you can hide wrinkles that betray age, while a thin element can highlight your neck (if it is the source of your pride).
- On the shoulder. A large “shoulder” bow is the choice of confident ladies. Having decorated a dress like this, be prepared for increased attention: an outfit with an original detail looks bold and extravagant. The solution is appropriate for cocktail and evening dresses, red carpet outfits.
The main fashion rule is: you need to knit just one bow on your dress! The element should also not overlap with accessories. Overdo it and others will think you have bad taste.