There are a lot of decorative elements and one of the universal decorations is the bow. There are many materials for creating such an accessory. Let's consider making a bow from fabric with your own hands. The use of such jewelry is universal: on a dress, on the head, on a handbag, on a gift, and so on.
The difficulty of making a fabric bow depends on the desired look and fabric. There is a material that requires edge processing, and there is one that is easier to work with. Of course, the appearance and production are also influenced by the density of the fabric and its environmental friendliness. Let's consider several options for sewing fabric.
How to sew a voluminous bow, step by step with photos
To sew a voluminous bow, you don’t need many tools; you don’t even need to have a sewing machine, a simple understanding and ability to sew by hand is enough.
For work, prepare:
- textile;
- needle and thread in the color of the fabric;
- pencil;
- ruler;
- scissors.
This master class uses checkered fabric, but you can choose the color and print of your choice. Cut out 2 rectangles from fabric measuring 12.5x25.5 cm and 6x6.5 cm.
Place the larger rectangle face up, fold it in half widthwise and sew it together. We turn the resulting part inside out.
Fold the pieces in half lengthwise so that the seam is in the middle, sew the ends together and turn them inside out.
We take a small rectangular piece of fabric and do all the same manipulations as with a large rectangle.
We assemble the larger rectangle with an accordion and thread it through the smaller one.
We straighten it and our bow is ready.
Product made from a scarf
A quick and easy way to sew a bow from a handkerchief can be a good option for a hair clip, elastic band, summer light dress or handbag. The accessory turns out to be very light, feminine and elegant, every fashionista will like it.
It is good to complement the delicate design of a handkerchief with beads, rhinestones or special blanks.
Materials for production:
- handkerchief;
- needle with thread;
- rubber.
Related article: Match house: manufacturing instructions with photos
Let's start a master class on making a simple bow.
Flatten the handkerchief and iron it on the work surface. We form two longitudinal folds. Fold the edges horizontally into the middle. It turns out that this is the detail. We collect the edges.
Sew the middle. We string pearl beads onto a thread. We wrap the middle of the bow. Without cutting the thread, we sew the elastic on the wrong side. An elegant bow from a handkerchief is ready.
It is very easy to sew familiar American bows from leftovers and scraps of fabric of natural compositions. To do this, you need to sew the cuts into ribbons, trim the edges, a piece of grosgrain ribbon to decorate the middle, and an elastic band to attach the accessory.
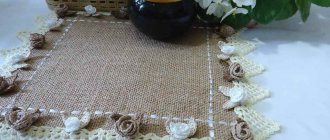
A simple and cute bow can be created from burlap or lining fabric. It is important not to forget to heat the edges. The middle can be a bead, a half-bead or a button.
Volumetric bow made of corrugated paper, step by step with photo
Working with corrugated paper is a pleasure. With its help, you can easily decorate an apartment or even an entire room in honor of a special holiday. There are several techniques for creating bows from corrugated paper, but we propose to master one of the simplest ones, where the only materials and tools are scissors, the paper itself and glue.
Step 1. Cut out a rectangle from paper with a length equal to the width of the corrugated sheet and a width of 20 cm.
Step 2. Find the middle of the rectangle in width and bend the edges of the paper to it.
Step 3. From the same rectangle, cut a piece of paper with a length equal to its width and a width of 1.5-2 cm.
Step 4. Conventionally, we find the middle of a large rectangle and bend its ends to it.
Step 5. We assemble the blank for the bow with an accordion and go around the center with a previously cut piece of paper. On the back side of the bow we glue the ends of the segment.
A voluminous bow is ready to decorate a room or become part of the decor of any craft.
Product decoration options
Having figured out how to make an accessory with your own hands and how to tie a lush bow from nylon ribbon, you can move on to the decor. For decorations, it is permissible to use any available materials. It is best to attach them to the finished product using a special glue gun. You can also use regular textile glue in a tube, but then you must remove the excess with a soft cloth, otherwise the accessory will look untidy.
You can make a beautiful ribbon bow if you use it as decoration:
- lace and guipure of any shades;
- beads and glass beads;
- beads of different sizes, artificial pearls look especially impressive;
- semiprecious stones;
- rhinestones and sequins with a glitter effect.
A cotton or grosgrain bow can be decorated with a small brooch. But for less dense fabrics, nylon, organza or tulle, it is better to choose other options.
The easiest way to decorate a bow is to use ready-made stripes. They can depict stylized flowers, geometric shapes, symbols and logos, and cartoon characters. These elements are glued or sewn (by hand, by machine).
Volumetric bow on the headband, master class
In this master class we will tell you how to design a headband and make a beautiful and voluminous bow for it.
Tools and materials used for work:
- headband;
- fabric at your discretion;
- thread with needle;
- glue “Moment” Crystal;
- glue gun;
- scissors.
We cut out 2 blanks from fabric. We will make a bow from one piece measuring 16x23 cm, and from a second piece measuring 3x40 cm we will make a cover for the headband. Important: the length of the headband is 37 cm and the width is 1 cm.
1. Mark a strip of fabric, dividing it into 3 equal parts.
2. Apply “Moment” Crystal glue to the upper edge of the fabric and bend the edges of the fabric to the first mark along the entire length.
3. Fold the bottom of the fabric about 1 cm inward and sew along the entire length with stitches.
4. Apply glue to the top of the workpiece and glue the ends. After the glue has dried, pull out the thread.
5. Put the cover on the hoop.
6. Cut off the excess and glue the ends into the middle.
7. Make a bow. Take a rectangular blank for the bow and glue its long edges.
8. Find the center of the workpiece and glue the edges to it.
9. Fold the rectangle along its width like an accordion, forming a bow, and glue the folds together with a hot gun on both sides.
10. Using a hot gun, glue the bow to the headband.
11. Cut out a strip from the same fabric and glue it to the center of the bow.
Ready.
Knot batik technique
The knotted bow technique is used to effectively decorate a scarf on the head or neck. How to make a fabric bow using the knot weaving technique:
- You need to make loops from the ends of strips of fabric.
- Thread them together, fixing the lower and upper ends in the second loop.
- Tighten.
The elegant figure in the form of a bow is ready.
Scheme for creating a knotted bow
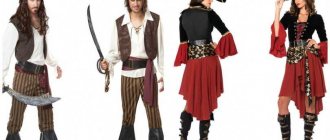
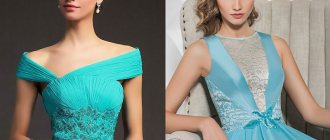
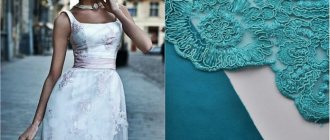
Volumetric bows on dresses, photo
Make 4 loops
Similar actions are performed with strips of 4 cm tape. Since the width of the tape is smaller, the loops will also be smaller.
Next, you should glue 4 loops into the first layer, the next 4 loops into a layer of tape of smaller width. Prepare a thin strip.
Glue the smallest layer to the larger one. A narrow strip is smeared with glue, pressed to the middle of the bow, wound and the tip is glued again.
The second stage of the process involves modeling colorful marshmallows. For this stage, you should prepare the squares, cut out the satin ribbon of the required size and singe the sections.
The squares are folded in half in pairs, connecting opposite corners to each other.
The two resulting parts are superimposed on each other, with the two sharp corners lowered to a right angle in the resulting triangle of many layers.
Next, the lower part is cut off and singed. To do this, you need to turn the cut edge back, aiming at the diagonal. Holding the workpiece in this position with your hands, you need to bend the corner back and fix it with glue. This manipulation will make it possible to form a sheet for marshmallows.
The next step is to glue all the leaves into marshmallows. You need to prepare a round felt base and a bead.
The circle is glued to the back of the marshmallow, and on top is the middle of a different color. A second felt circle will be needed to securely attach the steel clamp.
The clip is glued to the back of the made bow, and a beautiful marshmallow is placed on top.
There can never be too many bows, as every woman who has daughters knows. The model described above may well become the best decoration suitable for any celebration.
Volumetric bows on chairs, photo
How to assemble a voluminous, tightening bow, detailed instructions with photos
It's hard to imagine a wrapped gift without a chic bow as decoration. The material for the bow can be satin ribbon, brocade ribbon or ribbon that is used to decorate boxes.
To begin, cut a 2 meter long ribbon from a skein. The width of the tape depends on the desired volume. The wider the ribbon, the more magnificent the bow will be. This instruction uses 2.5 cm wide tape. Next, wrap the tape around your hand.
Remove from hand and cut off corners on each side.
We connect the cut corners.
We tie a narrow ribbon of the same color in the middle of the bow.
We take each layer of ribbon out one by one from the middle of the bow and turn it in the opposite direction.
The lush bow is assembled.
Twisted bow
To create such a product, you will need ribbons that are the same width, but their lengths should be different.
- You can use three to four ribbons, but if you want to create a large bow with your own hands, then you need to take more material.
- They are sewn together using a sewing machine or by hand in the form of an infinity sign.
- One is inserted into the other, and the center is closed with a piece of material, but its edges must be processed.
Beautiful voluminous bows for girls, photo
Volumetric kanzashi bows, master class
Jewelry made using the kanzashi technique always looks expensive and original. We invite you to make an unusual bow with us, which can later be glued to a hairpin, to a brooch blank or to an elastic band.
- From satin ribbon 2.5 cm wide in two compatible colors, cut out 4 pieces 20 cm long.
- We fold 2 pieces with the wrong sides facing each other (ours are red and white).
- We singe the corners of the ribbons so that the ribbons stick together.
- Turning the tape inside out, fold it in half so that the top edge does not reach the bottom 2 cm.
- Turn the tape over to the reverse side and fold its top towards the center of the connection of the ends.
- We extend the long edge, connecting it to the short one.
- We fasten the part with a tailor's pin. We make 2 such blanks.
- We take two pieces of tape again and do the same steps as with the previous ones, only this time the bottom edge should be 2 cm longer than the top. Thus, we will get a mirror image of the first blanks.
- We sew stitches on each of the blanks and pull out the pins.
- We sew identical pieces together in pairs, tightening the centers.
- Glue the central parts of the bow to the outer ones.
- Glue the parts of the bow onto a piece of felt or foamiran measuring 2.5x1 cm.
- Use a 1 cm wide satin ribbon to cover the joints of the bow parts and decorate with rhinestones.
Lush beautiful bows in a couple of minutes
If you have a strip of organza, then in a couple of minutes you can make a beautiful lush bow.
Beautiful bows in a couple of minutes
- Fold the organza strip into an accordion shape.
- Tie the middle of this accordion with thread.
- Straighten the bow and decorate the center.
There are other articles on our website about how to beautifully tie bows for different purposes, read:
- Different ways to tie bows on your head.
- How to tie puffy and double bows on clothes, on boxes, on chairs.
Volumetric bow for a girl, step by step with photos
To create a voluminous bow for a girl, prepare:
- satin ribbon 2.5 cm wide;
- glue gun;
- scissors;
- felt;
- beads.
1. Cut a satin ribbon 2.5 cm wide into 10 cm long pieces. To create this bow, a ribbon of three colors is used: white, yellow and milky. Each color will require 11 pieces. If you want a single-color bow, cut 33 pieces 10 cm long of the same color.
2. Make a petal. Take a piece, fold it face inward, pressing well in the center.
3. Drop a drop of glue into the center, gluing the middle.
4. Holding the petal blank in the center, bend the edges, forming the letter M in the middle.
5. Apply a drop of glue to the tip of the tape and, with the front side inward, glue first one end of the tape, then the other.
6. Glue the ends together. We make 33 such petals.
7. Glue the petals one by one onto a piece 4.5 cm in diameter.
8. Decorate the joints of the petals with rhinestones. You can glue an elastic band or a hairpin to the bow.
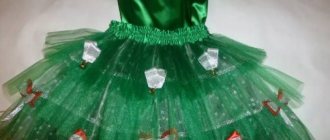
DIY ribbon bows for the Christmas tree
The secret of this cute bow is in the special folding of the ribbons that make it up. This bow is suitable for decorating a Christmas tree, and for elastic bands, or hair clips.
DIY bows for the Christmas tree
- Cut 6 strips of thick tape.
- Burn the edges of the tape with a lighter.
- Fold each ribbon in half.
- And then lift one edge 90 degrees and fold it so that an inverted loop is formed.
DIY Christmas tree bows
- Fold the three ribbons this way and sew them together with a backstitch.
- Tighten the thread by gathering all three pieces together.
- Fold the remaining three ribbons in the same way and create a bow.
- Cover the seam with a pretty ribbon.
- Decorate the center as you wish.
Large voluminous bow for discharge from the maternity hospital, step-by-step instructions with photos
When preparing for a significant event such as being discharged from the maternity hospital, every expectant mother wants everything to look beautiful and perfect, including the bow.
You can make such a bow yourself by preparing the following materials:
- 9 pieces of satin ribbon measuring 5x20cm;
- 7 pieces of organza ribbon with lurex measuring 2.5x18 cm;
- 7 pieces of satin ribbon 2.5x15 cm;
- 6 pieces of organza ribbon with lurex measuring 2.5x12 cm;
- 8 pieces of printed satin ribbon measuring 1x8 cm;
- glue gun;
- needle and thread to match;
- felt base with a diameter of 6 cm;
- decorations.
We take the widest pieces of satin ribbon, fold it in half and sew the ends with long stitches. Thus, we string all the wide pieces of satin ribbon onto one thread.
Pulling the thread together, we tie its ends, forming something like a flower as in the photo below.
We carry out exactly the same manipulations with all segments.
Glue the felt base to the center of the largest part of the future bow.
Next, layer by layer we assemble the future bow. Glue organza on top of part of the bow made from the widest ribbon, on top of the organza again part of the bow made from satin ribbon, only smaller in size, then organza again, and finally a layer with prints.
Glue flower-shaped decorations to the center of the bow.
We cut out another piece of felt with a diameter of 6 cm and make 2 cuts in the middle. We need them to thread the ribbon.
Glue the resulting blank to the one that is already glued to the bow. We stretch a ribbon 2 meters long.
The bow is ready for discharge.
Multi-layered puffy bow
Let's take a closer look at how to make it yourself with your own hands, which is suitable for decorating a hairpin or headband. This product is also often used to create hairstyles for schoolgirls.
- You will need to prepare a base, which consists of 2 layers, they are connected to each other. These parts are for the rear.
- To get the outside of the product, you need to create a simple bow.
- Upon completion of the work, all the individual parts are glued together, and a center made of the same material is placed in the center.
- Receives a voluminous bow that can become a hair decoration.
Craftswomen also like to make three-dimensional products from a combination of three or four layers.