Not too long ago I mentioned that I often sew booties for my little girl.
Today, I sewed another one - this time for a baptismal dress.
Our girl's baptism took place just a few days ago and my heart skips a beat at the mere memory of this event. A child dressed in a white baptismal gown looks like an angel...
In fact, I could use any excuse to spend time with a piece of fabric again!
The dress turned out to be long and quite fluffy!
The bodice of the christening dress is decorated with flowers, which I already talked about some time ago.
I just love looking at children at such special moments! For everyone, without exception, but especially for your own!
It’s a shame that we will only wear this christening dress once. Maybe I should use it as a nightgown until my little one outgrows it, just so I can see her in it a few more times?
Kidding. I will definitely save this dress for when she is all grown up.
Her hair is decorated with flowers too!
And legs - of course!
Want to make your own baby girl christening dress?
Baptismal dress pattern
Seam allowances – 1 cm.
Print out the pattern sheets and glue them together. Pay attention to the printing scale - it should be 100%.
Sewing a dress
Cut details:
- 1 piece – front part of the bodice,
- 2 parts – back,
- 1 piece – front part of the skirt,
- 1 piece - back of the skirt,
- 2 parts – sleeves.
From lace:
- 1 piece – front part of the skirt,
- 1 piece - the back of the skirt.
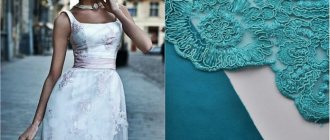
Apply 25 cm wide lace to the back and front of the bodice of the dress, as shown in the picture below. The edge of the lace should be about 1.5 cm longer than the main piece. Attach the lace around the neckline, shoulders and armholes. Baste and trim excess lace. Do the same on the back of the dress so that you have two completely lace-covered back pieces.
Apply lace to the bodice details
Fold the sleeve in half in the center. Place a smaller width of lace along the folded edge of the sleeve and pin. Trim around the edges. Repeat this procedure for the second sleeve. Sew two lines. Pull the threads to gather the fabric.
Making lace gathered sleeves
Place the back and front right sides together. Sew stitches on the hangers. Press seam allowances. Insert the sleeves into the armholes and secure them. If necessary, tighten the threads to gather more. Sew on.
Finish the neckline with an overlocker or use a zigzag stitch on a sewing machine. Fold in 0.5 cm and sew. Also process the cuts on the back: turn them in 0.5 cm and sew.
Sew the details of the bodice and sew on the sleeves
Place the front piece of the lace skirt on top of the front piece of the linen skirt and baste together. Baste the edges in two lines along the top of the skirt to gather the fabric. Pull the ends of the threads to gather the fabric. Continue tightening until the top of the skirt matches the width of the bottom of the bodice.
Fold the front part of the skirt and bodice right sides together and sew, turning away the lace edge. After this, stitch seam allowances along the edge of the bodice. Turn the edge of the lace back.
Sew the front and then the back of the skirt to the bodice
Sew the back pieces. Gather the back part of the skirt and sew it to the back. Sew seam allowances along the bodice. Sew a loop and button at the top of the dress. Fold the front and back faces together. parties together. Match the details of the skirt and bodice. Sew the side seams. Turn up the hem of the dress by 1.5 cm and sew.
We lay the side seams and make a hem at the bottom
Attach a 25cm wide lace ribbon to the bottom of the skirt, starting at the side seam and finishing there. Cut off the excess lace. Sew the edges together using a zigzag stitch. The baptismal dress is ready!
Ready-made christening dress for girls
Headdress for a newborn for Christening
You can make a beautiful headband or hat with a flower from fabric. The principle of creating such a flower is shown below. Or you can sew a cap. Below there is a pattern and sewing instructions.
The baby's cap is ready!
Translated from the site: https://seekatesew.com/free-blessing-dress-pattern/
Another cap pattern
We sew a baptismal dress for a girl aged 2 years
I am sharing with you the story of the creation of the baptismal dress that I sewed for my daughter.
After reviewing all the possible options, I decided that the outfit would consist of two parts: 1 - an underdress, which is an elongated T-shirt, slightly flared towards the bottom (the fabric is 100% cotton lining) and is decorated with lace at the bottom. 2 - outer dress, with a skirt over the belly, puff sleeves and fastened at the back with 4 buttons (fabric - Devore (this is 100% cotton with etching)).
Based on the results of the work done, I would like to say that the Devore fabric turned out to be very finicky in sewing (like gauze): you pull a little and the fabric “creeps”, under the foot it “wiggles and slides” (to sew an even stitch, I sewed at minimum speed - hence the 2 day of work). Considering the mobility of children at this age, the dress (from this fabric) needs to be sewn looser, and so should the sleeve elastic. Or, as an option, take thicker cotton for the outer dress (Sewing). And the process:
The first thing you need to do before cutting the fabric is to align the fabric with the thread ! To do this, pull the thread across the entire width of the fabric (usually the width is 140-220 cm depending on the type of fabric) and cut along this mark. This good old method will help to avoid distortions in the future.
Second, since the fabric contains natural fibers, the fabric will shrink . That is why the fabric needs to be moistened and ironed before cutting ! I usually wash it on the “delicate” cycle at 40 degrees + let it dry + iron. I didn’t create a special pattern. I took my daughter’s knitted dress as a basis, or more precisely: the height of the front, the depth of the armhole and neckline. To the “bust circumference” measurement I added 2cm (for looseness of fit) and another 2cm (seam allowances). And that turned out to be 53 cm + 2 cm + 2 cm = 57 cm (and in the end they were not enough; for freedom of fit you need at least another 3-4 cm! Keep this in mind!) The height of the shelf was made 20 cm. I cut out a rectangle 20*57 cm and folded the fabric so that the cuts were in the center of the back (with an overlap of 0.7-1 cm - these are our seam allowances). And then I cut out the armholes and neckline. We also need strips of 20*2 cm (2 parts) - to process the cut of the back.
And another photo with a fabric cutting diagram: skirt (36 * 148 cm), top (20 * 57 cm), sleeves (20 * 44 cm) - 2 parts, strips for processing the back cut 20 * 2 cm - 2 parts:
I cut out the sleeves and rectangle of the skirt:
I added pleats to the sleeves and skirt:
1 - folds on the sleeves: I measured the arc of the sleeve armhole, folded the sleeve part in half and marked the middle, from the middle I begin to form folds, first in one direction, then mirrored in the other direction from the center, not forgetting that the length of the sewn-in part of the sleeve should ultimately coincide with the length sleeve armholes (I didn’t bother with the seam allowance, because both parts have one seam). I pinned the folds together with pins. We mirror the folds onto the second sleeve and pin them together.
2 - pleats on the skirt: I decided to make bow pleats. I decided on their number (15 turned out to be optimal for this dress). Now the skirt fabric needs to be distributed so that a length of 148 cm fits into a length of 55 cm: 55 cm / 15 folds = 3.67 cm - this is the length of one fold on the dress. 3.67 cm * 3 = 11 cm - this is the amount of fabric that is needed for a fold without gaps. (148 cm - 2 cm seam allowance) / 15 folds = 9.73 cm - this is actually the maximum possible amount of fabric that we can spend on one fold.
Now it becomes clear that 9.73 cm is not enough for a tight fold, because we don’t have 11 cm. Therefore, we will form the folds with a gap from the existing 9.73 cm of fabric, we will use 9 cm for the fold, and the remaining 0.73 cm - will form a gap between the folds: 9 cm / 3 (fold) + 0.73 cm (gap) = 3.73 cm, which is almost equal to 3.67 cm (calculated fold). Shaping and pinching the pleats of the skirt will require a lot of time and patience.
We put a fastening stitch on the machine along the folds of the skirt (but I didn’t take out the needles, this helps to fix the skirt to the top before sewing on the overlock machine). We sew the shoulder seams of the top using an overlocker (I also usually sew a stitch on a machine to secure the seam to the top). We sew the sleeve along the length using an overlocker. Both details. We check whether the length of the sleeve armhole coincides with the length of the sewn-in part of the sleeve; if there is a discrepancy, then we correct the folds. And we sew in the sleeves.
We close the cut of the back as when working with trim: we apply a strip of fabric 2*20 cm face to face to the cut of the top, lay a stitch, turn our “trimming” inside out, iron the seam and lay a stitch 1-2 mm from the edge, then turn it under the free edge of the binding inward and lay a parallel stitch. There will be buttons on this side.
We process the second cut of the back in the same way, only we place loops between the top and the trim (the loops should point from the cut towards the sleeves, and the top loop should move 1-1.5 cm away from the neckline - after all, we haven’t processed the neckline yet). This is what the back looks like now.
Let's process the neck. After fitting, I deepened the neckline by another 3 cm. I processed it in the same way as the back sections. I cut off the fabric of the long neck + 3 cm and carefully stitched it. Since the remainder of the fabric did not allow me to cut out the “trimming” as it should be at 45 degrees, I cut it in a straight line, and so that the collar area did not start to bulge too much, I made the minimum width of the facing. If your fabric allows it, then do it according to the rules, the result will be better than mine!
Pin the skirt to the top from the center to the edges (it's worth spending time on this).
While trying on the top, I decided to make a balance along the back (remove a 2 cm wedge along the bottom of the back towards the sleeve). The landing is better this way.
If everything comes together, we sew the top and skirt on the overlocker.
Remove the pins.
Now we machine-stitch the back section of the skirt at a distance of 1 cm from the edge, not reaching the top 8-10 cm. Iron the seam on both sides, turn the edges inward, and iron.
We lay the lines with an indentation of 1 mm from the free edge.
And now the sleeves.
We measure the circumference of the child's arm. And feel free to add 4-5cm! So that nothing weighs on you. Sew with zag-zag.
We sew elastic into the sleeves. I did this on a sleeve platform, wrapping the elastic in the sleeve. If you do the same, you will have to sew very slowly, and distribute the fabric and elastic very, very carefully, since there is a high, very high probability of ruining the fabric. Choose an elastic band that is as loose and easy to stretch as possible.
And then, the best part! We decorate the dress with lace and hem the hem.
Well, the result:
I won’t go into detail about the underdress: I sewed it like a regular T-shirt from a sweatshirt, and decorated the bottom with lace.
I hope my story will be useful to you. Thank you for reading to the end 
How to sew a dress for Epiphany without a pattern
If there is no pattern of a suitable size, you can take as a basis any children's T-shirt that is just right for the child at the moment. We will remove the bodice pattern from it. Or you can take as a basis one of the patterns for children's dresses proposed in this article.
Christening dress without a pattern
The photo clearly shows how to remove the pattern from the finished product; in particular, we only need the bodice. Remove the front, back and sleeves. Don't forget to leave 05.-1 cm for allowances. In the photo below, about 2.5 cm was added on the back of the dress in the center for fasteners.
Removing the pattern from the dress
Cut out the bodice pieces from the main fabric and lining. We sew two parts of the back and front of the bodice (satin parts) on the sides and shoulders. We do the same with the lining details.
Now we connect the bodice parts from satin and lining. Place them together, pin them along the neckline and on both sides, as in the photo below. Sew the pieces together (0.5cm seam allowance). If you did not use an overlocker, but a zigzag stitch, then you will need to cut off the excess allowances. Turn the bodice inside out and straighten out all the corners. If necessary, there will be excess fabric here and there in the corners, turn the bodice inside out and cut off more allowances.
Now you need to remove the pattern from the sleeve. In the photo, the sleeve is gathered, so it’s not so easy to remove the pattern; below you can see what the author of MK did. Don’t forget to also add 0.5 cm to the allowances. We make a basting along the top and bottom of the sleeve. We gather the sleeve to the desired size, but do not forget to leave a little allowance.
Removing the pattern from the sleeve
Cut a strip of satin the same length as the lower section of the sleeve, the width is optional, the author of MK has a width of 3 cm. Attach the strip to the lower section of the sleeve with the right side to the wrong side of the sleeve. Sew the strip to the sleeve. Allowance = 0.5 cm. Then trim off the excess fabric so that the strip is not too thick when folded later.
Turn the sleeve over, fold the strip twice and pin it together. Place a line. Fold the sleeve in half and sew the edges. Repeat the same with the other sleeve.
Insert the sleeves into the armholes, matching the seams on the sleeve and on the sides of the dress. The basting that was made earlier will help you adjust the sleeve to the size of the armhole. Sew on the sleeves.
Insert sleeves into armholes
Make several buttonholes on the back. Sew buttons and fasten. The author of MK did not have buttons at the time of sewing, so the back was simply pinned together with pins.
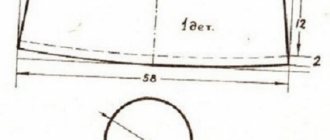
The length of the skirt, pomp and layering are optional. The author of the master class has a skirt length of 45 cm.
Measure the length of the bottom cut of the bodice. In this case, it is 45 cm. Cut out the first layer of the skirt = 100 cm wide and 40 cm long. The second layer of the skirt was twice as wide – 200 cm wide and 33 cm long. And another layer of lining, equal to 76 cm in width and 30 in length.
We chop off the two top layers, already sewn on the sides, gathered and folded into folds and sew them together.
Sew all layers to the bodice
We chop off the bodice and skirt, add a layer of skirt lining on top, and adjust it to the width of the cut of the bodice. We sew the parts together using a zagzag stitch. We hem the bottom of all layers of the skirt.
The Christening dress is ready!
How to make a rose from fabric
We fold the strip of fabric, stitch it and tighten it. We twist the strip into a flower and secure it.
DIY elegant christening dress for a girl
Not too long ago I mentioned that I often sew booties for my little girl.
Today, I sewed another one - this time for a baptismal dress.
Our girl's baptism took place just a few days ago and my heart skips a beat at the mere memory of this event. A child dressed in a white baptismal gown looks like an angel...
In fact, I could use any excuse to spend time with a piece of fabric again!
The dress turned out to be long and quite fluffy!
The bodice of the christening dress is decorated with flowers, which I already talked about some time ago.
I just love looking at children at such special moments! For everyone, without exception, but especially for your own!
It’s a shame that we will only wear this christening dress once. Maybe I should use it as a nightgown until my little one outgrows it, just so I can see her in it a few more times?
Kidding. I will definitely save this dress for when she is all grown up.
Her hair is decorated with flowers too!
And legs - of course!
Want to make your own baby girl christening dress?
Required tools and materials
- satin fabric for a dress;
- lining fabric;
- buttons or Velcro for fastening;
- sewing machine, scissors, thread, needles.
Before we start sewing, I will say that I created this baptism dress from scratch because I had experience sewing similar things. But you could use a ready-made dress as a pattern or template, or just buy a white satin dress and decorate it with flowers... Choose what suits you!
Here's how I made our dress.
How to sew a baptismal dress: step-by-step instructions
I took a dress that fit my girl and folded it in half. After which I traced it into the bodice part. The bodice on the old dress was a little shorter than I wanted, so I drew it in a little - right up to the red line in the photo.
Then I added a few centimeters on each side for seam allowance to the finished drawn pattern.
On a new sheet of paper I drew exactly the same detail of the bodice.
After that, I slightly changed the neck line so that it was a little higher on the back side.
I also added a few centimeters to the center of the pattern. I did this so I could sew on the buttons - this requires a little extra fabric to overlap the edges.
Here's what both of my patterns for the bodice of the baptismal dress looked like - front and back:
I then folded the fabric in half and cut out two fabric pieces for the back and front - one from satin fabric, one from lining fabric. After I unfolded the halves of the fabric, I ended up with two whole pieces. I leave the shelves whole, and cut the back parts in half.
I aligned the satin details of the bodice of the baptismal dress with right sides facing each other and sewed them together - on the sides and at the shoulders. Then I did the same with the lining fabric pieces.
Now, you need to match the lining pieces and the front part of the bodice. To do this, fold them together with the right sides facing each other and secure with sewing pins along the entire neck line, and then along the sides - from top to bottom on both sides.
After that, sew the parts of the baptismal dress in the places where the pins are located. It is better to stitch the raw edges with a zigzag - the satin frays quite a lot.
Then turn the bodice right side out and iron it. If the neckline doesn't line up correctly, you may need to cut the edges of the fabric in several places. However, I didn't need it.
View of the finished bodice detail from the back:
Next, you need to create a template for the sleeves. I trace the finished dress again. You may find it difficult to redraw the shape of the sleeves without cutting up the dress you are using as a reference. But there’s actually nothing complicated here - the main thing is to understand what size part you need.
In the end, you can make an approximate shape, and only then cut something like this out of it. The main thing is to remember to add a little fabric on all sides of the sleeve for seam allowance.
You can see my paper christening gown sleeve template in the upper right corner.
Along the top and bottom of each sleeve I made a small gather in the center using a regular basting stitch.
Now, cut out a strip of satin fabric for each sleeve - its length should be exactly the same as the bottom edge of the sleeve detail, and the width can be any, at your discretion. The main thing is to remember that a little later we will fold this strip in half, which means its width should be twice as large as you need.
Sew the strip to the sleeve.
Excess fabric can be trimmed to make the sleeve less bulky.
Here is a view of the sleeve of the baptismal dress from the wrong side.
And here is what this design looks like from the front side:
I fold the edge of the strip inside the sleeve - first once...
And then again - so that the fabric does not fray. And I secure the strip with sewing pins.
After which, I turn the sleeve over and iron it from the front side.
Did you get about the same thing? Now fold the piece in half, right sides inward, and sew the sleeve on the side.
Repeat the same steps with the other sleeve.
Then place the finished sleeves into the armholes of the christening dress, matching the side seams of the sleeves with the side seams of the dress itself. I attached the sleeves to the armholes using the same sewing pins.
Here the bodice of the dress is turned inside out, so you can see the lining fabric in the photo.
And here’s what the sleeves look like now from the front side, however, turned upside down - the neck line is now at the bottom.
Sew the sleeves into place and then zigzag the edges of the armholes.
After that, turn the bodice of the baptism dress inside out and iron all the seams.
Then make some buttonholes at the back of the dress like this:
Instead of buttons, you can sew buttons, hooks or Velcro - whatever you find more convenient. I didn’t have any suitable buttons at this stage, so I secured the back of the dress with pins instead. Looks like I'll have to run to the store later!
The finished bodice can be put aside and you can work on the skirt for the dress. Next, on to the skirts of the dress.
Before you start cutting the fabric for the skirt, you will need to decide how long your baptismal dress should be, how fluffy it should be, how many layers of skirt it should have.
This is how I made the skirt for our dress. I wanted the skirt itself to be about 18 cm long and not too full. I measured the opening at the bottom of the bodice and it was 46 cm. I decided that I would need about twice as much fabric for the first layer of the skirt. Thus, I cut a piece of fabric about a meter wide and 16 cm long. I made the second piece for the skirt twice as wide, so it will be even fuller than the first layer. It was about two meters wide and about 13 cm long - a little shorter than the first piece, as it should be. And then I cut a piece of lining fabric about 30 cm wide and 12 cm high.
After that, I sewed all three parts on the side, thus getting three rings of fabric.
This is what one of the resulting “rings” looks like. I sewed the two short sides together and then simply zig zagged the top side. I did the same with the other two parts.
Along the finished edge I sew the pieces with a basting stitch.
Starting with the largest piece of fabric, match the skirt pieces to the bodice - right sides together. The easiest way is to turn the skirt inside out and then slide the bodice down into the skirt, turning the pieces upside down. Having gathered the basting stitch on the skirt so that the skirt is the same size as the bottom edge of the bodice, secure the parts with sewing pins.
Then place this entire structure inside the ring of lining fabric, and gather the basting stitch on the lining in the same manner as above. The width of the lining piece should correspond to the width of the bodice and outer skirt.
Here's what all the details of the christening gown skirt look like now:
I sewed all the pieces together using a regular straight stitch and then zig zagged the edges. This is what happened from the front when I turned the almost finished baptism dress inside out:
And here's the rear view:
There is very little left. Lift the first layer of the skirt up and attach the remaining piece of fabric, sewn into a ring, to the lining. You can make the bottom layer any length you want. For me it turned out to be about eight centimeters longer than the top layer. Gather the top of the piece with a basting stitch and attach the fabric to the lining. And then sew it on.
I hemmed the bottom edge of the christening dress skirt by hand using a blind stitch so that the seam was not too noticeable and the edges were more delicate.
Of course, I sewed the flowers by hand too!
And I ironed the finished dress to give it a completely finished look!
And - everything is ready!
Brand new, elegant christening dress! However, it would be quite suitable for any other occasion, wouldn’t it?
Enjoy!
The post was prepared based on materials from the site www.makeit-loveit.com
umeem-sami.ru
Choosing a style
If you have been asked to be a godmother, you will most likely have to make your own christening gown. And you will certainly think: what should it be like? This depends on several reasons:
- your girl's age;
- her height and weight;
- Availability of suitable fabrics and accessories in the store.
From birth to one and a half years
If the child is small, the simplest style will do - a straight long dress made of thin white fabric, trimmed with soft lace or sewing. The pattern will be extremely simple, you don’t even need to look for it. It is enough to take a blouse or vest that is suitable in size and cut out the details according to it, making increases in the right places.
From one and a half years and older
In this case, an elegant dress, flared, with a high or low waist, is suitable. You can decorate it with embroidery, sewing, lace. It is sewn in the same way as any other summer children's clothing. The main thing is to choose the right fabric and finishing materials, and take into account that the style must certainly be correct - that is, the dress should not be too short, with a neckline and sleeves.
What should you give up?
The design of children's clothing differs from that of adults. Some materials should be discarded. Not suitable at all:
- beads;
- beads;
- sequins;
- rigid synthetic lace;
- hooks
Important! In general, try to avoid anything that is too hard, or anything that could accidentally come off and cause harm to the baby.
What is needed for a girl's baptism?
The baptism of a girl cannot be done without a cross, a kryzhma and a baptismal gown. Of course, this list can be expanded depending on the financial capabilities of the family and the personal wishes of the parents. Often a personalized icon, a baptismal blanket and an amulet are also purchased. However, this is not mandatory and does not in any way affect the performance of the sacrament itself.
All the main attributes for the ceremony are purchased by the godparents.
The spiritual father purchases a cross and also pays temple fees. It is important that the edges of the main symbol of the Christian faith are not sharp, but rather rounded at the ends. The baby may get hurt on the cross, which will not bring any joy to either the parents or the goddaughter herself. In addition, the godfather can financially participate in organizing the celebration of this significant event.
The spiritual mother purchases a baptismal set for the baby, also a kryzhma. Usually, when choosing clothes, they consult with the girl’s mother, since she knows her child better and can give practical advice. The girl's initials, as well as the date of birth or christening, are often embroidered on the kryzhma.
Baptism age
The Orthodox tradition presupposes the baptism of the baby at a very early age, since after this sacrament the child can acquire the grace of the Lord, and he finds an intercessor angel. Most often, the eighth or fortieth day from birth is chosen for this purpose. If the baby was born very sickly, then baptism is allowed even in the first day of life. Because it is believed that this will help protect the baby and give her Divine protection.
It is recommended that the girl be baptized on the fortieth day, since until this moment the woman in labor cannot be allowed to participate in church events. The clergyman must read a cleansing prayer over the mother before she takes part in the ritual.
In addition, newborn children tolerate contact with unfamiliar people much better. This applies not only to the godmother, who will have to hold the girl in her arms throughout the entire ceremony, but also to the priest, who is completely unfamiliar to the baby. If the girl will be immersed in the font, then it is better to carry out baptism in the first months of life, while the intrauterine reflexes have not yet completely died out.
Making a pattern
To sew a baptismal dress for a girl with your own hands, the first thing you need to do is take care of the pattern. For a newborn, everything is extremely simple:
- Take a suit-sized vest or blouse.
- Spread it out thoroughly.
- Smooth out the seams.
- Trace on a piece of paper (graph paper is best).
- Extend the sleeves by 3-5 cm.
- Lower the bottom line by 10 cm - if the dress is a little long, nothing bad will happen if your girl doesn’t know how to walk yet.
- Cut out the patterns, there will be 2 of them in total.
Baptism dress for a girl
April 9, 2014 admin Home page » Models and styles
One of the main events in the life of an Orthodox person is, of course, baptism. Believers compare this holiday to the second birth of a child. We believe that it is on this day that the little man receives his own guardian angel, who will help him throughout his life, protect him from troubles and help him walk the path of life with dignity. Therefore, many parents approach the organization of this day with full responsibility. They carefully select the items necessary for the ritual. For example, a cross on a chain, a baptismal shirt for a boy and a baptismal dress for a girl. Everything you need for baptism can be easily found and purchased at the church store. According to custom, the pectoral cross is acquired by the godfather of the child. The cross must be given to the priest so that he can perform the consecration ceremony over it if you bought an unconsecrated cross. You can also easily buy a baptismal set in a church shop or store. It immediately includes clothes for your child, a cap and a towel. All of this can be purchased separately, we especially recommend doing this if you don’t like the towel sold in the set. It must be big and warm. Take responsibility for his choice, as the child may catch a cold.
How to choose the right christening dress for a girl
First of all, it is worth mentioning the value of baptismal clothing. According to legends, it should never be sold or given to other people. It should be kept strictly in the family, away from strangers. People believe that baptismal clothing, like a guardian angel, protects a person from serious illnesses and protects him for the rest of his life. There are also many signs associated with this clothing. For example, if the godmother’s sister puts clothes on her godson, then in the future a warm relationship will arise between them.
There are many folk signs and church beliefs associated with baptismal clothing. Keep it carefully, passing it on through generations.
Tips for choosing
There are no clear criteria for the type of baptismal robe. Here are the rules you can follow:
- It is only accepted that these clothes are slightly longer than the godson himself and have a light range of colors.
- They mainly use white and gold colors as a sign of the purity of the child’s soul.
- Clothing for a girl should have as few drawstrings and buttons as possible, in order to remove the dress as quickly as possible and proceed to baptism.
- The girl's cap is also removable.
- To add as much solemnity to this day as possible, parents often decorate baptismal clothes with lace patterns and designs. The main thing here is not to overdo it. Pretentiousness has never been praised in the Orthodox Church.
- It is better to choose clothes that are as loose as possible so that the fabric does not interfere with your baby’s movement.
- When choosing material for baptismal clothing, it is necessary to take into account the time of year of the baptism. If it falls in the summer, you should choose a thinner fabric so that the baby does not get sunstroke. In winter, it is better to choose woolen clothes, although churches are usually warm, it is still not worth risking the child’s health.
Sew a christening dress for a girl with your own hands
Most parents, preparing for baptism, decide to sew a baptismal dress for a girl. Naturally, this will take much longer than buying the same clothes in a children's store, but the value of such a baptismal dress is much higher, especially if it is sewn by the girl’s godmother.
Also, a huge plus of a dress sewn with your own hands is the patterns that you want to see for yourself. I advise you to look at various jewelry on the Internet, you can also give free rein to your imagination. But don’t get too carried away with decorating your baptismal robe. We should not forget that baptism is, first of all, a holiday of the soul, and not of the world.
ActionTeaser.ru - teaser advertising Tags: Dresses for girls
www.my-dressing.ru
Traditions and signs
There are many Christian signs and traditions associated with the sacrament of baptism.
From the very beginning of the ritual until its completion, only his spiritual parents, but not his own mother or father, can hold the child. In many churches, the ceremony is generally held in a separate room, where parents are prohibited from entering during the sacrament. Before immersion in the font, the boy is held by his godmother, and received by his father, and vice versa: at the beginning of the ceremony, the girl is in the arms of her godfather, and after ablution - in her mother.
The baptismal dress must be new. It cannot be sold or lent to anyone. The consecrated diaper and clothes of the child are kept in the family and are considered a talisman. It is customary to cover a crib or wipe a baby with a towel during an illness: according to ancient beliefs, a sacred attribute should help the child recover as quickly as possible.
Uncover
Even when you take up sewing for the first time, you can easily see that sewing clothes for babies is a real pleasure. Very little fabric is required, half a meter is enough for the eyes, the seams are short and easy to do even by hand. But still, when making children's clothing you need to follow the rules:
- Cut the shelf and back strictly along the grain.
- Do not forget to cut the allowances in the corners - this is especially important in clothes for newborns, since each fold is clearly visible.
- Select threads that strictly match the fabric in thickness and quality, otherwise you won’t end up with a lot of trouble. The same applies to needles.
The simplest dress will consist of only three parts - a solid front and two halves of the back. There are no darts, there is no need to sew in the sleeve either - it is one-piece. It is better to make the fastener at the back - these can be small buttons with air loops or ties, but it can also be done at the front if you come across a pattern for a blouse and not a vest.
Here's what the process will look like:
- Fold the fabric along the grain so that the fold is in the middle of the front or back.
- Trace the piece using a 0.5 cm seam allowance.
- Cut the workpiece according to the allowances.
- Cut the second part in the same way.
Assembly
You've probably already guessed how to sew a baptismal dress for a tiny girl. This is no more difficult than for a large doll.
Important! There is, however, one nuance - on clothes for newborns, the seams are often made on the outside so that they do not rub the baby’s delicate skin. In principle, nothing prevents you from following this principle, and to make the seams look beautiful, you first need to overlock them with an overlocker, and then trim them with thin lace or crochet them.
This is what the sewing process will look like:
- Place the pieces with the wrong sides facing in.
- Sew the shoulder and side seams either by machine or by hand.
- Hem the fastener line by 0.2 and 0.5 cm.
- Sew buttons and air loops.
- Cover the closure with lace or sewing, pleating the trim.
- Finish the neckline with the same finish.
- Cut a piece of sewing twice as long as the bottom cut.
- Sweep it along the free edge, laying folds, in the end you should get a strip that will fit exactly along the cut.
- Fold the hem section.
- Sew the embroidery with a finishing stitch on the outside.
- Finish the sleeves in the same way.
We sew a baptismal dress and cap with our own hands | Zigzag.com
Every parent wants to make the day of their baby’s baptism in church unforgettable and special. A special baptismal dress will help emphasize the importance of this event. The baptismal dress gives children an angelic appearance, symbolizing purity and innocence. It is believed that it should be simple and loose for easy dressing after the bath. You don't have to buy this outfit to use it once - try sewing it yourself! To do this, it is enough to have minimal sewing skills. For sewing I needed:
- about 1 meter of white calico,
- a few scraps of white silk,
- white threads,
- 2 meters of decorative elastic,
- white silk bias tape,
- 1 button.
As a basis for the pattern, I took the dress that my daughter is wearing now. I measured the length myself - it is believed that the baptismal attire must necessarily be below the knees, preferably to the toes. The length of the waistband is 40 cm. We leave about 1 cm for an allowance, cut out the workpiece itself, the hole for the neck and the slit in the back.
Using a machine we sew the front and back and the dresses on the sides.
We alternately sew blanks of silk about 6 cm wide and a length equal to the length of the sleeve into the shoulder seam of the sleeve. The same silk ribbon can be sewn into the front of the dress.
Now you need to process all the edges of the dress so that the material does not fray. Since I don’t have an overlocker, I stitched all the edges with a zigzag stitch - it turned out well.
Now it's time for the bias tape. We use it to sew around the neckline, the edges of the sleeves and the hem of the dress. The binding adds aesthetics and additionally protects the edges from wear.
Sew a loop and a button at the back. In principle, the dress is already ready, and you can stop at this stage. A little advice - if your daughter doesn’t like to wear a dress over her head at all, then it’s better to sew a zipper or insert buttons on the back or side. Thus, you will receive a self-disposable dress that is very easy to put on and take off.
Or you can decorate it with something else, for example, braid, lace or decorative elastic. We'll take the latter. Having measured the required distance to the waist, draw a marking and sew on an elastic band that will slightly tighten the dress at the waist and decorate it.
We sew the same elastic along the edge of the sleeve and hem of the dress.
To complete the set, all that remains is to sew the baptismal cap. This is done very simply. From the remnants of calico we cut out a circle with a diameter of 40 cm (depending on the circumference of your baby’s head). We process the edge and sew the entire circumference along the edge with a large stitch.
Grasping the edge of the thread, we tighten the cap to the desired size (convenient when putting on a cap).
We attach a decorative elastic band to the edge, stretching it as much as possible.
The cap is ready!
After the baptism ceremony, it is customary to keep the baptismal dress. It is believed that it protects the child from troubles and has miraculous properties to cure ailments. Happy baptism!
Author of the material: Zolda
zigzagom.com
How to sew a christening shirt for a girl?
For girls, shirts can only differ in a large number of different trims, ruffles, frills, etc. If you want to sew the right baptismal shirt, then sew it long for longevity and decorate the hem of the product with lace, guipure, and embroidery. So life will be full of meaning. Baptismal shirts can be passed on by inheritance; they are often family symbols of good luck and a talisman for children.
Baptismal shirt for a girl - pattern diagram
It is not difficult to construct the diagram shown above in the figure. This is a pattern for a trapezoid-shaped shirt; you can determine the fluffiness of the product yourself by adjusting the width of the bottom of the part. You can make a yoke on top if you cut off the front parts along the chest line. The pattern is presented for a girl 2-5 months old. The back and front have a similar appearance, the only difference is the yoke.
How to sew a christening shirt for a girl?
- Transfer the pattern details from the paper to the fabric, do not forget about the allowances. You should leave about one centimeter everywhere so that the seams do not reduce the item by one size.
- Cut out all the pattern pieces onto the fabric.
- Sew the yoke to the front.
- If you cannot do without basting, baste the side parts of the product; if everything turned out smooth, sew the sides.
- Sew all seams with a zigzag to prevent the fabric from fraying.
- Finally, start working on the neckline, hem and sleeves. They can be trimmed with ruffles, frills, ribbons, lace, or simply roll up the bottom and sleeves, and stitch the neckline with trim.
Also, the finished product is also decorated with various frills, ruffles, embroidery, depending on what you chose for sewing the shirt. In the photo below you can see different shirts with beautiful ribbons, lace, embroidery, ruffles made of special cotton fabric with embroidery.
Ready-made models of baptismal shirts for girls
Girls' Shirt Baby Girl's Baptismal Dress Wrap Baptismal Shirt Tie Back Baptismal Shirt Long Baby Girl's Christening Shirt
How to sew a baptismal dress for a girl? Size 56 - 92
Clothing for christening is a separate part of the trading business. Festive dresses, shirts and pants for babies are sold at exorbitant prices only because parents have nowhere to go - after all, they need to dress their child beautifully for christening... But there is a way out: you can sew a christening dress for a girl with your own hands from knitwear with lace! And this is on a regular sewing machine, at home. Of course, before work you will need to stock up on materials in delicate shades and time, because sewing will take you several hours.
Materials and tools (for dress size 68):
- White thin knitwear (stretch cool) – 40 cm
- Milky lace – 2 m
- Stretch ribana (cuff knitwear) – 5 cm
- White threads for knitwear (thin)
- Fabric scissors
- Tailor pins
- Sewing machine
The pattern of the baptismal dress for this master class is here (model 1). In the magazine itself, the dress is sewn in colorful colors, but this does not prevent you from using the pattern for sewing a baptismal dress. Moreover, the sizes of this model start from the very first (size 56), and children are most often baptized in the first months of life.
How to sew a baptismal dress - step by step instructions:
1. From white jersey, cut out all four parts of the dress: front, back and two sleeves.
2. Cut out a neck piece and two cuff pieces (or rather, thin strips for small cuffs) from milk rib. To save time, you can iron all these parts right away by folding them in half lengthwise (wrong side in).
3. Unfold the ironed pieces and fold them in half again, but this time across and inside out. Close each piece with a “donut” and stitch on a typewriter. Then fold the cuffs and neckline along the pressed folds.
4. Place the front and back of the dress together with right sides facing inward. Pin the shoulder lines together.
5. Now you only need to take one shoulder to work: you will close the other together with decorative lace. Sew one shoulder line (in our case, the right one) using a knitted stitch on a machine.
6. Finish this seam allowance with an overlock stitch to make the product more neat. After this, turn the base of the dress right side out and topstitch the shoulder allowance with a straight seam, turning the seam allowance on the wrong side to the front side of the garment.
7. Place the lace, gathered in small folds, around the neck of the dress. Please note that the lace should not be placed at the neck itself, but a few centimeters below (otherwise the neck will stop stretching and you will not be able to put the product on the child). Secure the lace with pins.
8. Then use a hand basting stitch to secure the lace, gradually removing pins from it: it will still be awkward to sew with them.
9. Using a straight stitch, machine stitch along the top lace line to finally secure this christening gown embellishment. In this case, one shoulder remains unsutured.
10. On the wrong side, use a knitted seam to stitch the open shoulder (already along with the two edges of the lace), and finish the seam allowances with an overlock stitch. And on the front side, straight along the lace, stitch the shoulder line with a straight line.
11. Now you need to sew on the neck of the dress. Place the bent part of the neckline with the cut side to the cut of the neckline of the dress and secure it with pins along the entire perimeter. The ribbed detail is slightly narrower than the neckline of the dress, so it needs to be stretched a little, secured with pins.
12. Sew the neckline on the wrong side with a knitted seam, and finish the edges with an overlock stitch. At the same time, sew the sleeves into the armholes and finish the seam allowances with an overlock stitch in the same way. And then on the front side, stitch the neckline with a straight seam. To make this seam even, use the foot of the sewing machine as a guide. The photo shows that the junction of the neckline and the dress falls between the details of the foot: constantly maintain this “distance”, and the seam will come out beautiful.
13. This is what the neckline of a girl’s baptismal dress looks like:
14. Topstitch the seams in the sleeve armholes along the front side using a straight seam, turning the allowances on the wrong side towards the base of the dress.
15. On the wrong side, pin the sleeve sections and side sections of the dress with pins.
16. Sew these lines with a knitted seam, and then sew them with an overlock stitch.
17. Attach the pleated lace to the bottom of the dress. Here, too, it is better to stir the lace not at the very edge, but at a distance of about 5 cm from the bottom cut of the fabric.
18. Fold the sewn lace up and secure it with pins on the dress so that it does not interfere with subsequent work. Fold the bottom of the dress to the wrong side twice and run a basting stitch along the entire bottom.
19. Using a straight or knit stitch, sew along the bottom of the dress to finish this edge of the garment.
20. In the same way as you sewed the neckline, sew the cuffs to the sleeves. You don’t have to stitch seam allowances on the front side, the main thing is to remember to finish them with an overlock stitch on the back side.
21. From the remaining lace, sew an additional decoration for the dress - a flower. Hand sew it down the center of the dress.
Sewing a baptismal dress with your own hands is quite simple! In addition, by choosing natural knitwear for this work, you will provide your child with comfort during such an important life event. Good luck with your creative experiments!
lady-master.ru
What else do you need for a christening?
In addition to a dress or shirt, you will need other items:
Diaper
The mother wraps the baby in a baptismal swaddling cloth, which is called kryzhma, after he is dipped into the font. It is best to sew it from the same material as the dress or shirt. The ideal option is cambric, it is soft, absorbs water well and at the same time looks very beautiful and noble. Actually, this is a traditional material for baptismal accessories.
Important! If the fabric is 110 cm wide, you will need about half a meter. The traditional dimensions of the kryzhma are 74x44 cm, but it can be cut in any direction. You will need about 2.5 more meters of lace stitching or soft lace.
Here's how easy it is to sew such a trousseau:
- Cut out a rectangle of the given size.
- Sew along the free edge with a basting stitch, using medium-length stitches, and make a gather.
- Fold the diaper and sewing right sides together, aligning the free edge of the sewing with the cut of the diaper.
- Baste your sewing, not forgetting to place folds - pay special attention to the corners, they should look especially neat.
- Topstitch the sewing.
- Overlock the free edge of the sewing and the sections of the diaper together.
Important! If you have a lace ribbon, you can first hem the edges of the edge, and then sew lace on the fold side.
Cap
You can cut it out by ripping out an existing cap of the required size - your future goddaughter will probably have more than one. In extreme cases, it will be possible to sew it again later. It consists of two parts:
- the main part is a rectangle or trapezoid;
- bottom.
Both the front part and the seam between the bottom and the main strip are trimmed with lace. Therefore, immediately prepare a piece that is approximately twice as long as the main part, and sweep it along the free edge, placing gathers or folds:
- Fold the lace strip with the main right sides so that the cut that will be stitched to the bottom completely coincides with the free edge of the lace.
- Sweep away the workpieces.
- Baste the bottom, folding it right sides together with the main part.
- Sew up the details.
- Hem or overlock the bottom of the cap.
- Cover the front part with lace.
- Sew on the ties (you can also make them lace).
Required tools and materials
- satin fabric for a dress;
- lining fabric;
- buttons or Velcro for fastening;
- sewing machine, scissors, thread, needles.
Before we start sewing, I will say that I created this baptism dress from scratch because I had experience sewing similar things. But you could use a ready-made dress as a pattern or template, or just buy a white satin dress and decorate it with flowers... Choose what suits you!
Here's how I made our dress.
Dress-body for a girl aged 1 month: MK
This master class will be of interest to those who are about to welcome a little girl into their family. It is not at all necessary to have professional dressmaking skills - for sewing you will only need a nice soft bodysuit and some fabric to match it;)
For work we will need the following tools and materials:
- bodysuit (purchased in a store or sewn yourself) with a clasp on the shoulder or with an overlap on the hanger;
- matching cotton fabric;
- paper for patterns;
- pencil;
- sharp scissors;
- sewing threads;
- pins;
- darning needle;
- sewing machine.
How to sew a body dress: master class
Pattern and cut of the skirt
To create a skirt pattern, we will need to take two measurements.
- Measurement A is the width of the front or back of the bodysuit.
- Measurement B is the desired length of the future skirt. The skirt can cover the butt completely or only reach the middle of the panties - at your discretion.
Based on the measurements taken, we will design a wrap skirt.
So, first we draw a rectangle onto the pattern paper or directly onto the fabric, the height of which is equal to measure B, and the width is equal to three measures A. Pay attention to the figure below.
Next, round the bottom corners of the rectangle. That's it, the skirt pattern is ready! We cut it out with sharp scissors or transfer it to fabric and cut it if we drew it on paper.
Frill
The next stage of work is sewing the frill to the skirt detail. We choose the width of the frill at our discretion, and its length should be equal to one and a half length of the line along which we will sew the frill to the skirt.
To find out the length of the frill, take a measurement along the stitching line of the skirt (measurement B in the picture). Next, calculate the length of the frill: multiply measurement B by 1.5.
Attaching a frill to a skirt
The skirt is almost ready! All that remains is to sew it to the bodysuit.
To ensure that the skirt is sewn evenly, on the body itself we draw with a pencil a horizontal line for its stitching on the front and back.
Our skirt will be wrapped, that is, on the front part of the bodysuit, the edges of the skirt will be sewn overlapping. At the same time, we will sew on the skirt, shirring it a little, making tucks.
We sew the skirt upside down: we place the inverted part of the skirt with the wrong side up and sew it. We start stitching from the edge of the skirt that will be located on top of the wrap, that is, we start on the right side of the front of the bodysuit.
Next, we draw a line for sewing the skirt along the line drawn in pencil on the back of the bodysuit, also pinching (gathering) in the process. It is important to ensure that the tucks are even, so that there is enough fabric to overlap at the front.
DIY baptismal robe and crochet
You can buy a christening dress or create it yourself. The second option is better for many reasons.
A hand-knitted item will be unique, carry the warmth of your hands and emphasize the significance of the event.
If you have been invited to a wedding ceremony with your child and you need to find a dress for a girl for the wedding, then a baptismal style of clothing would be quite appropriate. Knit two dresses at once - one for baptism and the second for going out with your princess.
For a tiny fairy from 3 to 6 months
An openwork, delicate dress is ideal for a sacred ceremony.
Airy lace creation (photo)
Fabric density: 10 loops create 15 cm of fabric.
Sequence of work:
- The front and back pieces are knitted in one piece, starting from the neckline.
- Cast on a chain of 63 chain stitches. Knit the fabric with the pattern from diagram 1 for 9 rows. Next, 27 repeats are knitted, 4 loops are knitted on strips with fasteners on each side.
- Knit the second row of pattern 2: 4 double crochets, 4 repeats. This is the right side of the back piece. Next, skip 5 repeats, 9 repeats for the front part and another skip of repeats - 5 pieces. Repeat the mirror patterns. The back and front are knitted in one piece according to pattern 2. After 15 cm you need to finish knitting.
Pattern for knitting No. 1 Pattern for knitting No. 2
Assembly:
The neckline and part of the back are tied with a crayfish step. For fastening, sew 4 buttons: 5 cm from the bottom edge, 1 cm from the top edge. Pattern loops are used to fasten buttons.
The 1st and 8th rows of the product are decorated with a ribbon threaded through them, secured at the ends using hidden stitches. The finished dress is moistened and dried on a flat, hard surface.
Children's dress assembly diagram
You can find the rules for choosing dresses for women over 40 here.
For girls 6 – 12 months
Pink dress for a girl 6 - 12 months
In the first stitch: single crochet, 3 double crochets, 1 single crochet (repeat). Pass a loop and knit through the front loop, to the end of the row.
Sequence of work:
- Start knitting by casting on a chain of 172 chain stitches.
- 1st, 2nd rows: double crochets.
- 3rd row: Add 1 treble s/n every other stitch. from the previous row.
- 4th row: 1 treble s/n, then *1 treble s/n through each column of the previous row*. Repeat cycle ** until the end of the row.
- 5th row: double crochet stitches and increase 1st treble crochet on every 5th stitch of the previous row.
- Rows 6 to 10: Follow pattern 1.
- 11, 12 row: double crochets and increase of 1 treble crochet on every 10th stitch of the previous row.
- Row 13: identical to the fourth.
- Row 14: double crochets.
- Row 15: identical to row 12.
- Row 16: identical to the fourth.
- 17, 18 row: double crochets.
- Row 19: identical to the fourth.
- Row 20: knit according to fig. 1.
- From the 21st row, knitting goes in a circle.
- Row 21: double crochets.
- Row 22: identical to row 11.
- Row 23: double crochets.
- Row 24: identical to the fourth.
- Row 25: double crochets.
- Row 26: identical to row 12.
- Rows 27 – 36 are worked in double crochets.
- Row 37: identical to the fourth.
- Repeat the interval from rows 26 to 37 three times. At this point, 73 rows will be knitted. 74th: knitted as pattern 1.
Knitting and assembly pattern for pink dress No. 2
Assembly:
Tie a placket on the yoke and sew buttons with eyelets to it.
Headband:
According to pattern 2, a strip 48 cm long is knitted. To create a rose, cast on a chain of 38 chain stitches, knit a strip according to pattern 3 and form a flower from it. Sew the flower to the headband.
The following article will help you choose a summer dress for obese women.
Knitting materials
The skin of babies and children under one year old is extremely sensitive to synthetics; for this reason, knitting threads should be either cotton or acrylic.
An airy look for the tiniest princesses
An excellent option is Violett or acrylic yarn, which is most often used for knitting children's dresses. The main thing is that the thread is soft and allows the skin to breathe.
Preferred hook numbers are 2.3. Do not take hooks that are too large - the product will not hold its shape well. Hooks that are too small can cause the item to be too stiff.
Find a selection of stunning Muslim wedding dresses here.
We sew a baptismal shirt with lace inserts
In this master class I will not dwell in detail on the construction of the pattern, it is quite simple. I want to focus on tailoring and show how, using a fairly simple finishing method, you can get an interesting and very beautiful thing, even with a simple cut. The use of such finishing is very extensive, but I want to consider this method using the example of a baptismal shirt.
For the work I used white cotton, knitted lace and ready-made bias tape.
We fold the fabric in four and cut out the base of our shirt.
Mark and cut out the neck hole.
Then we take the lace and pin it from the bottom of the shirt to the shoulder fold, and then from the shoulder fold to the bottom. I pinned the lace slightly diagonally so that it ran almost parallel to the side cut.
We do the same on the other side.
We unfold our workpiece and check that everything is smooth and symmetrical.
On the machine we install a zigzag stitch with a stitch width of 1.5 mm and a length of 0.5 mm
and sew the lace first on one side, then on the other. One edge of the lace was scalloped; when sewing, I tried to adhere to this contour.
This is what the work looks like from the inside out when the lace is sewn on:
In this way we sew both lace strips.
Now we take small scissors with sharp tips and carefully cut out the fabric from the inside in the place where we now have the lace. This must be done extremely carefully, try to cut as close to the seam as possible, but do not cut through the seam itself. First on one side:
Same with the other:
We got this kind of lace stitching.
After the fabric behind the lace is cut on both sides, the work must be thoroughly steamed. It is better to do this through an iron, you can use a wet iron, or you can use a dry iron if the iron has sufficiently powerful steam:
Let's see what we got:
Sew the lace in a zigzag pattern (stitch width 1.5 mm and length 0.5 mm) to the bottom of the front and back, then to the bottom of both sleeves. I sew straight from the skein, you can first measure and cut, then sew - it’s more convenient for you.
Here's what happened:
Now we chop off (or sweep away, again, whichever is more convenient for you) the side sections:
This must be done by carefully combining the lace trim on the front and back.
We sew the side cuts at a distance of approximately 1-1.5 cm from the edge.
Now you need to trim the seam allowances on the back side by half, leaving an allowance width of 5-7 mm:
Next, fold the wide allowance around the narrow one, straighten the shirt and baste the hem.
We sew to the edge using a machine:
Carefully iron the seams both from the inside and from the face. Here's what it looks like as a result:
Let me make a reservation right away - flat seams are used in clothes for little ones; if there is no such need, the cut can be processed differently, the way you usually do it.
Now we find the middle of the front and make a 10-11 cm deep cut from the neckline strictly vertically downwards. From the end of the cut to the left and right we make small notches (4-5 mm):
We take the bias tape and begin basting it from the neckline along one side of the cut. Having reached the notches, turn the tape twice by 90 degrees. We have formed an equilateral triangle, secure it and continue basting the binding on the other side of the cut to the neckline.
Now we carefully stitch the binding on the machine, making sure that it is stitched both outside and inside. We additionally sew the triangle at the bottom of the cut:
Here's what happened:
All that remains is to stitch the trim along the neckline, leaving free ends on both sides for ties (25-27 cm on each side). I tucked the ends of the binding inside.
The shirt is ready!
As you can see, everything is quite simple, but the results have already pleased several of my little clients (more precisely, their mothers and godparents).
I really hope that this master class will be useful to someone
I would like to say that this was my debut in publications at the Fair, and I really hope that my first pancake is not completely lumpy. Well, how it turned out is up to you to judge. I will gratefully accept both positive and critical reviews! This is the first time I decided to participate in the competition, so if you liked it, please vote, I will be very grateful
How to choose
When choosing a dress for christening, first of all you need to pay attention not to the attractive appearance, but to practicality and compliance with church traditions.
The outfit should be made in light colors. Optimally - in white, but soft light shades are also acceptable.
The Church does not encourage luxury and pretentiousness, so a modest baptismal dress should have nothing to do with these concepts. Neat, elegant decor is not prohibited. The ensemble for the sacrament can be decorated with lace inserts, appliqués, embroidery, miniature bows and ribbons, but not all at the same time. If the shirt contains sewn compositions of flowers or bows, embroidery with beads or small pearls, you need to make sure that all the elements are held securely so that a curious baby does not tear off the decorations during the ceremony and try the beads.
When choosing the material of an outfit, you can be guided by seasonality. If the christening is planned for the summer, a thin cotton, cambric, silk, or linen shirt will do. For winter baptism, it is better to dress the girl in a warmer dress made of flannel, knitwear, or woolen yarn, which will quickly warm the baby after immersion in water.
It is better to avoid tight and tight-fitting styles. They will restrict the baby’s movements and can injure sensitive baby skin.
It is important to consider that the child will have to be undressed and dressed during the ceremony. So that the ceremony does not drag on, and the godparents do not have unnecessary problems, clothing should have a minimum of buttons, snaps or hooks. It is much easier to take off a shirt over your head by untying one lace at the neckline than to struggle with dozens of small fasteners.
Accessories
A christening ensemble does not require many accessories. For an important ceremony, children need bonnets and crosses. For infant baptism, you can also add booties to this list.
The cross worn during the ceremony is usually made of silver. It is better to choose a miniature decoration on a soft, thin but durable rope that will not rub or irritate the baby’s delicate neck.
To make the look complete and harmonious, the decor of the cap should match the decoration of the dress. Lace, embroidery, appliqués, ruffles, bows, and ribbons will add elegance and charm to the headdress.
The cap can be replaced with a delicate lace or openwork knitted headband with a bow or a flirty textile flower. Older girls wear neat scarves on their heads, trimmed with airy braid or patterns using the welt stitch technique.
Booties are often worn on the feet of newborn babies. They can be made from durable cotton fabrics, satin or knitted from soft yarn. White slippers will go well with a snow-white baptismal dress, and for an outfit in pastel colors you can choose booties with ribbons or trim to match it.