A cap is an important component of a baby’s first wardrobe. In addition to purely aesthetic functions, this headdress plays an important protective role. The cap protects the fontanel on the baby’s head, protecting it from temperature changes and drafts. Of course, you can buy a cap in a store. But how much more comfortable and warmer will a baby be in a hat sewn by the hands of his mother or grandmother! Making your baby's first headdress is not difficult. The pattern of a cap for a newborn is extremely simple; the sewing technology does not require deep practical skills.
Moreover, sewing can be done manually, without a sewing machine. You will learn how to make a cute cap with your own hands in this article.
Making a cap pattern with your own hands
In this section you can learn how to properly start making a cap pattern for a newborn baby, and we will start with the back of the head.
The back of a child's cap
To begin, we must take a blank sheet of paper, a pen or pencil (whichever is more convenient for you). On the surface of the sheet, carefully draw a rectangle and mark it. In our case, this is ABCD (in the figure above you can see this), the vertical lines AD and BC are the same length of 12 cm (1/2 head circumference, according to the measurement + 3 cm for any size):
18:2+3=12 cm
Also in the figure we see the horizontal directions AB and DS, they also make up the width of the occipital lobe and are similarly the same, 6 cm each (x/4 head circumference according to the measurement + 1.5 cm for any size).
18:4+1.5=6 cm
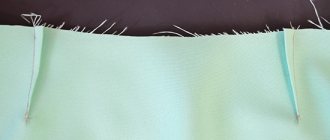
Sewing line
We divide the angle ABC in half and from place B along the bisector of the angle we draw 2 cm (for any volume). We divide the BC line in the same way into two identical parts. Having done everything written above, we put 2 cm from place C to the left side (for, we repeat, any size of your baby’s head). We shorten the sewing line from place A, go through the 2nd point, the middle of BC and approach place 2 (lower).
Bottom line of the cap
From place D (our vertical line AD) we cancel 0.5 centimeters (for the purpose of absolutely all volumes). Places 0.5 and 2 (bottom) are combined together.
So, slowly but surely, we reach the next and final stage: the front part.
Front part of baby's cap
Again, take a sheet of paper and the subject of writing. We draw a rectangle ABSD, where the vertical lines AD and BC are the same, 16 cm each (the length of the occipital lobe according to the direction of sewing from place A down to the bottom of place 2), and the horizontal directions AB and CD are 9 cm (V2 head circumference according to the measurement):
18:2=9 cm
Sewing line
From our letter D to the right side, along the line DS we set aside 1 cm and from this place we move upward at a right angle to the line DS, we set aside another 1 cm (for any volumes). After that, we combine places A and 1.
Line of the front and bottom of the cap
From place C we go to the left along the line SD and set aside 1 cm.
We combine places B and 1 (on the bottom line). Place 1 (on the hem line) is combined with place 1 (along the sewing line). We hope that our article will be useful and easy to read for you. Good luck in your endeavors!
This is interesting: Pattern Summer sundress for girls (size 104-128)
We sew a round cap for a doll
I offer a mini-master class on sewing a round cap for a doll .
Materials that can be used:
- fabric for the cap (for antique dolls, it must be natural) - lace for decoration (for antique dolls, it must also be natural) - decor (ribbons, fabric or paper flowers, brooch, etc.).
We will make the pattern ourselves. To do this, we perform the following actions:
1). We measure the length of the doll's head from ear to ear (or from lower points, if you want the cap to bury the ears) through the supposed crown - write down the measurement. To this measurement it is necessary to add a few centimeters for a loose fit, an allowance of say 3-5 cm. This is necessary so that the cap sits beautifully and freely on the doll’s head. Although, if you want it to be tight-fitting, then do not make an allowance at all.
We write down the final measurement with the allowance.
2). We take graph paper or other paper, a pencil and some round thing of the diameter we need (a plate, lid, pan, etc.) and draw a pattern - we will get a pattern for the “bottom” of the cap - the main part.
Further actions depend on the model of the cap - whether it will have a sewn-on “brim” (from the same fabric or lace) or a one-piece “brim” with a “bottom”.
Option 1.
In the first case, we cut out the pattern from paper, cut the fabric, not forgetting about the allowances (their width depends on the method of processing).
Then we sew on the “brim”, for example, from wide lace - with or without gathering. If you use lace for the “brim”, then I advise you to first hem the edges of the “bottom” - fold them twice 0.5 cm to the front side, and then close the hem area with lace on top - i.e.
make a small overlap of lace onto the seam allowance already created. Option 2.
If you have a one-piece brim with a bottom, then again there are two options - make a pattern with a brim, or draw the brim on the fabric when cutting it. The second option is more complicated, but preferable, because at the junction of the brim with the bottom we will have a drawstring for tightening the cap. We still need to mark this line on the fabric. So, we already have a cap with a brim ready. By the way, fabric fields can also be trimmed with lace.
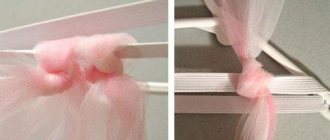
Now you need to make, as I wrote above, a drawstring for tightening the cap. The easiest way is to sew narrow straight lace (1-1.5 cm wide). The edges of the lace must be folded inward twice and placed next to each other (not overlapping!) where the back of the cap will be located. After attaching the drawstring, insert an elastic band or ribbon into it.
You need to pull the ribbon a little, put the cap on the doll’s head, finally tighten it and tie a beautiful bow.
If you use an elastic band (it is usually not used for antique dolls), then measure the doll's body, subtract a couple of centimeters, cut the elastic to the required length, and insert it into the drawstring using a safety pin. Place the ends of the elastic on top of each other and secure. At the junction of the edges of the drawstring, on the elastic band, tie the ribbon with a bow.
Next, decorate your cap with some decor (for example, as in my photos).
I would like to draw your attention to a number of important points:
— Before sewing, natural fabrics must be steamed, or better yet washed, because... When washed, they shrink (this also applies to cotton lace). — Each operation must be accompanied by basting and steaming (of course, after removing the basting seams). Then you will get a really high-quality sewn item.
Cap made of antique muslin and vintage wide cotton lace: Decoration in the form of a brooch made of silk ribbon and cotton lace: Drawstring on a silk ribbon:
Cap made of modern Italian lawn with a one-piece brim trimmed with lace:
Please note: the drawstring here is made of the main fabric (which made my sewing more difficult, since I had to bend the allowances on both sides):
Wreath of modern paper flowers for scrapbooking:
Here on the left you see a slightly different model of a round cap - it has a rather rigid shape due to the linen lining. As you can see in the photo, the cap holds its shape perfectly, and its one-piece brim with a “bottom” is very small and trimmed with narrow antique lace:
And this is a very simple, but cute, vintage cotton tulle cap:
Our grandmothers and great-grandmothers used curtains like these to cover a pyramid of pillows)))
"Brims" are one-piece, trimmed with cotton lace:
Here you can clearly see that the drawstring was not needed at all - the tape was simply threaded into the holes of the tulle:
Thank you for your attention! Happy creativity!
DIY clothes for dolls - on Beybiki
babiki.ru
How to choose a hat size for a child
When a child is very small, he is only a few months old, it is difficult to take him to clothing stores, so you need to buy hats according to your own measurements. Determining the size of a children's headdress is quite simple. It is recommended to use a centimeter, or, as a last resort, a thread that does not stretch. The centimeter must be applied to the most convex point of the head, and placed in front above the child’s eyebrows.
Pattern of a cap for a newborn
Do not tighten the tape, and if necessary, round the result up. The number that turns out will be the size of the headdress. For example, if the measurements give a result of 42 cm, then it is better to take the size of the product 43. When purchasing, you need to focus on the age of the baby.
Use of baby fabric
In the first years of life, the baby grows very quickly, so it is not advisable to buy many hats of the same size at once. Approximately every 2 months you need to take new products. Sometimes you can buy things to grow. For babies, size 44 is suitable, in six months you can safely buy 46, and in a year from 48 and above. These are averages and may vary for different babies because each person is different.
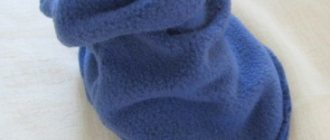
After one year, the size of the head will change, but not at a rapid rate. It is advisable to take measurements every six months and note changes. For sewing, regular knitwear is perfect, which is easy to care for. For the winter option, plush fabric is suitable, but in this case it is necessary to make a lining so that the headdress keeps its shape well.
Knitting a cap like Cinderella's
We sew an elegant cap for a baby - a master class for beginners and professionals
In this master class I want to show you how to make a pattern yourself and sew an elegant cap decorated with lace. The thing doesn’t seem to be complicated, but it requires a certain perseverance and painstakingness.