When a baby appears in a family, parents and relatives are touched by all the moments associated with childhood. The choice of clothes becomes a holiday - you want to pamper your baby with only the most beautiful and most comfortable outfit. Tiny overalls, small socks, the first shoes and tights are treasured by parents like the apple of their eye. Years later, children's things evoke a surge of nostalgia and warm feelings for a fleeting childhood. The greatest affection and tender memories are evoked by booties - the first shoes of a little man.
Types of booties
Booties (also called “topics”, from the word “to stomp”) come in different types and shapes. They can be knitted and crocheted, sewn from fabric, felt, fur. Boots come with open toes and without, with and without a strap on the instep, high like socks and low like slippers.
Experienced needlewomen have developed a lot of patterns for knitting various models of children's shoes. Booties in the form of sneakers, ballet pointe shoes, with or without decoration, delight the eye with a variety of ideas. Any pattern of baby booties with dimensions will allow you to sew comfortable and beautiful shoes.
Each seamstress thinks out how to decorate shoes independently. These can be appliques, flowers made of beads or seed beads.
Booties can also be made from a combination of fabrics - a leather sole, a felt upper and a soft insole all work together to perfectly perform the necessary protective functions.
Booties for newborns - manufacturing method with photo
Soft, warm booties for newborns are made of fleece. The booties pattern is very simple and sewing them is not difficult at all. Such beautiful booties will definitely warm your baby's feet in cool weather.
- Booties for newborns
- To work you will need:
- Fleece in 2 colors.
- Rubber.
- Booties for newborns, manufacturing method with photo:
- Booties pattern
Transfer the pattern to fabric. The sole can be made in a different color.
Then we sew on the elastic bands. Of course, it’s better to take a thinner rubber band than regular underwear. I didn’t have one, so I sewed on a wide elastic band, but it also turned out well.
- Sew the other side of the top.
Fold the upper part in half with the elastic inward, connect the edges and baste the sole. Just the main thing is not to mix it up and not to sew booties on one leg.
We stitch around the middle, stuff it with padding polyester and tighten it. Sew the petals.
- We assemble the flower and sew on the petals.
- And in the middle, the flower is ready.
- We turn the booties inside out and sew on the flowers.
- Booties for newborns are ready.
- Good luck to everyone in their creativity!
Bootie sizes
Most often, booties are sewn individually for each baby. There is no size range for this type of shoe. However, the masters have created an approximate diagram, based on which you can approximately understand the required shoe size.
For sewing, you need a pattern of baby booties with dimensions. You will need to adjust the boots to the desired size with your own hands.
In the picture, each line corresponds to the dimensions:
- red – 0–3 months;
- blue – 3–6 months;
- yellow – 6–9 months;
- green – 9–12 months;
- purple – 12–15 months;
- blue – 15–18 months;
- brown – 18–24 months;
- pink – 24–36 months.
Larger booties for children over 1 year of age are not sewn. These shoes are designed for a very young child, whose foot is still developing and does not experience heavy loads. As soon as the child begins to walk more confidently, he needs different shoes.
DIY booties
How to make a pattern of baby booties with dimensions? The master class will help you figure this out.
READ ALSO: Knitting a blouse for a girl, choosing yarn and tools, master classes
1st method. To construct, you need to draw an oval, the length of which is equal to the length of the child’s foot. For a newborn, this is approximately 5 cm. 1 cm is added for seams and looseness of fit.
2nd method. A rectangle is also drawn, the long side of which is equal to the circumference of the oval. For convenience, the length is measured using a centimeter tape along the contour of the oval.
The oval, if desired, can be slightly changed, giving it an anatomical shape. To do this, a small protrusion is made in the upper part for the thumb, and for the other four, a bevel is made at an angle of about 5 degrees. At the bottom, where the heel is, the corners are beveled more strongly to create a sharper angle.
For ease of construction, a 7 x 5 cm rectangle is drawn. Perpendiculars are drawn with an intersection in the center. From the upper border, move 1 cm down and 1.5 cm to the left (the right bootie is drawn). Point A is marked. Upper perpendicular B, bottom C, left D, right D1. Connects A with B with a smooth line, then A with D. It turns out to be a thumb. The remaining points are outlined evenly and smoothly.
3rd method. The child's leg is outlined with a pencil. The resulting contour is outlined with a smooth line with an allowance of 1 cm.
How to sew booties from felt or fabric with your own hands? Bootie patterns?
You can sew these booties from felt or other suitable fabric.
For this model, you need to cut out 2 pieces from felt and 2 pieces from lining fabric (you can use calico as lining fabric). The fact is that in this model it is assumed that the seams will be inside, so a lining is necessary. But you can make the seams facing out, then you won't need a lining.
First, sew the back parts of the top blanks from both felt and calico. Then sew the parts along the top, with the wrong side, retreating 5 millimeters from the edge. On the rounded areas of the fabric, notches of about 2 - 3 millimeters are made (this is so that the parts turn out even and do not tighten).
Turn out the parts, straighten them, iron them. Place the sole pieces made of lining fabric and felt together and baste. Sew the upper part of the booties to the sole with a regular stitch, the seam is made on the front side. The edges of the booties can be decoratively hand-sewn.
Sew ties to the booties, and decorate the front with a figurine.
And here is the pattern for making these booties.
Booties can be made not only from felt, but also from felt and other fabric. For example, here are these cute booties that you can make with your own hands and decorate to your liking.
- After you have cut out the parts of the booties, secure the place in the upper part of the booties where the cut ends and hem a piece of thick material or soft material on the wrong side.
Figure B shows what to do next. And then process the top cut. Booties can be decorated with some kind of applique. It is more advisable to do this at this stage, since it will be more difficult with ready-made ones.
In Figure C. Fold the piece and sew the seam on the heel. Fold the top and sole right sides together and sew. Now turn it right side out. Sew the toe of the upper part of the bootie and lightly pull the thread to add volume.
Ready-made patterns
For sewing, you can use a ready-made pattern of baby booties with dimensions. Descriptions of shoe making often contain instructions for work.
There are many ready-made patterns. They are very convenient to use - they take into account the characteristics of a newborn’s legs and are easy to adjust to the required size. The life-size baby booties pattern is very functional and makes the seamstress’s job easier.
Ready-made patterns are also convenient because they already contain diagrams of the details of the booties. Accessories and additional elements are simply transferred to scale.
The finished pattern can be printed on white paper. The diagram is drawn with a grid with 1 cm cells. If the cells are smaller, then it will be more convenient to reduce or enlarge the image.
The printed diagram is reduced based on the actual parameters of the baby's leg. If the finished circuit is significantly larger or smaller, then the proportional change is carried out in several approaches.
Open the booties
When the pattern of baby booties with dimensions is ready, you need to sew the resulting parts with your own hands. Before sewing, you need to cut the fabric.
For children's clothing and shoes, you must choose only natural materials. To prevent the child’s foot from steaming, breathing and not experiencing irritation from touching unpleasant, prickly or synthetic material, fabrics of natural origin are used - cotton, linen, knitwear. If the booties are for winter and need to warm your feet well, then it is imperative to use a lining made of natural material.
Booties are sewn with an inner part and an outer part. When cutting, 2 parts are drawn for the left and right pairs, and the top one should be 0.5 cm larger than the bottom.
The selected material is processed according to its specific characteristics - wool is steamed, cotton fabrics are ironed. The pattern is transferred to the fabric from the wrong side and cut out with sharp scissors.
Parts of the booties are pinned off with tailor's pins.
READ ALSO: Knitted shirt front - diagram and description for beginners
For the foot, two parts are also cut out - the lower and the inner. It is possible to add a cushioning layer for softness - felt or thin felted wool. The gasket should lie between the inner layer and the outer one.
The parts are pinned together.
How to sew slippers - baby booties with your own hands. Master Class
≡ March 24, 2015 · Category: Master class
If the baby does not walk yet or is just beginning to learn this activity, booties are the ideal shoes for him.
In such light and soft slippers, your baby will be extremely comfortable lying in a stroller or crawling around the room. Booties are worn by children from 3 months to one year. But due to their comfort and softness, such shoes are also suitable for older children to run around the apartment.
If you increase the pattern proportionally, you can sew soft slippers for children under five years of age.
If the baby does not walk yet or is just beginning to learn this activity, booties are the ideal shoes for him. In such light and soft slippers, your baby will be extremely comfortable lying in a stroller or crawling around the room.
Booties are worn by children from 3 months to one year. But due to their comfort and softness, such shoes are also suitable for older children to run around the apartment.
If you increase the pattern proportionally, you can sew soft slippers for children under five years of age.
These baby booties are very comfortable, cute and easy to sew. Even a debutant can easily make such soft slippers for a little person without much effort. Moreover, there is an opportunity to approach the process creatively. You can combine fabrics and textures, add ribbons and lace, decorate with beads and appliqué.
These baby booties are very comfortable, cute and easy to sew. Even a debutant can easily make such soft slippers for a little person without much effort. Moreover, there is an opportunity to approach the process creatively. You can combine fabrics and textures, add ribbons and lace, decorate with beads and appliqué.
Why with your own hands?
Millions of pairs of children's shoes are sold in stores. But booties made by yourself will be the most beautiful and beloved. A little person needs more than just food and lullabies. Neat and pretty slippers that mommy will make with her own hands, putting her soul into them, will act as a kind of amulet.
After all, a thing always carries the energy of its creator.
Handmade booties are not only a wonderful piece of clothing for your baby. However, this is also a necessary gift for a grandson, nephew, godson or child of a close friend.
Which fabric to choose
Take your fabric choice seriously. Although booties can be made from almost any material, try to choose the one that is softest and most pleasant to the touch. For the outside, some optimistic print will do. The sole can be made of felt, leather or rubber-coated fabric. And choose something comfortable for the inside.
It is convenient if the fabric is cotton or wool blend, so that there is no irritation and sweat on the legs.
Ideally there should be three types of fabric. Very little material will be used, so trimmings and scraps that are found in every home are quite suitable. You can also use old clothes for this purpose.
Necessary materials for sewing booties
- Two types of fabric (for the outer part and the inner);
- sole material;
- pattern;
- sewing machine;
- pencil;
- 2 small pieces of thin elastic band;
- scissors;
- threads;
- chalk;
- sewing pins.
Working with a pattern
First, prepare a pattern. Print it out and cut it out with scissors. You may need this template more than once, so make it from thick paper. As your baby’s feet grow, it will be necessary to gradually increase the size of the pattern in a timely manner, so as not to wear small booties and the foot develops correctly.
Mothers know how harmful tight shoes are for little feet.
You will need the following supporting materials: sole, upper and heel templates.
Connecting parts
Lay out two types of fabric (for the top and lining) on your work surface. Place cardboard templates on the material. From the fabric for the top, cut out two pieces each for the top and backs. From the lining fabric you need to cut 2 soles, 2 upper parts and 2 heels.
Also cut out 2 soles from a dense, possibly rubberized material. In our case, the fabric for the top is a piece of denim left over from old jeans. And the lining will be made of a piece of cotton. If you have denim, you can make slippers for yourself.
Don't know how? Read our master class!
Sew the inner and outer parts of the sole right side out. To prevent the two parts from falling apart, you can pin them together with sewing pins, which can be removed at any time.
Sew the top and lining as shown in the photo. Try to keep the stitching as close to the edge as possible.
Turn the top right side out and iron thoroughly. Repeat the same operation for the second part of the bootie. Set the finished pieces aside.
Prepare the back parts of the booties. Sew the back and lining with right sides facing in. Repeat the same with the second part of the parts.
Unfold the resulting pieces and lay them flat. Smooth them out with an iron. Press the seam allowances on the sides.
Sew them along the sides as close to the edge as possible. The seams should be as narrow as possible so as not to rub small legs.
Fold this piece in half. Place a piece of thin elastic as close to the fold as possible. Sew the top so that the elastic can move freely inside. You can also make a wonderful gift for an older child. See our article on making bunny slippers!
Now you need to connect the upper part to the sole. Place the pieces with the front parts facing each other. Find the middle of both parts, place them next to each other and start stitching from the middle to the edge. Then return again to the center point and stitch to the other edge.
- We sew the backdrops in the same way: starting from the center to the sides.
- And in order to sew warm booties, all you need is desire and a little time. And we took care of the rest, watch this interesting master class:
Well, for our booties, slightly tighten the elastic on the backs and sew the ends to the inside of the booties so that the slippers fit better on the child’s feet.
Check that the elastic is not too tight. Now you have finished sewing the first pair of booties. It was not difficult at all and only took a few hours.
But your love and warmth, together with such pretty slippers, will protect the little man.
The booties can be left as is, but you can give them a more elegant look. It is very good if the baby is surrounded by aesthetically designed things. This will involuntarily develop a sense of beauty in the child from infancy.
Options for decorating booties
- The appliqué decorations look interesting. You can make them yourself, depending on the gender of the child, or buy them ready-made. You can take these booties as a basis, but use appliqué to turn them into sneakers or sneakers for boys.
- The front part can be designed in the form of the faces of various animals: bear cubs, bunnies, seals, cockerels. Or fairy-tale heroes. Even just sewn on eyes, nose and mouth can lift your spirits.
- It is very important to decorate girls’ booties with a variety of bows made from multi-colored silk ribbons. You can beautifully tie several of these bows and sew them on top or on the side, and perhaps a whole row. It all depends on your taste and imagination.
- If you know how to knit a little, you can decorate your slippers with motifs: various flowers, butterflies, cones, snowflakes.
- Decoration with lace, ruffles, embroidery, pom-poms, tassels, and beads looks original.
Love and care
Please note that the decorative details must be sewn on very tightly, as kids are often interested in them and try to tear them off to taste them. Therefore, it is not recommended to decorate booties with details such as rhinestones. As a rule, they are glued.
A child can easily tear off such decoration and swallow it. You should also be careful with beads and buttons. And lastly, it is believed that the item carries the energy of the person who made it and has sacred meaning.
Therefore, when working on such a touching piece of baby clothing as booties, be sure to create a positive mood for yourself.
Remember pleasant events in your life, think about what you wish for your baby. Imagine how strong, smart and healthy he will grow up. You can read protective prayers and even just “Our Father.” Then the thing you make will bring only the best to the little man.
Stitching the parts
The cut and pinned parts are sewn together. The peculiarity of working with booties is that most models are constructed in such a way that the sole and top, together with the inner layer, are sewn on at the same time. The bootie is ready almost immediately.
Before sewing the upper to the sole, you need to align the lining and outer fabric together. The stitched workpiece is smoothed with an iron.
Then the fabric is unfolded so that the design is on the outside and inside of the bootie, with the stitching seam facing inward.
The resulting blank is folded in half and sewn to the sole. The sole is placed in layers so that the outer part, which will be in contact with the floor, is inside, and the topmost part is the lining.
The finished sewn workpiece is trimmed. The sole is finished with a zigzag seam. Can be sewn by hand. The bootie is turned inside out and decorated as desired - ribbons are sewn on for ties and beads are glued on.
It is worth noting that on booties with appliqués, the design must first be modeled on the fabric and sewn, and only then do they begin to assemble the parts together.
If you have created a pattern of baby booties yourself with the dimensions and how to sew them, there should be no questions during your work.
Leather booties
If there is a pattern of booties for a baby with dimensions, you can also sew booties from fur using this pattern. To work with leather, you need to make an allowance of 1 cm - on the seams and the freedom of fit.
The leather is sewn with the seam facing outward; it is difficult to sew such a small detail by hand without experience. For connection, a decorative braid with a thread of a contrasting color or a thin leather cord is most often used.
In fur boots, the pattern of baby booties with dimensions may differ from the blank. It is imperative to take into account what such shoes will be worn on - a sock, warm tights.
The simplest bootie
The simplest pattern of booties for a baby, the dimensions of which do not require lengthy calculations, is very simple to construct.
To begin with, an oval is drawn. The length of the ellipse is equal to the length of the child’s foot, the width is equal to the width of the foot. For a 3 month old child. the result is an oval 7 x 4.5 cm.
In the upper part, a straight line is drawn perpendicular to the length of the ellipse. Segments with a length equal to the height of the ellipse are laid out to the right and left. A rectangle 3 cm high is drawn. Along the length, a seam allowance of 1.5 cm is added on each side.
The blank is cut along the contour and folded like origami. This is to check if the strip is long enough to meet at the bottom of the oval and form the heel.
If the calculations turned out to be correct, 2 blanks are cut out for each leg. The blanks are stitched with the right sides inward, then turned inside out, and the heel is stitched. For greater softness, the heel can be sewn up with a hidden seam by hand.
DIY children's shoes - patterns for the little ones with sizes
Many mothers who are expecting a baby or have already given birth to a little happiness want to do something valuable and useful for him.
Today, DIY children's shoes are very popular - patterns for the little ones with sizes can be found in any thematic magazine or on the Internet.
Booties can be knitted or sewn at home, showing maximum imagination and creating their individual decor with ribbons, sequins, beads or fur. Let's look at step by step how to occupy yourself with such needlework for the benefit of your child.
Preparatory stage
Before you make a shoe pattern for babies under one year old with your own hands, you will need to complete several basic tasks:
- take measurements;
- prepare consumables;
- draw three components of future booties.
We measure the leg
The creation of any pattern is based on the basic dimensions and parameters of the future owner. To sew booties, you need to take the following measurements from your baby’s feet:
Having the basic dimensions of your child’s leg, you can begin making a pattern.
What will you need to create a pattern?
To make a pattern according to previously taken dimensions, you will need the following office supplies:
- pencil or pen;
- thick paper or cardboard;
- ruler.
Important! The pattern of booties for your baby will consist of three elements - the sole, the back and the top.
We develop pattern templates
The pattern is the basis of almost any product, so the appearance of the shoes you make for your beloved baby depends on its execution.
Sole
The sole of children's shoes can be made in one of two ways:
Top part
To make the upper part of the shoe, follow these steps:
Important! As a result, you should get a pattern whose shape resembles a semicircle.
Rear end
To make a pattern for the back, follow the following algorithm:
Important! As a template for the back, you should end up with a kind of trapezoid.
Choosing material
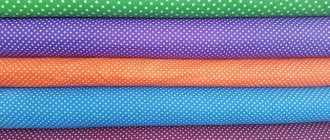
To make beautiful and comfortable children's shoes, you will need to choose 2-3 types of fabric:
What do you need to sew booties?
To make children's shoes you may need the following materials and blanks:
Making blanks
Lay out the fabric you have chosen for cutting on the table:
- From the fabric for the inside, you will need to cut two pieces of each pattern.
- Also cut out two soles from the thick fabric intended for making this element of children's shoes.
- From the material for the exterior finishing you will have to make two backdrops and two top parts.
Connecting the parts:
- Manually sew together all the parts of the sole - from thick fabric and material for the inner part.
Important! Please note that the sole parts must be sewn with the right sides facing out.
- Once you've finished the sole, take the top pieces and sew them together with right sides facing in.
- Using a sewing machine, you need to sew a straight line, turn the resulting product right sides out and iron it.
- Carry out a similar procedure with the backdrops, only you will need to iron them, opening the parts from the inside. On the sides, it is necessary to slightly smooth out the seam allowances left for the seam.
- Then fold the resulting products with the right side out, place the elastic inside and sew so that it can move freely.
We sew booties
Now let's proceed directly to making booties:
Important! When your booties are ready, you can already decorate them. If you want to do this with beads, then use thin fishing line instead of regular thread. Keep in mind that your baby will move his legs and the thread may break, which will not only ruin your work, but also pose a risk for your baby to swallow several beads.
DIY leather booties
If you are going to sew leather booties for your baby with your own hands, then you can use the instructions presented above, but also consider the following recommendations:
- Buy special needles for hand and machine sewing.
- You should not use chalk - it is better to make all markings using a two-color pencil.
- Also, to work with leather, you will need a roller foot, because leather does not slide well under conventional sewing machine components.
Important! Of course, you can try to combat the poorly sliding fabric yourself by simply pulling it or placing newspaper under it. However, this will be difficult to do, considering that you have to sew baby booties.
- You also need to choose the right threads for the leather so that your product does not deteriorate over time. It is best to use cotton or linen products; if you want the thread to shine, take a silk spool.
- You can sew a fur trim onto baby booties as decoration, or buy small stripes in the store and carefully glue them on the outer surface.
Video material
We sincerely hope that the detailed instructions we provided on how to make children's shoes yourself will help you give maximum warmth and affection to your baby.