- 23517
- 16-10-2020
- Author: Mysekret Team
- 2
With the onset of cold weather, you need to start warming up. Not only warm coats and down jackets, but also beautiful warm hats will help you with this. And for your child we suggest knitting a hat yourself. Newborn babies who need protection and care need special comfort and warmth. How to knit such products for newborns will be described step by step in our article. We will look at a detailed description and knitting patterns for hats with ears, a cap, products for girls and boys, a model with a simple pattern. Your baby will be delighted. And most importantly - stay warm!
What will you need at work?
The quality of a hat for newborns, as well as its appearance, directly depends on what materials and tools will be used in the work. There are a number of requirements for clothing intended for a baby. It must meet the following criteria:
- pleasant to the touch. Upon contact with skin, tingling is unacceptable, as are any other unpleasant sensations;
- practical. The finished product should not deform or fade;
- natural composition. It is best to use cotton or wool yarn;
- does not cause allergic reactions. Toxic dyes should not be used in the manufacture of threads.
Each yarn manufacturer has a line of products designed specifically for children. Thanks to this, even a novice needlewoman will not have difficulty choosing the right option. The main thing is to take into account the season when the knitted hat will be used.
For the winter period, as well as late autumn and early spring, merino wool is an excellent solution. The yarn is natural, things made from it contribute to proper thermoregulation. Mixed threads can also be used. They contain not only natural, but also safe synthetic fibers. Due to this, maximum strength is achieved.
For the off-season, acrylic would be an excellent solution. It will suit all kids without exception. It is often used in case of an allergic reaction to natural yarn. Summer caps for newborns are best knitted from viscose, silk or cotton. These threads are ideal for creating hats intended for the warm season.
It is not difficult to determine which crochet cap is best for crocheting. To do this, just study the information on the thread label. It indicates which tool to choose based on the diameter of the thread. Ideally, its thickness should be a millimeter greater than the yarn.
In addition, small tricks will help you make the right choice. It is noted that for acrylic and wool it is more convenient to use metal options. Bamboo and wood products are ideal for viscose and silk.
Necessary materials
You can knit a hat with ears quickly and easily, literally in a couple of evenings. The first step is to choose the right yarn. Knitting threads should be soft and hypoallergenic. For knitting children's clothes you should not use:
- Natural untreated wool. It has a rough texture and can cause skin irritation in a newborn.
- Mohair and other fleecy fabrics. Small fibers can get into the respiratory tract.
- Yarn with additional inserts: beads, sequins, metallized thread.
Many yarn manufacturers have their own lines of threads for children's products. As a rule, they are called “Bebi” or “Children’s”. For winter items, treated merino or alpaca wool is best. It has a soft and delicate texture and does not cause skin irritation. For demi-season items, it is better to choose acrylic. The yarn is highly breathable and has hypoallergenic properties. Cotton threads are suitable for summer items.
It is important to keep in mind that products made from natural threads shrink when washed. Therefore, before you start knitting, you need to make a control sample of 10x10 cm. It must be washed, steamed and dried. After this, the sample is re-measured and adjustments are made to the original calculations.
Crocheting clothes for a newborn is easier and faster than knitting. In addition, such a product can be tied on, increasing the size as needed. At the same time, crocheted fabric has worse stretch. Therefore, it is necessary to make the necessary measurements as accurately as possible.
Finding the right size
To crochet a cap for a newborn, you only need to take one measurement. You should find out the circumference of your head. A measuring tape is used for this purpose. It must be carried out at the following points:
- above the eyebrows on the forehead;
- on both sides above the ears;
- on the back of the head.
This way you will be able to understand exactly what size the headdress should be. However, when creating it, you should also remember that babies grow very quickly. Therefore, it is better to make a small supply and make a crocheted cap for a slightly larger baby.
| Baby's age (months) | Cap size (cm) |
| 0-2 | 35 |
| 3 | 40 |
| 6 | 44 |
| 9 | 46 |
| 12 | 47 |
Step-by-step instruction
Crochet hats for newborns can be created in a variety of ways. True, there are a couple of the most popular models, the creation of which will not arise any difficulties even for a novice needlewoman. You just need to study the master class and follow the instructions specified in it.
Openwork cap
For a girl, you can crochet a light openwork cap. He looks incredibly touching and sweet. There are no complex elements at the heart of the scheme. Therefore, even a novice craftswoman who has mastered the execution of basic columns can cope with such work.
To create a crochet cap, you just need to follow simple instructions:
- When completing the first line, you should create an amigurumi ring and complete 6 columns. For this purpose, you need to circle the thread twice around your finger, and knit the resulting ring in columns. The short end of the yarn is simply tightened.
- Then a set of three chain stitches is made, and in each stitch from the first row a pair of double crochets is made. This creates the second row.
- Again you need to create three air loops, and then follows a pattern that involves alternating two double crochets in one stitch with one of the same stitch in another stitch. The latter is performed in three similar columns.
- After this, a pair of double crochets are performed in one loop, two without increases until the end of the line. Increases need to be made only in every third stitch.
- At the next stage, a circle is made in columns with casting and increases in every fourth loop.
- Then, every fifth stitch, three columns are cast over. The last seven elements remain untouched and are marked with markers.
- The remaining seven loops are knitted in half columns. There is no need to touch them in the future.
- In the next row, each of the loops is performed in one column with a throw.
At this point, the bottom of the baby’s crochet hat has already been formed.
Now you can start making the openwork pattern. Initially, three air lifting stitches are followed, at their base a column is made with a throw, three air stitches are skipped, and in the fourth four columns are knitted. Then again, three aerials are performed with the product of one column into the base, after a couple of loops another column. Then again through two stitches a column, a pair of chain stitches and a column. This pattern of action continues until the end of the row.
Having reached the marker, the canvas turns and the same actions are performed in the opposite direction. In total, nine lines need to be formed in this way.
The final row involves doing regular stitches. From the same yarn, ties of suitable length are then formed. For this purpose, it is enough to simply create a chain of air stitches.
Using a similar pattern, you can create a warm crocheted cap. In this case, thicker yarn is selected, and the openwork pattern is not performed at all. This option is suitable even for a bewitched boy.
Hat with ears
A warm, unusual crochet hat for a newborn is crocheted using a simple pattern. To create it you just need to follow simple instructions.
Initially, a ring is formed and six double crochets are performed. Each of the subsequent columns begins with 3 chain stitches and ends with a connecting element. From the second to the third circular line, stitches are knitted with a throw. The increases are distributed evenly. In the second, they are produced in each stitch, in the third, after one, in the fourth, after two, and, accordingly, in even smaller quantities in all subsequent ones.
Starting from the ninth row, increases are made across the line. Such actions are carried out until the crochet hat for newborns is crocheted to the required size. After this, you need to complete, without increments, the number of lines that will allow you to achieve a suitable depth.
At the next stage, you need to mark the edges of the future ears with a marker and start knitting using three air elements. After this, fourteen columns are made. Then the product is turned and five more rows are made according to this pattern. The second ear is created using the same principle.
Creating a crochet hat for babies is not difficult at all. Depending on who it is intended for, yarn of different shades is selected. A pastel palette and pink color are perfect for a newborn baby. For a boy, it is better to choose blue, gray or green.
Crochet hat for a newborn Giraffe, how to knit
Use yellow thread to make an amigurumi ring. 1st row: knit 10 tbsp. b/n in amigurumi ring, conn. column. = 10 loops. 2nd row: knit 2 tbsp. b/n in each loop, conn. column. = 20 loops. 3rd row: *1 tbsp. b/n in the next loop, 2 tbsp. b/n in the next loop, repeat from *, conn. stitch = 30 loops. 4th row: *1 tbsp. b/n in the next 2 loops, 2 tbsp. b/n in the next loop, repeat from *, conn. stitch = 40 loops. 5th row: *1 tbsp. b/n in the next 3 loops, 2 tbsp. b/n in the next loop, repeat from *, conn. stitch = 50 loops. Rows 6-23: 1 tbsp. b/n in each loop, conn. column.
Ears: 1st row: 1 in/p. (= first column), 1 tbsp. b/n in the next 12 stitches, turn = 13 stitches. 2nd row: 1 v/p., 1 tbsp. b/n in the next 11 stitches, turn = 12 stitches. 3rd row: 1 v/p., 1 tbsp. b/n in the next 10 stitches, turn = 11 stitches. 4th row: 1 v/p., 1 tbsp. b/n in the next 9 loops, turn = 10 loops. 5th row: 1 v/p., 1 tbsp. b/n in the next 8 loops, turn = 9 loops.
6th row: 1 v/p., 1 tbsp. b/n in the next 7 loops, turn = 8 loops. 7th row: 1 v/p., 1 tbsp. b/n in the next 6 loops, turn = 7 loops. 8th row: 1 v/p., 1 tbsp. b/n in the next 5 loops, turn = 6 loops. 9th row: 1 v/p., 1 tbsp. b/n in the next 4 loops, turn = 5 loops. Finish the work, break the thread.
Skip 12 loops, join thread. Knit the second eye in the same way as the first.
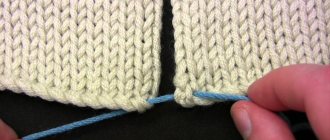
Connect a brown thread, tie the hat with single crochets. Make ties from the threads as in the photo.
The outer part of the ears (knit 2): use yellow thread to make an amigurumi ring. 1st row: knit 8 tbsp. b/n in amigurumi ring, conn. column. = 8 loops. 2nd row: knit 2 tbsp. b/n in each loop, conn. column. = 16 loops. 3rd row: *1 tbsp. b/n in the next loop, 2 tbsp. b/n in the next loop, repeat from *, conn. stitch = 24 loops. 4-5 rows: 1 tbsp. b/n in each loop, conn. column. 6th row: *1 tbsp. b/n in the next 2 loops, 2 tbsp. b/n in the next loop, repeat from *, conn. stitch = 32 loops. 7-8 rows: 1 tbsp. b/n in each loop, conn. column. 9th row: *1 tbsp. b/n in the next 6 loops, knit 2 tbsp. b/n together, repeat from *, conn. stitch = 28 loops. 10th row: *1 tbsp. b/n in the next 5 loops, knit 2 tbsp. b/n together, repeat from *, conn. stitch = 24 loops. 11th row: *1 tbsp. b/n in the next 4 loops, knit 2 tbsp. b/n together, repeat from *, conn. stitch = 20 loops. Rows 12-14: 1 tbsp. b/n in each loop, conn. column. 15th row: *1 tbsp. b/n in the next 3 loops, knit 2 tbsp. b/n together, repeat from *, conn. stitch = 16 loops. Rows 16-18: 1 tbsp. b/n in each loop, conn. column. Finish the work, leaving a long tail of thread for stitching.
Inner part of ears (knit 2): cast on 11 loops using brown thread. 1st row: knit 1 tbsp. b/n in the second loop from the hook, knit 1 tbsp. b/n in the next 8 stitches, knit 2 tbsp. b/n in the last loop, turn the work over, knit 1 tbsp. b/n along the other side of the chain in each loop, conn. stitch = 20 loops. 2nd row: 1 v/p., knit 1 tbsp. b/n in each loop, conn. column. Sew the inner and outer parts of the ears.
Horns (knit 2 parts): use brown thread to make an amigurumi ring. 1st row: knit 6 tbsp. b/n in the ring, conn. stitch = 6 loops. 2nd row: knit 2 tbsp. b/n in each loop, conn. column. = 12 loops. 3rd row: *1 tbsp. b/n in the next loop, 2 tbsp. b/n in the next loop, repeat from *, conn. stitch = 18 loops. Rows 4-6: 1 tbsp. b/n in each loop, conn. column. 7th row: *1 tbsp. b/n in the next 4 loops, knit 2 tbsp. b/n together, repeat from *, conn. stitch = 15 loops. 8th row: *1 tbsp. b/n in the next 3 loops, knit 2 tbsp. b/n together, repeat from *, conn. stitch = 12 loops. 9th row: *1 tbsp. b/n in the next 2 loops, knit 2 tbsp. b/n together, repeat from *, conn. stitch = 9 loops. Switch to yellow thread. Rows 10-15: 1 tbsp. b/n in each loop, conn. column. Fill the part with filler.
Spot (knit 3-4 parts): use a brown thread to make an amirugumi ring. 1st row: knit 8 tbsp. b/n in the ring, conn. stitch = 8 loops. 2nd row: knit 2 tbsp. b/n in each loop = 16 loops. Cut the thread, leaving a long tail for sewing.
Assembly: sew horns and ears to the hat, sew on spots.
Decor variations
The appearance of hats for newborns can be very diverse. However, when choosing decorative elements, you should exercise maximum caution. Not all of them are appropriate in this case. Many of them are potentially dangerous for infants. It is recommended to refuse the following options:
- beads, regardless of their diameter;
- fasteners with sharp edges;
- sequins;
- buttons.
The best decor option is textile decorations made from soft fabric. For example, it could be yarn, felt or knitwear. A girl's headdress can be decorated with a bow made of felt flower or ruffles. Boys can choose fabric images of cars or boats.
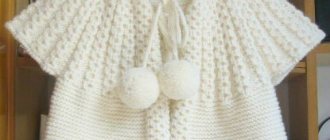
Pompoms look great on hats. They can have different sizes. Both single-color and multi-colored options are appropriate. They can be purchased ready-made, but it is not difficult to make them yourself.
When creating decor, you should adhere to one important rule. Decorations should not interfere with the baby. It is recommended to fix them in the forehead or crown area. True, even soft decorative elements can be dangerous if they are not securely fixed. Therefore, all details need to be thought through with special care.
Crocheting is a fun hobby that allows you to create incredibly beautiful hats for kids. It is not surprising that many knitters make original items in this way. Even novice needlewomen will be able to cope with this task without much difficulty. The main thing is to carefully study the step-by-step instructions and strictly adhere to the specified scheme.
Cap, hat, fur hat
You can crochet anything. And even more so a baby’s hat. The main thing is to know what, for whom and on what occasion.
- Baby cap.
- Panama hat for a preschooler.
- A headband, an openwork hat, a scarf - for little fashionistas.
- A cap with a visor, a bandana, a helmet, a hat - for strong boys.
- Warm pipes, transformers that cover the ears, neck, forehead and chin with a nose - for the winter.
- Hats with cat, bear, and bunny ears and animal hats with the face of a cute animal - for the off-season.
Beautiful hats - happy children
There are many options for decorating a baby hat:
- Braids: short, long, two on the sides, one on top.
- Pompoms: one large, a couple of medium ones, many small ones.
- Applique: butterflies, flowers, cars, ships.
- Embroidery: from ribbons, beads and beads, gold and silver threads.
The main thing is that the child enjoys it and does not interfere with walking. A cute and beautiful model in a crocheted hat needs to be photographed. For history and family album.
How to knit a magic hat
Every craftswoman mother wants to crochet that very hat that cannot be bought in any store. And every mother, even a beginner knitter, can do this. A hat associated with love and patience will not only be unique, but also magical. Mom knits and thinks how beautiful the child will be in this hat, how strong and smart when he grows up. The hat is knitted, bathed in love. And it turns out a magical amulet that will protect from the cold, from the sun, from the evil eye. For happiness, for health, for good luck. Checked - executed.