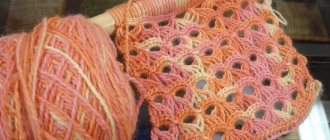
It’s autumn outside, but my soul longs for the continuation of summer. Bright accents in your interior and wardrobe will help prolong this wonderful warm season. And here you cannot do without the constant companion of the sun - the sunflower. It is very easy to do it yourself. Even beginner knitters can crochet a napkin or an elegant brooch. There are several ways to crochet a sunflower; the diagram and description are presented below:
Step-by-step description with diagram
Step 1: Knitting the Middle
We start crocheting a sunflower from the middle. To do this, you need to take chocolate brown yarn and a hook. We start knitting by setting a chain of 5 air loops. We close the chain into a ring with a connecting loop. Next, we continue knitting according to the pattern shown in the photo:
The pattern uses double crochets combined into one “lush column” alternating with air loops.
So, in the second row you need to knit 5 “lush columns”, which are separated from each other using 4 air loops.
Next, we knit lifting loops (3 pieces) and continue circular knitting with “lush columns”. In the third row their number doubles. The number of dividing air loops between the columns remains the same.
In the fourth row, the number of “lush columns” doubles again, and the dividing air loops become slightly smaller - not 4, but 3.
The fifth row completes the middle of the product. There is no increase in the number of “lush columns”; their number remains the same and is equal to 20. There are more dividing air loops. Their number is 4.
Step 2: Knitting Flower Petals
To knit petals you will need yellow yarn. The thickness of the yarn should not differ from the thickness of the previous thread.
We begin knitting by fixing the thread and knitting three lifting loops. Next, you need to knit 6 more air loops and secure the chain on the already knitted workpiece in the places indicated in the diagram (see above). After this, we continue knitting by casting on 8 air loops and then fixing the chain on the product. In total, you need to knit 20 chains or arches.
The next row must be knitted with double crochets. Each stitch is knitted in one loop. The only exception is the air loops at the top of each arch. This loop must be knitted immediately along the double crochet. Subsequent rows are knitted similarly, in accordance with the pattern (see above).
The last row of the napkin can be knitted with chocolate brown threads to give the product contrast and expressiveness.
If desired, you can tie a stem and leaves of green yarn to the napkin. The pattern of knitting leaves and stems is illustrated in detail in the photo:
This is the crochet sunflower you should get according to the above diagram and description:
Other sunflower napkins
The difference between napkins of this category is that their petals are not connected with a “Pineapple” pattern. These are much rarer, but incredibly beautiful products - they have their own charm.
Option 1
Napkins in the shape of sunflowers in three different sizes, but in the same style. An excellent option for interior decoration. The knitting principle is very simple. We recommend that you start with the smallest napkin; most likely, you will end up making all three.
Unusual round crochet sunflower napkins
Pattern for three sizes
Option 2
An even more unusual napkin. Here it is not the sunflower itself - the product is decorated with small flowers located around the perimeter and in the center. The middle flower and the green part of the napkin are knitted continuously. But in order to tie the resulting circle, you will have to work hard: each sunflower is done separately. But the flower pattern is very simple, so you only need a little patience.
Lesson 2. Brooch “Sunflower”
Step 1: knitting the warp
We start knitting from the base. To do this, you need to take yellow yarn and a hook that matches the thickness of the yarn. First, we make an arugumi loop. Then we knit 7 single crochets and tighten the loop.
Next, we continue circular knitting with single crochets, adding loops in each row so that the shape of the circle is even and the base is flat. In total you need to knit 7 circular rows.
Next, we form the petals. To do this, you need to cast on a chain of 10-12 air loops (the number of loops depends on the desired length of the petals). We knit the chain towards the base using single crochets. Next, we fix the chain on the base. After this, we continue tying the petal with single crochets (2 times). After the first petal is knitted, move along the base 6 stitches to the left and continue knitting the second petal according to the same pattern.
Step 2: Knitting the Middle
To decorate the middle you will need brown yarn and beads. We knit in the round, without adding loops. It is necessary to knit with a thread on which beads or seed beads have already been pre-strung.
When the core is ready, it can be sewn to the base, after placing foam rubber between them to give it a convex shape.
Step 3: knitting leaves
Leaves are knitted from green yarn according to the following pattern:
Crochet sunflower: step-by-step knitting instructions, photo
Crocheted flowers are incredibly beautiful and naturalistic. They act as decorative interior items, serve as decoration for wardrobe details and simply delight our eyes.
If you want to learn how to create crocheted flowers yourself, this article is for you. In it we will tell you how to easily and simply crochet a bright sunflower.
Using our detailed descriptions with photographs, even beginners will be able to make an interesting applique with their own hands, spending a little time and materials.
First stage: buy what you need and get to work
To create a crocheted sunflower you will need to prepare the following materials and tools:
- thin (180 m by 50 g) cotton threads of three colors: yellow, brown and green;
- hook No. 2;
- scissors.
We start knitting a flower from the core:
- Take a brown thread and create an amigurumi ring. We make 3 air loops (VP) and 15 double crochets (C1H).
- We close the row using a connecting loop (SP).
- We start the second row of the sunflower core, like the first, with 3 VP and 1 C1H (in the same base loop).
- Next, we knit 2 C1H into each column of the base.
- Thanks to the additions, we get 32 columns.
- We close the row with SP.
- In the third row, first perform 3 VPs, and then use the pattern to the end: 1 C1H in the first loop, 2 C1H in the second.
- We complete the row with a connecting loop (in the third loop of the initial base chain).
- Thanks to the additions, we have 48 columns. We fasten the thread and cut it.
The core of the sunflower is crocheted.
Second stage: knitting lush petals
After making the core of the flower, we begin to work on its petals:
- Take the yellow thread and attach it to the workpiece. We perform 14 VPs and, skipping one loop of the base, attach the chain to the core using a joint venture.
- We knit 14 air loops again and make a second petal, retreating 1 base loop.
- We work according to this scheme until the end of the row. As a result, we get 24 petals.
- In the next row we tie the resulting arches.
- We will design the first and all other petals according to the following scheme. We do the following in the arch:
- 2 single crochets;
- 2 half double crochets;
- 2 double crochets;
- 2 double crochets;
- 2 single crochets;
- 2 half double crochets;
- 2 single crochets.
We make a connecting half-column between the petals in the base loop.
In the last row we tie the petals. To do this, we make connecting half-columns in all loops of the base, and in the center of the petals we make a picot of three VPs, forming a sharp edge. We fasten the thread and cut it off.
Congratulations, half the work is done! Our bright crocheted sunflower takes on recognizable shape.
Third stage: knitting the stem and leaves
To make a crocheted sunflower stem, take a green thread. We collect the desired number of air loops (we have 51 VP). Next, we tie the resulting chain on both sides with connecting half-columns. We put the workpiece aside (without cutting the thread) and start knitting the leaves.
We will perform them using a simple scheme:
- First we cast on 15 air loops.
- In the second loop from the hook, make 1 single crochet.
- The next one - another one.
- Next we knit 2 half double crochets, 2 single crochets, 2 double crochets, 2 single crochets, 2 half double crochets and 2 single crochets.
- At the end of the row we knit two VPs.
- We turn the workpiece and make exactly the same binding on the other side of the initial chain.
Stage four: assembling the application
- We process the finished leaf along the edge with single crochet half-columns.
- From three air loops we make a leaf stalk. Don’t forget to tie the stalk with half-crochet stitches.
- Attach the leaf to the stem using a connecting loop.
- We make the second leaf by analogy with the first.
- We attach it to the stem on the other side.
- We tie the workpiece with another row of single crochets.
- We attach the stem to the flower, secure it and cut the thread.
So our bright, elegant crocheted sunflower is ready. Did you find the description and photographs helpful? We hope they helped you complete this interesting applique quickly and easily. I wish you creative success!
Ideas for using the sunflower motif in the interior: crochet napkins
Beautiful crocheted sunflowers perfectly refresh any interior, making it more comfortable and elegant. Unusual coasters, tablecloths, sofa pillows and comfortable blankets with floral motifs, made by yourself, will radiate warmth and love and will become the main decorations of your home.
If you want to add bright accents to the interior of the living room or dining area, we suggest you knit an interesting sunflower napkin.
In this work we will use a simple scheme. It should not cause difficulties for those who are just learning to crochet.
We will make the sunflower napkin from yarn of two colors, black and yellow, with a density of 280 m per 100 g. A hook No. 3 or No. 3.5 will suit it. You will also need scissors.
Knitting the central part of the napkin
Having prepared the necessary tools, we begin work.
- We take a black thread and make 6 VPs, connecting them into a ring using a joint venture.
- In the second row we knit three lifting loops and into the same base loop a lush column consisting of two double crochets.
- Next we make *3 VPs and a fluffy stitch of three double crochets*. We repeat the pattern * - * until the end of the row.
- We knit the third row using the pattern: 3 double crochets, 2 ch, 3 double crochets, 1 ch.
- In the fourth row we alternate groups of three double crochet stitches and two chain stitches. At the end we fasten the thread and cut it off.
- To knit the fifth row, we attach a yellow thread to the workpiece. In the arch of two loops of the previous row we knit a single crochet, a picot from 4 ch and again a single crochet. Next we make an arch of 5 air loops.
- We work according to this scheme until the end of the row.
Making sunflower napkin petals
Now let's start knitting the sunflower petals:
- We attach a yellow thread to the core of the flower, using connecting loops we move to the third VP of the arch of the previous row.
- We knit 14 air loops.
- In the second loop from the hook, make a single crochet. Next we knit two half-stitches and 10 double crochets.
- We turn the petal, knit on the other side of the chain again 10 double crochets, two 2 half double crochets, 1 single crochet.
- In the last stitch of the row we make 3 single crochets.
- We continue to work according to the scheme, making the necessary increases, and draw up the first petal.
- By analogy with it, we knit all the other petals into each arch of 5 VPs of the previous row.
- At the last stage of the work, we tie the petals along the edge with half-crochet stitches. We fasten the thread and cut it.
This is such an elegant and original napkin! You can enjoy the result of the work done. Now you know how to crochet a sunflower. Feel free to use it in interior decoration. I wish you creative success!
Source
Natalia
contemplator
- Activity: 112k
- Gender: Woman
Natalia
contemplator
Source: https://masterlomaster.samodelkinoblog.com/1533510948942514382/podsolnuh-kryuchkom-poshagovaya-instruktsiya-vyazaniya-foto/

