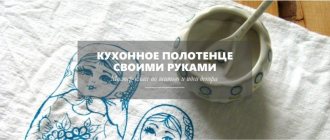
How and what to make a rooster/chicken hot water bottle for a mug/teapot with your own hands?
How can you sew or crochet a rooster/chicken to make a warmer for a mug/teapot? How to do it yourself?
It’s easy to make a heating pad for a teapot or mug in the shape of a cockerel or chicken. Absolutely anyone can do it.
Firstly, you can sew such a heating pad from fabric, insulation (for example, padding polyester), various ribbons, braid and lace.
The cutest version of the hot water bottle, in my opinion, is chicken with chicken.
To make it you will need
You will find a detailed description of working with photographs here.
If you are not very good at sewing, then you can make a simpler heating pad. One of the simplest options is this perky cockerel.
The cockerel can be cut using this pattern.
The next simple option is this Ryaba Chicken.
A detailed description of the work on Ryaba can be found here
You can not only sew a heating pad for a teapot, but also knit it. If you know how to knit even a little, you may well end up with a chicken like this Chernushka (although it’s just as easy to make a chicken of a different, more cheerful color).
Step-by-step instructions for making this chicken can be found here
The next version of the heating pad - Cockerel - is suitable for those who know how and love to knit.
How to tie such a beautiful cockerel is described here
I find the first and last option of heating pads especially attractive. They will undoubtedly attract the attention of your tea guests.
The easiest way is to sew a heating pad by hand from two parts, connecting them to each other - it will look like a cap. First, you should make a common part to completely cover the kettle, and then additionally “attach” elements for the spout and handle of the kettle, sewing a head and neck to the chicken on one side and a tail on the other.
It is more difficult to make a heating pad for a teapot from several parts, sewing them together: the head and body, beak, beard and comb, wings, tail. But this heating pad turns out to be more attractive.
You can also sew this original heating pad for a teapot in the shape of a Rooster:
It requires the following parts:
First, a “suit” is sewn together, which is made from six wedges.
Another heating pad “Chicken” with a pattern:
There is also such an interesting, cozy heating pad, as in the image:
You will need for work:
The filler can be holofiber; you will also need a ring, a couple of beads for the eyes and accessories, such as a needle and thread, scissors.
The master class can be viewed in detail and step by step at the link.
Another interesting option for a knitted heating pad:
There is also a master class for her.
When making a heating pad for a kettle, the most important thing is to ensure sufficient thermal insulation, so the choice of material should be approached most carefully - it can be drape, felt with an additional insulation lining, you can also use light fabric on top, but the bottom layer should be made of quilted warm lining fabric. You can immediately make such a heating pad from thick quilted material. The upper part can also be tied. It should be noted that the shape of a rooster/chicken itself is very suitable for creating teapot warmers - here are a few examples:
Here are a few more patterns that you can use to create your own looks, including:
With the approach of the New Year - the Fire Rooster, I want to “pamper” seven symbolic things in order to “attract good luck to the house.”
With one of these little things you can make a “chicken” for a teapot, saving the heat of the most popular drink in our harsh winters.
The simplest and most uncomplicated version of a “warmer” for a teapot can be sewn on several layers of fabric. Choose a fabric that is more colorful and brighter.
Master classes with step-by-step instructions
Making a Tilda doll with your own hands
Tea Baba Tilda is a Norwegian model of a curvaceous doll, which has gained immense popularity among the Russian people. For work we will need:
- Fabric (use natural threads such as linen, satin, calico).
- Sintepon as a filler.
- Yarn, buttons, ribbons, lace pieces to decorate our doll.
- Threads, needles, scissors, glue.
Step-by-step diagram-instructions for the master:
- We prepare patterns (we take the dimensions from the teapot and add a few centimeters to the seams).
- Using the templates, we cut out blanks from fabric.
- Place the fabric pieces right sides facing each other.
- We overcast the edges of the product, leaving free space at the bottom.
- Sew the edges according to the outline. We turn the product inside out and fill it with holofiber. We sew it up tightly.
- Now we need to make a wide skirt, which, in fact, will cover the teapot. To do this, cut out the skirt parts according to the template. We sew a layer of insulation along the inner surface.
- We close the finished part in a circle and sew it to the finished woman.
- Let's start decorating the doll (don't forget about the aesthetic aspect of using the woman).
- We make hair from yarn. You can form a neat bun, hem a colored scarf, a hairpin, or a bow.
- We draw cheeks, eyes, mouth with gouache.
- You can add a miniature apron made of plaid fabric. Such a woman will look like a lively and hospitable hostess.
Thanks to the layer of filler and natural fabrics, Baba Tilda will retain the rich aroma and temperature of the tea drink.
Baba made from yarn and stockings
What makes this model different from the rest? The simplicity of production and the pliability of the materials were appreciated by beginning needlewomen, and experienced craftsmen have long left this technique in their arsenal. The advantage of the technique: no work with patterns is required. For work we will need:
- Nylon (you will definitely have a pair of old tights in your closet).
- Yarn or floss.
- Filler.
- Fabric base and padding polyester for the skirt.
- Threads, needles.
Step-by-step diagram-instructions for the master:
- First, let's work on creating the tumbler doll itself. Take a stocking or the cut end of nylon tights. We stuff the cut with cotton wool. We tie the upper edge of the product with a strip of nylon.
- Using a needle and thread, we sew individual parts, forming the curves of our doll’s face: nose, cheeks, mouth, arms and legs.
- Sew on toy eyes or glue them.
- Now you need to hide the tuft of nylon on the woman’s head. To do this, we form a bun of hair from threads, which we glue on top of a tightly tied knot.
- Next we do the same work as in the previous method. After all, the direct purpose of the woman is to preserve the heat and aroma of tea. Therefore, we prepare the hem details and hem the padding polyester. We attach the finished part to a tumbler doll.
Baba is ready, you can make tea!
Classic tea doll
This model is a cap made of natural fabrics with filling. For work we will need:
- Main fabric (linen, cotton, chintz), decorative fabrics (guipure).
- Filler (cotton wool or padding polyester).
- Threads, needles.
- Scissors.
- Patterns or template.
Step-by-step diagram-instructions for the master:
- We take measurements of the kettle. We transfer the results to paper and prepare patterns.
- Using the template, we cut out blanks from the main fabric: we need four parts.
- We stack the blanks in twos, laying a layer of insulation between them. We sew the edges of the blanks.
- Next, you need to combine the resulting parts into one. To do this, we lay them on top of each other with the front side facing out, stitch them, leaving the lower edge of the product free. If you have rough, unattractive seams, decorate them with guipure or sew them with large colored stitches.
- Multi-colored patches can be attached to the front and back surfaces of a traditional baba-warmer. Sew the colored areas with diagonal seams and get a touch of home comfort at every tea party.
Baba amulet
This model is distinguished by one single detail - it does not have a face. The creation technique is not at all different from the technology for making a tilde or a classic model.
We got acquainted with the main types of teapot dolls. Of course, real craftswomen come up with new and original models of tea women every day. Imagination and skillful hands create real miracles. If you have any difficulties studying the material, you can always get acquainted with online lessons on working on the presented models. Imagine, create, and let your tea party be a holiday every day!
https://youtube.com/watch?v=6EMdFzV3LW0
Sewing a heating pad
To sew a simple heating pad or cover, you need to take the main fabric of any color, insulated lining fabric, scissors, an awl, thread, chart paper, pencil and cardboard. First you need to decide on the dimensions of the future product. To do this, take measurements using paper. Using the created paper patterns, make fabric samples.
Pattern of a simple model
After their formation, create an insulated lining for the finished product. At this point the product can be considered complete. At the end, you can decorate the heating pad as you wish. For example, you can complement it with stripes or a voluminous toy.
Ready product
Owl
To sew such a heating pad we need:
- coffee-colored fleece;
- felt in white, yellow, black and blue colors;
- felt or fleece of carrot color;
- cotton fabric for the inner cover;
- threads, needles, scissors, sewing machine.
Description
We draw out 1⁄2 of the pattern for half of the main part according to the size of our teapot, and cut it out.
Fold the coffee-colored fleece in half and cut out the main piece with seam allowances. Then we cut out a second similar one.
We straighten out the details.
We cut out the details of the inner cover from cotton fabric.
We cut out decorative details - blue feathers, white eyes, black pupils.
We cut out the wings and beak from carrot-colored material.
We cut out feathers and eyebrows from yellow felt.
On one of the main parts we lay out the elements of the owl's face. We fix them with pins.
Sew on with matching threads by hand or by machine.
We fold the two main parts inside out and sew along the upper contour.
Next, we will sew a cover from cotton fabric.
We put the main cover into a cotton fabric cover with the right sides facing each other.
Sew the bottom seam, leaving a gap for turning.
Turn the toy inside out and straighten it out.
We tuck the inner cover under the outer one. Sew up the gap with hidden stitches.
Tabby cat
To make a cat, you need to take the main part of the heating pad, the lining, the insulation, the tail, the muzzle in the amount of two pieces, and then the fabric for the paws in the amount of four pieces. Then you should take the details of the heart, nose and cheeks.
Tabby cat pattern
First you need to sew the main parts of the heating pad to each other and make the edging. Next, sew a lining to the product and begin constructing the cat. To make a voluminous cat, you first need to sew the tail parts together and iron them using an iron. Then stuff the tail with padding polyester.
The next step is to sew the parts of the muzzle and stuff them with padding poly, just like the nose. Then you should make the paws and sew the tail to the edge of the heating pad. At the end, you can make a loop, ears and somehow decorate the product.
Warmer tabby cat
We sew a textile teapot
I somehow wanted to sew a teapot, but I couldn’t find a detailed master class. And I decided to sew it myself and share the process with you. Please don't judge harshly
So, we will need:
— fabric, for external and internal parts;
— padding polyester or holofiber;
- needle, thread, scissors, pencil, glue;
- and the most important thing is a good mood
We prepare the pattern, use a pencil to transfer it to the fabric and cut out the details.
For the outside of the teapot I took calico in two colors, and for the inside - white cotton fabric.
To get the side walls of two colors, the pattern was folded in half and the top part was transferred to one fabric, the bottom to another. I stitched it and got a solid side wall. Here's what I got.
Next, take the outer side wall and apply cotton lace. We measure according to the size of our wall, cut it and sew it on. And we do this with each outer side wall.
We take 2 parts of the outer wall and 2 parts of the inner wall. Place the outer pieces on top of each other with the right sides facing inward. We do the same with the inner walls. This makes 2 stacks of parts. See the photo below.
Next, we place one stack on top of another. We should get a kind of “little book”. We sweep one side and sew it on the machine.
When unfolding our “little book,” the seam should be on the inside. Don't forget to trim the side seam slightly with zig-zag scissors. If there are no such scissors, then we simply make cuts. So that when we turn the parts right side out, we get an even seam. We have 2 of the 8 side walls ready (photo below).
We sew the remaining walls according to the same principle as before. We apply 1 outer wall and 1 inner wall to one side, so that we get a “book”. We sweep, stitch, cut with a zig-zag and turn right side out. And so we continue with all the other details of the side walls. We also make sure that the cotton lace of one part matches in height with the lace on the other part.
This is how we should get an eight-blade:
To make a round teapot, we connect the side parts of the eight-blade in the same way as before. The outer walls face each other. Internal facing each other. Those. making a “little book”. The result should be a “cocoon” of side walls. Baste and sew.
Carefully turn out our “cocoon” and get the finished side wall of the teapot
Turn it inside out. We take the part of the bottom of the teapot from the inner fabric. We attach it to the teapot. We stitch on a machine.
We prepare the outer part of the bottom. Cut out the bottom piece from cardboard. Glue the fabric part to the cardboard. Next, we apply it to the teapot, secure it with needles and begin manually sewing the bottom to the teapot with a hidden seam.
When 7 of the eight walls have been sewn on, carefully fill the bottom of the teapot with synthetic padding. There should be a convex bottom inside the teapot
Then we sew on wall 8. The bottom is ready
Next, we fill the side walls with padding polyester and form the bulges of the teapot.
Next we need to beautifully decorate the top of the teapot.
Measure the diameter of the top. From the fabric we cut out a strip equal to the length of the measurement and 3.5 cm wide.
We attach it to the teapot as in the photo below. I sewed it by hand, because... The machine did not take the thickness.
We turn the sewn collar inside out, secure it with needles and sew it with a hidden seam. The side can be stuffed with padding polyester for more volume. But in this case, I didn't do that.
The teapot belly is ready!
We make the spout and handle of the teapot. We turn out the parts sewn together and stuff them with padding polyester. We do not completely fill the spout with padding polyester, forming a small recess.
We attach the spout to the belly of the teapot, secure it with needles and sew it with a hidden seam. We do the same with the handle of the teapot.
Next, prepare the lid of the teapot.
The cut cardboard part of the lid turned out to be too big for my teapot, so I had to adjust it to fit.
This is what happens. Glue the cardboard piece to the fabric piece. We go along the edge with a regular seam and quilt the edge. Next we fill it with padding polyester.
Sew on cotton lace.
Next we make a pimple. We take the pimply part, stitch it along the edge and tighten it. We stuff it with padding polyester and sew it to the base of the lid with a hidden seam. We put it on the teapot.
And now our teapot is ready!
Happy creativity! Creating together is great!
I will answer all your questions.
When copying or partially using materials from this master class on other resources, an active link to the source is required.
Pink kitty
The pink cat is a modern kitchen accessory that can be made by hand. It is designed in the same way as a regular heating pad. For this you can use two types of materials. Then the animal's muzzle and the corresponding darts on it, a curved tail, paws and back are created. The muzzle is created in two layers: the first is a lining made of calico, and the second is made of knitwear or other fabric.
Pink kitty pattern
German and Korean cotton, Russian flax and Belarusian calico are excellent for this. The ears are complemented by an openwork braid. After attaching the muzzle to the created warmer with lining, the paws are sewn on. Then the back part of the cat's body is made and at the end the tail is sewn on. At the very end, the decor is created: eyes, nose, mouth and mustache are sewn on.
Finished model of a pink cat
How to sew an elegant young lady
A charming hot water bottle doll can be made from all kinds of fabric scraps. A textile souvenir made by hand is a fashionable handicraft trend.
The basis of an elegant young lady
A hot water bottle, which is made in the shape of a girl dressed in a fluffy dress, is a traditional kitchen attribute. Previously, it was performed based on the Russian folk peasant and merchant costume. To obtain such a product, you need to make a base and then connect all the patterns together.
Baba on the samovar
According to the culture of Russian tea drinking, a hot water bottle in the form of a woman or doll, a ruddy beauty with a fluffy bright skirt, was placed on the teapot. Today, many people make such a thing using standard step-by-step instructions, a pattern and parts of the hand and head of a Barbie or baby doll. The upper part of the body should be sewn from fabric and stuffed with cotton wool or padding polyester. The design of a fluffy skirt with lining insulation should be sewn to the waist.
Pattern of a hot water bottle doll
A life-size pattern for a teapot doll can be represented by a traditional Russian folk beauty, complemented by a sundress and kokoshnik, or by the old man Hottabych, wearing a striped quilted robe.
Baba on the samovar
Tilda heating pad for teapot
Tilda is a Scandinavian doll created by Norwegian master Tone Finanger. It has its own unique structure: small head, large hips, small chest circumference and small waist.
In response to the question of how to sew a doll for a teapot, it is worth pointing out that creating a Tilda heating pad for a teapot is no different from any other heating pad with a doll. First you need to cut the fabric with insulation, and put a layer of insulation into the fabric.
DIY dolls for samovar patterns
Next, quilt the layer and join the edges together. Mark the top edge and leave room for the body. Then cut out the torso and arms according to the existing template. Sew off all darts using a sewing machine. Turn out the parts and stuff them with cotton wool. Sew the bottom of the body. Cut out a skirt with sleeves and a blouse.
Next, connect the arms and body, stitch the sides of the skirt. Gather the top of the skirt edge and finish it with a zigzag. Then connect the skirt with the warmer and the body, sew the lace onto the sleeves with the neck. Make eyes and hair. Draw blush using cosmetics or a pencil. Then decorate the doll, if desired. For example, you can complement her dress with flowers, accessories and any other products.
Finished product tilde heating pads
Second master class
I hope you have heard about the woman on the samovar? Here. Let's make a hot water bottle doll. Believe me, this is also not difficult, since we will use only affordable materials available in every home, which means we won’t have to buy anything special. You are already quite an experienced master.
Baba on a samovar or hot water bottle doll
So. Are we sewing a peasant young lady, a merchant's wife or a society lady? The less we guess, the more interesting the result. In addition to the materials that were used for the base of the previous craft, we are looking in the house for everything that could be useful for an exclusive and truly magnificent work.
We will need:
1. Sew according to the pre-measured dimensions of the base. You already understand how this is done. But I propose to simplify the task even further and, as a pattern, draw a regular rectangle, the length of which is equal to the diameter of the teapot, including the spout and handle. The height is also known. Don't forget to add 2cm for seams. This will be the base, also known as the underskirt.
2. You need to stitch together the folded parts of the base with just one seam.
3. Carefully hem the bottom of the skirt and gather the top into a gather, not forgetting to leave a hole for sewing in the body.
Now the underskirt is ready. You can leave everything in this form, additionally placing a nice apron on top of the finished doll, which can always be removed and washed if necessary. Which, of course, is very convenient.
But, if all this seems not enough for you and your imagination continues to run wild, do not deny yourself the pleasure of amusing your imagination and start sewing a chic overskirt.
4. Overskirt.
If you decide that your product is not a simple woman on a samovar, but an exclusive work of art, then do not limit your possibilities. Use beautiful bright fabrics, lace, ruffles, flounces, artificial flowers and all sorts of fashionable accessories. Anything is good. Sew the finished top skirt along the side seams. Fold the bottom. Once again, evaluate whether all the details are applied and fasten with a cotton base.
That's not all. A little patience.
5. To complete the masterpiece, you will have to find or make very important parts. For them, you can use elements of an old rubber doll. Of particular value is the head, where everything is already there: eyes with eyelashes, lips, rosy cheeks and even hair. If there is no extra doll in the house, then you will have to work a little more and sew the head, torso and arms separately. Or you can link it. Experiment. Old knitwear, socks or tights can also help out here.
6. We sew up the sewn or knitted head, turn it inside out and stuff it with filler. The pattern for the head is simple and depends on the size of the doll. I suggest using the following.
7. To create hair and style your hair, use any yarn, including bright and colored ones. You can use a soft base to embroider a smooth hairstyle with a parting in the middle, and then braid voluminous braids or tie funny ponytails with bows. Or you can immediately create a full head of hair by first loosening an old scarf, which will give volume and a curl effect. If you decide to dress the young lady in a knitted hat, turban or a spectacular deep hat. In this case, you won’t have to bother with making hair.
8. Cut and cut the arms and torso according to a simple pattern that does not require exact dimensions. One condition is that all parts of the body must correspond to each other. Each part requires two pieces. Sew them together with neat seams, turn them inside out and stuff them with filling. It is convenient to use knitted materials.
The patterns are so simple that you don’t have to look for them on the Internet. You can easily draw them yourself:
9. The arms, torso and ready-made head must be connected to each other to form a whole workpiece.
10. Finishing touches. Embroider funny eyes, nose and smile. Dress the doll in a smart blouse. All you have to do is carefully fasten the workpiece to the base (lower and upper skirt). All.
Just great. The result was not a woman at all, but a charming girl. But as soon as you put a crown on her head, she will already be a princess. And with a rose in your black hair you can end up with a beautiful gypsy.
Experiment. Believe me, there will be no limit to the delight of family and friends. Now you know how to sew a heating pad for a teapot with your own hands. Have no doubt, the ability to make such souvenirs will definitely come in handy. You can now give a master class to anyone. Moreover, the issue with gifts has now been resolved once and for all. Moreover, such textile products are now in fashion. This is also a functional gift. After all, it not only decorates the kitchen, but also allows you to retain heat inside the kettle for a long time. That's what we wanted. Enjoy your tea.
In the form of vegetables and fruits
You can sew a heating pad for a teapot with your own hands using patterns and patterns in the shape of an orange, tomato and apple. The spherical shape can be made of parts designed in the form of symmetrical petals, the bottom of which is cut in a straight line. First you need to build a pattern using the appropriate dimensional details. Then cut out several paper pieces and connect them using a pin or stapler. Then put it on the teapot. If necessary, the template can be adjusted.
Note! Next, you should lay out the fabric blanks, trace them, taking into account the allowances, and cut out the parts in a consistent manner, using colored decorative material that will serve as an insulating layer and a lining that will touch the teapot.
Then you need to sew the parts together. If they do not have a very dense structure, they should be folded in the desired surface one on top of the other with the front side inward. Sew the hem at the bottom, and then the main seam along the contour. Finally, turn the product inside out and iron it.
Fruit model
First master class
Hotty cock
For the base you will need:
This is all. Even a sewing machine is not necessary if you have the desire and skillful hands. And I’m sure you will always find scissors and thread with a needle in your home.
1. Let's start making a simple paper pattern. To do this, you need to measure the circumference of the kettle, including the spout and handle, as well as its height. We take these dimensions as a basis.
Take the simplest version of the drawing first. I found it on the Internet.
2. Selecting fabrics. The pattern can be absolutely anything, from colorful to monochromatic. If you find extra waffle or terry towels in the house, the cockerel will be irresistible.
If there is no padding polyester, then batting or any other insulation will do.
Popular articles We make an envelope with our own hands from paper for letters or money
For the reverse side, you need a thinner, but again, cotton material, cambric or chintz. For the manufacture of small parts, such as a comb, beak and beard, try to find dense, preferably red, fabric. But this is also not a prerequisite. It is convenient to use felt, fleece, drape or any dense material that does not require additional processing.
3. Transfer the design from the paper base to the fabric, not forgetting to add 1.5 cm to the seams. We cut out small details (comb, beak and beard) separately. And cut it out. All parts need to be cut out in two pieces.
4. We add three layers of our future heating pad in the sequence: top, padding polyester and lining. We pin it with pins. The result was two identical blanks. To ensure that the blanks do not fall apart and have a finished look, we sew or hand-embroider decorative seams on each of them. This will emphasize the volume. It’s also best to sew an eye button to each separate half right now.
5. We fasten the resulting two blanks with pins or basting to each other, with the seam inward, not forgetting to first place the pre-sewn small elements in their places: the comb, the beak and the beard.
6. Before stitching completely, turn the sample inside out and try it on, placing it on the kettle. At this stage of our needlework, we need to make sure that the heating pad will fit just right. Sew the two side elements of the heating pad together using a final seam. And don't forget to finish this inner seam by hand or with an overlocker.
7. If the height of the product allows, fold the bottom edge inward and simply stitch. If not, then use braid, piping or leftover fabric to form a decorative welt for the product.
The heating pad in the shape of a rooster is ready. Now you can put it on the kettle and not worry about it cooling down quickly.
Using the same principle, you can sew a chicken, excluding one element. Yes, it's a beard. Therefore, we will not repeat ourselves, although chicken will also come in handy, since you also have a teapot. And this is already a whole family. Also consider a mitten and potholders in the same color. No doubt, your household will love it.
If you master the simple task of making such an improvised rooster warmer or chicken warmer, then believe me, you will be unstoppable. For this reason, I propose to depict something more delightful in the next master class.
Hen
You can make a heating pad in the shape of a chicken. It’s difficult to design because you need to make a couple of parts. Separately, a bird's beak with a comb, wings, head and body will be cut out and embroidered. And then the whole chicken must be collected together. An experienced seamstress will make a masterpiece with her own hands. Although it is worth creating a more simplified version by making a pattern with a two-piece heating pad. Only here you will need to create a pattern with a round cap for the teapot, not taking into account the nose and handle. Then additionally build parts for the handle and nose, where the teapot will be placed.
The chicken who knows a lot about tea
Warming cap or bell
A heating pad or bell is the easiest option to implement. But this does not mean that such a heating pad cannot be beautiful. All a couple of decorative elements can make the craft interesting. The inner surface of the cap should be made of cotton fabric. The insulation material should be padding polyester with batting or felt. The main thing is to ensure thermal insulation. The outer layer can be anything. Everything will depend on the desire of the author with his creative concept.
If you wrap paper around the teapot, you can understand the width of the fabric cut. Then all that remains is to measure the height by connecting the paper from the spout to the handle. The resulting triangle will be the size of the inner walls of the cap. The outer cut should be made a little larger. The fabric should not stick to the insulation and squeeze it. All layers must be cut with seam allowances.
Pestle for teapot
Sewing a heating pad for a chicken-shaped teapot is not as difficult as it might seem. Having prepared the fabric for the inner and outer layers, insulation (batting, padding polyester), threads, scissors, sewing machine and needle, you can start working:
- To make the body, you need to determine the dimensions according to the same scheme as in the case of a heating pad in the shape of a cap. To avoid a seam along the top edge of the warmer, fold and cut the paper measure into two equal rectangles, then join them together at the long sides. The result is a rectangle whose height is twice its length. Thus, the seams will be at the front and back, which will add rigidity to the structure. But it’s better to sew it after the wings and tail are sewn on.
- The wing pattern can be made by drawing a right triangle with a height equal to half the back and a base 2/3 of the height. The corners need to be rounded. The combination of white stripes and the fabric from which the upper layer of the body is made looks impressive. Now the wings need to be sewn to the body, adding a little padding polyester for volume.
- The tail is also a triangle, but isosceles. Its base is equal to half the length of the back, the other two sides are 2 cm shorter. You need to cut out two such figures from a canvas stitched from white and stripes of the same color as the body. After this, you need to fold them with the right sides inward and sew along the sides. Turn it inside out, fill it with a small amount of padding polyester, and sew “feathers” along the border of the stripes. Having retreated a fifth from the edge along the line of the back, align the middle of the base of the tail with the resulting point. Now you need to sew it on, first placing the triangle in the opposite direction (towards the head), and then, turning it away, stitch it again. In this case, the tail should protrude beyond the body by a third of its height.
- Now you can sew the main part of the heating pad front and back.
- To make the head, you will need two round pieces of white fabric. The diameter is almost half the length of the back.
- The easiest way to make a comb is from stitched red fabric. By wrapping a 2 cm wide strip at an angle of 45 degrees alternately to the right and left sides, you can form a ridge. Stitch to secure folds.
- The beak is a triangle, folded from a two-centimeter yellow ribbon and stitched together.
- You will get two beards if you sew together two red circles with half the diameter of the white ones. After this, the circle is cut in half, turned inside out, and quite a bit of padding polyester is placed in each half.
- Now you need to place the comb and beak on the round blanks, perhaps even baste them, and then sew the head, stepping back half a centimeter from the edge and first folding it with the front surface inward. Do not sew a third of the circumference - through this hole the head will be filled with padding polyester. The unsewn part should start from the beak.
- For each white blank, it is necessary to baste the beards immediately under the beak, after which the head is “planted” on the corner of the chicken body and swept off by hand.
- All that remains is to make the eyes. You can use black buttons, embroider them with floss threads, or simply draw them.