An elastic band (elastic band) is attached to the waistline of those dress models that need to be fitted. A belt (cut-off or one-piece) is not used in this case. The density of the folds on both sides of the elastic is preserved.
The elastic is attached to the product using a sewing machine or by hand. You can narrow the dress at waist level using elastic threads (rubberized threads), which are used to sew the fabric on a machine.
cujournal.ru
Sewing rules
Regardless of the type of rubber belt, it is necessary to attach it to the base by following the basic rules.
- Do not pierce the rubber veins of the tape with a needle. Punctures can lead to deformation of the elastic - once damaged, it stops stretching. When stitching by hand or by machine, it is recommended to stick the needle between the rubberized veins of the tape. In this case, the zigzag stitch is considered safer.
- During operation, the tape should be evenly tensioned. If the degree of tension of the rubber band changes, the folds at the model’s waist in different areas will be different in thickness.
blogspot.com
Basics of Sewing a Belt to a Zipper Skirt
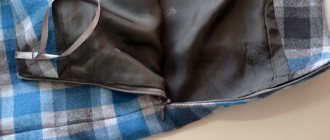
Let's look at the process of sewing a belt that will be fastened with a zipper. The difficulty is that the zipper needs to be sewn both to the belt and to the main product. Let's get started in the following sequence:
- The pattern of such a strip will differ very slightly from a belt with a button. To its length it is necessary to add allowances for sewing on a zipper of about 1.5 cm. A tail for sewing on a button is not needed in this example;
- Next, we chop and process the bottom edge of the element: duplicate and process the bottom edge with an overlocker;
- We sew the strip according to the pattern discussed above and proceed to sewing in the zipper;
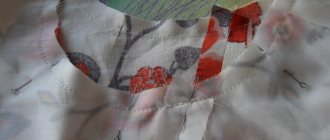
- To do this, distribute the zipper along the belt and skirt. We pin it first with pins, and then we baste it and stitch it on a machine;
- Next, we fold the part of the fabric with the zipper and sew the edge on the machine as close as possible to the zipper;
- To ensure that the corner where the zipper closes is even, the excess fabric from the allowance must be cut off;
- Then the strip is turned inside out and a securing stitch is made along the front side of the product. To do this, you need to align the sections of the belt and pin it to the skirt;
- A stitch is made along the front side of the product, trying to get exactly into the seam of the connection between the belt and the skirt;
- At the end of the work, iron the entire product completely.
Important!
For sewing on hidden zippers, there are special feet that greatly simplify this process.
Thus, among the various methods of sewing on a belt, you can find the most convenient one. Beginning craftswomen are recommended to sew products on simple belts and then, increasing the level of their professionalism, move on to more complex options.
The final element of any wardrobe item is the belt. In particular, this applies to all kinds of skirt models. Since this accessory is most often sewn on at the very end of the work, it often turns out to be of insufficient quality or incorrectly processed. Therefore, today we will look at a completely new technique for making this part, we will learn how to sew a belt to a half-sun skirt or any other model quickly and efficiently.
Sewing methods
There are three main and two additional ways to sew elastic tape to the waist of a dress. The methods differ from each other in the type of rubber material (elastic tape, elastic thread), the type of seam (simple, zigzag), as well as the technique of applying the seam (manually, using a sewing machine).
Basic
Manually or with a simple machine stitch
When manually “fitting” a dress model onto an elastic band, preference is given to loose, easily stretchable elastic bands, about 6 mm wide. If there are several rubber layers, the top one can be made in the form of a wider strip.
As a result of using this method of fastening the elastic, the model will be equipped with soft folds.
- Mark a line on the fabric along which the rubber belt will go.
- When stretched, according to the waist circumference measurement, cut off the rubber fragment. The elastic band can be measured by wrapping it around your waist without too much tension (it should touch your body, but not sag).
- Connect the segment into a ring. Another version of this operation involves dividing the tape in half. One part will be attached to the front of the model, the second to the back.
- Pull the rubber ring evenly and sew it into the waist area of the dress. In the second option, sew on a rubber strip, pulling it tight.
- To ensure that the elastic is evenly distributed throughout the fabric, you need to divide the rubber ring into 4 equal parts using pencil marks. Similar marks are made on the fabric. If the rubber belt is attached in parts, each fabric and rubber section must be divided into sections.
- The resulting marks are stitched together. Machine stitch by pulling the rubber strip under the presser foot. Pull the elastic with two fingers of one hand and simultaneously straighten the fabric fragment.
- If the tape is sewn by hand, the initial distances between the stitches are divided again and stitched again. The operation is repeated until the entire belt is inside the product.
blogspot.com
Using a zigzag seam
- Cut the elastic band into two equal pieces and set them aside.
- Use another piece of elastic equal in length to the width of the product itself.
- A long rubber fragment is placed under the machine foot. A zigzag type of seam is used, with a wide zigzag step. The fabric should be pierced with a needle 1-2 mm from the edge of the tape.
- Press the elastic line to the fabric with a curly stitch. In this case, the tape can remain movable. Afterwards it can be tightened.
- After the entire rubber fragment is under the stitching, next to it place half of the elastic that was cut at the beginning of the work.
- Two marks are applied to the elastic underneath the stitching, corresponding to the edges of the short section.
- Tighten the long rubber band until the previously made marks are aligned with the edges of the model.
- Secure the edges of the elastic tape to the edges of the fabric.
rukopedia.ru
Drawstring assembly
- Measure the length of the seam along which the rubber band will be sewn.
- A fabric strip of similar length is cut. The width of such a strip should be equal to the width of the elastic, taking into account the additions for making seams.
- A piece of fabric (drawstring) is sewn into the area where the belt is located.
- Pass a rubber band through the formed channel, attaching a safety pin to one edge.
- First, it is recommended to fasten the back edge of the elastic to the fabric, and after threading, the front edge.
magazineindex.org
How to sew a belt to a skirt - step by step photos
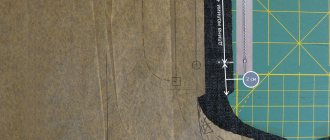
Step 1. Cut it correctly
Draw rectangles of the desired size directly on the fabric.
Cut the front and back parts into separate pieces. Transfer all control marks. Don't forget to allow an extra 3cm for the clasp. Seam allowances - 1 cm.
From the lining fabric, strictly along the lobar, cut out 2 pieces with a width of 1.5 cm and a length equal to the front and back parts of the belt (with seam allowances).
Step 2. Duplicate correctly
When choosing a material for duplication, give preference to one that also stretches across, best if it can be glued with an iron.
The duplicate layer of each part is cut out with allowances of 0.5 cm.
From the wrong side, we place strips of lining in the center of each piece and baste them. We retreat 2 mm from the fold line and add a stitch (2.5 mm) from the side of the inner belt. These “shares” will not allow it to stretch along the fold while being worn.
Step 3. Iron correctly
Bend each part in half and iron without stretching! We get 2 blanks.
Now we pull each piece at the bottom (folded) with an iron, without touching the fold. There should be 2 “arcs” - front and back.
For greater rigidity, you can cut out (according to the shape of the resulting workpiece) and glue another layer of dublerin to the wrong side of the outer belt.
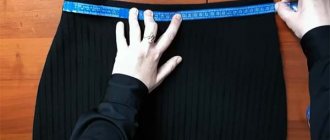
Step 4. Trying it on correctly
First, we baste each detail to “its” part of the skirt, while the belt should be taut, and the skirt detail should have a slight fit along the stitching line. This will prevent the darts and side seams from “protruding” through the fabric. Then we sew up the side seams and try them on.
When trying on, it is very important to make sure that the belt is located exactly where it is “intended” and does not press or slip. Excess, if any, is removed into the side seams.
Step 5. Sew correctly
Additionally
Additional methods concern securing a certain number of rows of elastic threads in the waist area of the product.
kupivip.ru
Simple stitch
- The sewing machine is threaded from below with elastic thread. We place a regular thread on top with a loosening of tension, which will allow, if necessary, to tighten the bottom thread after laying the stitch.
- The “face” of the product is stitched with a slightly weakened top thread.
- A tension stitch is placed on the wrong side.
- Having laid a line from one edge of the base to the other, tighten the rubber thread to the desired limit. The rubberized thread should “walk” freely inside the loops formed by a simple thread.
Zigzag stitch
- Elastic threads are applied to the corresponding lines drawn on the fabric.
- A zigzag seam is laid on top.
- The threads are stretched until the desired degree of fitting is achieved.
One-piece belt
In order for a one-piece belt to have an impeccable appearance, the upper section of the skirt or trousers and the facing are reinforced with interlining (non-woven fabric).
For the top section of a skirt or trousers, cut out the lining along the grain thread, for facings - along the transverse thread. Iron the spacer to the corresponding parts from the wrong side.
Sew darts and seams on the skirt or trousers. Press the seams. Sew the zipper.
Sew the seams on the facing, leaving the edges of the fastener open. Overcast the bottom edge of the facing.
Baste the facing to the top edge of the skirt or trousers, right side to right side, leaving the allowances along the side edges of the facing protruding at the edges of the fastener. Stitch (1).
Cut the seam allowances close to the stitching, iron them onto the facing and topstitch on the right side (2).
Bring the facing to the wrong side and iron the edge. Tuck the short edges of the facing and sew them to the zipper strips. Hand sew the bottom edge of the facing to the seams and darts (3).
Recommendations for performing work
- Before starting work, you can draw a waist circumference on paper, mark on it the centers of the back and front of the product, and then divide the resulting fragments in half, marking the side points. Divide the resulting parts in half several times. A circle with a smaller radius is drawn inside the first circle - this is an elastic band. The outer circle marks are transferred to it.
- Divide the fabric base (to which the rubber belt will be attached) into equal parts by successively folding the fabric at the waist line. Marks are made as the folding fragments decrease.
How to sew a belt to trousers?
To sew the belt to the trousers, we repeat the same steps with only one difference: the part of its front part will consist of 2 elements.
Now trousers and skirts will fit perfectly on you or your customers. Sew professionally!
The belt emphasizing the waist can be straight, shaped, with a drawstring for an elastic band, or one-piece along with a skirt or trousers. In addition, you can sew on a ready-made elastic belt.
If you are sewing a lined skirt, you must first sew on the lining and then the belt.
For a fastener on a straight or shaped belt, an allowance for the fastener is required. If it is located in the front, then the allowance is located at the left edge of the cut, and if the fastener is located at the back, then the allowance protrudes at the right edge of the cut; if the fastener is on the side, then the allowance for it is given to the back edge of the cut.
Sew the elastic into the sleeve
If you want to sew elastic into the sleeve of a blouse or turtleneck, then this can be done quickly and without problems at home.
- We set the type of stitch on the machine to zigzag, and the stitch length to 3. Your needle should be “stretch”, which is suitable for working with elastic tape.
- Take the sleeve of the product and turn it inside out. Then we place it under the machine foot.
- We put the elastic over the stitching on the sleeve and attach it, not forgetting to pull it a little.
The end result is these beautiful products with elastic in the sleeves:
Don't miss: What is Spelled: how to prepare it correctly and beneficial properties
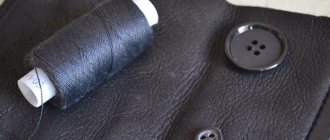
Choosing an elastic band
There are several types of elastic bands in the world. The first type is an elastic base tape, which is covered with cotton fiber.
And the second is the most familiar and accessible type to us, an ordinary elastic band of varying degrees of hardness.
You can sew such elastic bands into clothes, either manually or using a machine.
Recommendation for beginners: use the second type of elastic for sewing into clothes for the first time. Because it is easier to work with a regular elastic band, and it does not deform when sewn in.