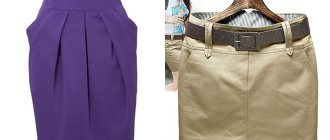
Stress, bad weather, bad mood, laziness and delicious cakes have a bad effect on the figure, but we will not say that we have become wider on the sides, but simply that the skirt has become small and needs to be embroidered. You can increase the size without embroidering using simple methods, but more often we will have to alter the skirt at the waist and hips. All methods for widening a skirt are described in the article.
How to make a skirt bigger
The female figure is very fickle and often, especially in spring, “delights” us with new volumes.
In this connection, the question arises: “How to make a skirt larger?” It’s unlikely that you’ll be able to change your wardrobe right away, and there’s still hope of returning to your previous size. Therefore, the first aid in such a situation is to simply widen the skirt without extra expenses.
How to make a straight or pencil skirt bigger
The most common problem is that the skirt is too small at the waist. Simply altering a button or removing darts, as my clients suggest, is a bad idea. In some cases (a figure with a high belly), you can remove the front darts and partially release the side seam allowances. Back darts cannot be reduced! In addition to this, of course, we make sure to increase the waistband by inserting it.
But these manipulations will not help increase the skirt by much. A greater effect can be achieved by making inserts into the seams of the skirt.
Increasing the skirt in the belt
First, let's consider the option when you need to widen the skirt at the waist. To do this, we make an insert into the waistband and into the upper part of the side seams (Fig. 1). The width along the hip line will remain unchanged.
It is better to make the insert into the side seam not just a triangular wedge, but in the form of an imitation of the entrance to a pocket (rounded or trapezoidal). Stitching around the insert will make it complete (Fig. 1).
If the skirt has reliefs, then you can make inserts in the upper part of the reliefs, as shown in Fig. 2.
Increasing the skirt with a zipper
To increase the size of the skirt at the hips and waist, an insert along the entire length of the skirt is required. As an insert, you can use a detachable zipper in the rear middle seam (Fig. 3).
When sewing in a zipper, we additionally release the seam allowances; we sew the zipper directly on top with an overlay seam at the edge. The belt also needs to be increased. The total expansion is up to 3 cm.
Increasing the skirt with an insert
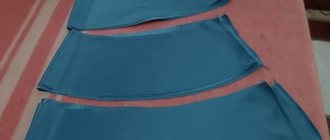
To increase the skirt by one or two sizes, you can insert another fabric into the front panel of the skirt, expanding it - Fig. 4.
You can choose a fabric that is contrasting to the main one or the same color, but of a different texture (with fabric, with pile, with shine, etc.). In addition, you can make a new belt and decorative flap from finishing fabric.
Enlarging your skirt with a wrap
A similar option is to make a wrap skirt from a regular straight skirt - Fig. 5. The inner part is made of a different fabric. The width of the wrap is at least 22 cm (for sizes 44-48) and at least 26 cm for large sizes.
In the figure, for clarity, the top part is shown translucent. The belt can be completely replaced or enlarged with an insert.
How to make a flared skirt bigger
The details of the wide skirt widen at the bottom. And the lower, the wider they are. Therefore, you can enlarge a flared skirt only by cutting off the narrowest part of the top. Don't cut the zipper, it needs to be flogged.
Of course, this will make the skirt shorter. But for wide skirts the required amount of shortening is small. Three to five centimeters may be enough.
Keep in mind that the waistband needs to be enlarged with an insert, and the zipper needs to be moved lower.
How to widen your skirt yourself
The quality of the result largely depends on careful preparation for it.
Preparing for work
Before you begin restoration, it is important to evaluate all the pros and cons. To do this, you first need to carefully examine the thing. The most common way to add inches to the width of a garment is to use seam allowances.
Important ! If the product will be placed along the side seams, compare their shade with the color of the main fabric. The color of the allowances must match the front side.
The seam allowance should be wide enough to accommodate new side stitches.
It is also necessary to determine the degree of wear and type of product. There are fabrics that are very sensitive to sewing needles. They leave noticeable holes. Unfortunately, it is impossible to get rid of them, so it will not be possible to widen such a skirt while maintaining an attractive appearance.
The material of the skirt can be convex, voluminous, for example, corduroy, velor, ribbed. This should definitely be taken into account. Additional inserts should under no circumstances violate the integrity of the pattern .
If the condition of the item satisfies the above conditions, feel free to proceed with the alteration.
How to make a skirt wider at the waist
This option involves inserts in the form of wedges.
- To arrange the skirt in the waistband, insert a wedge into its upper part. At the same time, we do not change the width along the hip line.
- We make the shape of the arrangement triangular, imitating a pocket.
- We perform stitching, which will create the illusion of completeness of the form.
Advice . If the skirt is made with reliefs, then insert a wedge on top of them.
Adding width to the hips
To add width at the hips, an insert along the entire length of the skirt is needed. In this case, use a detachable zipper sewn into the back.
- Take measurements of your waist and hips. Divide the difference in volumes by four. The resulting figure will be equal to the required allowance.
- Open the side seams . You will make your task easier if you use a special steamer.
- Strip the seams of old threads.
- Iron them using the steam setting. This will help get rid of machine stitch marks.
- Match the side seams . Use a bar of soap to mark the new measurements on the fabric.
- Sweep them with a simple stitch.
- Machine stitch the details.
- Press the new side stitches.
Don't touch the grooves, leave them the same. Open the belt along the longitudinal seam, cut off the fastener button. Baste the waistband again, taking into account the adjusted side width. Sew on a machine.
Bottom extension
And if the skirt widens downward, for example, with flares? This can be expanded by cutting off the top, narrowest part.
How to widen a skirt without sewing
Your skirt has elastic, but is it too tight? You can cope with this trouble in the following ways.
- Lay the skirt out on the ironing board. Stretch the elastic band. By the way, you can put it directly on the board itself.
- Iron the elastic using a steam iron. You can also do this with a damp cloth.
- Steam the elastic for a while; you can stretch it further with your free hand.
In addition, you can flog the tight part and wear the item without it.
How to prevent shrinkage
Before washing any denim item, jacket, skirt, trousers, be sure to read the manufacturer's recommendations, which are indicated on the label. The first wash should be carried out only in cold water, making sure to turn the item inside out. Before turning on the machine (if it has a front loading), you must wait until the jeans are completely wet and sink to the bottom, only then turn it on.
Important! Do not wash any jeans in hot water or soak them for a long time.
There are no restrictions on the use of air conditioning. It allows you to make the fabric softer, especially if it is too rough.
Useful tips for widening skirts made of different materials
Cotton products
You can stretch them a little with water and vinegar.
Description of work
- Mix three tablespoons of acetic acid in 10 liters of warm water. Place the item in the prepared solution for 30 minutes.
- Wring out and place on a terry towel, stretching the fabric in the required directions.
- Let the skirt dry.
Wool fabrics
Prepare fabric softener.
- Dissolve laundry detergent in a bowl of warm water. You can replace it with baby shampoo or wool detergent.
- Soak the material in the solution for 30-40 minutes.
- Gently rinse and gently wring out the wool item.
- While suspended, for example, on a clothesline, begin to gently stretch the skirt.
- Repeat this step periodically until the fabric is completely dry.
Knitted fabric
You will need a washing machine and an iron with a steamer.
- Place the skirt in warm water for 15-20 minutes.
- Place the item in the washing machine and turn on the spin mode.
- Take it out of the drum and stretch it in different directions.
- Dry the product in an upright position so that it does not shrink and return to its previous shape.
- After drying, iron the fabric.
Jeans, leather
- Wet your skirt. This material stretches perfectly when wet.
- The main thing is to find/come up with a shape on which you can pull a wet skirt. For example, on the back of a wooden chair, an ironing board without a cover.
- To secure the result, iron the fabric through a steamer.
- In addition, you can put on a skirt and walk around in it for a while.
Before you scrap an item, give it a chance to serve you. At least try it!
Using the press
How to iron a leather product? It must be remembered that only smooth material can be ironed. Leather with embossing and inserts must be straightened differently. The procedure is as follows:
- Set the device to the minimum temperature. Remove water from the steam compartment.
- Before ironing a leather skirt, you need to lay it out and straighten it. It is preferable to work from the inside out, but this is not always possible due to the lining. You can iron the product from the front side, but only through the lining - thick paper or fabric. If you touch a material without a protective layer with your sole, the skin will wrinkle.
- As a lining, you can use wrapping paper, parchment or light-colored material with a smooth texture.
- The process should occur slowly and in stages. First, iron a small area - slowly and without pressing the device. Then the lining is removed and the result can be assessed. If it is far from ideal, then you need to repeat it. If the skin has smoothed out, you need to wait until the area cools down and only then move on to another.
- Small details on the skirt can be ironed using the pull-out bar on the ironing board.
- Do not heat the product for too long, otherwise the leather will dry out and crack.
We suggest you read How to clean a cast iron bathtub at home
How to iron a leather dress or skirt if it is made of artificial material? The procedure is almost the same. However, leatherette should only be ironed from the inside out. It may take more effort to tidy it up, as it is a rougher and less pliable material.
Another way to iron a leather skirt? One of the most popular methods used at home is aging under pressure. The latter can be any smooth, heavy objects, such as books or water bottles. However, you should not use weights that are too heavy, otherwise you may end up with unsightly dents. The algorithm of actions is as follows:
- Place the skirt on a flat, hard surface (table, ironing board) and smooth it out.
- Straighten the product, but do not stretch it. Otherwise, the item may be deformed.
- Level the lining, if any.
- Place the load on problem areas. In this case, you need to carefully smooth out the area on which the load will be lowered in order to prevent new deformations.
- Leave for 8-10 hours. Then you can evaluate the result.
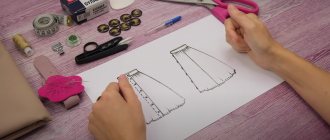
Design for beginners: building a straight skirt
When tailoring, the phrase “every woman is unique” ceases to be a simple figure of speech. Finding a suitable item or pattern is not at all easy if we have an “atypical” figure.
But, of course, there is a way out. We suggest mastering the basics of design in order to easily build yourself an ideal model. Let's start our course by building a straight classic skirt.
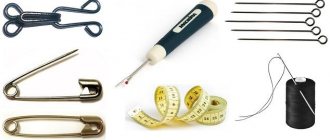
You will need:
- graph paper (buy at Burda store),
- pencil,
- eraser,
- ruler (buy at Burda store),
- tailor's pattern,
- calculator
- To take measurements from a figure, we will need a measuring tape
Measurements for construction
- St - half waist circumference (we divide the girth measurements in half and get half girths)
- Sat - half hip circumference
- Di - product length
How to take measurements
Waist circumference
When taking waist measurements, you need to pay special attention to the fact that the measuring tape should be positioned strictly horizontally in the narrowest place. Do not pull the tape, as this may cause the product to narrow at the waistline.
Hip girth
When taking measurements of hip circumference, you also need to pay special attention to the fact that the measuring tape should be positioned strictly horizontally, passing along the most protruding points of the buttocks. The tape should also run with some freedom and without tension. The distance from the waist to the protruding points of the buttocks is the measurement of the height of the hips.
Increases in looseness of fit
- increase in waist (Fri) 0 - 1.0 cm,
- increase in hips (Pb) 0 - 2.0 cm.
The increases depend on the type of fabric, its elasticity, as well as the desired freedom of the product, and this must be taken into account when constructing. For example, we will take average values. You also need to take into account that we use increments to build half of the product.
To build a classic skirt, we will take size 44 (this is size 88 cm across the chest) for a height of 170.
- St=33.5 cm,
- Sat=48.0 cm,
- position of the hip line for constructing a skirt: 18.0 - 20.0 cm (this measurement depends on the type of figure; with a significantly non-standard figure, this measurement must be taken directly from the figure).
Increases: Pt=0.5 cm, Pb=1.0 cm.
Calculation for construction
- St + Fri = 33.5 + 0.5 = 34.0 cm - the width of the skirt along the waist line.
- Sat + Pb = 48.0 + 1.0 = 49.0 cm - the width of the skirt along the hip line and the width of the grid for construction.
- Wb=19.0cm - position of the hip line
- Di = 55.0 cm - the length of the finished product and the height of the grid for construction.
Step 1. Constructing a mesh
The first point of construction is take point T - and from it we set the width of the grid to the right - 49.0 cm, draw a line and at the end of the segment we put point T1.
Down from point T we set the height of the mesh and put point H at the end of the segment - the length of the product - corresponds to the bottom line of the product.
We complete the rectangle by lining up point H1 to the right of point H. The segment H-H1 is also 49.0 cm and is the width of the base grid.
Also, for construction, we need a line of hips: from point T down on the segment TH we set aside a distance equal to the height of the hips = 19.0 cm. And to the right we set aside a horizontal line and on the segment T1-H1 we get point B1.
We mark the side seam line; it will be located in the middle of the mesh, i.e. 49.0 cm/2 = 24.5 cm.
The first and important stage of construction should look as shown in Fig. 3.
Step 2. Construction of darts
To construct darts along the front, back panels and side seams, you need to perform the following calculation: (Sb + Pb) - (St + Pt) = Gvyt (dart depth).
49.0 cm - 34.0 cm = 15.0 cm - this is the total difference between the size of the waist and hips, as well as the total amount of darts along the waist of the product.
In the side seam we put half the difference between the hips and the waist, which is 15.0 cm/2=7.5 cm.
In turn, you need to divide the total dart along the side seam into a dart along the front panel, and a dart along the back panel, which will be 7.5 cm/2 = 3.7 cm.
Constructing a side seam dart
From point T2 to the left point T3 and to the right point T4 a distance of 3.7 cm, connect points T3 and T4 with point B2, we have a temporary side seam line.
The remaining dart at the waist should be distributed in a percentage ratio of 30%/70% along the waist of the front/back part of the skirt, respectively.
The total amount of dart at the waist of the front panel is 7.5*30%=2.2 cm, the total amount of dart at the waist of the rear panel is 7.5*70%=5.2 cm.
For ease of construction, you need to divide the total amount of the dart by 2, in this regard, half of the dart of the front panel will be 2.2 cm/2=1.1 cm, and half of the dart of the rear panel will be 5.2 cm/2=2.6 cm.
The length of the front panel dart should be 8.0 - 11.0 cm, and the length of the back panel dart should be 15.0 - 20.0 cm.
For example, let's take the average length of darts for construction:
- dart length of the front panel - 9.0 cm
- The length of the back panel dart is 17.0 cm.
The length of the front and back darts depends on the type of figure and the height of the hips: for higher hips the darts need to be made shorter, for lower hips the darts need to be lengthened.
The location of the darts on the front and back panels should be at a distance of about 50% from the center of the front panel and back panel to the side seam.
An incredibly simple way to “sew” a skirt or trousers in two minutes and without a sewing machine
Receive one of the most read articles by email once a day. Join us on Facebook and VKontakte.
The female figure is an unstable quantity. And that's okay. It is common for almost everyone to gain a little weight over the winter or begin to rapidly lose weight for the beach season. But clothes don’t have the magical ability to do the same. Has the “perfect” skirt or cool jeans begun to hang around your waist? Don't rush to the studio. Here's how to fix this defect yourself and in just a couple of minutes.
If your favorite skirt or jeans begin to hang hopelessly at the waist, their owner has several options: a) quickly begin to make up for lost centimeters by consuming treats; b) put the item in the closet away until better (fed) times; c) go to the studio and ask for stitching. Which, of course, is far from free. Add one more option to your portfolio: “tighten” your waist yourself. No special skills, it's simple!
To sew in a skirt or trousers at the waist, you don’t even need a sewing machine. Prepare instead:
1. Needle and thread; 2. Sewing hooks and eyelets.
First, arrange a fitting and measure how many “extra” centimeters there are at the waist of your jeans or skirt. Now arm yourself with a ruler and put the same amount on your belt: to the right of the very top of your fly. Sew a metal loop there.
Now it’s a small matter: on the opposite side (to the left of the fly) sew on the hook itself. Just be careful that both the hook and eyelet are clearly on the same line. Otherwise the magic won't work.
Now you just need to fasten the hook, tucking in the extra piece of fabric, and tighten the zipper.
In this simple way, a beloved but large item became perfectly tailored to the figure. The method works best for skirts, especially flares and pleating - the more folds, the more invisible the intervention. More details in the video below.
And here you can see another alternative trick - what to do with big jeans
.
Did you like the article? Then support us, click
:
Professional products
Currently, there are many natural leather care products on sale. In particular, special moisturizers are sold in the form of a spray. To straighten folds and creases on a skirt, jacket or trousers, you need to proceed as follows:
- Place the item on a flat surface and straighten it.
- Spray the spray from a distance of 25-30 cm.
- Rub the substance with a soft, clean cloth.
- Hang the item on hangers and let it hang for 3-4 hours.
How to shorten a leather skirt at home