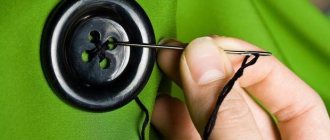
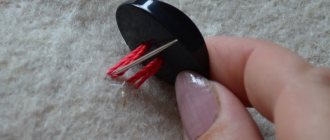
- If you are replacing a four-hole button, look at how the other buttons are sewn. Sew in the same way (diagonally or parallel) as other buttons.
- The inside of the button should be sewn on just as neatly as the outside, so keep an eye on the underside to make sure you are not creating a nest of thread there. Thread the needle and thread in approximately the same places.
- Make sure you use at least 12cm of thread.
- Some people prefer to secure the thread to the fabric with a few stitches before starting to sew on the button.
- Ordinary thread will do, but there are special threads for buttons. It is thicker and stronger than regular thread. If the buttons you are going to sew on need to be very secure, such as on a coat, use special thread for buttons.
- Another way to tie a knot at the end of the thread is to make a tiny stitch on the wrong side, pull it almost all the way, and then pull the needle and thread through the loop before pulling it tight. If you do this twice in the same place, you will end up with a double knot. You can then cut the thread closer to the knot.
- Sew with double thread if you want to reduce the number of stitches to secure the button.
- You can thread two threads through the needle and make both of them double, thus using four threads to really speed up the sewing process.
- It would also be good to choose the same threads that are used to sew on the rest of the buttons. Fabric stores have a lot of buttons, and if they don’t have the right one, they will definitely have one very similar. If that doesn't fit either, you can replace the entire row of buttons - this will make your clothes look much better.
- Button thread is usually easier to use if you coat it with beeswax after you thread it through the needle. You can even use two double threads for buttons, which works well for coat buttons.
- For an item of clothing that you wear frequently, try wrapping the end of the thread on the needle around the threads holding the button at least 4-5 times, and then thread the thread and needle through this tight bunch of threads. Try to thread the needle parallel to the holes in the button to avoid resistance. Use a thimble to push the needle through. (The reason for this is simple: fraying threads will cause the button to fall out faster unless you wrap another bundle around the exposed threads.) Once you've pushed the needle through, thread it through the fabric again and tie a knot. If you wrap the threads, the button will be held in place better and the thread that holds it in place will last much longer.
In this article, you will learn how to properly sew a button with two and four holes, and you will also be able to familiarize yourself with the main points that you should pay attention to before getting started.
Color spectrum
The next important point concerns how to choose the right thread shade. Of course, if both the button and the fabric are the same color, there will be no problems with the choice, however, if they are different, you should focus on the type of button. If it is flat, you should focus on the color of the button, not the fabric. This will help visually hide the stitches made on the front part. If you need to sew a button on a stem, the thread should be matched to the material, since it will be almost invisible.
Tips for a needlewoman
- Sew with thread in two layers - fewer stitches will be needed. Accordingly, measure its length longer.
- To avoid pulling and to create a straight leg for a “holey” button, after the first stitch, insert between it and the material an empty rod bent in half, a comb with sparse teeth or other device of the required thickness.
- For outerwear with a dense material structure, use a thimble. It will protect your fingers from damage.
- If a torn button is lost and there is nothing to replace it with, you will have to rip off all the old accessories and purchase a new one. At the same time, it should match the coat in shape, design and color and fit into the loop not very tightly, but not too loosely, otherwise you will have to reduce or increase the cuts.
If you sew a button to a coat correctly, following all the recommendations, you don’t have to worry about it coming off again. Your favorite item will look perfect, and you will wear it with pleasure.
What to wear with a brown belt
Earrings hurt ears
Button on the leg
This type is more often used as decorative elements, because even one such button, depending on the type of product, can carry more significant loads than a regular flat one. This is why it is so important to know how to sew on buttons of this type. It is best to start working using a double-folded or very thick thread. However, it must be taken into account that in practice this is not always possible, because the holes in the legs of such buttons are often very small.
Having determined for yourself the main points of how to sew buttons with a foot, pierce the fabric along with the button, starting from the wrong side of the product. Repeat this operation at least 2-3 times, trying to get the needle into the same holes.
You need to know how to sew buttons so that they are not pressed tightly against the fabric. To do this, you will need to create a special gap, which is very convenient to do using an ordinary match, which is placed under the button on the front of the fabric. After this, make up to 5 turns of the thread under the button and, having pierced the fabric towards the wrong side of the product, secure it and cut it.
How to sew a button with 2 holes?
In order to properly sew a button with two holes, you will need a thread of size 40 - it is not recommended to use thinner ones, since in the future the sewn button will look quite sloppy. Having threaded it through the needle, you need to secure both ends into one small knot. Then take a small piece of soap and, having determined the place where the button should be located, make a cross-shaped mark on the front of the product.
After this, insert the needle slightly above the center of the cross you marked, piercing the fabric from the front of the product, and remove the needle approximately the same distance below the center of the cross. Now take the button you have chosen, put it on the needle through both holes and try to get into the hole you made on the fabric again. Similar actions must be repeated at least 3-4 times, trying to ensure that the thread is a single whole. When working, keep in mind that you should not tighten the thread too much, because in this case the button will be quite difficult to fasten in the future.
At the end of the fastening, pierce the fabric by pulling the needle from the front side of the product so that it passes under the button without touching the holes. Using thread, loop it around the button to form a regular loop and tighten it. Repeat the procedure several times, and then pierce the fabric several times through the same holes through which you originally sewed the button and trim it. Thanks to such measures, you can be sure of the strength of the sewing.
What is a buttonhole, why is it needed and how to sew it on?
What is a subbutton?
A button pod (another name is a counter button, sometimes a hidden button) is a special type of fittings that is designed to better fix the stitches that secure the button to the product. The button closure is sewn on the wrong side of the product or on the reverse side of the placket directly under the button - hence the name.
As a rule, button guards are made of plastic. Usually they look like a flat button without any decorative details, because the buttonhole should be as inconspicuous as possible. The button can be round with a bridge or similar to a regular button with two or four holes. Most often, buttonholes are produced in white or black, plus transparent ones, but you can also find other colors. You can also use any buttons of suitable shape and size for this purpose.
When choosing a button closure, you need to focus on the number and location of the holes of your buttons. Usually the button closure is selected to have a smaller diameter than the button itself. The buttonhole is sewn together with the button using one thread.
Buttons and surrealism: inspiration from Elsa Schiaparelli
Why do you need a button guard?
* The button guard prevents damage and deformation of the material
This is important if the product will experience stress at the place where the button is sewn on. For example, when sewing buttons on the waistband of trousers, on a coat, jacket, jacket, and so on. The button guard holds the button on the other side and prevents it from being torn out “with meat”. The button closure is also good for use with buttons on items made of knitted fabric and other materials that tend to deform and stretch.
* The button guard helps to better secure the button
Thanks to the button closure, the button is fixed smoother and stronger. The threads with which it is sewn are less likely to twist and are less likely to break.
* A buttonhole is neat and beautiful
Finally, the buttonhole also performs an aesthetic function. This is especially important when it comes to buttons sewn, for example, on a coat or jacket. If the item is opened, the places where the buttons are sewn on will be visible, and with a button closure they look neater.
How to sew a button with four holes on a thread stem
How to sew a button with a button closure
As an example, let’s look at a not-so-simple option: sewing a button on a hidden leg with a button closure to a leather product with a fur back. For such a button, a button holder with a diameter slightly smaller than the button itself, with two holes, is suitable.
Mark where to sew on the button.
We make the first puncture with a needle from the front side to the back. The knot left on the face will then be hidden with thread and a button.
From the inside out we grab the buttonhole with the first stitch.
We bring the needle to the front side.
Grab the leg of the button.
We bring the needle to the wrong side so that it comes out through one of the holes in the buttonhole. Make the required number of stitches, sewing on the button and the buttonhole at the same time.
Then, if necessary, you can make a leg for the button.
Finally, bring the needle under the buttonhole and secure the thread.
Photo: furnitura.com.ua, Gudzik, Textile Plast, Natalia Pykhova, master class: sewway.com
Life hack: how to mark the position of buttons and loops using an elastic band
The idea of using “fang” buttons: 3 options for a cape with a fastener
How to cover a button with fabric (video)
How to sew a button with 4 holes?
The 4-hole button is one of the most commonly used buttons on various clothes. In addition, thanks to various ways of attaching to fabric, it can act as a decorative element. There are three main ways to sew a button with 4 holes, and using any of them, you can be completely confident in the reliability of the fastener:
1. Crisscross - moving the needle from the left corner to the bottom right, pierce the fabric. Next, repeat the procedure, starting from the upper right corner and moving the needle to the lower left - this will allow you to form a kind of cross. To ensure the reliability of the fastener, the steps are repeated.
2. Parallel stitches - after piercing the upper left corner with a needle, bring it through the upper right corner, from which move it to the lower left. If necessary, repeat the fastening and fix the thread on the wrong side of the product.
3. Letter “Z” - the thread must be drawn from the upper left corner to the upper right, then from there along the wrong side go to the lower left and return to the upper right.
Sew buttons on outerwear
In order to sew a button on a coat, be sure to keep in mind that the most important rule when carrying out this work is that it is convenient to both fasten and unbutton. It is for this reason that it should not be sewn too tightly or loosely, because it can quickly come off.
When starting work, place a match under the button. Try to keep the stitches close to it and pull the thread tight.
Once the work is completed, carefully remove the match and use a needle to wrap the space between the fabric and the button several times in a row. The resulting result should resemble the stem of a flower. After this, carefully insert the needle into the fabric and, bringing it to the wrong side of the product, trim the ends of the thread and tie them into a strong knot.
What is needed to properly sew a button to a coat?
Buttons on coats come in two types: flat, with holes drilled in them, and convex, with a leg-eye or a leg-loop.
. In order to sew both of them, we will definitely need:
- needle;
- a thread;
- subbutton;
- scissors;
- a thin piece of chalk or dry soap;
- long ruler.
Which needle is suitable?
The bead to which the fasteners are sewn is usually very dense in structure
.
It consists of at least four layers of face material. In high-quality sewn items, there is also a hot-melt adhesive cushioning material inside (dublerin, non-woven fabric), which helps to keep its shape. The needle with which the button will be sewn must be sharp, not too thin, long enough, with a large eye
. Otherwise, it will bend, break, or get “lost” in the layers.
Thread selection
The color of the thread should match the button if it has holes and the tone of the coat if it has a leg.
Thickness is not as important as strength
. Do not use thread that has been sitting for many years. To see if it's good, try pulling on the end while holding the spool. If it breaks easily and immediately, you can throw it away; if you had to apply some force, feel free to use it.
What is a subbutton?
This is an additional small button that is sewn on the inside of the product at the same time and at the same level as the main one. In this case, the fabric appears between them, and during further use it does not deform in the places where it is fastened. The load on the mount is reduced, making it more durable
.
How to sew a button on a leg?
Some types of buttons are already equipped with a foot. They are sewn in exactly the same way as with holes. There is no need to make a column of thread if the leg is in the form of a loop
.
If it is in the form of a recessed eye, you need to leave a space of 1-2 mm between the button and the fabric. Without it, the button will be tightly grabbed, motionless and will not be able to move freely into the slot. At the end of the work, you need to make a couple of turns around the threads under the button leg, tighten with a loop and secure.
Greetings to all sewing lovers! Let's talk about such details of our clothes as buttons. They are present on almost all of our things and from time to time they come off, get lost, and need to be restored. ? Surely many of you have encountered this problem. Not everyone likes this activity, but sometimes it is simply necessary.
At first glance, it may seem that nothing could be simpler than sewing. I think so too, but much to my surprise, some of my clients bring me their clothes just so that I can sew buttons on them. And, oddly enough, there are women among them.
It would seem that such a thing should not be a problem for women, but not everyone likes to do something with their hands, including sewing on buttons. Although this is not at all difficult to do. But it is advisable to do it correctly. This is exactly what we will do. Perhaps you will learn something new for yourself.
Buttons are different. The most common of them:
Buttons with two holes
Buttons with four holes
Buttons on the leg (half leg)
Each of them is used for different types of clothing. It depends on the size of the button and on the item on which it will be sewn. Let's look at some options for this application. I have prepared a detailed step-by-step photo report. For clarity, I took thick threads and materials of contrasting color so that you could see it better. On real products, it is advisable to select threads to match the button.
Life hack: a neat way to sew a button on a thread stem
This method is suitable for sewing flat buttons on a thread stem. Usually this leg is made by wrapping the threads that are used to sew the button with thread in a circle. It may not turn out very neatly, and if the top thread frays or breaks, the winding will unwind. The figure eight sewing method is stronger and looks neater, plus the button sits firmly on the leg.
What are Dorset buttons: history and master class
You will need:
- product and buttons;
- a pair of wooden toothpicks;
- needle for hand sewing;
- threads (we took contrasting ones for clarity);
- scissors.
What is a buttonhole, why is it needed and how to sew it on?
Step 1
Cut a long thread, fold it in half and thread it through a needle. Align the ends, tie with a strong double knot, tighten well and cut the tail close to the knot. Thus, you get a thread in 4 additions.
Step 2
Leave the knot on the front side. Bring the needle to the wrong side, make a stitch approximately equal to the stitch with which we will sew the button, and bring the tip of the needle to the face.
Pass it between the threads and tighten.
Step 3
Using the next stitch, thread the button onto the thread, but do not immediately tighten the thread. First, insert toothpicks under the button between the stitches and under the thread on top. If you need a shorter leg, one toothpick from the bottom will be enough. Now tighten the thread.
Sew on the button using as many stitches as you need.
And then bring the needle and thread under the button.
Step 4
Remove the toothpicks and pull the button up. Now you need to start braiding the leg using the figure eight principle. Insert the needle halfway between the stitches and pull out the thread.
Pass the thread around the leg, and now insert it in the middle, braiding the other side.
Continue, moving from bottom to top, to the button.
Tighten the weave to make it tight by pulling the working thread down.
Continue until the entire leg is braided.
Step 5
Now you need to return the needle and thread to the surface of the material to secure the thread. To do this, make a couple of neat stitches down along the groove in the middle.
Step 6
Fasten the thread.
Move the needle with it a couple of centimeters to the side, passing it between the layers of material.
Pull the thread a little and cut it off, so the tip remains inside.
This is how the work will look from the face:
So - from the reverse side:
And this is the leg itself:
Master class and photo: Natalya Pykhova
Luxury is in the details: DIY brooches and buttons
How to sew a button with four holes on a thread stem
Life hack: how to mark the position of buttons and loops using an elastic band
How to sew a button with two holes
These buttons are the most commonly used. First you need to draw a cross with soap, the center of which will coincide with the center of the button. Tie a tight knot and trim off any excess thread if it sticks out of the knot. Pierce the fabric with a needle as shown in the photo. The knot should be between the lines diagonally, and the needle should come out on the line of sewing the button.
After this, we put the button on the needle and sew it with a few stitches to the fabric. If the thread is folded in half, then it is enough to pierce it three times. It is advisable to get into the same punctures. Before completing the process, the needle should be brought out between the fabric and the button on the front side, and a knot should be tied, catching the threads. For strength, it is enough to make two (three) such knots and cut the thread.
Here is the button sewn on. Notice what the reverse side looks like. There are no knots on it. The threads lie flat and are concentrated in one place.
How to sew a button with four holes
Such buttons are also used on different types of products, from coats. I took a large button. Since there are more holes in it than in the previous one, there can be many sewing options. It depends on your imagination. I decided to sew with a diagonal cross, so I placed the holes at an angle to the intended soap cross. If the holes are located along the lines, then the principle of sewing will be the same.
Similar to a button with two holes, we make three punctures in the directions we need, and bring the needle between the fabric and the button on the front side. This can be done both from below and from above.
Buttons with four holes are not very convenient in the sense that the area they are sewn to the fabric is larger than the slot of the loop into which they are threaded. Therefore, very often they stretch the loop. To prevent this from happening, it is better to tighten the threads a little. To do this, you need to make two (three) windings of the main threads under the button. After this, tie a knot on the threads.
Cut the thread and finish the job. The button is sewn on, making a neat cross on the reverse side.
Sew on a button with holes
- First, mark the place for sewing. To do this, place the coat on a flat surface and fasten it with all the remaining buttons. We even it out, smoothing it with our hands so that the top and bottom match, there is no pulling anywhere, there are no folds.
- Draw a line in the empty slot with chalk.
- We unbutton the product, place a ruler along the fastener so that its edge divides the existing buttons into halves.
- We make another one on the horizontal mark - a vertical one along the ruler to make a cross. This place will be the center of the button to be sewn.
- We unwind the thread a little more than half a meter and cut it off.
- We thread one end into a needle, make a knot on the other, leaving a small tail.
- In the place marked with chalk, we pierce the fabric from the outside with a needle and pull the thread towards the wrong side until the knot stops.
- We string the counter button from the inside and pull it back.
- We pass it through the holes in a large button and, using several stitches, loosely, slightly moving it away from the surface of the product, we make a bunch with a buttonhole.
- We build the “leg” with our own hands. To do this, pull the fastener, wrap the thread bundle between it and the material with the remaining thread until a tight column is formed. We fasten the thread on the front and then on the back side and cut off the excess.
Important! There should be a play between the smooth button and the fabric that corresponds to the thickness of the coat at the location of the fastener. Otherwise, dents and wrinkles will soon appear around the fittings, and it will be very difficult to fasten the item.
How to sew a button to a coat
On items such as fur coats, sheepskin coats, and those with rather thick linings, buttons are sewn on in a special way. Not one, but two buttons are used in one place. From the front side and from the back side. This is done for strength.
A knot is tied and the fabric is pierced as in the case of a button with two holes. The thread is threaded through one of the holes in the top button, and a match is placed under it. This is done in order to create a distance between the surface of the material and the button.
Then you need to sew on the top and bottom buttons at the same time through the same punctures. After several punctures, the thread is brought to the front side, the match is removed, and all the threads are pulled together with several turns of the main thread. A false leg is created on which the button will be held. It is necessary to tie several knots and secure the thread. The height of the leg depends on the thickness of the product.
This is what happened as a result. Buttons are sewn on both sides.
As you can see, there is really nothing complicated, and everything is done in an elementary way. Now you know how to properly sew buttons by hand. If you have never tried to do this, now you will definitely succeed.
1. If you use double-layered thread (when sewing buttons with holes), you must ensure that the thread does not twist. Otherwise, the threads may not lie very evenly, which will ruin the appearance of the buttons.
2. For thin fabrics it is better to use thin threads, for denser ones - thicker ones.
3. When using double-fold thread, there should not be many punctures. Two or three are enough. If there is a single thread, then there should be more punctures, which may not have a very good effect on the material.
4. Make sure that the direction of the threads when sewing buttons is parallel to the loop and not perpendicular to it.
Knowing these little tricks, you can sew on any button without any problems. And, if you want to make an unusual detail out of it on your product, then I suggest you take a look at the article “”. There you will see how creative these ordinary objects can be. With your own hands you can make a button out of not just a decoration, but a talisman that will make your wishes come true.
I hope that everything about sewing buttons by hand has become clear to you, and now you can easily handle it yourself.
If the material was interesting to you, share it with your friends. Give them the opportunity to learn more about sewing and crafts.
Subscribe to the news and stay up to date with all events!
The magic of a sewn button
What is a button? A common item of clothing these days. And a long time ago, it was the most important magical amulet that scared away evil from a person. Even the word “button” or “button” itself comes from the word to scare, but it can also become your amulet, programmed for wealth and good luck. Would you like to try the magical effect of buttons for yourself? To do this, make your deepest wish and select the sewing method shown below. In the evening, fasten the button to the wrong side of your favorite garment.
HOW TO PROFESSIONALLY SEW BUTTONS TO OUTER CLOTHES? THE MOST COMPLETE INSTRUCTIONS! Of course, the easiest way to sew on a button is to give it to your wife. But, if, by an incredible coincidence of circumstances, you yourself are a wife, then below you will learn so much about buttons and how to sew them on, as you have never known in your life. What types of buttons are there? If you look globally, there are only two types of buttons: Flat (with two, three or four holes). These are the main buttons on a coat, raincoat, jacket or jacket. Sew on using a thread stand (instructions below). It helps avoid loop deformation and makes fastening easier. Flat buttons can be sewn on without a stand, but only for beauty and without functional load (for example, on the vents of jacket sleeves). Buttons "on the leg". They are sewn on without a stand (the function of the stand is taken over by the “leg” on the button). Choosing the right button If you are sewing on a button that has not come off, but want to update the buttons on your outerwear, then take their shape, color and size seriously. Of course, they can be of such unearthly beauty that then “everything is like a fog” and you want to buy it right there and sew it on right away. But it is better to pull yourself together, otherwise the result may be unpredictable. There are only three rules: Buttons must be in harmony with the style and material of your clothes. Therefore, choose the color and shape carefully. Buttons should not be too small or too large. Otherwise, they will either unfasten endlessly and thus be incredibly annoying, or while you are fastening them, you will break three nails, develop two calluses and break the loop. How do you know which size is right? Try it. Take a button that has not yet been sewn on and conduct an “in-and-out” experiment with it. When choosing a button with a stem, evaluate the correspondence of the size of the stem to the thickness of the material to which you will sew. To prevent it from sagging or, conversely, having difficulty fastening it. Choosing the right needle Everything is very simple here: A thick needle is suitable for sheepskin coats, fur coats, leather jackets and coats. Fine needle – for light cotton fabrics and medium-sized buttons. Choosing the right thread Thread color For leg buttons, the thread should match the color of the fabric. For flat buttons - in the color of the button itself. Thread Quality Cotton thread is not the best choice unless sewing on buttons is your lifelong hobby. They quickly wear out and tear. Reinforced threads are the best option! You could say eternal. And, of course, the thicker the fabric, the thicker and stronger the thread should be. Thread thickness It is better to use a thread folded in half (a total of 4 folds). This is not so much for the sake of durability, but for the sake of saving you time. Two or three stitches and the button will be sewn on! Thread Length A doubled thread should not be longer than the distance from your elbow to your hand. Otherwise, you will get confused and tired of pulling the needle to the ceiling. A button down is a must! Since we sew buttons to outerwear, we cannot do without a button. A subbutton is a plastic flat button of the simplest shape with round or elongated holes, usually transparent. Sewn on the wrong side, simultaneously with the main button. That is, it was created not for beauty, but for reliability. What is a subbutton for? For “heavy” winter clothes (fur coats, sheepskin coats, etc.) buttons are very important! Because the load on the main buttons is too much. Judge for yourself: either you wrap yourself in a scarf three times and fasten all this beauty on top, then you run with leaps and bounds after the bus, or you just walk, but for a long time, thoughtfully and with long steps. Therefore, the top and bottom buttons suffer especially badly, and all the others - no less. And buttons are what make their life much easier and take the load off significantly. Let's sew! So, we folded the thread in half, threaded it into a needle, tied a knot at the end, and cut off the excess tail. Prepare the fabric. If wrinkled, iron or steam. If you are sewing on a torn button, then get rid of the remnants of thread in the place of its former habitat, everything should be clean. Mark the location of the button. Of course, everything should be symmetrical and even. Sew on a flat button To prevent the fabric in the area of the button from stretching and tearing, you need to sew it on with a small stand of thread. The length of the stand must correspond to the thickness of the side on which the hinges are made. A little trick: To make a stand of thread, you can use a match, a pen rod or a roll of paper of the thickness you need. It sounds scary, but it's easy to do. Start from the wrong side. Pierce the fabric with a needle at the intended point. The knot will remain on the surface; later we will cover it with a button. Put a button on the needle, from the front side, first with one hole, then with the other. Puncture the needle a second time from the front side, stepping back 1-2 mm from the first puncture. Pull the button towards the fabric. Not tight - leave room to form a stand. Bring the needle through the hole in the buttonhole. Form 3-4 similar stitches. Make a final puncture and bring the needle out between the button and the material. Form a tight and strong stand by evenly wrapping 3-4 stitches around it. Make sure that the wrapping does not gather in one place, otherwise you will get an unsightly thickening. Make the last puncture under the button stand, bring the needle between the button and the material, secure the thread in any convenient way and cut. Important! Decorative (finishing, non-functional) buttons do not have a stand. Sew the button “on the leg”. Great news! For a button “on a stem,” there is no need to make a stand of thread, which makes our life much easier. The exception is the very wide thickness of the side. The button should be positioned so that its shank is parallel to the buttonhole. Perform the first puncture with a needle and thread, from the wrong side, strictly at the intended point. The knot will remain on the surface; later we will cover it with a button. Place the button on the loop and make a second puncture in the fabric, stepping back 1-1.5 mm from the first and pulling the button quite tightly to the surface. Insert the needle sequentially into the holes of the subbutton and puncture at the very first point. Pull the button tight! Form 3-4 similar stitches. Bring the needle between the fabric and the button and make two wrapping stitches, forming a loop and tightening the knot. Make the last puncture under the foot of the button, bring the needle to the back side and carefully trim the threads with scissors. How to fasten buttons correctly? Yes, yes, even for this banal daily action there are instructions. And those who follow them are 99% likely to forever forget what stretched and torn loops are. The main thing in this matter is not to force the loop. The buttons must be inserted exactly along the buttonhole slot. That is, if the loop is horizontal, insert the button horizontally, if it is vertical, insert it vertically. When unbuttoning buttons, the rule is exactly the same. We inserted it along the loop and carefully pushed the button inside out. That's all! But, of course, sewing on buttons is a task that is better to see once than to read a hundred times. So be sure to watch our video, which will remove all doubts and teach you how to sew on buttons like a pro! Did you like the article? Give it a class! Are you looking forward to a video on the topic? repost!
Hello, my dear readers!
Recently, my first-grader son was given an assignment at school: bring fabric, thread with a needle and various buttons. They were taught to sew on buttons, both boys and girls. The son did quite well and received a “5”. I brought home a rag with neatly sewn buttons :), even without loops and knots.
Buttons sewn by my son
And I thought that the ability to sew buttons correctly is very, very useful. And I decided to write about it. I’m sure every mother has to sew on these same buttons from time to time. And if your children are lively, active, mobile and inquisitive, you have to pick up a thread and a needle and return the buttons to their place more often :).
And you and I are also sewing mothers, so we can’t do without sewing on buttons.
And on purchased items, the buttons are often sewn on quite weakly, and they often need to be sewn on again. Otherwise, they will get lost, and you will have to look for a replacement that matches the color and shape, which is not always easy.
Selection of threads and buttons
The threads used to sew buttons must be strong enough so that the button does not easily come off. To check, you can try to break the thread with your hands. If you succeeded, and quite easily, definitely, a button sewn with such threads will also come off easily.
(Out of habit, I check all new threads this way. From time to time I encounter defective threads that break easily, regardless of the thickness and composition of the threads).
The thickness of the threads should correspond to the size of the button and the item on which it is sewn. For example, to sew a button on a summer shirt, you should not use thick threads.
The color of the thread depends on the button itself. If the button is on a leg, the threads are taken to match the color of the fabric. If the button has 2 or 4 holes, match the color of the button.
(Here I am sewing a button not onto the product, but simply onto a piece of scrap material, so for clarity I use white threads).
How to secure thread when sewing on buttons
Here you can and should do without knots. To do this, fold the thread in two folds. We insert the ends of the thread into the eye of the needle. Use a needle to grab several threads of fabric in the place where the button will be sewn on, and thread the thread, but not all the way.
Thread a needle and thread into the resulting loop.
and carefully tighten.
Thread, you can sew on a button.
How to sew a button
It depends on the type of button. It can be with 2 or 4 holes, or it can be on a leg.
A button with holes is sewn on so that there is a small leg underneath it. That is, so that it is not pressed tightly against the fabric. This is necessary to make it more convenient to fasten it.
It is convenient to use a match or a toothpick here. Place a match under the button and sew it on.
On the wrong side, we try to make needle punctures in the same places.
Since our thread is folded in half, it is enough to make 3-4 stitches. For a button with 4 holes, 3-4 stitches for each pair of holes.
Then remove the match from under the button. And we make 6-8 turns of thread under the button. That is, we wrap the thread under the button with the threads with which it is sewn to the fabric.
And we take the thread to the wrong side, where we fasten it.
Fasten the thread
To do this, from the wrong side we again grab several threads with the needle, you can also grab the fabric.
We pass the thread through them, and again insert the needle into the resulting loop.
Tighten the thread tightly.
Thus, we tied a knot, which secured the thread.
For greater strength, you can do this again so that there are 2 knots. Don't be afraid, they turn out very small, neat and unnoticeable.
And one more little secret :). It is better not to cut the thread at this point. It won’t turn out very neatly, and there is some chance that the knots will unravel.
If you are sewing a button to a product, then bring the thread between two layers of fabric. And cut, leaving about 3-5 cm of thread to the button. These 3-5 cm of thread will remain inside the product and will not be noticeable, either from the front or from the back side. But you can rest assured that nothing will bloom :).
Here I simply sewed a button to a piece of fabric, and brought the thread to the front side, but under the button, and cut it there.
Thus, there are no “tails” left on the wrong side :).
It’s easier to sew a button on a finished leg
We fasten the thread in the same way. And with 3-4 stitches we sew the button behind the leg.
There is no need to wrap the button with threads and make the leg yourself; the button has it ready-made. On the wrong side, we also try to make game punctures in the same places.
Then we fasten the thread in the same way and move it between the layers of fabric. But buttons are never sewn onto one layer of fabric.
And here's something else I found on the Internet:
Perhaps you will be interested. In general, buttons with 4 holes can be sewn on in different ways. You can place stitches in different ways.
Methods for sewing on a button with 4 holes
And you can attach special meaning to this location!
For good luck, for attracting money, for success...
As they say, believe it or not
