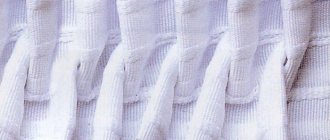
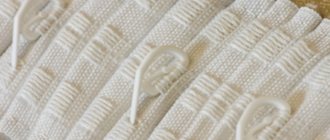
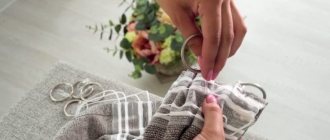
In the modern world, there is a large number of different curtain accessories on the market. The accessories help to decorate the fabric, hem it and quickly hang it on the cornice without spending a lot of effort. Curtain tape serves just to achieve this goal! Curtain tape is fabric strips of different widths; several thin ropes and laces are stretched along their entire length.
This simple accessory consists of a special braid of different widths, into which a thin cord is threaded.
If you take a closer look at such a tape, you will notice in the middle a layer of denser material; it serves to attach the curtain to the cornice; ropes are needed to create beautiful draperies and folds. Curtain tape can be made from completely different materials, they can be natural cotton or linen, or they can be synthetic, transparent and colored.
Curtain tape allows you to create uniform folds when tightened.
What is braid or tape for curtains used for:
- Processing the upper edges of tulle or curtains.
- Attaching curtains to the curtain rod using hooks or special metal clips.
- Creation of draperies and folds of various sizes and shapes.
The frequency and density of drapery depends on the degree of tension of the cord.
In sewing stores you can find a large number of different types of curtain tapes. In total, the assortment includes about 70 varieties. They differ from each other in the following parameters:
- The material from which the curtain tape is made.
- Fasteners. These can be plastic hooks or metal clips.
- The type of drapery that results in width.
It can be adjusted as desired from maximum to light smooth waves.
Which curtain tape to choose, decide for yourself, based on your goals and financial capabilities.
Types of curtain tapes: overview
Types of curtain tapes
Curtain tape is a fabric strip that is sewn to the back of the product. The ribbon contains cords that allow you to adjust the width of the material.
Braid can create a chic drapery on any fabric. It is also convenient that you do not need to sew additional loops for hooks. This reduces the time of sewing tulle and helps to quickly pull it together with thread on the sides. The braid allows you to adjust and fix the width of the curtain.
Designers use several types of curtain tapes. Here's their review:
- Narrow ribbon - up to 4 cm .
- Wide - up to 15 cm.
- With tucks.
- Forming bows.
- With a small number of draw-out pockets for hooks and an increased number of them.
- Different in assembly coefficient - from 1.5 to 3 . This determines how often the folds will be placed on the product.
- Sew-on - attached to the product using a seam. cars.
- Adhesive to the product with a hot iron.
- Fixed to the cornice using adhesive tape with loops.
Also, the curtain tape can come complete with the following items:
- Eyelet rings
- Special seals
- Pockets for fastening with hooks
- Cords for tie.
When selecting braid, you need to take into account its length, which depends on the size of the folds that you want to create on the product.
Common mistakes made by newbies
In some cases, novice craftsmen may have problems. Lack of experience often leads to avoidable mistakes. The instructions below will help you get the firmware installed correctly the first time.
How to choose the right door to your apartment?- Kitchen design in Khrushchev: useful tips for those who have a small kitchen (100+ photos)
Which laminate to choose?
- After washing, the material may shrink and, in principle, cannot be used further. This can only be corrected later by cutting and re-stitching. However, this is easy to avoid - you just need to leave extra supply of tape.
- Often, laces fall out of place, causing irreparable damage. The best way is to tie strong knots on the sides that will prevent it from moving freely. The best solution would be to make pockets on the reverse side. The ropes are placed in them, after which they are fixed and will no longer be able to fall out.
- In the middle of the tape there is a tightening seam, which is easily damaged during operation. If you cut it, subsidence will occur. It will not give the proper tension.
Tulle gathering coefficient for curtain tape: what does it mean?
This term denotes a ratio equal to the fabric to that already collected using a ribbon. It depends on the complexity of the pattern and there are such assembly coefficients:
- 1,5
- 2
- 2,5
- 3
For example, if you buy a strip with a coefficient of 2 , then from tulle 4 m wide, you will get exactly 4 meters of a beautifully draped transparent curtain. This indicator can be found on the packaging for the accessories.
Worth knowing: The assembly factor is also taken into account when purchasing the ribbon itself. After all, it is attached to a flat fabric and pulled together only before it needs to be hung.
To find out the required length, multiply the width of the cornice by the gathering factor +6 cm at the edges.
Preparation of material
Before you start sewing a curtain, you need to calculate exactly how much fabric and textile accessories we will need. And then properly prepare the material for sewing.
Algorithm of actions:
- We calculate the dimensions of the curtains and braid.
- We add a margin to level out the bevels and shrinkage of the material.
- We check the material for shrinkage.
- We prepare threads to match the fabric, tailor's tape, chalk, sharp needles, pins, scissors, and iron.
We calculate the sizes
The width of the planned curtain is equal to the width of the cornice, multiplied by the “K” factor, plus 15-25 cm for bending the sides and shrinkage.
For example, a cornice is 150 cm, braid parameter K=2.
150 * 2 + 25 = 3.25 meters.
Add 12 cm to the length of the curtain for hem:
- 2 cm for the hem of the top of the curtain;
- 10 cm - on the bottom.
Length of the braid = the sum of the width of the folded curtain plus 50 cm for shrinkage/safety.
Checking for bevels and shrinkage
We are considering the material for the future curtain, whether it is cut evenly when purchasing. A canvas with a pattern is easier to align. Plain fabric is aligned so that the edge is strictly perpendicular to the grain thread. The bevels are cut off. We carry out the check by securing the cut vertically and looking for any distortions or tension on the side up.
It is necessary to buy fabric with a margin of 15-20 cm. We take textile accessories 50 cm longer.
Avoiding the consequences of shrinkage
- The straightened piece of fabric should be washed without powder in warm water, dried and ironed. After this operation, the material will not shrink.
- Wet and dry the tape before sewing to avoid the effects of shrinkage.
Setting up the machine correctly
1. Adjust the thread tension.
To make the seam beautiful, you need to adjust the degree of thread tension. We carry out the test on a small piece of matter. The stitching should be even and the threads should not stick out.
2. Adjust the presser foot pressure on the fabric.
Strong pressure from the foot crushes the material and tightens it. It is impossible to iron such a seam with an iron. Therefore, it is necessary to adjust the presser foot pressure according to the type of fabric, especially when sewing organza and voile.
Preparing the curtain
The SL is hemmed onto an already prepared curtain.
- First, we cut off the factory edges on the fabric. When folded, they tighten the fabric.
- At a distance of 1.5 cm from the edge, pull out the vertical thread. We make a cut along the formed line and bend the side edge. We carefully stitch it, followed by steaming.
- Fold the bottom, stitch, steam.
- We process the top of the curtain. We make a 2 cm hem, iron it delicately, avoid deformation, and sweep it away.
- Only after this we sew on the textile strip and form the drapery.
Tulle mesh: how to sew curtain tape?
The curtain tape is sewn to the tulle mesh.
For the tulle mesh, it is recommended to use a translucent nylon ribbon. In this case, the ribbon will be less noticeable. Choose the color of the fabric. The width of the strip is no more than 6 centimeters . How to sew curtain tape to mesh tulle? First prepare the tulle and ribbon:
- Leave an extra 3-4 cm on each side of the braid.
- Also leave extra centimeters ( 3-4 cm ) near the fabric.
- During work, do not allow strong tension on the fabric and threads.
Step-by-step instruction:
- Iron all the tulle. Fold 1 centimeter of fabric over the top and iron.
- A curtain ribbon is applied to the folded fabric. 5 millimeters from the edge .
- Use a thread to secure the ribbon to the fabric.
- Sew evenly on the machine. There are as many lines as there are cords in the tape.
- Trim the ribbon so that each edge is one and a half centimeters shorter than the fabric.
- Make two folds on the fabric. First, fold it completely, then part of the tape.
- Sew the edges of the fabric. The main thing is that the cords are not sewn into the collar.
- Pull the tulle to the required width.
To secure the tulle, it is most convenient to use special clothespins.
How to sew a wide curtain tape to tulle and make folds: instructions, photo
Curtain tape with which you can make folds
To change a boring interior a little, you don’t have to rush to the store for building materials and wallpaper. It will be enough to change the curtains on the windows. This step will not only save money and time, but will also add newness to the room. For example, buy new tulle and sew it to a wide curtain tape. Here are instructions on how to sew such a braid to tulle and make folds:
First you need to choose the right tape:
- For tulle, you need to take transparent braid, so it will not show through and will not spoil the look of the curtain.
The next step is to correctly calculate the required length of the tape:
- The length of the ribbon should be proportional to the length of the tulle.
- Calculation of the length of the tulle and, accordingly, the tape is made based on the size of the window opening plus 10-15 centimeters .
- For example, the length of a window is 1 meter , then it is recommended to take tulle in a ratio of 1/2 or 1/3 . Where 1 is the length of the window, and 2 or 3 is the length of the tulle, respectively.
- That is, for 1 meter of window length you need to take 2 or 3 meters of tulle.
Curtain tape sewn to tulle
Next, let's look at the process of sewing tape to tulle:
- The first step is to sew the sides and bottom of the tulle.
- We turn the top edge 3 centimeters (no more) and iron the bend.
- Applying the ribbon to the wrong side, step back 1 centimeter from the top edge and secure the ribbon to the tulle. You can baste or use pins and needles.
- Once the ribbon is secured, stitch along the top and bottom edges. If the folds are supposed to be complex, you need to stitch the tape near each cord.
After the ribbon is sewn, you need to make folds by tightening the cords. When the folds are ready, hang the tulle on the curtain rod.
Tips for beginners
Beginners often have problems when filing. A large curtain size and unaccustomed hands are not your best friends, so it is unlikely that you will be able to avoid mistakes.
But you can give some useful tips:
- Textile adhesive tapes are not suitable for wool fabrics. The curtains will lose elasticity in this area and the drapery will be uneven.
- Always hem from the wrong side, not from the right side. And try not to make a mistake, otherwise everything will have to be redone.
- Always test your machine on a separate section of fabric before hemming. Products often suffer serious damage.
You can also watch video instructions on how to tighten curtain tape. This way the drapery will be smooth without crooked folds.
How to sew a narrow curtain tape to tulle: instructions, photo
Narrow curtain tape sewn to tulle
If you decide to change the design by replacing curtains and tulle, you need to know some rules. First, you need to decide what folds you want to see on your future curtain. If you like complex folds, then you need to take a wide curtain braid. Well, if it is light transparent tulle, then it is better to take a narrow curtain tape. Here are instructions on how to sew a narrow curtain tape to tulle:
- Calculate the required amount of tulle and the ribbon itself. Remember: the length of the curtain tape is equal to the length of the tulle +25 cm .
- The calculation is made strictly depending on the length of the window opening. If you like a lot of folds, then you need to take tulle at a ratio of 1 to 3 . That is, for 1 meter of window length, 3 meters of tulle.
- If you want to make a design with a small number of folds, then the coefficient will be correspondingly smaller.
- Now overcast and stitch all sides of the tulle except the top. 1-2 centimeters is made on the upper side .
- After the fold is made, iron the curtain thoroughly.
- 0.5 centimeters from the top edge , apply the curtain tape and baste it by hand.
- Now stitch the tape along the top and bottom edges.
Tie the edges of the cords on the curtain tape
- Once the ribbon is sewn, make folds. To do this, pull a special cord and tie the edge into a knot.
After this, we even out the folds along the entire length of the tulle and hang the curtain on the cornice.
Options for decorative folds
Braid with different “K” coefficients forms various types of draperies. The “K” value is indicated on the hardware label.
Drapery options are grouped in the table.
| Types of drapery assembly | Features, attachment, SL size, “K” coefficient value |
| "Accordion" - easy assembly | Narrow parallel pleats for thin and delicate fabrics. Transparent LH: 6 cm, K=1.5 Hook fastening to a string, thin rod. |
| “Pencil” (“columns”) – classic version | Narrow vertical folds. Wide three-row LH: 7.5 cm, K=2.5. Hook attachment. |
| "Sleeves" or "wave" | Round folds. Three-cord SL: 9-10 cm, K=2. Suitable for long curtains with detachable hooks. |
| French folds | Fan assemblies with three tucks and two pockets 14 cm deep. Double-row L: 8.5 cm, K=2. Optimal for any fabric. Recommended for long curtains. Do not overtighten the cords - the pattern will be disrupted. |
| Double pleated | Three rows of narrow folds in a checkerboard pattern. Four-cord SHL with two pockets: 10 cm, K=2 |
| Counter pleats | Double-row SL: 7.5 cm, K-2. Under detachable hooks. |
| Diamond folds. Varieties: “butterfly”, “waffles”, “checkerboard” | Formed into rhombuses. Double-row four-cord SL: 7.5 cm, K=2.5. Lay 4 lines along the cords. |
| Flemish assemblies (“glasses”) | The fold consists of 3-5 tucks that make up the bottom of the glass, transitioning into a large rounded gather (the top of the glass). Wide four-cord fittings: K=2-2.5. Fastening with detachable hooks. Suitable for long curtains. |
| Bow drapery (bow) | Flat folds laid in opposite directions form a bow. Double-row, two- or four-cord tape 5 cm, K=2.5-3. Recommended for short curtains, frills. Not suitable for sliding curtains. |
| Trellis fold | It is formed by two counter-directed tucks. Three-cord tape with three stitched rows |
| "Tulip" | The lower part of the SL is gathered, and a fold is made on top, reminiscent of a tulip. The form is reinforced with filler. |
| One-sided folds | The gathers are directed in one direction and are represented by even tucks. |
| "Chicken feet" | Three pintucks at the bottom of the HL, diverging upward. |
When buying braid, test it. Rigid, neat assembly guarantees a beautiful appearance of the product.
How to sew curtain tape to tulle diagonally: show in the instructions
Curtain tape sewn diagonally to the tulle.
Today's design delights are full of unexpected and unusual solutions. Curtains or tulle hanging diagonally are no exception. If you have a design idea in which the tulle will hang on a baguette in an unusual way, then you need to approach this idea accordingly.
Having decided on the size and number of folds, you need to choose a curtain tape. For light tulle, a thin transparent braid is perfect. It’s easy to calculate the required amount of curtain tape:
- In the usual case, the length of the ribbon is equal to the length of the tulle.
- In our version, the number of meters of tape will be equal to the length of the tulle folded diagonally.
Curtain tape sewn to the tulle diagonally
. All other steps are the same as when the tape is sewn along the top edge. We show in detail in the instructions how to sew curtain tape to tulle diagonally:
- First, bends are made on all sides.
- Each fold is ironed and stitched using a sewing machine.
- When all four sides are ready, the tulle is folded diagonally, in the shape in which it will hang on the curtain rod.
- The tulle must be ironed at the fold location.
- Secure the fold with pins or make a mark along the entire length.
- Then apply the tape, stepping back a few millimeters from the edge.
- Secure the curtain tape to the tulle with pins.
- Sew the tape along the entire length of the tulle, from the top and bottom edges. Make sure that the stitching does not cross the ribbon cord.
- While sewing, keep the ribbon, like tulle, taut.
When the ribbon is already sewn, tighten it with cords, thereby forming folds. Next, hang the tulle on the cornice.
