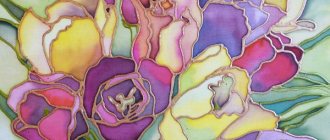
People have learned to create batiks since time immemorial. This technique involves applying a design to fabric. Residents of Indonesia, India, Africa, and Japan were especially fond of art.
Women, of course, did such painstaking work. The technology for creating batik varies depending on the method of applying the design. It is better for beginners to start with simple techniques, and as their skill develops, move on to more complex options.
Types of batik
Batik experienced its heyday in the modern world in the second half of the last century. At that time this technique was extremely popular among hippies. Young people adopted the secrets of art from each other, resulting in original clothes with psychedelic patterns. Today, batik as a type of handicraft is back in fashion.
This technique can be performed in various ways:
- cold - when, before creating a pattern, a contour is applied to the fabric with a special compound;
- hot - the design is created using liquid wax, which is washed off with gasoline at the final stage;
- knotted - the fabric is first tied into knots or tied with thread, and then dipped in dye.
Sometimes painting is carried out without drawing an outline. This technique stands out as a separate type.
The most difficult thing is to create hot batik; mastery of this art does not come immediately; craftswomen master it as they gain experience. The cold method of creating batik is considered simpler. The knot technique can be considered just as simple and no less interesting. Already the first experiments using this method can please you with amazing results.
How to make a frame
We fasten four wooden blocks of the required length together with self-tapping screws at the corners, so that in the end we get a square or rectangular frame. The thickness of the block can be any, but it is better to take a not very thin block (while working, the frame with the stretched fabric should be placed on a flat surface so that the fabric does not come into contact with the surface).
We attach the fabric to the frame using pushpins. You can attach a slightly damp canvas. First we pin the corners, then we fix the buttons in the center of each edge, then we attach all the other buttons.
Paints, reserve and tools There are many paints for fabrics, both domestic and imported. Be sure to buy paint in a specialized store, since the appearance of the product and its durability will depend on the quality of the paint.
The reserve for cold batik can be of different composition. You can buy a ready-made reserve or make it yourself.
Possible composition of the reserve for cold batik:
- Rubber glue - 200 g, gasoline - 250 g, beeswax - 50 g.
- Rubber glue - 200 g, gasoline - 250 g, paraffin - 50 g.
- Rubber glue - 215 g, gasoline - 200 g, Vaseline - 85 g.
To prepare the reserve, you can use a metal or glass jar. The jar is placed in a metal container (ladle, pan). Cook the reserve in a water bath.
First, paraffin is placed in the jar, then rubber glue and other additives. Gasoline is poured in last, carefully and gradually. This is done so that, if necessary, the amount of gasoline can be reduced or increased depending on the density of the resulting mass. Mix everything well and remove the prepared reserve from the electric stove. Store the reserve mixture in a jar with a tightly closed lid. Be sure to follow fire safety precautions and remember to open the windows to ventilate the room.
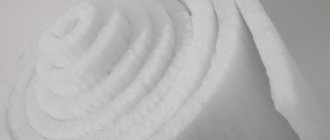
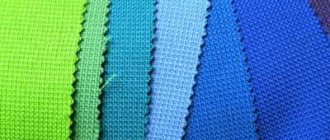
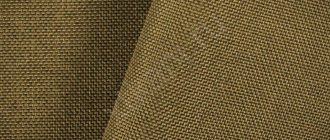
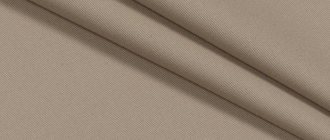
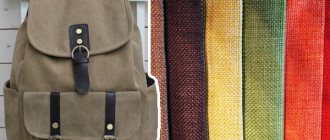
Suitable fabric for batik
Painting in the batik style is somewhat similar to creating stained glass, but instead of glass, thin fabric is used as a basis. Dense material is not suitable for these purposes, since the reserve (composition for applying the contour) will not be able to saturate thick fibers well.
As a result, the paint will flow beyond the intended area, and the design will become sloppy. All types of batik are created only on thin natural fabrics. You can use cambric, silk, double thread. For beginning painters, cambric fabric is most suitable as a base.
A little history
Scientists have not come to a consensus about the time of the emergence of the art of batik. Most believe that this method of decorating fabric appeared in the 13th-14th centuries. But its roots undoubtedly go back to ancient times. The birthplace of batik is considered to be the Indonesian island of Java, where this art was most developed.
I had a chance to visit a workshop that was engaged in artistic painting of fabrics. Indonesians are true craftswomen who decorate clothing and interior items with unique and fabulously beautiful designs.
Types of hand-painted fabrics using the batik method Batik is a method of painting fabric in which areas of the fabric that should not be painted are covered with a special mixture - a reserve. Paraffin, beeswax or various resins can be used as a reserve.
Batik paints
Batik paints can be purchased in a set that includes a palette of different shades. For beginners, it is better to buy dyes separately. In order to try your hand, it is enough to purchase just a few color shades. You can take different types of paints to understand which one is more convenient for you to work with.
Based on their composition, the most commonly used paints can be divided into two groups - acrylic and aniline. Dyes must be marked accordingly:
- "For batik";
- "Silk";
- "SILK".
For those who are just starting to paint on fabric, it is better to choose dyes from domestic companies whose products are inexpensive. Imported paints are more expensive, but they have a more varied palette. Such dyes stay on the fabric longer and do not weigh it down. When creating batiks, plastisol paints can also be used; after they are applied, a luminous pattern appears on the fabric.
Acrylic paints
Acrylic paints are easier to use and can be easily fixed to fabric with an iron. They are produced in cans, jars, and tubes. Acrylic is a polymer material and dries quickly in air, so brushes and palettes must be washed immediately after use; later this will be much more difficult.
Paints on this basis are unstable, they are gradually washed off from clothes during the washing process. Color acrylic pigment is also available in powder form. Before application, the crystals are thoroughly rubbed so that the coloring is uniform. Acrylic paints are best used for paintings that will later decorate the interior.
Aniline dyes
Aniline dyes are fixed only with the help of steam, so they are more suitable for experienced craftsmen. Securing designs over steam is quite difficult. At the steaming stage, an inexperienced craftswoman can easily ruin the work. At the same time, aniline-based paints have their advantages.
They are more durable and paint the material better. From the inside, the design turns out as bright as on the front side. The dye does not weigh down the fabric, unlike acrylic. For those who intend to create batiks on a regular basis, it is advisable to stock up on an autoclave, in which the steam is at a high temperature and is under pressure.
Some imported dyes are sold complete with a fixative. In this case, the process of fixing the picture is simplified. The finished product is simply rinsed in a fixing solution. If aniline is used in powder form, it must be handled with caution, as this substance is poisonous and inhaling its particles can be harmful to health.
LiveInternetLiveInternet
Quote from Ananta
Read in full In your quotation book or community!
Batik materials.
| Materials for batik: •Fabric • Frame • Paints • For hot • For cold • Auxiliary • Safety precautions |
MATERIALS What we need: FABRIC. It is better to choose natural fabric. Composition: silk, cotton, fine wool, linen. The easiest way to start is with cotton. Convenient to learn and minimal costs. Cotton will be used for panels and paintings. But for clothes, especially after waxing - in hot batik - it will not work. For “training” you can take scraps from former sheets and shirts. The plus is that they have been washed many times, which means they will easily absorb paint, but the minus is that the paints noticeably fade on old fabric. The disadvantage of synthetic fabrics is that they do not absorb water well enough and the paint may not flow well. When choosing a fabric, you can do the following: drop water or paint on the washed fabric. If the drop lies on the surface and does not spread, then such fabric will not be suitable for painting. If the paint applies easily, you are good to go. But it is worth considering that at high temperatures (when fixing paint with an iron or in the oven), synthetics tend to melt. Silk is the best option. Ideal for making clothing and accessories. The price is higher, but working with silk is more interesting, and there are more opportunities. When purchasing in specialized stores, just ask for painted silk (unfinished, undyed). There are many types of silk. Here are a few varieties. Information from the website of the Moscow Silk Factory "Red Rose" https://www.red-rose.ru/product.html Classic silk fabrics include: • Crepe chiffon - the thinnest, lightest transparent crepe fabric of plain weave. Available plain-colored and printed. • Crepe georgette is a thin, translucent crepe fabric with a plain weave. It is characterized by increased elasticity and low creasing. • Crepe de Chine is a plain weave crepe fabric. The fabric is opaque, with moderate shine and a grainy surface. • Satin is a crepe fabric with a satin weave. The reverse side formed by crepe threads has a granular surface. Facial smooth, shiny. The colors are smoothly dyed and printed. • Toile is a fabric made from natural raw silk, plain weave. Smoothly painted. Used as lining fabric. There are all kinds of silk fabrics on sale - jacquard, textured silk, stretch satin, wild silk. But painting on fabric with a complex texture is more labor-intensive, and for batik, as a rule, the same classic toile, satin, and crepe de Chine are chosen. What to stretch on To paint the fabric, it must be secured to a frame or hoop. Hoops are a convenient option for small-sized projects or for painting a piece of clothing. But to experience all the splendor of batik, you need a larger size, and here you will need a frame. Choose whether to put together a stretcher of the required size yourself or buy a ready-made one. Ready-made special frames for batik are convenient because they are usually sliding - you can set them to any size. They also come with special devices for tensioning the fabric (hooks, holes for buttons, etc.). To secure the fabric to a wooden frame, we use ordinary buttons or pins. If the fabric is very thin, we help with a needle and thread. The “classic” buttons with a bent corner, which, cutting into a wedge, will push apart and tear the fabric, are not very pleasant. How to put it on the frame. Those who sew know very well how clothes are cut. The shared thread is always verified. The direction of the grain thread is along the edge. Across - respectively transverse. The fabric hardly stretches along the lobes, but stretches a little more across. But along the bias, diagonally, the fabric can be very stretched and deformed. Therefore, when tensioning, we try to maintain this strict parallelism-perpendicularity. We don’t pull the corners as much as we can, but on the contrary, we try to secure them from the middle to the corners. You will need quite a lot of buttons or pins. Pull it quite tightly so that the fabric does not sag. If the frame is homemade, not sliding, and its size is larger than the piece of fabric that we will paint, then you can sew pieces of other, unnecessary fabric along the edges so that the direction of the grain thread coincides for different fabrics, and then pull it, securing it to the sewn “unnecessary” ones. flaps. Don't forget an important thing - we take the fabric with a small margin on all four sides. When our batik is ready, it will need to be decorated - hemmed or inserted into a frame. PAINTS There are many colors, good and different. For every taste and budget. Let’s conditionally divide the paints according to the method of fixing them to the fabric – “for ironing” and “for steaming”. To fix the paints “under the iron” on the fabric, just iron them. For paints “for steaming” this is not enough; in addition they need to be treated with steam for about an hour. When purchasing paints, check with sellers about the method of fixing the paint. Paints have different compositions and different properties. For example, if iron-on paint dries out, you cannot use it - it will not dissolve with water. Paints “for steaming” can be diluted again. This is the basis for some effects that are not available when working with iron-on paints. For example, interesting things can happen if you wash painted fabric with water or sprinkle dried “dust” from such paints on a wet fabric. Also, paints that require steaming are more fluid, it is easier to create a smooth color transition with them, and they are usually used for artistic painting. There is an opinion that they are brighter, darker, and it seemed so to me too, until I tried black iron-on paint. Prices for paints vary greatly, but it cannot be said that dyes “for ironing” are significantly more expensive than dyes “for steaming” - it all depends on the specific paint manufacturers. Next I will tell you about paint brands that I know. In fact, there are many more of them. I started with the Hobby Batik set from Gamma. Such paints must be steamed. There are 2 options in the photo. The set in a dark box is no longer produced, but is still sold in some stores. There is a new product in a light box; the shape of the jars and packaging have changed. The content remains the same. I especially liked the instructions included in the set, where all the technologies are described concisely, clearly and clearly. The set includes five paints (red, yellow, green, blue, black), a glass tube and a reserve in a tube. The tube and reserve are used in cold batik. They are written about below. Please note that the reserve in the tube is thicker than necessary for work, I highly recommend buying an additional jar of reserve. In addition to the five colors included in the set, you can buy additional colors separately: orange, scarlet, turquoise, wheat, red-brown and violet. The advantages of such paints. Firstly, accessibility. The Hobby Batik set is sold in many places. Check your local office supply store. Inexpensive price. Ideal for studying.. Another plus is that after drying, they can be diluted with water. But don't overuse it! Of course, it is not worth diluting endlessly dried paints - their quality will deteriorate. These paints need to be steamed, and the downside of such paints is the risk that the paint will run when steaming. The paint doesn't stick to fabric very well. If you are planning to paint items of clothing, then unpleasant surprises are possible during washing and steaming. And the paints are quite suitable for wall panels - over the years spent on the walls of the sunny room, my works have never faded. Another of the domestic paints that need to be steamed is aniline paints in tablets, sold in hardware stores. The pros and cons remain the same - affordable price, but the risk of ruining the work when steaming. Now about iron-on paints. Quite recently, Gamma released sets of acrylic paints for fabric - 5 or 9 colors, reserve, tube, instructions (photos taken from the Gamma booklet). You can also purchase other colors separately. There are 25 shades in total, 9 of which are fluorescent (well, very bright). The advantages are the same - affordable, convenient to learn, bright and rich colors, convenient to attach. They may have already appeared at your “nearest office supply store.” Imported, expensive iron-on paints. I used German paints “Javana” and “Marabu”. Very good, bright, wonderful choice of colors. I was surprised when the ironed batik did not stain the water in which I washed it. Advice. If you buy such paints, do not expect to buy several primary colors and mix them to get the rest of the shades. It’s better to buy exactly those that will be used in your work and mix as little as possible! The colors are already complex and mixing can result in mess. The colors are fixed with an iron, but are very stable, adhere perfectly to the fabric, do not fade or wash off. High quality at a high price. “Javana” and “Marabu” are very well-known brands, but there are many more manufacturers of paints, reserves and other materials for batik. Don’t forget to check with the sellers about the method of fixing the paints, what and how the paint is used. Here everywhere we are talking about liquid paints, “silk”, “for silk”, and there are also coating, thick paints – “textil”, “for textiles”. They are applied to the fabric without spreading. This is a completely different painting technology. For example, domestic acrylic (thick) paints, such as Olki. Read the instructions carefully - they may contain restrictions on the composition of the fabric - for example, the dye is only for natural fabrics or the percentage of synthetics in mixed fabrics is strictly limited. How to apply dyes to fabric. “Steaming” paints are usually very concentrated. They are pre-bred. For cold batik, it is recommended to dilute the paint with a soda solution (1 teaspoon per glass of boiled water) in a 1:1 ratio. For hot batik - just water. Solutions are stored for no more than two days. For paint solutions, stock up on plastic jars and cups of cottage cheese and yogurt in advance. Iron-on paints are no longer used after drying. And use additional containers for them, like a plastic palette - you just waste time washing it, since the paint dries very quickly during the process. It’s convenient to brush directly from the jar and mix it on a saucer or in the same plastic jar. How is paint applied? Brushes - like in watercolors - round, soft (squirrel, kolinsky), large - for covering large areas, small - for “jewelry work”. Don't forget to rinse them thoroughly after use. Especially after iron-on paints. If you need to cover an evenly large surface, you can use foam rubber (cut from a household sponge), or cotton wool wound on a stick, pencil, or fork. You can secure the tampon with threads. Using a cotton swab instead of a brush is very important in hot batik. When paint is applied over wax, the brush can easily be damaged and “greased” on the waxed surface of the fabric. MATERIALS FOR HOT BATIK In hot batik, areas of the fabric where paint should not get in are covered with melted wax. In classic batik, natural wax was used; now wax refers to paraffin or stearin candles. They are all sold in the same hardware stores. The most ordinary household candles. The more colorless the better. To apply wax, artists use special watering cans, tubes, and modules, but for starters, we can easily get by with a brush. The brush should be hard. It’s better to have a couple of different brushes – larger and smaller. Preferably bristles and a long wooden handle. Long - so as not to get burned. Wooden - so that it does not melt or heat up. After work, the wax will harden and cannot be washed or removed. We’ll leave it until next time, and we’ll work with them in the same way. In a word - wax brushes are brushes ONLY for wax, or “that you don’t mind”. In order to melt the wax, you will need technical utensils. This is a tin jar in which we will place the wax, and a saucepan, ladle or bowl - into which we will pour water and place the jar with wax, that is, heat it in a water bath - on the stove or electric stove. Stock up on plenty of old newspapers in advance. They will be necessary to remove wax from the finished work. New ones are not suitable - they can stain your masterpiece with printing ink. Letters in a mirror image are not part of your plan, are they? MATERIALS FOR COLD BATIK In cold batik, an outline is applied that prevents the paint from spreading. The contour, reserve composition or reserve - this is the same thing - is a thick mass, and in order for it to lie on the fabric in a thin, even line, the contour is applied from special tubes with a thin “spout”, and most often from a glass tube. The tubes have a thin spout - the width of the line depends on its diameter, and the expansion is a reservoir for reserve. The tubes are very fragile, so it is better to buy several at once. When purchasing straws, pay attention to the spout. I have never seen absolutely identical tubes, and each of them makes its own line. To fill the tube with reserve, the instructions recommend using rubber bulbs. But in practice they inflate with their own lungs. Take your time and be very careful! To work, it is enough to half fill the convex reservoir of the tube. The outline from the tube is drawn almost in the same way as we usually draw or write, for example, with a pen, although much more slowly. But if you hold the tube in one place for a long time, instead of a line you will get an ugly blot. You can try to make your own device for applying the reserve, replacing the tube. Take an empty helium pen refill. Remove the tip. Rinse and blow out the tube of ink and gel. Use a needle to squeeze out the ball from inside the tip. Insert the tip onto the rod. The tube is ready. Use exactly the same as glass. It’s a little inconvenient to draw the reserve, but with such a tube you get amazingly thin lines. Apply the reserve slowly and carefully - very thin lines have a catch - they let the paint through. And since the tip is iron and quite sharp, it can scratch and snag fabric. An important rule is that we always rinse the tubes very thoroughly after use. As the reserve dissolves, the tubes need to be washed. If with water, then water, and if with gasoline, then gasoline, or a solvent for oil paints, and then hot water and soap. We rinse it like this - add water or solvent several times and blow it out with force. If the reserve hardens, it will become impossible to use the straw. Imported reserves are sold in tubes with thin, long tips. The tips are replaceable, with holes of different diameters. From the same tubes the reserve is applied to the fabric. When it runs out, you can purchase a jar of reserve, and, placing the reserve in a tube, continue to work with it. When applying from tubes, you need to constantly squeeze out the reserve, but it flows out of the tube on its own. It is much more convenient to work with a tube. Now about the reserve. Let's conditionally divide it into two groups - those that are diluted with water (as a rule, these are imported reserves), and those that are diluted with gasoline (as a rule, domestic ones, in particular Gamma). There are also decorative contours that can be used to decorate your work, but for all their magnificence they do not hold paint, they cannot be used as a reserve, they are not intended for this. There are even felt-tip pens for fabric, which makes painting much easier. The advantages of the imported reserve are a variety of shades, including gold and silver, a neutral smell, just dilute with water, just wash the tube. The downside outweighs many of the upsides. It doesn't hold the paint well enough. Apparently this is due to the fact that it dissolves in water. For example, if you cover the fabric generously with paint or water on both sides of the contour line, the one that is dissolved by gasoline will withstand such “pressure”, since it does not dissolve from water. It can let paint through only where the contour is interrupted, or when the paint flows over the contour. And if you try to do the same with a water-soluble reserve, then the paint solution will begin to color the outline and, as it seemed to me, wash it away. As a result, it retains the paint somehow arbitrarily, unpredictably, and unpleasant leaks appear. Therefore, it would be best to start with the proven “Gammovsky” reserve. The only disadvantages of such a reserve are the unpleasant smell, and the fact that it is necessary to wash it off the tubes not with water, but with the same gasoline or solvent. Until recently, Gamma produced only a colorless reserve, but now new items have been added to it - red, blue, green and black (and later also gold, silver and copper). If the reserve is too thick for work, it is diluted with gasoline. When the room is cool, it may become thicker. To soften the reserve, lightly warm the jar in your hands or place it in warm water for a short time. An important note: such a reserve cannot be stored in the cold. At first glance, it remains the same, but will lose its properties. If the reserve freezes during transportation, it will no longer work! I’ll tell you separately about the colorless reserve. I like to work with a clear outline. If you dye the fabric in several layers, the contours turn out to be multi-colored, with tints. When dry, the colorless outline becomes almost invisible. And painting almost “blindly” is very inconvenient. You can mix colorless and very little color (the main thing is that they both dissolve with gasoline). And you can also tint the contour with oil paint, previously low -fat, or an oil paint pigment. In a separate small jar, we interfere with the reserve, a drop of gasoline and a drop of oil paint until a homogeneous state. In this way, it is difficult to achieve a saturated color in the reserve, but it is quite enough for it to be noticeable on the fabric. The colorless contour applied to the fabric and the dried -up colorless circuit can be “detected” if you moisturize the fabric. If the reserve does not flow well from the tube, a little dilute. Import - water, Gammovsky - gasoline. A little bit, by trial and error, until it goes smoothly, without interruptions. If you overdo it and dilute very strongly, the contour on the fabric will blur, and there will be no paint. Banks from under the photographic cloth with caps are very convenient. In one, you can store the reserve diluted for work, and in the other gasoline or solvent for laundering the tube. When there is no way to buy a reserve, or does not suit ready, there is a desire to cook it yourself. On interesting sites dedicated to the batik and not only, good recipes of the reserve and descriptions of how to do it were found. Recipes from the Daria website of someone else's https://darja-21.narod.ru/batik-kurs.htm recipe-1. • 100 grams of rubber adhesive of brand “A” (other brands are not suitable) • 25 grams of paraffin (one household candle of about 30 g) • 100 grams of gasoline (any) • 1 grams of rosifoli components are mixed as follows: in technical fireproof dishes (pots ) Pour gasoline, glue is dissolved in it, then a finely bulged paraffin and rosin is added. The dishes are placed on a small fire, in a water bath (preferably on an electric tile, because the composition is very easily ignited) and, constantly stirring, boil for at least 15 minutes, not bringing to a boil. An indicator of readiness is the dissolution of all components and uniformity of the composition. Recipe-2 • 200 grams of rubber glue only brand “A” • 200-250 grams of gasoline or diluent No. 2 • 20 grams of paraffin (candles). Prepare as in the first recipe. Store the reserve in a dark place, in a glass bowl, hermetically closed, otherwise gasoline will evaporate and the composition will thicken. If such a nuisance happens, then you should not despair and throw away the already suitable R.S., all the more. Take the same gasoline that was used to prepare the composition, and just dilute R.S. to the desired density, if necessary, then a little warming it in a water bath. After preparation, or dilution, the composition can be used no earlier than in a day, having previously tried it on an unnecessary piece of fabric. Recipes from the site "Gallery of Nadezhda Shubina", material from the book "Gifts from the Battika", author A. Ya. Zholobchuk https://members.tripod.com/ ~shubina_gallery/libary/batik/batik5.htm
| Cold reserves for batik, in grams. |
| When preparing a reserve for cold batik, you should strictly adhere to fire safety rules. The reserve is cooked in a water bath over a closed fire (electric stove with a closed spiral) in a well-ventilated area. Crushed paraffin is poured into a metal or glass jar. And in order for it to melt, they place it in a water bath in a small vessel with a small amount of boiling water so that the jar of paraffin can stand vertically in it. If the reserve is prepared in a glass jar, then a piece of cloth should be placed in the water at the bottom so that the glass jar does not crack in boiling water. When the paraffin melts, pour rubber glue, wax, rosin, Vaseline into it in accordance with the recipe, stir well and then gradually pour in gasoline. The mixture is heated in a boiling water bath, thus obtaining a homogeneous mass, ready for use - reserve. The prepared reserve is stored in a tightly closed container. When stored for a long time, paraffin and wax precipitate, and gasoline evaporates. Therefore, before use, the reserve should be heated in a water bath, and if it thickens, add a little gasoline. The amount of gasoline in the proposed recipes can vary between 20-30g. less or more - it depends on the thickness of the rubber glue. In the process of making a reserve, gasoline should not be poured all at once, but in parts, while testing the reserve on the fabric that is to be painted. In cold batik, the reserve is not removed, but remains on the fabric. The most used and widespread is recipe No. 1. The resulting reserve is transparent, gives a clean outline, and is not visible when dry. Reserves with the addition of beeswax are plastic, spread well, but when dry they form a yellow outline. If the work you have in mind requires a colored outline, then the reserve can be tinted. For this purpose, artistic oil or printing paints are used, which are degreased for this purpose: the paint is squeezed onto porous paper, squeezed under a slight press. When the grease stains on the paper become barely noticeable, this means that the paint has degreased and can be mixed with the prepared reserve. You can use several color reserves in one work, depending on your ideas. Please note that reserves using oil and printing inks take longer to dry. A properly prepared reserve has good fluidity, ductility, and fabric permeability. If too much paraffin is added to it during the preparation of the reserve, it will not saturate the fabric well and will lie on top of the so-called sausage. Such a reserve is very brittle - it will allow paints to pass through the cracks (“shoot”), which will overlap each other and mix in places you don’t need at all. If the reserve contains more than the required rubber glue, then, when drawing contour lines from the spout of the tube, thin hairs of glue (cobwebs) will separate and settle on the fabric in unnecessary places. It is almost impossible to remove them, and during painting they form unpainted lines. So we will need - textile; — frame and buttons (or hoop); - paints; - brushes; - for hot items: wax (candles), wax brushes and technical utensils (tin can and bowl) and newspapers; — for cold: reserve and straw (or reserve in a tube); We will also need a hair dryer (for drying), an iron, an electric stove (or stove), vinegar (for rinsing and steaming), gasoline, solvents, containers for diluting paints or reserves. Always have cloths and napkins on hand. Now about safety precautions! I am constantly haunted by information about the dangers of materials used to create batiks. They said that aniline dyes were terribly harmful (to the extent of my chemical illiteracy, I considered all domestic fabric dyes to be aniline), I read terrible things about paraffin vapors (in hot batik, when candles are melted in a water bath) - I beg you, don’t breathe on it! I myself can hardly stand the smell of gasoline-soluble reserve. Conclusion - be sure to always work in a well-ventilated area. It is very important! If you change your mind about making batik because it is “harmful,” then pay attention to the fact that all materials are sold freely, and at the same time as materials for a hobby. Children and pregnant women practice batik in courses and studios. There is no need to be afraid, but there is no need to be too careful. Please also note that everything you will work with - gasoline, paraffin - are highly flammable substances. Textile paints are even on the prohibited list when sending parcels by mail, as flammable. And heating wax will be much safer on an electric stove than on an open fire. Be extremely careful! source - https://ireneya.livejournal.com/52753.html |
How to make sketches for batik
Sketches for batiks are easy to create using a stencil or a simple template. Suitable pictures are simply downloaded from the Internet. Drawings can have any theme. Popular sketches include flowers, plants, abstract compositions, and portraits.
It is better to train on simple drawings; over time you will be able to move on to more complex sketches. By the way, craftsmen often take pictures for stained glass painting as a basis.
The sketch is drawn on paper without resorting to drawing small details. The size of the design should correspond to the size that needs to be obtained on the fabric. The contours of the sketch are outlined with a marker. After this, the design on the paper is attached to the fabric from the wrong side with paper tape. Through thin material, the contours will be easily visible. After this, you can proceed directly to painting on the fabric.
Cold batik - execution technique
Hand painting on fabric requires patience in any case. At first, the drawing will take a lot of time. With the arrival of experience, acceleration will appear. It is better to do work in a well-ventilated area, since the reserve substance used to apply the contour releases substances that are harmful to the body. It's better to start with a small drawing.
Step by step technique:
- The fabric must be secured using an embroidery hoop to prevent it from sagging. To complete large format work you will need a special frame. In this case, the fabric is secured with special hooks included in the kit.
- Nearby are pre-prepared paints, a reserve substance and a glass tube for it. If the circuit is enclosed in a tube with a tip, a tube will not be needed.
- A paper sketch is placed under the material and secured at the bottom.
- Using a soft pencil, transfer the design onto the fabric.
- The designated contours are outlined with a reserve. It is convenient to draw the reserve substance into the tube using a syringe, placing it on the opposite end of the tube. The pear contracts and the reserve enters the tube.
- After the outline has dried, check it by running a damp brush over the fabric. It is necessary to ensure that the water does not cross the contour line.
- In those places where the contour turned out to be weak, it is repeated.
- Now you can start coloring the picture with paints.
After finishing the work, the batik is removed from the frame and the design is fixed with an iron. The temperature regulator must be set to the type of fabric. Each section of the pattern is ironed for 3-5 minutes. It is better to paint in a work coat or old clothes so as not to get stained with paint.
Tools
Paints are applied to fabric using a brush. Brushes come in a variety of shapes and sizes, with natural and artificial bristles. For small details, take thin brushes with a sharp tip; it is convenient to paint the background or large details with a flat foam brush.
The reserve is applied using a glass tube with a pointed end or a plastic bottle with a metal nozzle. You can buy them in the store along with paints. A drawing pen is also used to apply the reserve.
To remove paint smudges, you will need cotton swabs and sponges.
Well, now that the preparation for work is completed, you can rest a little and proceed directly to hand-painting the fabric using the batik method.
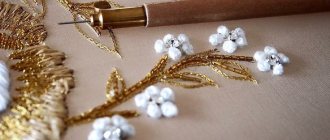
Features of painting on silk
Silk painting is suitable for more experienced craftswomen, because it is an expensive material that would be a shame to ruin. In this case, to create batik you will need paints designed specifically for silk. For a beginner, ready-made kits with a contour and pattern already applied to the fabric are suitable. The needlewoman will only have to paint the work like a child’s coloring book.
For those who have artistic skills, the free-style painting style is suitable. In this case, you will not need a pre-created template. During work, the craftswoman will be able to better demonstrate her creativity. In addition to silk paints you will need:
- round squirrel brushes;
- water tank;
- cloth napkin for brushes;
- cotton swabs;
- colored outlines;
- palette.
Having prepared everything you need, they begin to create the picture. This can be done either cold or hot. In the second case, you will additionally need melted wax. It is applied instead of a reserve substance using a thin brush or dripping through a tube.
After the wax outline has dried, painting begins. Landscapes made using the batik technique on silk turn out very bright and impressive. Even if only one flower is painted in the picture, it will look very elegant. Silk painting is often used to decorate the interior, placing the canvases in frames and hanging them on the wall.
Free painting
This batik technique especially shows the artist’s talent; here it is impossible to create a drawing using a ready-made template. The individual uniqueness of the work is created.
Basically, free-form painting is practiced using aniline dyes or oil paints with special solvents. You can conduct various experiments, adding a reserve or salt effect somewhere, or using alcohol-containing substances to moisten the tissue.
Knot batik technique
The process of creating knotted batik is always a mystery. It's difficult to predict exactly what the finished drawing will look like. Even if you perform two jobs using the same technique, they will still differ from each other. This technique is often chosen by advanced masters. It’s easier for them to predict in advance how the painting will turn out.
During the work, the fabric is not only tied with a knot in several places, but also twisted. For the first time, you can create batik according to a sample by watching the corresponding video. In the future, there is usually a desire to experiment. To begin with, it is better to master the technique on not too expensive fabric, taking scraps of cambric or thin cotton.
What a beginner should consider when creating knotted batik:
- It is desirable that the fabric be light and plain.
- You will also need strong cotton threads for this work. They will play the role of a reserve, preventing paint from leaking to the neighboring area.
- In the middle of the napkin you need to mark the center and, holding it, make a cone out of the fabric.
- Then the material is pulled in several places with thread.
- You can fold the fabric differently - like an accordion.
- The threads should pull the fabric very tightly.
- The tied napkins are dyed using the immersion method.
Then the dye solution is allowed to drain, and the napkin is rinsed in a weak shampoo solution to remove paint that has not been absorbed. When using acrylic dyes, after drying, the workpiece is ironed to fix it.
The batik technique is very popular today as a hobby. Some needlewomen are seriously interested in painting on fabric and even begin to create products for sale. In the field of handicrafts, all professionals once started with a hobby, managing over time to become a real master of their craft, who embodies creative ideas, develops their own techniques, and constantly comes up with something new, without stopping there.