The nuances of repairing jeans using patches. Photos of ready-made solutions and original ideas.
We need clothes not only to cover the body, but also to create original fashionable images.
Jeans are a wardrobe item that has found its way into almost every person’s closet in a short time. They, like any other clothing, are prone to damage, holes and tears.
Because of our attachment to clothes, we often find it difficult to part with our favorite jeans. That’s why we arm ourselves with a needle and thread to repair them and extend their service life.
Fortunately, they are not going out of fashion. On the contrary, it throws up new fashion trends in their appearance. Therefore, putting patches on jeans, even in prominent places, is very appropriate and stylish.
Let's talk in more detail about the nuances of repairing torn places on jeans and techniques for eliminating them.
Areas Most Prone to Holes
There are many ways you can use to create a high-quality patch. However, they should be chosen taking into account where the cut or hole occurred. They usually occur in the knee area or between the legs.
Decorative patch options will help get rid of such defects, for which you should use guipure or contrasting fabric. You can also apply a patch using internal linings to match the color of the jeans or by darning.
Flap materials
The materials of the flaps that are used as patches may be different. They depend on the type of patch, its purpose and some other factors. The most commonly chosen materials are:
- natural or artificial leather, which is highly resistant to wear;
- the main material of the garment where the patch is needed, or as similar as possible to it;
- any textured types of fabrics, for example, suede or velvet;
- decorative thermal applications;
- ready-made patches that are decorated with drawings or ornaments.
Types of patches
There are quite a variety of ideas for what patches can be made from. At the same time, needlewomen have access to methods that allow them to design several types of patches. They are represented by samples:
- bilateral;
- set-in;
- invoice;
- lining;
- artistic type of performance.
In this case, you can use both independently selected materials and factory-made thermal patches. Applications are also popular and widely available in stores.
How to hide holes with decorative elements
A traditional patch or darning does not always look neat and can greatly spoil the overall appearance of the jeans. We offer you several ideas of what you can make patches from:
Women's jeans will become even more feminine and delicate if you use lace or guipure as a lining at the tear site. The color of the lace can match or contrast with the jeans.
You can add a few more specially made small holes and abrasions to the existing gap and decorate them with beads or small beads. You can sew on the decorations in any order.
Patches on jeans with elements of satin stitch embroidery look original. These ready-made patches imitate embroidery on jeans and reliably hide holes.
Purchased thermal stickers with images of your favorite cartoon characters, animals or flowers are perfect for repairing children's jeans.
Materials and tool kit
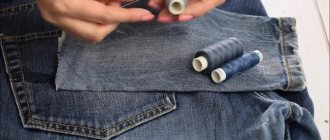
In order to install a patch efficiently and reliably, you need to prepare a patch of the selected type. You will need to use non-woven or double linen, and also stock up on:
- sewing machine;
- a set of needles for manual sewing;
- a set of tailor's pins;
- scissors.
And the proposed action algorithms will help you install the patch correctly. The results of the work can be assessed by photos of patches for jeans.
patch patch
To complete the work, you will need to follow the following sequence of actions:
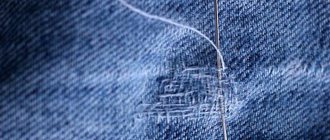
- Cut off all visible thread ends on the hole.
- Use a buttonhole stitch to carefully repair the damage.
- Having chosen the material of the appropriate shade, cut the flap to the required shape. In this case, its size must exceed the size of the cut or hole.
- Having turned the cuts on the flap 10 mm, baste the patch along the front side.
- Using a sewing machine, finally secure the patch in place.
Experienced needlewomen manage to install a fringed patch with high quality.
Patches
If you can’t disguise the patch, use stripes. They can be made from the original denim fabric or have a decorative function.
If you choose a purchased decorative patch, ask the seller if it has an adhesive base.
Some patches simply need to be sewn on using a sewing machine or by hand; some are glued on the reverse side with a special hot-melt adhesive. Such patches are applied to the repair site and ironed with a hot iron.
Whatever patch you choose, it is better to first glue it with adhesive “Spider Web” (it is sold in sewing stores), and then stitch it.
Note!
- Knitting a snood: ideas, patterns, options and practical advice from masters on how to knit a snood
Backing patch
This method also does not require any special skills. Enough:
- using scissors, make a patch the size of which exceeds the size of the damage on the jeans;
- baste it from the inside out, placing the front surface towards the top;
- Using threads of a suitable color, zigzag the hole a couple of times.
Thanks to threads chosen to match the fabric, you can perfectly disguise the patch. But the cuts of the hole can also be folded to the wrong side. After this, you will need to carefully stitch along the front surface in the direction from the folded edges.
Types of patches
If we imagine a picture of patches on jeans, the first thing that comes to mind are old-fashioned square-shaped patches sewn on top of the main fabric. In fact, there is more than one way to fix jeans.
From the point of view of patch fastening technology, there are:
- Set-in;
- Invoices;
- Double sided;
- Lining;
- Artistic.
Also, depending on the location where the hole appeared, the patch can be decorative or hidden. For example, in the area of the knees, where the fabric of jeans stretches the most, only decorative patches are used, but between the legs you can sew a completely invisible patch.
Using a leather patch
Instructions on how to make a patch for jeans using a leather patch will help save a seemingly hopeless situation:
- Remove the remaining threads and finish the cut using a buttonhole stitch. You can use the manual method, overlock or zigzag.
- Make a patch from leather material, choosing the appropriate shape.
- Install a patch in the damaged area, and then baste.
- Machine stitching along the edges of the patch will help attach it to the defect site. You can also use a stitch. For an aesthetically pleasing appearance, the sections are processed, for which you should take zigzag scissors.
Decorative patches on clothing elbows: 11 creative ideas
That's how we women are! Give us variety all the time, new fashionable things, a new dress and more of everything else! And you and I have golden hands, and we can sew, and knit, and patch, and remake, and embroider, and dance in the end
We are fashionistas, frying pan girls!
It happens that you like an item so much that you don’t want to take it off, but want to wear it and wear it. But the tendency is that everything eventually wears out, stretches, loses color and shape. And if the item is vintage, from an old grandmother’s chest... And suddenly it comes into fashion, but adjustments to the appearance are required. Then this article will help you.
Like most wardrobe items, the elbow patches have their own historical, military past. Elbow patches were first worn by German soldiers during the First World War. Soldiers often crawled on their elbows so that the enemy would not see them and therefore the elbow part of the sleeve would become worn. At first, the soldiers put patches on the torn places, and a little later they began to sew them on in advance to protect the fabric from damage.
So the idea of sewing patches was picked up by hunters. But the patches were convenient for them to simplify shooting from a point-blank range. They also sewed patches onto their shoulders to protect the fabric from chafing with a belt or the butt of a weapon.
Then, no one knows how, but such patches appeared among students of prestigious American universities: Yale, Dartmouth.
A little later, clothes with patches became a mandatory attribute of the ivy style and over time became popular all over the world.
Today, patches can be seen not only on sweaters and sports jackets, but also on shirts, cardigans and almost all clothing. It's just relevant and fashionable. And it is already regarded as a kind of decor on clothes. Fortunately, there are now a great many ideas on how to make patches not look boring and contrived.
Here is a selection of 11 ideas on how to make an old or new thing unique and look stylish at the same time.
1. The classic option is leather patches on outerwear, jackets, coats, etc. They look very stylish, especially if you play with color and shape. Make them, for example, in contrast to the main color.
2. An extravagant option that not every man will agree to. But if you have a sense of humor, then why not. You definitely won’t find such a repeat on the city streets.
3. How to make a cute hole on a knitted item? Very simple! Create a composition - “as if it’s supposed to be that way.”
4. A hot topic for those who do felting...
5. Masterpiece. You can, for example, embroider with a cross or beads, as I love the whole picture, with your own plot, you will definitely be the only one so amazing...
6. Rhinestones, stones, beads, glass beads, everything that glitters and is sewn on. In my opinion, the idea is super!
7. Find an old knitted napkin and voila!!! Moreover, lace and knitting are in fashion now.
8. Simple and tasteful.
9. Interesting idea for a shirt. At least for men, at least for women. We'll take it too 
10. Let's add a little naivety and childishness to the image...
11. Beautiful combination of knit and fabric.
Thank you for your attention!!!
I wish you creative inspiration!!!
Ethnic style in patch design
This option for getting rid of holes in jeans requires care and attention. Necessary:
- Process the slit, giving it the desired shape and removing excess threads. You can leave a fringe along the edges.
- Select a piece of the desired color from cotton or linen fabric.
- Cut out the patch. Its size should be approximately 10-15 mm larger than the hole.
- Baste from the inside out. In this case, the front part of the patch should be visible through the slot.
- To attach the patch along the contour line, you can use a machine stitch or a manual method.
- Decorate the patch with snowflakes and Bulgarian cross stitches. Using this method, you need to make a couple of rows around the patch. In this case, it is advisable to select the color of the thread in the appropriate tone, and embroidery will only benefit if you use floss or acrylic threads.
Rules of care
To ensure that the thermal adhesive lasts as long as possible, you must adhere to the following recommendations:
- It is better to wash a product with a patch by hand. Or, if we use a washing machine, we need to choose the appropriate gentle mode.
- The water temperature should not be higher than 40°C.
- Since most patches are bright, you may want to avoid using bleach.
- The product with the applique should be dried on a flat surface.
- It is better to iron such things either from the wrong side or through gauze.
Application of factory thermal decal
The following master class on how to apply patches correctly will help you create a high-quality patch:
- Choose a sticker or interlining. A sample of material should be taken that is larger than the size of the defect on the jeans.
- Make the cut smoother. Using an iron, secure the interlining from the inside. The adhesive layer should be located in the front area.
- A sticker is applied to the damaged area.
- Then you will need to baste the sticker. It can be secured with tailor's pins.
- A damp cloth or parchment is applied on top of the thermal application. Then an iron is passed over it, gluing the patch.
After the trousers have cooled, they can be used.
How to glue a patch with an iron
There are two options for gluing a patch to fabric.
If your patch already contains an adhesive base, proceed as follows:
- The material on which we will glue the patch must be placed and properly straightened on a hard surface so that there are no creases.
- Heat up the iron and turn off the steam option.
For better glue melting and adhesion to the surface, it is better to heat the iron to maximum. Remember that not all fabrics can withstand this temperature load. Therefore, we check whether the material is damaged in any inconspicuous area.
- We remove the protective film from the applique and place it face up on the place where we plan to glue the patch. If the thermal patch is large, it is better to secure it to the fabric with pins.
- Cover the top of the patch with gauze or paper and press firmly with an iron. Iron for 30 seconds. To glue the part well.
- We wait 2 minutes and repeat the operation from the wrong side.
For adhesive-based patches, cotton fabrics are better suited, but not coarse knitted wool. In addition, Boucle, leather, and velor are also not suitable for gluing the thermal decal.
We recommend watching the video instructions:
If your patch does not have an adhesive base. No specialized equipment is needed to glue such an applique. For this we need thermal film. When choosing thermal film, you need to pay attention to the types of adhesive base.
There are several types of glue:
- Polyamide glue. It has high elasticity and sticks in steam mode. It tolerates washing and dry cleaning well. But it holds less firmly on synthetic fabrics with special impregnations.
- Polyethylene glue is compatible with a wide range of fabrics and is suitable for gluing small parts. Glues without steam.
- Polyester glue is more suitable for synthetic fabrics. Glues without steam. Reacts well to washing and dry cleaning.
So, to glue such a thermal patch:
- Take thermal film of the required size. Apply the glossy side to the applique from the wrong side.
- Heat the iron and iron it through paper or gauze with the matte side of the thermal film facing up.
- Trim off the excess thermal film along the edge of the patch. And check how tightly it is adhered to the patch. Try peeling off the film. She must sit tight.
- If everything is in order, repeat the steps from the first point.
Application of the Boro technique
The best options for handmade patches are now available to needlewomen. However, since ancient times, the Japanese “Boro” technique has come down to us, which involves the design of many equal, parallel stitches. This art is similar to darning using coarse thread and long needles.
To repair holes in jeans, it is advisable to use linen or cotton fabric. Lightweight denim will also work. The flap can be arbitrary, but the allowance for seam design is about 30-40 mm.
The algorithm for repairing a defect will be as follows:
- To prevent the slit from stretching when wearing clothes, it is necessary to process the outline with stitches forward with a needle.
- Stripes of embroidery are drawn parallel to the edges of the hole with a gap of 6-8 mm between each other.
- Lines are used to create smooth stitches. Their size from the inside should be shorter in comparison with the front surface.
- Turning the stitch to a new row is done from the inside out. The embroidery will be reversed.
- From the bottom and top parts of the patch, as well as on the sides, you need to make several rows of stitches of unequal length.
If you need to make a more stylish type of patch, then it is advisable to make stitches of different lengths and take threads of different shades.
Neat patch on elbows
A neat patch on the elbows will allow you to restore the damaged area of the fabric. To give a textile item an original look, you can use the so-called woolen heel. This will look especially interesting on a light sweater, which is sewn from dense material, or on a sweatshirt. The algorithm of actions is not very complicated:
- Prepare everything you need. You need to take a damaged item of clothing, a sponge made of thick fabric, any shape (for example, a pastry shop), felting needles, tape and wool of the selected shade.
- Now you need to mark the places where the stripes will be applied. To do this, you need to put on a sweater and stick pieces of tape on your elbows at a distance of 2-3 cm from the fold. This will ensure the patches are positioned perfectly.
- You need to take off your sweater and put a sponge in the torn sleeve. You need to place the form on it so that its lower edge is located on the tape.
- You need to lay out colored wool on top of the form.
- Now you need to felt the wool in the usual way, piercing it with a needle, which is located at a right angle. You need to work until you get a dense layer of wool without any fluffiness.
- Remove the mold and secure the patch by steaming with an iron.
You can decorate the second sleeve in the same way. A product with two decorative elements will look much more harmonious and interesting. If the work was done correctly and in accordance with the algorithm, the patches do not require any special care. They will delight you for a long time.
Features of the design of a hole on the thigh
To solve this problem, it is advisable to use a patch type patch. First, measurements are taken of the slit, and then the lace patch is made. The sample should be 30-40 mm larger than the size of the hole. Then you will need:
- by processing the sections manually using a loop stitch or a zigzag, make the lace motif neat;
- run the iron over the hole, after placing a damp cloth on it to align the cuts;
- attach a patch and baste it;
- sew it along the edges.
This option allows you to decorate the product with floral motifs or fix a patch around the hole.
Repairing holes
Let's move on to more complex objects - holes!
Stocking up:
- Threads in color, if there is no color in color, then take threads a little darker, they are less noticeable.
- A piece of fabric is the same. Maybe you shortened your jeans, maybe you have jeans of the same color and you don’t mind cutting them.
From the outside, we look at the hole in the jeans and use scissors to cut off the fringe as much as possible. We don’t make the hole bigger, but rather trim it! When broken threads stick out, it is very noticeable. If you cut this fringe, the look is immediately neater.
We substitute our piece. See for yourself - you can put a patch on top, covering the tear. The piece of fabric should be 1-2 cm larger than the hole. If there is a large hole on your jeans and several small ones nearby, it is better to place a piece of fabric from the inside and fill the place of the former hole with a machine.
How to piece, see above in the text.
What to do if the same fabric is not available
You and I know that there are no hopeless situations, we’ll look for fabric color-matched, it could be chintz or knitwear, we’ll place it on the back side of the hole so that the side that most matches the color is looking into the hole, and we’ll do the piece in the same way .
What to do if it is torn thoroughly and on a large plane
In pants, the area between the legs is the most vulnerable spot. We make a large and thorough patch. You will need material in denim color to match. We cut out a triangle on the patch from the ischial seam, along the side seam to the desired length. The second similar piece is mirrored.
This patch is applied only on the outside, as if it were a decorative element. Therefore, it is important to take into account the material for the hem, approximately 0.5 cm on each side. We sew our triangles on top to the problem area.
Using a lace patch
The damage must first be properly documented. Its edges can preferably be shaggy, although the size of the fringe should not exceed 5-10 mm. After this, a piece of lace is cut out with a size 20-25 mm larger than the hole.
A patch is applied from the inside out; it must be carefully basted. Turning the trousers inside out, sew the patch along the edges on the right side. Jeans with a lace patch will look original, but this option is undesirable when masking damage at the fold points. The patch in such a place will wear out quickly.
Beautiful, fashionable, DIY leather patches for women's, men's and children's jeans: ideas, photos
original lace patches on women's jeans
Let's add a photo of a series of designs for patches on women's, men's and children's jeans for your inspiration to repeat or create original options:
interesting ideas for patches on women's jeans, option 1
interesting ideas for patches on women's jeans, option 2
interesting ideas for patches on women's jeans, option 3
interesting ideas for patches on children's jeans, option 4
interesting ideas for patches on children's jeans, option 5
interesting ideas for patches on women's jeans, option 6 interesting ideas for patches on women's jeans, option 7
interesting ideas for patches on women's jeans, option 8
interesting ideas for patches on teenage jeans, option 9 interesting ideas for patches on children's jeans, option 10
interesting ideas for patches on children's jeans, option 11
interesting ideas for patches on men's jeans, option 12
interesting ideas for patches on men's jeans, option 13 interesting ideas for patches on children's jeans, option 14
interesting ideas for patches on women's jeans, option 15
interesting ideas for patches on women's jeans, option 16 interesting ideas for patches on women's jeans, option 17 interesting ideas for patches on women's jeans, option 18 interesting ideas for patches on women's jeans, option 19 interesting ideas for patches on men's jeans, option 20
interesting ideas for patches on children's jeans, option 21 interesting ideas for patches on women's jeans, option 22
interesting ideas for patches on women's jeans, option 23
interesting ideas for patches on women's jeans, option 24
interesting ideas for patches on women's jeans, option 25
interesting ideas for patches on women's jeans, option 26
interesting ideas for patches on women's jeans, option 27 interesting ideas for patches on women's jeans, option 28 interesting ideas for patches on women's jeans, option 29 interesting ideas for patches on men's jeans, option 30
interesting ideas for patches on men's jeans, option 31
interesting ideas for patches on men's jeans, option 32 interesting ideas for patches on men's jeans, option 33 interesting ideas for patches on men's jeans, option 34
So, we looked at the nuances of repairing jeans by sewing patches on the knees, between the legs, on the butt, above the knees, both manually and by machine. We got inspired by looking at ready-made ideas on women's, men's and children's jeans with sewn patches made from different materials.
If you have a pair of jeans with holes sitting on your shelf that you can't get around to throwing away, it's time to give them a new life. Arm yourself with several scraps of fabric and choose the best one to patch them.
Even your seams!
