The word "lambrequin" is French. It refers to a type of decorative trim or drapery (or simply curtains) that is usually applied at the top of a window or door. It is a simple way to decorate a room.
If you wish, you can easily make openwork curtains yourself. You can also use puffs. And they will look as if they were made by a master. At the same time, sewing these will not take you much time.
So, we sew “lambrequin” curtains. What are they? Lambrequins can be made of fabric contrasting to the main one. So, for example, if thin tulles and curtains are used as the main fabric, then the lambrequins can be satin, silk, with decoration, such as puffs , and no. They occupy about 1/5 of the window. Such curtains can be openwork or have a figured silhouette.
Hard and soft – this is also about the lambrequin. In the first case, we are talking about non-woven curtains that can hold their shape. In the second case, we are talking about those made from special curtain fabric. A rigid lambrequin is difficult to attach - on a separate strip and with the help of eyelets.
At the same time, the hard one can be called more noble and interesting. Where to start? Naturally, many people want to know: how to sew a lambrequin with their own hands. A master class on how to sew a lambrequin - hard or soft, for the kitchen or for the living room - begins with the advice to cover yourself with patterns. In them you can find all the useful information that will allow you to make one curtain or several at once in a simpler way. Lambrequin for the kitchen The master class “Sewing decorative curtains for the kitchen” should begin by listing the list of necessary items.
It includes: main and lining (if you need hard) fabric, non-woven lining, plank, cord for decorative tape. Making a hard lambrequin with your own hands is not at all as difficult as it seems from the outside. Even the classic method of production - on a plywood box - will be within the power of the most fragile craftswoman, and modern materials will help you complete this job in the time required for regular sewing of large-sized items. The edge of the lambrequin can have smooth outlines or sharp corners, edging made of another fabric, or additional decorative elements. None of the methods will be so difficult that it cannot be used for sewing a lambrequin at home.
Selection of materials and tools
The most necessary thing in creating decorative hard-type cornices is a frame.
This is the element that gives the structure immobility and strength. In the classic version (in theaters, Kremlin offices or palace interiors) ordinary plywood is used. But at home, it is best to make do with lightweight modern materials.
Bando or shabrak is a dense non-woven textile material with an adhesive layer applied to it. Different manufacturers have different options for bandeaus: thick and thin, self-adhesive or requiring additional processing, double-sided and single-sided.
Therefore, choosing the right quality of material does not seem particularly difficult. You can buy shabrak or dublerin in fabric stores and handicraft departments. There you need to stock up on related materials and tools:
- fabric for decorating a rigid lambrequin; additional decor, if necessary (tassels, fringe, braid, cords, etc.); threads to match the fabric; a set of pins; Velcro tape (Velcro); scissors.
For sewing, you will also need a sewing machine, which every craftswoman probably has. If the bandeau base does not have a self-adhesive coating, then you will definitely need an iron.
Before sewing a rigid lambrequin, you need to sketch the future product and draw a life-size pattern. To create a pattern, you need thick paper of sufficient length so that you can make a drawing for the entire width of the window. As a last resort, you can glue several newspapers together, but it is best to use special paper with a millimeter grid applied.
The top part of the pattern is part of a rectangle. The bottom one can be designed as your imagination dictates.
A rigid bandeau lambrequin for curtains can be made from separate parts, one of which partially overlaps the other. In this case, each element must be cut out and sewn separately. But first you need to figure out how to make the simplest base for a decorative cornice.
Eyelets
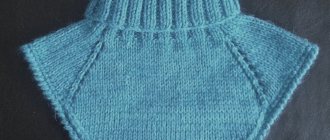
Curtains on grommets - double metal, plastic or wooden rings that are strung on round or string cornices - have been in no hurry to leave the design projects of modern halls and living rooms for several years in a row.
At the same time being a tool for attaching curtains and a fashionable curtain decoration, eyelets carry not only a functional, but also a decorative load.
Curtains with eyelets are original in themselves, so most often they are made plain and do not burden their design with additional decor.
It is only allowed to fix such curtains, if necessary, with simple tiebacks made of the same fabric as the curtains themselves.
They can be made more decorative by using an original cornice.
It can be decorated with stylish finials or choose a forged, artificially aged model with patina, rubbed gilding or convex floral or floral patterns.
If you don’t like monochromatic monotony, you can diversify the curtains on the eyelets at the top and bottom with two contrasting stripes or horizontal prints.
Spacious windows can be decorated with not two, but four canvases of contrasting colors. This combination looks very stylish and expensive.
Not only thick curtains, but also light curtains made of tulle, veil, organza, and awning are equipped with eyelets.
So that they hold well and the thin fabric does not wrinkle around the rings, the upper edge of the curtains is sealed with an additional fabric strip, eyelet tape or any other tailor's lining.
How to make a base for a rigid lambrequin?
The finished paper pattern must be cut out and transferred to the adhesive material. Trace the contours with a pencil and cut without allowances, exactly along the intended line. Since the material is hard, the appearance of the finished product depends on the accuracy of this stage.
You may also be interested in: Creating a swag on a curtain tape with your own hands
Further actions must be performed step by step, in accordance with the instructions:
Place the adhesive base on the back of the curtain fabric at a distance of 2 cm from the top edge. On other sides there should be a seam allowance of at least 1.5 cm.
If the length of the lambrequin is longer than the existing cut, then you can make a composite tape by sewing together individual pieces. If desired, fabrics can be combined. Pin the fabric to the ironing board so that it does not move when ironing the glue. You need to glue the bando with a hot iron with steam, the direction of movement is from the center to the edges.
Turn over and iron again from the front side. A lining is needed for the lambrequin. You can make it from another piece of fabric of suitable size. Place the pieces with right sides facing each other.
The glued bandeau pattern should be on top. If the width of the cut allows you to bend it in half, then you need to do just that without cutting the fabric. The front side should be on the inside, and the glued base on top. Peel off the front and lining layers along the contour of the adhesive base without touching it. Sew the fabric at a distance of about 3 mm from the edge of the bandeau or depending on the thickness of the adhesive.
Place the stitch along the side and bottom contours, leaving the upper part completely open. Trim off the excess fabric of the lining and front trim, leaving an allowance of about 1 cm on the sewn sides of the product. If the bottom has wavy or jagged contours, you need to make notches at the tops of the relief. In this case, under no circumstances should the stitching be damaged.
Do not trim the top edge. If the bandeau has a second adhesive surface, then remove the protective coating. Turn the product right side out. Carefully iron the lambrequin, rolling the stitch to the wrong side. Place a finishing stitch at a distance of 0.3-0.5 cm from the edge.
This can be done with contrasting threads, and at the same time sew on a braid or cord. Fold the edges of the top inward along the edge of the adhesive base. Iron the folds and stitch at a distance of 1-2 mm from the edge. Sew one piece of Velcro tape along the top edge from the inside out. Glue the corresponding part of the Velcro to the cornice on which the rigid lambrequin will hang.
Video of simple production of a rigid straight lambrequin:
Self-sewing the simplest base for decorative cornices makes it possible to make many different options. By complementing the rigid base with draperies, ties or other decorative details, you can create a beautiful and unusual thing for window decoration.
Openwork lambrequin bandeau
One of the design options for such a lambrequin could be openwork appliqué.
For it you need to choose a fabric of a contrasting color in relation to the base. This way the openwork weaves will be better visible. The fabric for the base can have an unobtrusive pattern, but a plain base will look good.
You may also be interested in: DIY curtain brushes - instructions, video
You can draw the pattern for the openwork yourself, to suit your taste. Intertwining stems and leaves, an ornament on one of the interior details, or a vignette you like on a box of chocolates - everything will be appropriate if you do not overload the bandeau with decorative overlays. The openwork must first be made on paper in full size, and then cut out and transfer the pattern to the prepared fabric.
There are also no particular difficulties in how to prepare material for appliqués. You will need non-woven fabric and web to connect the layers of the openwork element.
Iron the fabric for the front side with a dry iron to the adhesive part of the interlining. On its reverse side, lay out an adhesive web, and on top of it a lining of synthetic padding polyester, quilted with a thin fabric. The padding polyester should be inside the multi-layer cake.
To create clear, melted contours of the openwork, you need an electric burner. You can buy a tool in craft stores or borrow it from friends if you only need it for one time.
Having redrawn the pattern on the wrong side of the glue cake, carefully cut it out with the heated tip of the burner. Place the openwork parts on the base of the lambrequin and attach with a hot glue gun. Add rhinestones and sparkles, hanging elements, etc.
How to make a combined bandeau?
Looking at photographs of interiors, many paid attention to the lambrequins with edging. Combining 2 types of fabric on a rigid bandeau is a little more difficult than making a one-color base, but it is also quite accessible at home.
A small step-by-step master class will help you get the job done quickly and correctly:
Draw a pattern as for a regular base. Transfer it to adhesive material. Mark the boundaries of the edging element, put several vertical marks (to align the parts in the future) and cut off part of the bandeau along this contour. Glue both parts onto the fabric for the main lambrequin and its edging. Cut out the edging with allowances around the perimeter (1.5 cm on each sides).
Make notches on the side where the fabrics will be connected to each other, not bringing them to the bandeau layer by 3-4 mm. Iron the seam allowance inside out. Cut out the piece of the main part of the lambrequin with an allowance of 2.5 cm on top and 1.5 cm on the other sides. Place the edging wrong side up. Place the main part on top, also with the adhesive layer facing up.
To correctly connect the parts, you need to focus on the vertical lines drawn earlier: they must coincide with each other. Pin together and along the front side, lay a stitch along the edging at a distance of 1-2 mm from the edge, connecting the parts. Place the edging and base united into a whole fabric on the lining fabric face to face, and pin together. The adhesive base will be on top.
Cut the lining along the contour of the front part with its allowances. Connect the lining and front parts. The stitch runs along the fabric 2-3 mm from the edge of the adhesive band. Do not stitch the top of the product.
You may also be interested in: How to sew a kitchen curtain with your own hands
Turn the finished lambrequin right side out, iron it, process the edges and top edge, as when making a plain base. Add decorative elements to your taste, sewing them in the right places. Fasten the Velcro tape from the inside out and hang the rigid lambrequin on the cornice.
A classic of the genre - a real hard lambrequin
Those for whom a model based on adhesive bandeau fabric is not enough can make lambrequins with their own hands on a plywood frame.
For this purpose, you need plywood 1.5-2 cm thick and wood screws. Cut out the details of the box (sides, top bar, front wall and back). Connect the frame parts with self-tapping screws.
Prepare the fabric by cutting out a rectangle 15 cm longer than the total length of 2 sidewalls and the frame facade, and 5 cm wider than the facade. Make a gasket and padding polyester of the same size. For the lining, you need to make a rectangle 5 cm shorter than the front fabric.
Glue the padding polyester onto the box along the facade and sides. Sew the lining and front fabric. Using a furniture stapler, first attach it along the bottom border of the box.
Pull the front part of the fabric onto the facade. Bring the edges to the top of the box and shoot with a stapler. Cover the sides.
Turn the box over, place the lining on the inside, and secure with staples.
To decorate the top, cut the fabric of the required size with a hem allowance of 1.5-2 cm. Secure it with staples in the center and in the corners, then tuck the sections inward and secure them. Install hangers on the backdrop, mark their location on the wall, install fasteners and hang them.
Such a lambrequin can be decorated with cord and fringe, hanging elements, applique, etc.
p. You can attach additional draperies by laying the assembly and shooting it with staples. There can be a lot of design options, you just need to use your imagination.
A rigid bandeau lambrequin, even the most elaborate one, can be easily made with your own hands. The main thing when creating it is the clarity and accuracy of edge processing. You can decorate a rigid base in different ways.
Save
After hanging curtains on the cornice, the understanding often arises that in order to achieve a more attractive appearance, in addition to drapes and curtains, the window opening must also be decorated with a lambrequin.
If the curtains were made independently, then you can make a suitable option in the same way. In this case, it is best if this detail of the window design is rigid, providing not only a more attractive appearance of the curtains, but also visually hiding the cornice. And if you need a hard lambrequin, then you can do this work quite simply and quickly, and do it yourself.
Combination with Roman blinds
Roman blinds are one of the most practical types of curtains. Thanks to their compact design and ease of use, they are not only a stand-alone solution for window decoration, but also look great together with classic curtains.
In fact, there are no strict rules regulating the combination of curtains with Roman blinds. They are combined in tone, in contrast, to create combinations of curtains with different patterns and dissimilar fabric textures.
As for colors, it is not recommended to use colors on the same window that together create disharmony (for example, red and purple, brown and pink, green and gray) and the same color for both types of curtains.
A good solution is an ensemble of accent colors and pastel colors, for example, milky curtains and lilac Roman blinds. Another interesting option is Roman blinds with floral patterns and light-colored curtains to match them.
If we talk about the texture of the fabric, then the most practical and functional combination is considered to be one in which Roman blinds act as curtains and are sewn from light translucent fabric.
It is also possible to sew both types of curtains from fabric with the same texture, but different colors.
Similar accessories will help to combine such a set, for example, tassels at the ends of the adjusting ropes of Roman blinds and rope tiebacks with the same tassels on curtains.
They will serve not only as decoration, but will also fix the intended shapes of both curtains
What is a rigid lambrequin?
A rigid lambrequin, also called a bandeau, is understood as a decorative element of curtains made on a dense basis using fabric and various accessories.
This product received its second name due to the fact that for its production the fabric of the same name is used - bandeau, which is glued to the base material, thereby providing support for the required shape. In addition to its aesthetic purpose, gangs are also used to hide the cornice on which curtains are placed. A rigid lambrequin is also used to visually change the height of a room, namely to increase it.
Very important when making a rigid lambrequin for curtains is its height, which should be 1/6 of the length of the main fabric. In order for the lambrequin to be combined with the curtains, it can be made from exactly the same fabric or another material correctly selected in color and texture.
For decoration, you can use various accessories, fringe, lace and much more. A lambrequin made using several types of material differing from each other in color and texture and complemented with various decorative inserts and fringe looks very interesting. Thus, various patterns or designs can be created on it. The use of such a lambrequin will make the design of the window opening even more interesting, and the curtain itself, even if it is made of a plain, not bright material, will look very beautiful.
For small rooms
If possible, use minimal decorative finishing. The best option for low ceilings would be a narrow rectangular bandeau without the addition of curtains; this design will save space and look almost weightless.
Preparatory work when creating a rigid lambrequin
Before you start sewing a rigid lambrequin with your own hands, you need to prepare all the tools and materials, the main ones of which include:
- the main type of fabric of the required size or several types of them when sewing a two- or three-color lambrequin; bandeau fabric; decorative elements and accessories; threads; pins; paper; Velcro tape - Velcro; scissors, iron and sewing machine.
Bandeau fabric is a dense textile non-woven material on which an adhesive composition is applied on one or both sides. To create a more voluminous rigid cut lambrequin, you can use bandeau fabric with a foam layer. The gluing of the base material to a dense base is carried out due to exposure to high temperatures, for which the materials used, combined with each other, are ironed.
See also: Beautiful curtains with lambrequins
Options for the hall
Some interesting combinations for the living room:
- the base is matte tulle with a pattern; two-color lambrequins (one color duplicates the base) with additional elements in the form of swag and frill are suitable for it. This classic option will give the room solemn elegance;
- short curtains, long drapes and lambrequins. An original solution with the possibility of creating a unique window masterpiece;
- a combination of tulle and lambrequin in warm shades will add sophistication;
- the combination of tulle, curtains, bamboo curtains and lambrequin is distinguished by its originality. This rich harmony will give you a feeling of luxury.
Having studied in detail the varieties of lambrequins, their decorations and combinations with curtains, you can decide on the choice of a suitable composition for the living room. Determine the main accents that are worth paying attention to, taking into account the specific features of your room. A variety of curtain options for a living room decorated in a modern style can be viewed here.
Step-by-step instructions for making a rigid lambrequin
In order to sew a rigid lambrequin using the above tools and materials, you must step by step follow certain instructions, the main steps of which include:
pattern of the product in full size in accordance with the taken measurements of the length of the cornice on thick paper. Most often, the upper part of the pattern is a rectangle, and the lower part is those figures and details that the performer can desire.
A rigid lambrequin can be made of several parts, each of which overlaps the previous element by a certain distance. In this case, each individual part of the pattern must have its own pattern and it must be made separately, sewing together only at the very last stage of the work; transferring the paper pattern to the adhesive material and cutting it out without leaving room for allowances; applying the adhesive material to the wrong side of the curtain fabric in such a way that on each side of the manufactured product there is room for allowances of at least 2 cm on the top and 1.5 on all other sides; having secured the resulting workpiece with pins on the ironing board, it is necessary to completely iron it until all the adhesive fabric will be firmly attached to the curtain. After this, the workpiece must be turned over and ironed again from the front side; making a lining layer by placing the workpiece on any suitable piece of fabric, tracing the pattern and cutting it out.
Then attach the lining fabric to the main workpiece using pins so that their front sides coincide, and the adhesive fabric is the topmost layer of this “pie”. Sew all sides except the top edge, turn the product right side out and iron it thoroughly; fold the allowances left for stitching on top of the lambrequin inward and sew at a distance of 0.3-0.5 cm from the edge of the product. To make this stitch look beautiful, you can use contrasting threads or close it by sewing a decorative cord or braid at the same time as the stitching; sew or glue Velcro tape along the upper edge of the product, the counterpart of which should be attached to the cornice.
If the lambrequin has rounded or sharp curves, before turning the lambrequin right side out, it is necessary to make notches along all edges of the product at the allowances so as not to damage the stitching.
This will eliminate the tension of the fabric and allow it to lie beautifully, maintaining its shape. In addition, before sewing a rigid lambrequin, you should consider the possibility of shrinkage of the fabric. So, if such a product is used to decorate a kitchen, where conditions of high humidity are sometimes created, after they return to normal and the moistened lambrequin dries, it may lose its shape, warp or deform in any other way. In order to avoid this, before using a particular piece of fabric as the main or lining layer, it must be washed and dried.
Possibilities of decorative drapery
With a creative approach and skillful combination of elements, you can create original options for decorative drapery. In addition to the function of decorating the upper edge of the curtains, lambrequins can be used to cover the cornice or imperfections in the fastening of the main curtain panels (if necessary).
A large number of different ways of laying fabric add uniqueness to the living room environment. A large selection of colors, styles, and fabrics allows the products to harmonize with any interior, create a pleasant atmosphere, give windows unique outlines, and receive visual pleasure.
We also recommend: Roller blinds - ideal for the kitchen, but you need to choose the right one
Lambrequin on a solid base
If the density of a solid lambrequin is not enough, then as a base you can choose not adhesive material, but thin plywood with a thickness of no more than 2 mm.
In this case, all actions to cover the base with material will be performed using a construction stapler. At the same time, during production you can also use various fabrics and decorations, which are stitched and sewn to the base material before covering the plywood with it. And in order for the rigid lambrequin to look more voluminous, thin foam rubber must be glued to that part of the plywood blank that will serve as the basis for the front curtain fabric.
Having carefully studied these instructions, the question of how to sew a rigid lambrequin will no longer arise. And every housewife who has at least a little experience in cutting and sewing can quickly do it on her own, paying sufficient attention to the clarity and accuracy of edge processing to achieve a high-quality result. At the same time, she will receive maximum pleasure from the work done and will complement the interior of the premises in her home and the beautiful curtains themselves with an exclusive decorative element. Lambrequins are divided into three types. There are hard, combined and soft types of products.
For the greatest completeness of the interior, it is advisable to sew a hard lambrequin yourself. Before you start sewing a lambrequin, you need to measure the window opening to determine the size of the future product. A rigid lambrequin, decorated with flowers, in combination with even simple curtains will be a worthy decoration for the bedroom. For the lambrequin, you should provide the usual length, which will be one sixth of the total length of the curtain . The window openings will be designed impeccably.
Types of product and features of its tailoring
A rigid type lambrequin is a fabric strip duplicated with a denser lining material.
For sewing, various fabrics are used along with the main one. In this case, you can use dense fabric if it is pleated, non-woven or any other. This will create the perfect shape for the base.
The finished product must be fixed to the ceiling. In this case, you can use eyelets that are attached to a strip spaced from the cornice.
A hard lambrequin does not require folds, unlike a soft one. If you need to create a lambrequin with your own hands, then you should be especially careful when choosing a suitable fabric. Great attention is paid to the shade of the material and its main tone; it is possible to choose patterned fabric if you make the curtains plain.
Seven reasons for the popularity of curtains
Curtains, like no other curtains, can create a cozy, relaxing atmosphere in a room.
Today they have become the most common window decoration, but were once used only for draping doorways to protect rooms from drafts.
Later, having appreciated the functionality of these thick curtains, people began to use them on windows. With the advent of a large number of other methods of window decoration, the decorative and practical importance of curtains has not decreased at all, but today they look most harmonious in halls and living rooms.
However, their main advantages remain the same:
- Curtains perfectly protect the room from scorching sun rays, drafts and curious looks and sounds from the street.
- Thanks to the massive (compared to other curtains) design, it is convenient to use curtains to regulate the degree of natural light in the room.
- Thick curtains keep the room cool in hot summers and warm in cold winters and help maintain a comfortable temperature in the room.
- The decorative properties of curtains allow them to be used in the most sophisticated and elegant as well as simple interiors and make these curtains truly universal.
Traditionally, we present classic porters on one window along with an equally classic lambrequin, which visually expands the window.
But the times of heavy and lush draperies that came from palace-style living rooms are a thing of the past.
Today, designers practice visually increasing the width of the window through the use of an elongated cornice and a large amount of fabric on the curtains, and are increasingly offering combinations of curtains in which any lambrequin would be superfluous.
Let's look at them in more detail.
How to sew lambrequins correctly
To decorate the product, you can use cord or fringe, use all kinds of flowers made from various materials. The following tools and necessary materials will help you sew a lambrequin with your own hands:
- scissors; adhesive tape; sewing machine; iron; finishing materials.
If you need to start sewing a rigid lambrequin, then you need to purchase adhesive tape (Velcro) and glue (“Moment”).
To properly sew a lambrequin, the following step-by-step instructions are provided:
- An example of a rigid lambrequin template. Apply a base prepared and cut out in advance to create a bandeau. Treat the fabric with a hot iron. Glue a non-woven or other lining onto the main one using a warm iron. Trim excess fabric from each edge by 5 cm. The fabric is laid on the lining. Using 3 sides of the product should be marked with pins, excluding the top. Place a machine stitch along each edge of the product at a distance of 1 cm from them. Trim off excess fabric. Straighten the processed lambrequin. Turning the bandeau face up, pull it on, fastening it with a pin. After this is completed, the adhesive tape is strengthened Velcro to the cornice. Machine stitch on the Velcro, securing it. The fabric should be trimmed next to the Velcro. The adhesive tape is turned out and secured.
To sew a product yourself, you must adhere to several rules:
A rigid lambrequin based on a gang can have the most elaborate, fantasy shape. Create a template for cutting the lambrequin.
First, for the template, determine the dimensions for the future gang. It is necessary to think in advance about how the finished product should look mounted on the cornice. The shape of the product can be complicated or have regular figured cutouts. Compacted material is prepared and cut, which can be non-woven fabric or dublerin, it can also be a finishing material. A frame should be created using the template, taking into account all side seam allowances (5-6 cm each) .The prepared and cut parts must be glued to the gang (you can use a steam generator, which is usually used for gluing appliqués). The edges of the base should be treated with adhesive tape, retreating about 3 cm so that the tape is visible. The completed lambrequin should be placed on the cornice, gluing it with adhesive tape .
If you need to sew a rigid type lambrequin for the first time, then it is better to sew it for the kitchen. This does not require inventing samples according to the developed special design, which is complex. To decorate a window, you can sew a gang, that is, a lambrequin, which is most suitable for this purpose.