Previously, products using the patchwork technique were in almost every home. But even now they are no less popular. A blanket or bedspread made from multi-colored scraps is often used to decorate an interior in Provence or country style. But the finished product is quite expensive. To avoid unnecessary expenses, you can create a patchwork quilt with your own hands. In addition, the patchwork technique is not as complicated as it might seem. Handicraft masters can sew real masterpieces from scraps of fabric. But for beginners in this business, it is better to first learn the basic rules of working with fabric and use ready-made templates.
…
What is patchwork technique?
Patchwork is a type of needlework that is a patchwork: pieces of fabric of different sizes and colors are sewn together in the form of a mosaic, and the result is an original and bright design.
- Patchwork has gained particular popularity only in the last few years, but this type of needlework cannot be called new, because it dates back to ancient times.
- People made bedspreads, pillowcases, sheets, tablecloths and even clothes for themselves from expensive scraps.
- In England and the USA, this type of needlework was called textile mosaic, which was classified as decorative and applied art.
- The patchwork masters left us as a legacy an excellent technique for creativity. We can use it to decorate our homes and sew soft original blankets for our children.
How to work with this technique? Anyone who is interested in her needs to clearly understand that she loves neatness and precision, although “patchwork” does not require special labor or skills. There are only a few basic rules that should be followed when creating products using the patchwork technique:
- It is necessary to think over a sketch of the future product. To sew the patches correctly, you need to at least imagine the end result in your head - what the final pattern should be on the blanket or sheet that we are sewing.
- Choose the fabric that suits you. Handicraft masters recommend using:
- Linen, which is very easy to cut and sew
- Wool, which makes excellent covers and bedspreads (this fabric can be combined with any semi-synthetic textile)
- Silk, from which you can make a very beautiful bedspread
- Sintepon, which is used as the insulating part of the blanket
- Fabric blanks must first be folded according to a template into a general pattern, and only then sewn together using a sewing needle, thread or sewing machine (this device will significantly speed up the process of creating a blanket or any other product that you want to make). As a rule, blanks are made according to three main schemes:
- When the entire canvas consists of different flaps
- When a pattern stripe is created in scraps on a single piece of any fabric
- When the product is a kind of applique that is made without glue using fabrics and a needle and thread
- Each piece of fabric used to create any product using the patchwork technique must be ironed so that the result is a perfectly smooth fabric without flaws.
- All flaps must have a clear sequence - they need to be measured with graph paper, contours created with chalk, cut very evenly and leave allowances for creating seams.
Modern patchwork has many varieties:
- Traditional - when pieces of fabric are sewn together in strict sequence;
- “Crazy patch” - when patches of different sizes can be sewn together as desired and at the same time decorated with beads, rhinestones, and buttons;
- Knitted - no different in technique from the traditional one, except that the flaps in this patchwork should not be sewn, but crocheted;
- Japanese - products are sewn only from silk and stitches. The main pattern of any product is geometric shapes;
- Quilting is when two sheets of any fabric, between which there is a warm lining, are sewn together with a machine stitch (quilted fabric). This technique is best suited for creating quilts and furniture decor;
Each piece of fabric can be prepared using a special technique. Your choice should be based on where you want your patchwork piece to be used. Let's name the most widely used techniques:
- “Squares” - 4 fabrics are taken and cut into strips of the same size. You need to arrange two strips and sew them together. Then these strips need to be cut into squares, which can only be sewn together into a single piece.
- “Watercolor” - you need to choose a fabric in 7 different shades (some of the fabrics may even have a light print), which will harmonize well with each other. From the squares of this fabric you need to fold a pattern.
- “Strips” - this technique of sewing fabric is similar to the principle of folding parquet. The main thing is that all stripes are the same length and width (this will be more beautiful).
- “Log cabin” - the basis of the future canvas is a large square of fabric with a pattern, which is trimmed in any shape with other scraps.
- “Triangles” is exactly the same principle in stitching technique as “Squares”, only the blanks are made in a triangular shape.
- “Corners” is a technique that combines elements of the “Squares” and “Triangles” techniques. First, squares are cut out and folded diagonally into isosceles triangles. They are stitched together in any shape, forming a three-dimensional fabric.
- "Chess" - when the squares are stitched together like diamonds in a checkerboard pattern.
- “Russian square” - squares, triangles and strips are sewn together so that the base is a square, from the corner of which rays emanate from triangles located base down, and the sides are trimmed with rectangular pieces of fabric.
- “Honeycomb” - scraps of fabric are cut into hexagons that need to be sewn together.
- “Lyapochika” - you need to twist any strips of raw fabric into tubes (here you can even use old T-shirts), which are sewn together in any shape.
Using any of the above techniques and varieties of patchwork, you can sew a baby blanket with your own hands from padding polyester and any other natural fabric. We will present you several detailed master classes in the following sections.
This is interesting: Pattern Beautiful baby blanket made from scraps
Patchwork for kids
Patchwork quilted fabric symbolizes comfort and warmth, so it is ideally suited for the interior of a nursery. The baby blanket is made of cotton fabric with natural fillings. In this case, it is customary to choose pastel colors with delicate patterns, and use embroidered and openwork fragments.
For a child's or teen's quilt, you can come up with an original design using digital prints or scraps of fabric with themed designs.
- Curtain tiebacks - 150 photos of new exclusive designs
- Do-it-yourself tulle - step-by-step instructions on how to sew beautiful tulle. Photos of ready-made ideas and modern design
Curtains for gray wallpaper - options for the ideal combination of curtains in a gray interior (TOP-150 photos of new designs)
In this case, both traditional schemes and adapted designs are used: one large block with the image of a cartoon character is located in the center, and a bright patchwork frame is made around it.
Variety of styles
Chaotic patchwork also has its own directions. Not all of them are ideal for creating blankets using this technique. Styles are:
- classical. The most suitable for sewing a blanket, as it easily fits into the selected dimensions and monotonous decor of the room. This style includes patches of equal size, often in two color schemes, which are placed in clear symmetry or in a checkerboard pattern;
- Oriental. More suitable for decorative small blanket. The style is maintained in the use of flaps of different shapes and sizes, adding to them a variety of embroidery with threads, beads, beads, as well as zippers, buttons, chains and any other type of decorative design. However, unlike the next type, the eastern one adheres to a certain system and symmetry in stitching the flaps;
- crazy patchwork is a “crazy” patchwork technique. The style, which is not limited in the shapes and placement of flaps, combines the chaotic clumsiness of the placement of parts and a mixture of color schemes. More suitable for blankets and bedspreads of outdoor garden decor.
Quilt patches come in many forms:
- squares - simple stitching of square flaps of the same size;
- stripes - flaps of stripes can be sewn either alternating or in a circle, into a spiral, decreasing their length as you work, using a template in the form of a lined square;
- triangles - in order to achieve a smooth square canvas at the end, such flaps are cut in the form of isosceles triangles;
- honeycombs - symmetrical hexagons, which are combined with triangular flaps along the edge;
- lapachikha is a type of patchwork made from patches of different shapes, assembled into a specific pattern according to a pre-prepared template.
How to sew a patchwork quilt with your own hands. Step-by-step instruction
The first step is to think about the appearance of the product, color combinations of elements. It is advisable to choose colors so that the composition is in harmony with the overall interior design. The idea should be moved to the sketch. For this, a regular checkered notebook sheet is suitable, on which the future patchwork composition can be marked with colored pencils. The simplest diagram of the front side consists of squares of the same size connected to each other. You can come up with more complex patterns yourself, pick them up on the Internet, or purchase them in a specialized store, along with a craft kit.
Arrange the squares so that you like the combination of prints and patterns
Next, individual elements are manufactured, which will subsequently be connected to each other. Fabrics must be pre-washed and ironed well. Using templates, the required number of parts is cut out. Each flap should be ironed carefully.
Sew the squares into one line equal to the width of the bedspread
The simplest method of patchwork is to connect the pieces into strips, which are subsequently sewn together.
Sew horizontal rows together
The method of sewing with stripes is the simplest and is popular among beginners and professional craftsmen. The result is a solid front side.
Carefully align all seams for a perfect front side.
Ironing the resulting blanket
After this, the lining is cut out, which will be the same size as the top layer of the product.
Cut the seal to size, lay it out on a flat surface, and place the blanket on top, face up
Next, spread the lining fabric on a flat, solid base, wrong side up. It will not hurt to secure the material to the table or floor with tape. Insulation is laid on top and leveled. It is important that the size of the filler is 5 cm smaller at the edges than the rest of the product. The patchwork surface of the blanket is laid on top. After this, all three layers are connected with pins.
Cut the piece for the back of the quilt and place the fabric right side down on top of the stack, stitching 3 layers around the perimeter
Turn it inside out through a small hole, iron it, sew it up by hand
Bonded layers should be quilted correctly. If you do this work using a sewing machine, you will need to install a special embroidery foot. Then you should start from the center of the canvas diagonally to the edges. Instead of a regular stitch, a curly outline is often used.
Add decorative stitching along the seams
If quilting is done by hand, you need to start by finishing the edges of the blanket. The edges are framed with a border of fabric or ribbon. For edging, material 8 cm - 10 cm wide is used, the length should be slightly longer than the edge of the product. The fabric or tape is folded lengthwise and ironed. Next, the border is sewn along the edges of the back and front sides of the quilt.
Ready-made patchwork blanket made by yourself
Making a Patchwork Quilt
Making a blanket using the patchwork technique differs from other types of sewing blankets only by working on the front part. For a blanket in a classic patchwork style you will need:
- scraps of fabric measuring 25x25 cm, 20 pieces;
- filler 130×130 cm;
- fabric for the back 130×130 cm;
- fabric for the canvas seal 130×130 cm;
- sewing machine, needle and thread, scissors.
The first step is to lay out the flaps in the required order.
The second stage involves connecting the flaps together into strips.
The third step will be to connect the strips into one canvas.
The fabric should be ironed well, after which the appropriate part should be cut out of the seal according to its size.
After this, you should cut out a piece of the appropriate size from the backing fabric or filler. We lay out the parts in the following order: seal, filler, canvas, wrong side to the filler, wrong side, right side to the canvas.
Please note that, if desired, the filling can be inserted into an already sewn blanket after turning it inside out.
All parts need to be sewn together, leaving a 10-15 cm hole for turning inside out.
Having removed the protruding corners and uneven edges, turn the blanket inside out and sew up the hole.
The blanket is ready. According to the described size, it is more suitable for a child, but the size of the fabrics and the number of flaps can always be changed to suit your own preferences.
To create a more complex blanket pattern, you can use the following patterns:
Features in creating blankets
Choosing a blanket making technique is not the last thing you will have to deal with when sewing. First you need to approach the issue of size. You can make a blanket of the following size with your own hands:
- 120x120 cm – a blanket for a newborn or a small blanket for a chair;
- 150×120 cm and 140×110 cm – for older children;
- 150×200 cm – single;
- 150×205 cm and 155×215 cm – one-and-a-half blankets;
- 175×215 cm, 180×210 cm, 220×240 cm – double;
- 200×200 cm, 200×210 cm – European sizes.
The duvet filling is also heavy. They may be:
- synthetic winterizer is a cheap hypoallergenic material, but not natural;
- wool is a very warm and fairly light material;
- fluff – not suitable for allergy sufferers, it is quite heavy, and over time, if used without proper care, it picks up unpleasant surrounding odors.
The fabrics of the flaps should be chosen to be approximately the same in density, thus avoiding possible stretching and damage to the blanket in certain places. If this is not possible and the materials were taken from what was available in the house, then it is necessary to place fabrics that are more susceptible to damage closer to the center, alternating them with flaps that are more dense in composition. However, the best choice for such work would be scraps of cotton fabric.
Fabric for making a patchwork blanket
Patchwork is patchwork sewing from fabric of various household and decorative items - beds, blankets, bags, clothes, tablecloths, kitchen utensils, etc. The technique, known for thousands of years, is popular all over the world. Skilled craftswomen create all sorts of outlandish works of art using the patchwork method. And novice needlewomen are advised to start with wide blankets made from “quick squares”. Such products are practical and aesthetic, and are also optimally suited for mastering such a delicate science.
Today, patchwork is considered one of the most popular patchwork techniques. It consists of stitching together various pieces of fabric according to the mosaic principle. In the hands of experienced needlewomen, bright pieces of material are transformed into luxurious products that surprise and delight. But not all fabrics are equally good for patchwork patchwork.
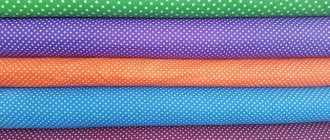
To choose the right material for creating a patchwork quilt, you can follow the traditions of our grandmothers: simply save all the scraps and leftovers from sewing clothes or bed linen. From such different-sized shreds you will certainly get a motley blanket. Or you can do it much simpler - purchase a set of fabrics for patchwork at any specialized store. Since the most difficult process in the patchwork technique is working with the material, the fabric must certainly not only be beautiful in appearance, but also of sufficient quality.
Cotton fabrics are considered the ideal material for patchwork because they meet all the important requirements:
- Do not wrinkle;
- Don't rush;
- Do not shrink;
- They do not shed;
- Easy to cut.
Linen, silk, viscose and wool are used a little less often in patchwork, since such materials are more capricious and always require special care in work. Craftswomen with experience begin to use complex fabrics; for beginners, there is nothing better than cotton!
Sewing material stores offer customers a huge selection of cotton fabrics of different colors and densities. But, unfortunately, they are not always suitable for patchwork. Some options fray too much when cut, others are hard to iron or sag after washing. It is, however, recommended to buy special fabrics for patchwork that have undergone special pre-treatment. This material is very easy for beginners to work with.
What materials will be needed for production?
The future product will consist of three layers:
- front side;
- insulation;
- bottom lining.
First you need to select fabrics for the front side. These can be pieces of satin, chintz, silk, linen, drape, satin, calico, knitwear.
Square pieces of fabric for the front of the blanket
Denim fragments that combine well with chintz or cotton are also suitable. Patchwork can be made from unnecessary things or you can buy blanks for patchwork sewing in specialized stores. Sintepon, batting, and holofiber are used as synthetic insulation.
Synthetic padding filler in a roll is perfect for making blankets
The natural filling will be wool or cotton.
Cotton filling for summer blankets
If you want to make a DIY quilt rather than a quilt, then you won't need insulation. Any thick fabric will be suitable for the back lining.
Cotton fabric is suitable for lining a light blanket
The amount of material depends on the size of the product.
You will also need:
- threads No. 45 or No. 50;
- regular threads;
- cardboard or plastic templates;
- sewing machine;
- iron;
- needles, pins;
- scissors, chalk, centimeter.
Tools you may need for patchwork
The color of the threads is chosen to be contrasting or to match the product. Regular threads will be used for basting. Templates are made based on the shape of each individual piece of fabric.
Scheme of a square template for patches with a seam allowance
It can be a square, rhombus, triangle, circle, hexagon, rectangle. Each element must have a seam margin of 0.5 - 1 cm.
Schemes of patterns for patchwork from square elements
Popular types and patterns of patchwork
The patchwork style is a wide field for ideas and experiments, which has no boundaries in combinations of shapes, colors, and types of material. Here, any creative idea of the author can be brought to life. Fancy patterns, applications with animals and flowers, geometric mosaics and other equally interesting options can easily be folded into a warm bedspread or comfortable blanket.
Of course, you can create a diagram for a product with your own hands, armed with imagination and a sharp pencil. Or you can use ready-made ones, of which there are hundreds of thousands, depending on the types of patchwork.
Let's look at the most popular types of patchwork:
- Classic English
. In this version of patchwork, all parts of the same shape and size are used, usually in two primary colors. Patterns for English patchwork are very primitive. For example, squares of two shades arranged in a checkerboard pattern, or symmetrically stitched triangles. - Eastern patchwork
. The manufacturing principle is similar to the classic one, but differs in the use of various decorative elements - ribbons, beads, zippers, etc. Most patterns for oriental patchwork products allow greater freedom in the shapes and sizes of parts. For example, these can be arched and wavy patches, connected and decorated with satin ribbons. - Crazy patchwork
. The most “free” look. Characterized by its aesthetics and attractiveness. As a rule, the shape, color and size of parts are not limited by anything other than the pattern used. And the designs can be incredibly diverse: images of nature or flowers, floral or geometric patterns, complete abstraction.
This is interesting: Pattern Cool children's hoodie
Types of patchwork
It is possible to make a baby blanket yourself for beginning needlewomen according to the pattern using various techniques.
We bring to your attention the most interesting variations of such manual techniques and using a machine:
Classic scheme . It involves the gradual stitching together of each element of matter of geometric shape. This is the easiest technique.- Quilting technique . Stitch a blanket on a sewing machine or by hand using various stitches.
- Crazy patchwork . This is sewing, stitching together elements of different sizes and shapes. You can choose any stitches for joining, and use beads, buttons, beads and other decorative elements as an addition.
- Japanese technique . The technique uses silk fabrics with patterns of geometric shapes and designs. The products look unusual and bright.
- Knitted patchwork . Each piece is knitted independently, and only then all the pieces are sewn together with strong threads to form a complete product.
A homemade DIY baby quilt makes a great gift because it is soft, comfortable and colorful.
Peculiarities
Patchwork is an ancient skill that can be traced back to the invention of fabrics themselves. The thrifty housewife did not throw away precious scraps of material, but sewed them into linens for further use. Museums around the world have historical exhibits that confirm the interest of our ancestors in quilting. A carpet made from fragments of pilgrims’ clothes was discovered in the Cave of a Thousand Buddhas; it dates back to the 10th century. One of the museums in Egypt displays a canvas made from pieces of leather, the appearance of which dates back to 980 BC.
The peculiarity of patchwork art lies in its uniqueness . It is impossible to make two identical blankets from the many scraps, so each product is exclusive. There are other advantages of the patchwork technique:
- Only threads are used to create the product, and the canvas itself is assembled from scraps;
- by piecing together scraps, you can sew blankets of different sizes, even for non-standard children's beds;
- during work, any fantasies are realized, and the more original they are, the more the craftswoman will be able to surprise with the final result.
The colorful pattern of the paintings adds mood, it brings comfort to any home. A patchwork-style blanket can be supported by a mosaic pattern on the wall, a bedside rug made from pieces of fabric, or an equally colorful lampshade. The main thing is not to overdo it, otherwise the original interior will turn into a tacky and tasteless environment.
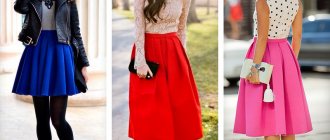
To prevent the blanket from looking haphazard, craftswomen put a certain logic into the selection of patterns and colors . For example, the entire ornament is built around a central plot appliqué, or patches are selected that match the dominant shade of the children's room. The pattern of the blanket should not put pressure on the eyesight or create an imbalance in the interior, so designers recommend choosing several primary colors and 2-3 background shades to create it. Variegation and many small details are allowed in small children's rooms.
A blanket for a large room is formed from large patches connected by a common storyline or making up a common ornament.
We sew a patchwork quilt from old jeans: patterns, photos
Among the things that are a pity to throw away, there are often old jeans, and more than one. If you have the material and patience, try creating an original patchwork quilt from them.
How to sew a patchwork quilt from jeans?
- Sewing a blanket from old jeans like the one in the first photo is very simple, just cut out squares of the same size from the jeans and sew them together in any order. For a blanket like the one in the photo, 64 squares were needed.
Beautiful patchwork quilt made from jeans
- You can also sew a blanket with colored fabric inserts without a special pattern, because the decorator’s task is simply to create “artistic chaos.”
- The colors in the second photo are very well chosen. Please note that there are 3 primary colors, and this is the maximum number of colors that designers recommend using in clothing and interior design.
- Patchwork quilts made of denim in one color scheme look better when combined with colored inserts, but if the jeans come in a wide variety of colors and textures, then other fabrics will be superfluous.
Jeans blanket with pockets
- Such pockets are very convenient; you can, for example, put a mobile phone or a chocolate bar in them, in general, anything that you might need at night
Blanket Making Tips for Beginners
Nowadays, patchwork creations have become more popular than ever. In between the noisy bustle and tiring workdays, you really want to touch something warm and cozy. Even those women who have never thought about needlework before begin to confidently master patchwork. Decorative sofa pillows, aprons, coasters, colorful panels, curtains for a country house, ultra-modern bags and many other things can be created by experienced craftswomen.
Beginning needlewomen should pay attention to a few useful tips:
- Before using new fabric, it must be washed, ironed and only then cut. This will prevent accidental shrinkage, loss of color, or other problems.
- The color of the thread used should match the color of the shred or differ by a couple of tones.
- For drawing, use a pencil or soap. It is prohibited to use a pen.
- Cutting is done along the shared thread. In this case, the part will not warp.
- When cutting, leave a 1 cm indent on all sides. If the fabric is loose - 1.5 cm.
- Ideal templates are made of plastic.
- Without a ruler, patchwork is impossible.
- The resulting fragment must be ironed after each line.
Patterns for making a blanket using the patchwork technique
Depending on the chosen patchwork technique, the needlewoman may need one or another pattern pattern:
- Square technique
. It involves creating a product from square patches or square blocks of different colors. In this case, a pattern in the form of a regular square or a pattern of strips from which a square block will be made will be useful. - Strip technique
. This is parallel or circular stitching of strips of different colors and lengths. To create a product using this technique, you will need to cut out different strips. - Triangle technique
. In many ways similar to squares. Most often, patterns of isosceles triangles, identical in size, but different in color, are used for it. Parts can be sewn along a short edge to form a strip, 4 pieces to form a square or in the shape of a star. - Honeycomb technique
. It got its name thanks to the end result. Upon completion of the work, the design of the product will resemble the pattern of a honeycomb. For production, patterns of symmetrical hexagons are used. - Lapachikha technique
. It is considered the most interesting and at the same time difficult. Pieces of fabric with raw edges are attached to the canvas, thereby forming a three-dimensional drawing of a certain pattern or a chaotic image of a three-dimensional abstraction. If a specific pattern is chosen for the product (bird, animal, flower, etc.), patterns for each part will be needed. If you plan to randomly sew on different patches, you can do without patterns altogether.
How to make a patchwork blanket - watch the video:
Products made using the patchwork technique are not only beautiful and cozy home decorations, but also positive emotions from the process of making them. Agree, a few pieces of fabric, a sewing machine and imagination in combination can work wonders.
Creation technology
The process of sewing a product from small pieces of fabric is actually a very exciting activity. In addition, it does not require huge financial investments. After all, the necessary materials in the form of various pieces of fabric can be purchased as a set or you can use old things that may be lying in your closet.
Many ideas and secrets from experienced designers can be found at dizajny.guru
As a result, things that have gone out of fashion will be able to continue to exist in a new way and will remind of the wonderful past. But you should not use very old things, so that your diligence will not be in vain.
To create a patchwork quilt, you need to prepare 6 or more different colors of fabric. To realize a unique design with the help of your irrepressible imagination, you should use different colors, fabric structures and patterns on them. Slightly gathered details will add volume to the texture and an impressive appearance.
How to sew a patchwork quilt with your own hands? To do this, just watch master classes from the Internet that will help you learn the patchwork technique yourself.
What are they?
Patchwork blankets for children are especially varied . They are rich in color, contain applications, thematic images based on the plots of your favorite cartoons. In addition, products can be for a boy or a girl, intended for a newborn baby, or sewn in certain sizes, especially for a baby’s crib. Children of any age – from toddlers to teenagers – can appreciate these funny blankets.
We invite you to look at a selection of children's blankets to understand how beautiful, original they are, and made with great love for little users.
- When creating a blanket for boys, they often resort to a marine theme. Here you can use white and all shades of blue. The younger the child, the weaker the tonality and the more delicate blue is present in the product. Marine themes with other shades are used much less frequently; they are used when it is necessary to maintain the overall color of the interior.
- Kids especially like blankets with a large pattern in the center ; it can be viewed as a picture, including imagination and inventing adventures for their favorite characters.
- Look how lovingly you can completely decorate a baby’s crib in patchwork style. The sheet, blanket, pillow and even the sides are made of bright patches. A variety of funny bunnies will hold the baby’s gaze for a long time, because they are not repeated, but you want to look at each one.
- For the little princess choose light and delicate colors . A large number of pillows made from pieces of fabric, bows and lace sit on top of a quilt with appliqués.
- Boys prefer products with pictures of cars . For a baby, a calm background is selected, and an older child can be offered a riot of colors. The colorful canvas with pictures is impressive and delights children.
- Stories are also being developed for animal lovers. For example, a teenager can be offered a beautiful canvas depicting African wild animals (safari). And for a little one, a plot with mischievous dogs, or kind pets that he saw in the village with his grandmother (farm theme) is more suitable.
- Your teen will appreciate a blanket with photos of family memories . The canvas is sewn from squares containing non-repeating plots.
For kids, each square can become their favorite frame from a cartoon.
- When creating children's blankets, they often resort to appliqués ; they neutralize the diversity of the patches and interest children in a specific topic, as they often depict animals, favorite equipment, or cartoon characters.
- A complex blanket for a girl was made with extraordinary love, using many techniques. It does not contain a specific plot, but shows good taste and high skill of the author.
Sewing a baby patchwork quilt for beginners
Difficulty: low
Working time: 4 hours
Materials: 100% cotton, patchwork fabric, cutter, ruler, cutting mat, sewing machine, scissors
According to the author. If you are expecting a baby and want to make something for him with your own hands or want to make an unusual gift for a child, you can sew him a patchwork quilt. It's not as difficult as it might seem at first glance.
What we need for this:
1. Fabrics for patchwork. I advise you to use high-quality 100% cotton. It does not shrink, does not stain and retains its color for a long time. We will need colored scraps and plain fabric for the background. I will use white and bright fabrics of different colors, you can choose any color scheme. I advise you to use small drawings, since large ones in a block do not always look good. You can buy fabric in the store by the meter, or you can buy ready-made cut pieces of 50*50 cm. I use a piece of white cotton, several 50*55 cm scraps and a few squares left over from other blankets. We will also need fabric for the border (optional).
2. Insulation. Cotton, bamboo or padding polyester. You don't have to buy it right away. It can be purchased once your patchwork top is ready.
3. Wrong side. Again, I recommend 100% cotton, the color can be any, but it’s better if it matches the tone of the patchwork top. You can also buy the backing after creating the top, so it will be easier to decide on the color and size. Basically, patchwork fabric has a width of 110 cm. If you plan to use it for the back of a blanket, you need to calculate the width of the patchwork top no wider than 100-105 cm. Otherwise, you will have to sew the back in two parts or look for a wider suitable fabric.
4. Tools: cutter, cutting mat, ruler, scissors, sewing machine. If you don't have special tools, you can cut everything with scissors.
So this time we will be making quilt blocks.
First you need to prepare the shreds: cut the fabric into squares. The squares can be any size, but I don’t recommend making them small. I will make squares 20*20 cm. The number of colored squares should be equal to the number of white ones. I'll be making a 4*5 block quilt, so I'm cutting out 20 colored and 20 white. If you're in doubt about how much to cut the fabric, you can always cut more as you go.
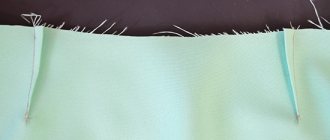
Be sure to cut off the edges of the fabric! If you use a cutter, you can cut several layers of fabric at once.
When our fabrics are prepared, we can begin stitching the block. To make the “Wings of the Mill” block, take 1 colored square and 1 white square and place them right sides on top of each other. All the beauty of the fabric should be inside. If necessary, chop with pins.
Using a sewing machine we sew the block around the entire perimeter! It is better to use needles for cotton, thicker No. 90, 100. Seam allowances should be the same everywhere! It is very important. I use the standard machine needle position, which gives a 6mm seam allowance.
The red line shows where the stitching should go.
Now we place our block on the mat and cut it diagonally from corner to corner.
We have four triangles. We go to the ironing board and with a hot iron and steam without revealing our part. This way we will relax the seam, it will not wrinkle and will fit better. This must be done every time after sewing the parts together: loosen the seam, open the part with an iron and iron it.
We relax the seam on four parts.
We open the part with an iron. The allowances are pressed onto the dark side. You can always place the triangles with the dark side up and open them with an upward motion of the iron.
We cut off the “ears” that appear.
Now from our four squares you can put together the “Wings of the Mill” block. All your blocks should be stacked the same! For convenience, you can put the first completed block in front of you and stack the rest while looking at it.
It's time to sew our block! First, we sew the halves together: top to bottom (or left to right, whichever is more convenient for you). If you want, you can pin it together. Make sure that the corners lie well and evenly. Since we pressed all the seam allowances onto the dark side, they will blend together perfectly.
We sew on a machine. For speed, you can sew them in a chain, one after the other, without cutting the threads. This significantly speeds up the work.
The result is a chain like this. We cut the thread, relax the seam, and open the parts with an iron. It is important that the allowances are smoothed in different directions. On one side up from the middle, on the other down. This way the middle will fit better and there will be no excess thickness of the fabric. The red arrows show the direction of the allowances.
Sew the two halves together. To make the middle beautiful, we carefully combine the fabric and secure it with a pin. If you pressed it correctly, the seam allowances should be facing in different directions.
We stitch on a machine. We go to the ironing board, relax the seam and open our block. The center should converge at one point.
If it so happens that the block is not quite even at the edges, it can be trimmed. This is one of the few blocks that can be cut to any size. They should all end up the same size. Therefore, it is better to do this at the end, when you have all the blocks ready.
We sew together all the remaining blocks in the same way. You can measure the resulting square and estimate how many blocks are needed horizontally and vertically. My block turned out to be 24*24 cm, therefore 5 blocks in length will be 120 cm minus about 3 cm in allowances = 117 cm. Then a border will be added (more on this in the next master class) and the final size of the patchwork top will be larger.
You can work on several blocks at once, this speeds up the work. For example, first sew several 20*20 squares together, then cut them, sew the parts, and so on. To prevent the parts from getting tangled, pin them together.
So at the end of this step you should have a nice stack of blocks for your quilt. If you want to trim them, trim them all at once, measuring centimeters along a ruler from the middle .
I will be sewing a 4*5 row quilt, so I will need 20 finished quilt blocks.
Lay out the blocks on any flat surface. Pay close attention to how the colors are combined. Do not allow blocks of the same color to stand next to each other. You can take a photo of the laid out blocks and look at the colors in the photo - sometimes it’s better to notice an inharmonious combination. Some masters look through colored glasses or glasses.
Now our task is to sew all these squares together. There may be several options: you can sew four into squares, you can sew in rows, and then the rows can be connected to each other. I prefer the first method, but you can choose whichever is convenient for you.
Before sewing four blocks into a square, I photograph them on a tablet or phone so that during the sewing process I do not forget how the blocks were originally located. Take photos every time before you stitch. It's not difficult, but it makes the job a lot easier.
We pin the blocks in place , otherwise you may forget which sides to sew. We chop the left with the right or the top with the bottom, whichever is more convenient for you.
We sew on a machine. Can be connected with a chain, this speeds up the work. The allowances should be exactly the same as in your blocks! If you sewed blocks with 6 mm allowances, sew all other parts with 6 mm allowances!
Using a hot iron with steam, iron the seam without revealing the details (relax the seam).
After this, we open the stitched blocks so that the allowances point in different directions. This is the time to check the photo. The direction of the allowances is shown by arrows.
If you do everything correctly and carefully, the seams should converge at one point.
Now you need to sew the two halves of the large square. Laying them out on the table again, check the photo and pin down the desired edges. If you press the seam allowances in different directions, the center will fall easily and there will be no excess thickness of the fabric. We stitch on a machine.
We relax the seam and open our square with an iron.
We put it in place the way the blocks were originally located (we check the photo again).
In the same way, by photographing and sewing parts in pairs, we connect all the blocks together.
In principle, this is where you can finish working on the patchwork top. Stitch, border and finish the quilt. But I would like to add a border to make the blanket dressier, larger and give it a finished look.
We select the border to suit your taste, there can be any options - you can use fabrics that are already in the blanket or any new ones. Try and experiment. The border can be thin or wide. If you have fabric, you can put it under the top and see how it looks. If you go to the store to buy border fabric, you can take the patchwork top with you and figure out combinations right in the store.
I will make a thin white stripe and a wide light green one. I wanted to add another thin red one, but then abandoned this idea. Again, to better imagine the future look, you can take a photo and look at the photos to see how it will look.
For the border I need to cut:
- four strips of white fabric, 5 cm wide;
- four stripes of light green, 9 cm wide.
Please note that this width already includes allowances, and the finished border in the blanket will be 1.2-1.5 cm thinner.
We sew the white stripe to the blanket, cutting it right sides together. If you have enough experience in sewing, you can not chop off the border, but apply it to the edge as you sew. I usually sew in pairs to short or long sections of the quilt.
After this, we relax the seam and open it with an iron towards the white border.
Pin and sew the border to the remaining sections. You can make a corner at 45*, but in this master class I will not dwell on this.
Loosen the seam and open it to the white side.
Now we sew on the light green border in exactly the same way.
You can straighten the cuts and remove excess borders immediately with scissors or a cutter after ironing.
Our patchwork top is ready! You can admire and enjoy your work. And also measure it. The size of the quilt top will be the same size as the finished quilt.
We will need:
- Patchwork top.
- Insulation. Its size should be at least 3 cm larger than the patchwork top on each side. Which one is better to choose is up to your taste. You can sew it with padding polyester of various thicknesses, you can choose cotton or wool, you can even use fleece. The only thing I can advise beginners is that it’s better to use thin insulation to begin with. It is much easier to quilt, the layers do not shift and everything turns out much smoother and neater. For example, I will use a thin, light and warm Waltherm.
- The wrong side. It can also be very different: cotton for patchwork, satin, cotton for linen, flannel, fleece or any other. The reverse side can be in harmony with the color of the top or be contrasting. It's a matter of taste. Important: the underside should be 5-6 centimeters larger than the patchwork top on each side.
The width of the fabric is 110 cm for patchwork, 220 cm for cotton on the back of patchwork quilts and the same width for linen fabrics, 150 cm for other fabrics. I will use 150cm wide orange cotton.
- Walking foot for a sewing machine - if you have thick insulation, you can’t do it without it. If the insulation is thin, you can stitch it with a regular foot.
- Curved pins (optional).
- Threads match the back and top and contrast for basting.
- Needles. Curved or straight.
- Masking tape, sold at any good store.
- The large surface is a table, but you can do everything on the floor.
So, iron the back and patchwork top, if required. And attach the back side face down to the table with masking tape. Be guided by the edge of the fabric - in stores they don’t always cut straight, but you can definitely trust the edges. I use a book table. Still, even a small blanket cannot fit on it, but it is still more convenient than doing it on the floor. Firstly, it is inconvenient to sew at an angle (watch your back!), and secondly, this process may take longer than it seems. It won’t be very convenient if your family comes home from work and your entire floor is taken up by a blanket.
Tape the fabric to the table.
Now we apply insulation.
And a patchwork top.
The whole blanket doesn’t even fit on my large table. But when I sew most of it, I can move it without any problems and continue sewing. This method works even for large blankets (200*200 cm and more).
Some craftsmen advise chopping off the layers with special curved pins rather than stitching them together. But I found a couple of significant disadvantages in this method:
1. Pins are thick and leave large holes in the fabric.
2. When working with more or less thick insulation materials, they do not provide the necessary fixation of the layers, and the layers move when stitching.
However, if you find them very convenient, you will save a lot of time.
I use a curved needle that comes straight out. It is considered furniture and is sold in many sewing stores. Choose contrasting threads to make it easier to remove stitches later.
We begin to sew our blanket from the center to the edges, laying horizontal and vertical lines at a distance of 12-15 cm from each other. When going beyond the edges of the blanket, make fastenings.
Be patient, this process is not very fast and not very exciting. Turn on a movie or good music, it will help take your mind off the monotony. I believe that stitching layers is a necessary and very important process and is worth the time!
Be sure to stitch along the border and along the very edge of the quilt top! Make the stitches slightly away from the seams, this way you will not sew along them later and it will be easier to remove the basting.
If you sewed the entire piece on the table, peel off the tape and, carefully leveling the layers, move the blanket. Check again to make sure there are no wrinkles on the backing or insulation, tape if necessary, and continue stitching.
If your backing is much larger than needed, you can trim off the excess fabric after basting (within about 5cm of the quilt top). If it doesn’t bother you, you can cut it off after stitching. I had a bit too much on one side, so I cut it off.
If the insulation is thick, you should use a walking foot (sold separately, costs approximately 900-1300 rubles). It has teeth and moves the top layer of tissue simultaneously with the bottom. This prevents the layers of fabric from shifting while sewing on the machine. If the insulation is not thick, then you can get by with a regular sewing machine foot. If you doubt the result, try sewing two layers of cotton fabric with your insulation (making a sandwich like in the blanket itself), and see how it looks in the end. If the layers shift, you will notice it immediately.
This is what our hand basted blanket looks like from the inside out. I don’t sew it diagonally, since these squares are enough.
Threads for a sewing machine. The top thread should match the color of the patchwork top, and the bottom thread should match the color of the backing.
Let's go to the machine and start quilting. The simplest stitch is in the seam, when you stitch along the seam. You can stitch the blanket in any way you like: squares, diamonds, waves or something else. Sometimes it is worth quilting to highlight the patchwork pattern of the quilt. If you quilt very tightly, the blanket will become thinner and stiffer; if you quilt very rarely, the insulation may become loose when washed. It's worth finding a balance here. The blanket should be soft and pleasant, but at the same time washable and durable.
It is not necessary to stitch from the center. You can start from the border. Be sure to backtack at the beginning and end of the lines!
Slowly quilt the entire blanket. I sewed along, across and diagonally the mill, a border around the perimeter.
If possible, it is better to choose to have the needle in the down position when stopping. This makes it easier to move and guide the fabric while sewing.
We sew along the border and be sure to zigzag stitch along the very edge of the blanket.
You can use decorative stitches that are in your machine.
This photo has been specially decolorized to show the stitch pattern.
Now that the stitching is finished, you can cut off the excess backing and the insulation around the edge. Don't damage the zigzag stitch!
Remove all basting lines.
Now... let's admire our work and praise ourselves! All that remains is to trim the edge with piping, and the blanket will be ready!
More on this in my next master class.
We will need:
- Fabric for edging (how to calculate, fabric later in the topic).
- Scissors or cutter.
- Cutting mat.
- Threads match the piping.
First you need to calculate the perimeter of the blanket. To do this, we measure it and add up the lengths of all its sides.
My blanket has two sides of 110 cm and two sides of 132 cm.
110+110+132+132 = 484 cm perimeter.
The edge should be 20 centimeters longer than the perimeter. I like to leave more and will do the calculation for 520 cm of edge.
I still have fabric from the wrong side with a width of 135 cm, therefore we divide 520:135 = rounding, four whole stripes. The piping will be 7 cm wide, folded 3.5 cm. 4 stripes * 7 cm = 28 cm of fabric 135 cm wide.
If you make a edging from fabric 110 cm wide:
520:110 = 5 whole stripes. 5 stripes * 7 cm = 35 cm of fabric with a width of 110 cm for piping. Take a couple of cm more, if the store cuts it unevenly, this happens. In this way, you can calculate the amount of fabric for the edging based on any of its widths.
If you want to make a wider edging, calculate the number of stripes and multiply by the desired width.
We cut strips of fabric with a cutter or scissors. Four stripes 7 cm wide.
These strips need to be connected into a single tape. To avoid excess thickness of the fabric, we connect at an angle of 45 *.
Fold the ribbons right sides together at a 90* angle. For clarity, I drew a seam line; you can also draw lines for yourself with a pencil or chalk and sew along them.
We sew on a machine. Both threads in the machine should match the piping.
Cut off the excess.
Using a steam iron, smooth out the entire edge.
Now fold the edging with the right side out and smooth it along the entire length.
The result is a long strip of fabric folded in half, 3.5 cm wide. This is our finished edging.
Now we apply it to the wrong side of the blanket with the edge towards the edge of the blanket, the fold towards the center of the blanket. Important : do not start sewing the edging from the corner, it is better from the middle.
There is an option to sew the piping first to the front side using a machine, and then manually to the back, but I prefer to sew both sides using a machine for durability and reliability.
If it is more convenient for you, pin the edging with pins. You can apply it as you sew. But be sure to leave at least 10 cm of the tail unsewn at first.
Sew on by machine. Choose the position of the needle and the distance from the edge so that the stitching necessarily covers the zigzag edge of the blanket. Agree, it won’t be very beautiful if a stitching zigzag sticks out from under your stitching.
Not reaching about 6 mm from the corner, we stop and move the line at an angle of 45*.
We put the blanket on the table and make a corner. To do this, bend the edge upward to form a 45* corner.
Now we bend the edging down, the fold of the edging should be flush with the edge of the blanket. If necessary, secure with a pin.
Having stepped back about 6 mm from the edge, we continue to sew the edging to the next corner.
We sew the edging along the entire perimeter in this way and stop about 15-20 cm short of the beginning. We make a tack.
Our task is to combine the edging beautifully into a single piece. We fold the edging and mark with something inside the edging the place where it should meet. Pencil, soap, fabric marker - whatever.
You can directly draw lines inside and sew along them. We fasten the straightened edging with pins and sew it on a typewriter.
Cut off the excess.
Fold it in half lengthwise again and machine sew this piece. The edging is sewn on the wrong side.
Now turn the blanket over with the right side up and, going around the edge, pin the piping to the front side to the piping sewing line (covering it slightly). You can start from a corner.
Sew on by machine. You can also use decorative stitches. It’s more elegant and sometimes even easier to sew on the piping. To lay a beautiful, even stitch along the edge requires some experience and skill; decorative stitches do not require such precision.
When you reach the corner, either fasten the stitching and fold the corners on the table, or you can fold them directly on the machine and sew without interrupting the stitching. As you prefer.
For this colorful blanket, I chose a zigzag stitch. It seems to me that she decorates the blanket. If you are making a blanket for adults or some other classic option, you should rather choose a straight stitch.
After sewing on the edging, the blanket can safely be considered complete!
Almost any not very large baby blanket can be folded into an envelope for discharge. Whether it is square or rectangular does not really matter - the nurses in the maternity hospital will roll up a beautiful little bag from any blanket. All you have to do is buy 4-5 meters of satin ribbon of any suitable color at any sewing store.
Such a blanket will warm the baby not only with warmth, but also with your love and care.
Don't be afraid to try new things, believe in yourself and do everything with love and pleasure! Good luck!
Source
Overview of techniques
Over the millennia of its development, patchwork has developed different techniques for making canvases from pieces of fabric. There are so many of them that it is impossible to cover them all in one article. Let's look at the most popular of them.
From the stripes
This type is considered the simplest technique, since sewing identical strips together is easy even for a novice craftswoman. For the strip stitching technique, the material is prepared in advance. They cut out identical elements in the form of elongated rectangles from pieces of fabrics of different colors and structures, and then sew them together. You can place a large square with appliqués in the center of such a blanket.
From squares
Blankets made from squares are just as easy to create as from stripes. This technique is one of the most ancient . But this applies to flaps of the same size. If the product uses squares of different sizes, you will need a diagram with which to lay out the working material. The pattern is chosen by the craftswoman according to her taste: it can resemble a chessboard, alternate colors in rows, or look chaotic.
The squares are sewn side by side to each other, or a more complex stepwise stitching design is chosen, when one flap begins to be sewn from the middle of the edge of the second. The pattern in this case resembles the laying of ceramic tiles. A similar stitching technique can be used to create a fabric of triangles or rectangles . In the first case, it is better to choose isosceles figures . High-class craftswomen, using geometric rags, are able to create “pixelated” portraits that look like photographs.
"Well"
The beautiful, unique “well” style is also called “American square” ; it was very popular in America several centuries ago. Europeans also made him famous by borrowing equipment from overseas. The basis of the product is a small square located in the center of the blanket, around which larger squares are gradually built up, sewn together in size in ascending order. If you look at the canvas from above, it creates the illusion of a well made of logs.
This technique gives visual volume and depth to the picture, especially if you use color effects correctly.
Watercolor
In this technique, it is the color, not the shape of the flaps, that is important. A watercolor blanket may consist of squares, stripes or shapeless segments, but they are all united by one color scheme, as if painted in watercolor and created with an artist’s brush.
From hexagons
The blanket is sewn from hexagons of the same size, cut from scraps . If you introduce shades of honey color into the canvas, it will begin to resemble a honeycomb. But most often a harmonious hexagon is used to create a flower or star blanket; other artistic images are created less often.
"Lyapochika"
The most beautiful and voluminous technique, used for many years in Russia . The “frog” blanket is made up of tiny scraps, the free end hanging from the canvas. Even more volume is provided by pieces of fabric rolled into a tube. Creating such a product is hard, painstaking work, as you have to work with a large number of small parts. Thanks to the selection of various shades, you can create paintings from scraps. They, like canvases painted with oil paints, look amazingly beautiful if you move away from them.
Choosing the right fabric
To sew a blanket from scraps with your own hands, you need pieces of fabric of the same thickness and texture. The color palette of fabrics is selected in accordance with the interior style, wall colors and furniture.
Contrasting combinations of fabrics look most advantageous against the discreet background of the main fabric. You should not allow excess variegation; it is better to give preference to moderation.
Before starting the sewing process, you need to make a preliminary layout of the blanks on the leading base of the fabric, move a little away from it and evaluate the resulting masterpiece. So to speak, a look from the outside will help you understand the success of the combination of design and color scheme.
Materials
For the patchwork style there are no restrictions in the selection of material, the main thing is harmony in the combination of texture and color . As for children's blankets, there are certain recommendations for the use of fabrics. For small users, natural products are predominantly chosen, soft, tactilely pleasant, with environmentally friendly dyes, ensuring complete safety for children. The following fabrics can be used to decorate children's bedrooms.
- Cotton . Durable and natural material, it makes durable and beautiful blankets. Many types of fabrics are produced from cotton.
- Flannel . Soft, pleasant to the touch fabric made from cotton threads. Often used in products for newborns.
- Linen . Dense, rough material with a high degree of hygroscopicity. Suitable for summer blankets in country and ethno style.
- Kulirka . The thinnest and smoothest cotton jersey, the touch of which children really like.
- Silk . Natural silk is beautiful, but very expensive, even scraps are rarely found. Its sliding texture is not to everyone's taste. But silk is ideal for oriental styles. The same characteristics apply to satin products.
- Fleece . The fabric is synthetic, but soft and light, pleasant to the touch, and does not require complex care. The bottom layer of the blanket can be made from natural material, and the top layer from fleece patches.
- Chintz . Durable cotton fabric in a variety of, mostly bright colors. The bedspreads are inexpensive and elegant.
In addition to fabrics, knitted fabric made in the form of colorful fragments is used to create children's blankets in the patchwork style.
How to sew a blanket using the patchwork technique from triangles
We lay out the desired pattern from multi-colored triangles cut out according to the template
For beginners, the easiest way is to form the patches in the shape of regular equilateral triangles of the same size. From such details, the front side of the product can be easily decorated with interesting geometric compositions and ornaments. Triangles can be used to form stars, flowers, waves, and many different patterns. Triangular patches will be perfectly combined with square and diamond-shaped ones. When creating a template for future parts, it is important not to forget to provide indents along the edges for seams 0.5 cm - 1 cm wide. You can look at the pattern of the future patchwork composition in magazines, on the Internet, or come up with it yourself.
Large patchwork triangle blanket
Dimensions
Baby blanket sizes vary. The patchwork technique allows you to make products of any parameters, from envelopes for newborns to teenage bedspreads for a single or single bed. To ensure that the blanket matches the size of the rest of the bedding, there are still certain standards.
- Single products - 110x140 cm. For the little ones, square options are made 110x110, 120x120, 130x130 cm.
- One-and-a-half blankets – 135x200 cm or 140x210 cm.
As for European standards, another 10 or 15 cm should be added to the above parameters. Many craftswomen prefer to sew non-standard blankets that are comfortable for a particular child and designed for his sleeping place.
We sew a blanket for discharge
An original, beautiful, convenient and safe envelope for the discharge of a newborn.
The topic of how to sew a baby blanket for discharge from the maternity hospital is relevant in cool weather. Festive satin and lace envelopes will not work. For this purpose, a transformable blanket is sewn using the same method as a regular quilt on padding polyester. Sew two main parts of the blanket measuring 46x85 cm and 46x60 cm, two side flaps measuring 20x70 cm. Fasten the two main parts and two side flaps to the bottom of the blanket with Velcro, or sew satin ribbons. The top of the blanket can be decorated with lace or pleated ribbon. This blanket can easily be converted into a regular stroller blanket.
Patchwork equipment
Patchwork has become so widespread that in many handicraft stores you can see and purchase patchwork kit But for those who are not going to do such handicrafts all the time and do not want to spend money on purchasing such a set, tools that can be found at home for free are suitable.
Tools
To create a patchwork masterpiece you will need:
- scissors or roller cutter
- needles
- threads
- pencil
- pins
- centimeter
- chalk
- paper
- sewing machine (if there is a lot of sewing to do)
Textile
In addition, you need materials that can also be purchased at the store or searched for at home. To create a beautiful multi-colored craft, you will need colorful pieces of fabric and lining - all this can be cut from unusable old clothes, bed linen, scarves, curtains and other unused household items.
Photo gallery of beautiful handmade patchwork quilts:
PreviousTextiles Enterlac knitting technique - we create beauty easily!
Next
TextilesHow often should bed linen be changed?