How to trim corners with bias tape, master class | Sewing Advisor
How to finish corners with bias tape? You will need the answer to this question when working on complex cutouts in women's and children's clothing, as well as when sewing home textiles: decorative blankets, napkins and panels, aprons and potholders.
Our master class will show in detail how to process corners with bias tape with your own hands quickly and accurately. It's not difficult at all! We will look at external and internal right angles.
How to trim corners with bias tape: basics and nuances
How to trim corners with bias tape yourself? Bias tape is a very convenient material for processing and finishing the edges of any product. You can purchase ready-made bias tape at your local sewing supply store.
It comes in a variety of widths and colors, so you can find the bias tape that's right for your project.
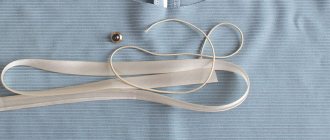
However, making bias tape with your own hands is not at all difficult! We recommend using only your own bias tape in cases where it is visible from the front of the garment.
The bias tape is cut at an angle of 45 degrees to the grain of the fabric.
Most often it is 3 cm wide, but you can increase it at your discretion. The cut strip of fabric should be ironed in half lengthwise, and then both long sections should be ironed to this middle line. That's all!
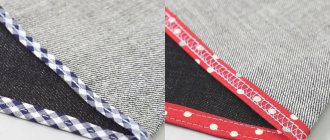
Processing the corners with bias tape can be done with a finishing stitch on the front side or fixed manually with a hidden seam on the back side. We will show you how to make an internal corner with a machine stitch, and an external corner with a hidden seam.
So, let's learn how to finish corners with bias tape yourself!
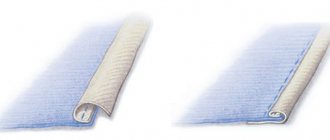
External corner
Fold the bias tape right sides together to the edge of the piece. Sew, not reaching the edge, a distance equal to the width of the allowance. That is, if you sew a stitch at a distance of 5 mm from the edge (the future width of the finished edge), then you need to finish the seam 5 mm before the edge.
Pull the part out from under the needle. Fold the bias tape upward, exactly from the last stitch.
Lower the binding down as shown in the photo. Pin or clamp together.
Sew, starting the seam at the same distance at which you finished the previous one.
Turn the binding to the wrong side.
Pin the binding to the seam allowances on one side first.
Pin the tape to the seam allowance on the other side.
Fold the corner.
Hand sew the edge of the bias tape with a blind stitch. Also tack the corner seam. Iron.
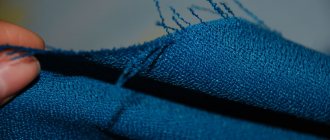
Internal corner
Reinforce the area near the inner corner with stitching. Cut the corner with scissors almost to the stitching.
- Align the binding right side to the right side of the product and pin, opening the corner so that the cuts form a straight line.
- Sew to the full length required.
- Iron the bias tape up.
- Make a bevel on the front side and drag it to the back through the notch.
Fold the trim around the edges and pin them to the seam allowances. Carefully fold the corner.
- Stitch close to the edge.
Source: https://sewingadvisor.ru/pp/ugly-kosoj-bejkoj/
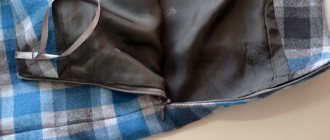
Video tutorial: Processing the armhole or neckline with chiffon bias tape
12 04 2021 Lina Frolova
Beautifully graceful finishing of an armhole or neckline with bias tape is not an easy task for beginners. But sometimes the entire type of product depends on how they are processed. Especially on thin and transparent fabrics.
To make products made from fine fabrics look beautiful, it is advisable to use a treatment that will favorably emphasize the properties of the fabric, and not ruin the appearance of the product with rough details.
Here it is no longer possible to use facing processing for processing armholes and necklines. Processing with bias tape is ideal.
I have already shown one of the methods for processing with bias tape.
This time I will show you another way in which you can make bias binding even more subtle and elegant. I really like this method. It is both reliable and elegant. I highly recommend that you master it.
This processing is not difficult at all, and may even be easier than the more well-known, common methods of processing with bias tape.
In this master class you will see a fragment from the film on sewing a two-layer chiffon dress.
The film itself has not yet been released. Maybe we’ll release it again, I don’t know yet... The quality of the film itself confuses me a little because of the black fabric in the work. I will NEVER make video tutorials with black fabric again. They have done such a great job and now they are having doubts whether to release it...
I still decided to post a small fragment on processing armholes with bias tape in the master classes, because you will definitely need it.
Don't be confused by the shape of the armhole. It’s just that this dress has an unusual cut (you won’t be able to see it) and the armhole configuration is therefore different from the standard version.
- So, watch the video MK and take into account an interesting and reliable method of processing with bias tape:
- ????
- *Let the video load for a more comfortable viewing experience.
- If the video does not play, download and install a flash player
Source: https://armaliniblog.ru/obrabotki-gorloviny-kosoj-bejkoj