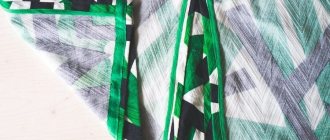
One way to finish cut edges on necklines and armholes is with bias tape. This method is very suitable for thin fabrics: lace, cotton, cambric and others.
This method is suitable for both children's and adult clothing. Summer, evening, and lace clothes can be processed in this way.
The trim can be made from the fabric of the product itself, or you can choose another fabric to match or contrast. For example, the trim can be made from chiffon, cambric, or mesh.
How to trim corners with bias tape, master class | Sewing Advisor
How to finish corners with bias tape? You will need the answer to this question when working on complex cutouts in women's and children's clothing, as well as when sewing home textiles: decorative blankets, napkins and panels, aprons and potholders.
Our master class will show in detail how to process corners with bias tape with your own hands quickly and accurately. It's not difficult at all! We will look at external and internal right angles.
How to trim corners with bias tape: basics and nuances
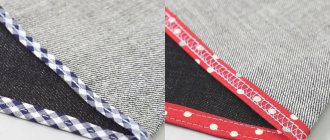
How to trim corners with bias tape yourself? Bias tape is a very convenient material for processing and finishing the edges of any product. You can purchase ready-made bias tape at your local sewing supply store.
It comes in a variety of widths and colors, so you can find the bias tape that's right for your project.
However, making bias tape with your own hands is not at all difficult! We recommend using only your own bias tape in cases where it is visible from the front of the garment.
The bias tape is cut at an angle of 45 degrees to the grain of the fabric.
Most often it is 3 cm wide, but you can increase it at your discretion. The cut strip of fabric should be ironed in half lengthwise, and then both long sections should be ironed to this middle line. That's all!
Processing the corners with bias tape can be done with a finishing stitch on the front side or fixed manually with a hidden seam on the back side. We will show you how to make an internal corner with a machine stitch, and an external corner with a hidden seam.
So, let's learn how to finish corners with bias tape yourself!
External corner
Fold the bias tape right sides together to the edge of the piece. Sew, not reaching the edge, a distance equal to the width of the allowance. That is, if you sew a stitch at a distance of 5 mm from the edge (the future width of the finished edge), then you need to finish the seam 5 mm before the edge.
Pull the part out from under the needle. Fold the bias tape upward, exactly from the last stitch.
Lower the binding down as shown in the photo. Pin or clamp together.
Sew, starting the seam at the same distance at which you finished the previous one.
Turn the binding to the wrong side.
Pin the binding to the seam allowances on one side first.
Pin the tape to the seam allowance on the other side.
Fold the corner.
Hand sew the edge of the bias tape with a blind stitch. Also tack the corner seam. Iron.
Internal corner
Reinforce the area near the inner corner with stitching. Cut the corner with scissors almost to the stitching.
- Align the binding right side to the right side of the product and pin, opening the corner so that the cuts form a straight line.
- Sew to the full length required.
- Iron the bias tape up.
- Make a bevel on the front side and drag it to the back through the notch.
Fold the trim around the edges and pin them to the seam allowances. Carefully fold the corner.
- Stitch close to the edge.
Source: https://sewingadvisor.ru/pp/ugly-kosoj-bejkoj/
Knitted trim
To sew a T-shirt, like in a store, you will need to buy a ready-made knitted strip (trimming, trim). It is made of ribbed knitwear, ribana, very elastic and holds its shape perfectly. The same method is useful for a tunic or T-shirt dress.
How to process a knitted neckline:
- Place the finished strip on the front side of the neckline.
- Baste (this is important so that the edge does not stretch).
- Sew using an overlocker or fine zigzag, making sure that the parts do not stretch.
- Take out the basting.
- Lay out the pieces so that the seam is on the wrong side and the placket is facing up.
- Place a securing stitch along the face using a zigzag with a slight bend or a stretch stitch.
- Press to make the seam flatter.
processing of cuts with bias tape | | Creative workshop Angel A
Necklines and armholes in summer dresses without lining can be conveniently treated with bias tape. Bias binding is strips of fabric cut strictly at 45 degrees to the weft and warp fabric. They are so flexible that they can easily follow the rounded lines of armholes and necklines.
Bias binding is also a facing, but in the form of a straight strip of fabric.
There are several ways to trim sections with bias tape. My favorite method is not the easiest, it is quite labor-intensive, but I prefer it more than others.
Why? Because it gives a completely flat, thin processed edge. The bias tape does not need to be folded in half first. It is better to cut the bindings from very thin fabric. I never buy bindings at the store. I never iron them in 4 layers. There is only one reason: I don't like it.
So: Italian linen, back with yoke and “tricky” neckline. New look style dress. There are a lot of sections and they need to be processed in stages. Let's start from the back. The darts are sewn, the yokes are either basted or already sewn on by machine, not reaching 2 cm from the end of the seam.
Description of slice processing:
1) strengthen all tensile sections with thin adhesive doublerin (non-woven fabric). I often glue the armholes and neckline: the cuts are fixed from stretching, and the processed edges in the finished product look clear and finished.
2) pin the bias tape “face to face” to the cut being processed. Often I not only pin it, but also baste it if there are complex bends ahead. This way I am confident that the binding is clearly fixed, in a straight line, and I am not distracted by removing pins. I never write on pins - I feel sorry for the typewriter.
- 3) sew the binding on the machine 4) iron the seam and press the binding to the seam allowance
- 5) stitch the binding to the seam allowance from the front side.
6) iron again and cut off excess allowances. You can trim the seam allowances in steps using regular or scallop shears for a flat border on the finished edges. 7) sweep out the piping. In other words, turn the binding over to the wrong side and secure the edge with bias stitches so that 1 mm of the main fabric folds over to the wrong side.
 fold the edge of the binding, sweep it (or pin it with pins) and sew it on the machine. But most often I sew this edge with hidden stitches. Still, individual tailoring is a special way of making clothes. There is a lot of manual work, but the end result is worth it. The seams are thin and flat. The time spent is repaid by the special sincerity and warmth of things.
All other sections are processed using the same technology. Sew the shoulder seams and apply bias tape to the neckline. In principle, the plastic trim will allow you to beautifully describe smooth curves and roundness. There is no need to pull it out with an iron before stitching. But in this dress the front neckline is triangular, and it was here that I made an exception - I stitched the trim “on the corner” at the bottom point of the neckline.
This is a processing that is unlike industrial technologies. Man-made.
- Simpler methods of piping with bias tape can be seen in this article.
Source: https://angel-a-dress.ru/texnologii/gorlovina-i-projmy/obrabotka-srezov-kosoj-bejkoj
How to make your neck smaller
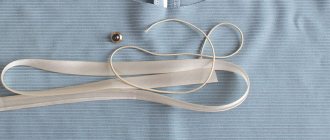
If the collar on a cheap knitted dress has stretched out, it’s easier to buy a new one. But if the main fabric has not lost its presentation, then you can save a T-shirt, long sleeve, half-over or dress:
- the most primitive thing is to tie it with a hat elastic band, a strap, a decorative ribbon, or the like. They are usually threaded into the hem, inside the knitted trim or under the facing. A more complex option is to make holes, process them with grommets (blocks) and tighten the tension through them;
- make darts (pinch and stitch or sew with a hidden seam in several places);
- add a placket in the same way as a knitted edging on T-shirts, only choose a larger width for the part;
- sew on a decorative facing/yoke, i.e. fold the factory knitted tape, make a decorative edging out of it, and sew a new collar with unstretched tape to the wrong side;
- Insert lace, knitted or any other insert into the V-shaped neckline. Another option is to close it with a hidden stitch.
The method of processing the neckline is chosen taking into account the model and style of the dress, one’s own experience and available materials. The most important condition is to act carefully. And the neckline will look like a purchased item.
Master class: neck processing
Share the link to this article with your friends on social networks.
When sewing chiffon clothes, it is very important to properly process the neckline . You can do this beautifully using bias tape. The task, of course, is very painstaking and requires special care, but it is really worth it. Our master class describes the entire process in detail and will help even a beginner to cope with it easily.
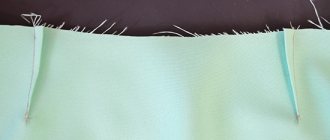
Sew shoulder and side seams on the blouse. Mark the middle of the front and back, fold the neck in half. Without stretching, fasten the blouse to a flat, thick fabric and measure the length of the neckline. This is the length you need to prepare bias tape.
To cut out bias tape, place a piece of chiffon on a flat piece of cotton fabric and pin it in place.
You can use, for example, a tablecloth or sheet folded in 4 layers. This will help you more accurately cut out bias tapes of the same width. It is important that all corners of the fabric cut are straight.
- Baste the straight edge of the bias tape to the neckline, right side to right side, pulling slightly.
- If you sew the binding too loosely, it will not lie nicely.
- It is also impossible to adjust the main fabric, since the chiffon will then be impossible to iron.
Mark the junction of the binding, trim off the excess and stitch the ends along the grain thread. Iron the cuts.
Sew the binding at a distance of 5 mm from the edge.
Press the binding onto the neck edges. Then turn it to the wrong side and baste the folded edge to the neckline close to the stitching seam so that on the front side the width of the binding is 0.5 cm.
- From the outside, sew a stitch into the stitching seam, setting the stitch length to 2.5 mm.
- Steam the neck through a thin cotton cloth.
- The elegant neckline of the chiffon blouse is ready!
- We hope our master class with a detailed description of the process of processing the neck of a chiffon product using bias tape helped you in your sewing.
Especially for the site Handicraft Lessons Valery-r.
Source: https://xn—-htbdjdhckueqe7ag0q.xn--p1ai/master-klass-obrabotka-gorloviny/
V-neck and bob necklines
These necks are made in the same way as round ones. So that the facing can be turned to the wrong side, notch the allowances at the top (8), respectively, in the corners close to the stitch line.
Extra tip: grind the neckline clean before sewing the side seams. Then you can lay the neck flat for ironing on the backing.
Using a sleeve ironing board, a terry towel and a gauze bandage, you can make your own ironing pad: roll the terry towel with a roller and attach it with bandages to the sleeve ironing board.
Processing armholes in sleeveless items with bias tape: preparation for work, rules - shvejka.com
0 151 views Sleeve patterns
In sleeveless products, the treatment of the armhole may vary depending on the material and model of the garment. For knits, stretch and other stretch fabrics, it is convenient to use bias tape.
Bias tape seals the cutouts of clothes, making them beautiful and neat (photo: sewingadvisor.ru)
It looks beautiful on round, oval, V-shaped and teardrop necklines.
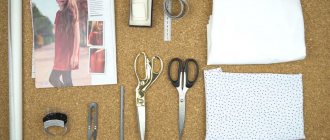
Preparing for work
How to cut strips of bias tape from fabric. The edging tape is made from strips of material cut along an oblique line. Thanks to this, they can be laid out in a circle in the finished product (which will not happen when cutting along a longitudinal or transverse line).
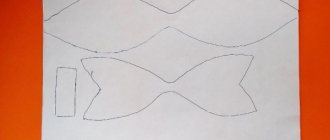
Manufacturing master class:
- Determine the total length of bias tape needed to cover the neckline and armhole.
- Place the fabric with the wrong side facing you. Mark strips of the same width on it at an angle of 45°.
- Carefully cut strips along the line with scissors.
Important! If the binding turns out to be short, it can be lengthened. The line connecting the parts of the tape should be oblique, so they are ground at an angle. The edges of the stitching strips are cut at an angle of 45°.
Preparing the bias tape, ironing the hem. The strip is folded in half (the edges should clearly coincide) and lightly fixed with a hot iron. There is no need to iron it too much. After this, the width of the binding will be reduced by about half.
To make sewing the ribbon easier, it is recommended to iron the hem as well. Its edges are fixed with an iron, unfolding the slightly ironed strip. With this scheme, the guideline for creating the hem will be the line in the center of the strip that the iron will leave.
Tips before processing
The edging strip for bias tape is most often made 2.5-3 cm wide. The narrower the tape, the better it fits the curves of the neckline, especially at the shoulder seams. For thin materials and linen products, you can use binding up to 5 cm. After ironing when folded, its width will be half that size.
Before work, you need to prepare not only a homemade strip for edging, but also a store-bought one. The ironing method is the same as for bias tape cut from fabric with your own hands.
Before work, the binding needs to be prepared and ironed (photo: burdastyle.ru)
Before sewing on the ribbon, check the condition of the sewing machine and the thread tension. Make sure the needle and thread numbers are correct (they must match the fabric being sewn).
Note! It is not recommended to sew bias tape with a small stitch, since frequent piercing with a needle can damage the material
Video tutorial: Processing the armhole or neckline with chiffon bias tape
12 04 2021 Lina Frolova
Beautifully graceful finishing of an armhole or neckline with bias tape is not an easy task for beginners. But sometimes the entire type of product depends on how they are processed. Especially on thin and transparent fabrics.
To make products made from fine fabrics look beautiful, it is advisable to use a treatment that will favorably emphasize the properties of the fabric, and not ruin the appearance of the product with rough details.
Here it is no longer possible to use facing processing for processing armholes and necklines. Processing with bias tape is ideal.
I have already shown one of the methods for processing with bias tape.
This time I will show you another way in which you can make bias binding even more subtle and elegant. I really like this method. It is both reliable and elegant. I highly recommend that you master it.
This processing is not difficult at all, and may even be easier than the more well-known, common methods of processing with bias tape.
In this master class you will see a fragment from the film on sewing a two-layer chiffon dress.
The film itself has not yet been released. Maybe we’ll release it again, I don’t know yet... The quality of the film itself confuses me a little because of the black fabric in the work. I will NEVER make video tutorials with black fabric again. They have done such a great job and now they are having doubts whether to release it...
I still decided to post a small fragment on processing armholes with bias tape in the master classes, because you will definitely need it.
Don't be confused by the shape of the armhole. It’s just that this dress has an unusual cut (you won’t be able to see it) and the armhole configuration is therefore different from the standard version.
- So, watch the video MK and take into account an interesting and reliable method of processing with bias tape:
- ????
- *Let the video load for a more comfortable viewing experience.
- If the video does not play, download and install a flash player
Source: https://armaliniblog.ru/obrabotki-gorloviny-kosoj-bejkoj
Sewing from knitwear - all the secrets
Knitwear (French tricotage, from tricoter - to knit) is a textile material that is created by interlacing loops . Cotton, synthetic, silk and wool fibers are used in the production of knitwear.
The first knitted items were found during excavations in Ancient Egypt. These are children's stockings with a separately knitted thumb.
Knitting lace and stockings was widespread in Europe during the Middle Ages. The first knitting machine was invented by the Englishman William Lee in 1589. Soon machine production of knitwear spread throughout Europe.
In the 20th century, knitwear became very popular thanks to Coco Chanel. She took sweaters and turtlenecks out of the category of workwear and turned them into a fashionable fetish. Since then, knitted fabric has not lost its position.
Today, both beginning fashion designers and world-famous fashion houses - Chloe, Celine, Maxmara, Burberry - work with knitwear. Knitted fabric provides the widest scope for the designer’s imagination. It is not surprising that the number of ways to knit knitwear, and therefore its types, is increasing. It’s worth taking a closer look at the most popular ones.