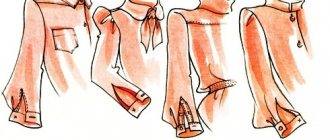
Elegant work! Processing the neck of a knitted jumper
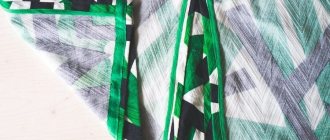
Knitted fabric is an excellent material that is ideal for sewing warm jumpers, sweaters or cardigans. Craftswomen have long appreciated its ability to hide minor flaws in work, and it takes much less time to sew knitwear than when working with ordinary fabrics. We have previously published patterns of simple and effective knitwear models on the site, and in this lesson we will tell you how elegantly and quickly you can process the neckline on a knitwear product using regular bias tape. You will find the pattern of a jumper with a bat sleeve, the example of which we will use in the master class, in one of the previous lessons.
How to process a neckline on a knitted product
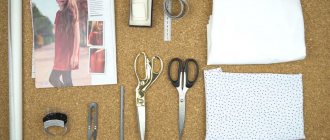
To process the neckline you will need: bias tape with folded edges the length of the neckline of your product + 10 cm, 10 cm of round elastic and 1 button on the stem with a diameter of 1 cm.
Sew the middle seam of the back of the product with a machine stitch, leaving a 10 cm long opening for the fastener unstitched. Overcast the seam allowances and press them.
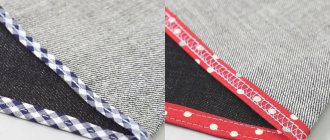
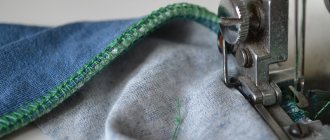
Rice. 1. Bias binding for finishing the neck of a knitted jumper
Trim the seam allowance along the neck of the jumper to 0.7 cm. Fold the seam allowance along one side of the bias tape and pin the bias tape along the edge of the neck allowance. Do not baste the binding so that waves and folds do not form (it may stretch a little during the stitching process). Sew the binding to the neckline, stitching 0.5 cm from the edge.
Rice. 2. Knitted jumper with bias tape
Rice. 3. How to sew binding to the neckline
Fold the tape over the neckline allowance and stitch the tape along the seam. Cut off the free ends of the binding on both sides, leaving 1 cm, fold and pin.
Rice. 4. How to stitch along the edge
Rice. 5. Fold the edges of the binding
Form a loop from the rubber band to the size of the button, wrap the ends of the elastic with several turns of thread, and secure. Pin the loop to the left side of the back at the top of the cut.
Rice. 6. How to baste an elastic loop to a product
Bend the folded edges of the binding on both sides of the cut down and pin it in place. Stitch along the edge of the binding, being careful to stitch exactly along the folded edge of the binding.
Rice. 7. How to fold bias tape onto a product
Rice. 8. How to sew the edge of bias tape to the neckline
Having reached the edge of the cut, turn the product 90° and stitch the binding along the short side, while simultaneously stitching the loop. Fasten the ends of the threads and cut them.
Rice. 9. Cross short stitching
Sew a button onto the right side of the clasp. In Fig. Figure 11 shows a section of the finished fastener from the reverse side.
Rice. 10. How to sew on a button
Rice. 11. Neckline finished with bias tape
You will find even more new interesting ideas on the website of Anastasia Korfiati’s Sewing School. Subscribe to free lessons and sew fashionable clothes with us!
We recommend
Casual sports suit made of jersey, pink or other color
Casual sports suit made of knitwear, pink or other color
Casual sports suit made of jersey, pink or other color Yana Levashova designer clothes3,765.95 UAH Buy Casual sports suit beige with lace and stripes Casual sports suit beige with lace and stripes Casual sports suit beige with lace and stripes Yana Levashova designer clothes3 765.95 UAH Buy Master class on sewing a pleated skirt. Training course. Master class on sewing a pleated skirt. Training course. Master class on sewing a pleated skirt. Training course. Yana Levashova designer clothes1 318.08 UAH Master class on sewing a knitted robe. Video course on sewing. Master class on sewing a knitted robe. Sewing video course. Master class on sewing a knitted robe. Sewing video course. Yana Levashova designer clothes1 694.68 UAH
The neckline or neckline on any item of clothing is almost the “pillar” of the entire appearance of the product. Therefore, the processing of the neck must be done professionally and efficiently, and most importantly, in accordance with the overall style.
club.season.ru
Any experienced seamstress will sooner or later become interested in how to process a neckline in an unusual and beautiful way. Often, basic knowledge and simple modeling methods are not enough to complete according to factory canons. A poorly finished collar or neckline can ruin even the most beautiful dress, shirt, jacket or blouse.
Types of necks
The type of technological processing of cuts of knitted clothing depends on the design of the model and the type of fabric. Neck options in knitwear have the same variety as in garments.
The cutout can be:
- round classic;
- round deep;
- V-shaped;
- draped neckline;
- stand collar;
- turn-down collar;
- fantasy options.
Depending on the type of neck and collar, the processing technology changes. In tailored blouses and polos, as a rule, collars are sewn in as in textiles, with preliminary processing of the collar and subsequent stitching. In industrial knitted fabrics, trims and collars are attached using special knitting equipment.
In hand-knitted models, the neckline is tied with a double or single strip of main yarn or decorated with a stand-up collar.
Processing technology
In mass production, to optimize the technological process, special devices and equipment are used to minimize the use of manual work. At home, processing a knitted neckline includes machine and manual operations. The use of a knitting machine needle with a rounded tip, which pushes the fibers apart, and the use of knitted elastic stitching improve the quality of the finished product.
Smooth edgings and eraser trims are used to decorate T-shirts, sweatshirts, basic assortment dresses or sports style models. Stand-up collars with polo-type trims are used to decorate sports dresses and polo T-shirts. Elegant knitted blouses and dresses benefit from hem facings that create a clean edge.
Round neck trim
- Cut out the binding from the main fabric or eraser. Its length when flat is equal to or shorter than the length of the finished neck cut. Make sure that the elasticity and length of the assembled edging are sufficient to be pulled over the head.
- Stitch the piece along the short side to form a ring.
- Fold the piece in half and iron it.
- Fold the binding with the neck cut right sides together, aligning one shoulder cut of the product and the stitching seam of the part.
- Pin together perpendicular to the cut, evenly distributing the lengths of the sections. Sweep if necessary.
- Sew the edge with an elastic stitch or overlock.
- Place or iron a seam stock on the product.
- Place an elastic single or double finishing stitch along the seam reserve.
Turning
Facing is a piece of fabric, 4-5 cm wide, completely repeating the shape of the collar or collar and armhole, if a sleeveless model is sewn. This design allows you to close the cut in an invisible way, leaving an even, smooth edge. This is how the neckline without a collar is treated on factory items (except T-shirts).
It is desirable that the facing does not have any seams, except for the side and shoulder ones. To prevent the part from turning on its face, to keep its shape and to prevent the neckline from stretching, the facing is glued with dublerin or non-woven fabric.
The material of the part is usually the same as the main fabric. And it is sewn on according to the lining principle. When finished, the front side of the facing is adjacent to the body, the back side is adjacent to the back of the garment.
Grinding technology
The technology of stitching the facing is not very difficult:
- Place the main piece and facing with right sides together.
- sweep or secure with pins.
- Sew along the edge, retreating 2-5 mm.
- Turn it inside out (turn the facing to the wrong side of the main product), straighten and iron the seam.
- If the fabric density is high or the facing is too narrow, sew a stitch on the outside to secure it. In the usual case, it is enough to secure it with a couple of stitches on the side seams.
Kashkorse and ribana
This processing method gives the product a sporty look, which many people like.
The first step is to decide how much material we will need. There is a special formula for this that allows you to find out the length of a circle inscribed in another circle:
- We measure the circumference of the neck according to the pattern
- Divide it by 3.14
- Subtract the width of the finished collar, multiplied by 2
- We multiply all this by 3.14
It turns out perfect! But if you don’t want to count every time, you can use a simpler formula:
Name
- We multiply the length of the neck by 0.7 - we get the length of the collar!
The same formula can be used for the cuffs and waistband.
Processing technology
We cut out the part of the required length (according to the formula) and width (usually 4 cm, but you can put more or less, depending on how you see the finished product), do not forget to leave allowances of about 7 mm
Fold the part in half lengthwise, face to face, cut to cut, and then in width, also in half, and stitch it on an overlocker.
We make an S-shaped seam ironing: iron part of it to the right, and part to the left, with a bend in the middle
Fold the part in the center “face” outwards and iron it - almost done