For many years now, such a simple and comfortable headdress as a bandana has not gone out of fashion. Despite the fact that it reached its peak of popularity back in the 90s of the last century, it continues to be worn to this day. These accessories are presented on the market in a huge assortment, but if you wish, you can create an original piece of clothing yourself. Before sewing a bandana, you need to study all the variety of models and choose the most suitable option for yourself. The work will not be difficult; even a beginner with no sewing skills can handle it.
Choice of fabric and model
Before you make a stylish bandana, you need to choose the material. Linen or cotton fabric is ideal for work. In addition, you can use durable, slightly stretchy calico, chintz, cambric. Since the main purpose of this headgear is sun protection, the above materials perform this task perfectly.
However, this does not mean that other fabrics are unacceptable. Synthetic options are suitable for a product that is not planned to be used daily. But ideally it is better to give preference to natural fabrics. Chiffon and other thin materials should be taken into account last.
The classic version of the product is a square of fabric. The size of the bandana depends on who it is intended for:
- for a child – 50 x 50 cm;
- women's – 60 x 60 cm;
- men's - 70 x 70 cm.
The above parameters are approximate dimensions. If you create a product yourself, then in any case you need to make an individual pattern. There are the most popular types of bandanas:
- The classic one looks like a square scarf.
- The bandana with an elastic band is comfortable to wear and does not fall off the head.
- The version with ties is universal for all ages and genders.
- Bandana-buff is a transforming model, made in the form of a tube made of elastic material. It can be worn as a classic piece, as a hat, hood or mask to protect your nose and mouth from dust while riding a bike or motorcycle quickly.
- A bandana with a visor is an interesting and multifunctional model. It is intended for summer, spring, autumn (depending on the fabric from which it is made). Most often, it has ties at the back to adjust the size.
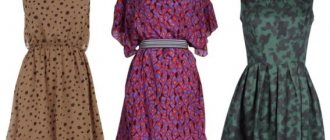
When choosing a material, you should pay attention to the color. It is ideal if the color scheme of the headdress matches the tone of the clothing. For men, muted shades of blue, gray, brown, green, and burgundy are suitable. Women most often prefer light-colored products with unusual prints. A scarf made from light denim looks stylish.
Bandana buff
Classical
With elastic band
With ties
With visor
How to sew a bandana for a woman with your own hands
What types of bandanas are there? Model selection
It is customary to highlight the main models of bandanas for women:
- A headscarf is a triangular bandana on the head. It is usually made from cotton. This is one of the most popular types of bandanas.
- An accordion bandana is an original headdress for women.
- Square bandana - cotton fabric of standard size 60 cm by 60 cm.
- The transformable bandana is a multifunctional headdress that has no seams. The model is made of elastic fabric, which makes it suitable for anyone.
- Bando is a headdress in the form of a bandage. The bandeau is usually worn on the forehead. This bandana is made from fabrics such as tulle, velvet, satin or lace. Sometimes the bandeau is decorated with decorative stones.
- Bandana with elastic band . For the summer they are sewn from natural fabrics (linen, cotton). In cold weather, choose warm materials: wool, suede, leather or even fur. If you look at the types of bandanas with elastic bands, they usually come with ties, with or without a visor. A headscarf with a visor is a multifunctional headdress that can be worn all year round. A lace bandana usually has ties at the back for size adjustment. The main advantage of a bandana with an elastic band is that it fits tightly to the head.
Materials, tools and equipment
To sew a regular square bandana, you will need fabric measuring at least 60 cm by 60 cm and thread for sewing seams. Also useful:
- sewing machine (if available) or needle;
- threads;
- ruler;
- graph paper;
- pencil;
- chalk;
- scissors;
- iron.
Recommended Fabrics
A women's headband can be sewn from almost any material. Before you sew a product with your own hands, you need to decide on the density of the fabric. For example, you can choose thick or transparent material. The headband can be made from calico, cambric or natural materials such as chiffon, silk and cotton. If the product is intended for autumn or winter, you should choose warm fleece.
Medium-weight cotton, such as muslin, is best for making a bandana. Very beautiful bandanas are made from silk or satin. Using fabric with interesting prints is also popular when making bandanas.
Another factor to consider when choosing fabric is how the material feels on your skin. You can find a fabric that looks good at first glance, but the skin underneath may not breathe at all or even rub, causing irritation. When choosing fabric, you should also pay attention to its color. Camouflage or denim looks interesting.
The fabric recommended for sewing a headdress depends on the type of bandana:
| Kerchief | Cotton, linen |
| Square bandana | Cotton, linen |
| Transformable bandana | Polyester and other stretch fabrics |
| Bando | Tulle, velvet, satin, lace |
| Bandana with elastic band | Linen, cotton, wool, suede, fur and leather |
Head circumference measurements
Before sewing a bandana on your head, you need to carefully take measurements and use them to make a pattern. The standard size of a bandana for women is 60 cm by 60 cm. However, you should not neglect taking measurements, because there is a risk of not guessing the size.
A head bandana can have different sizes, depending on the circumference of a woman’s head. If you need to sew a bandana for a head circumference of 57 cm, then the pattern will have to be adjusted to this size.
To do this, you will have to divide the girth by 1.414, that is, by the square root of 2. Accordingly, the minimum length of the bandana for a girl with a head girth of 57 will be approximately 41 cm. You should also leave 20 cm for the ties. After the measurements, you can start making the pattern.
Pattern
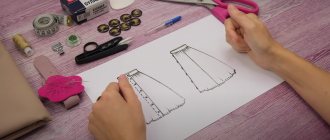
For smoother seams, it is best to first make a pattern on special paper - graph paper. It can be bought along with the fabric. On it you need to outline the dimensions of the future bandana and also leave 3 cm on each side for allowances.
After the shape has been outlined, you need to cut it out and then transfer the paper pattern to the fabric, outlining it with chalk. And only then the bandana itself is cut out.
Another option for a women's bandana pattern.
Step-by-step instruction
- The first stage of work will be preparing the fabric. It is better to immediately buy with a reserve, so that if something happens, you can simply cut off the excess. The fabric must be 60 cm by 60 cm or more.
- Then you need to measure the circumference of the head and use the formula to calculate the minimum length of the product.
- After this, you need to make a pattern, taking into account the parameters and wishes for length.
- After cutting out the pattern, you can try on the bandana and adjust the length. You still need to leave 5 cm for the seams.
- A bandana on the head requires mandatory processing of the seams. This can be done either with threads that match the color of the fabric or with contrasting threads to create an interesting design. To make the product look beautiful, you must use a zigzag stitch. It will protect the fabric from crumbling and other damage.
- After processing the seams, the product must be ironed well, taking into account the characteristics of the fabric.
- You can start decorating.
How to decorate a headdress
A women's head bandana is often decorated with additional materials. You can use a variety of patches as decoration for a bandana. There is a huge selection in craft stores: patches with flowers, logos of musical groups and films. Some are attached with the heat of an iron, while others can be sewn on by hand.
The bandana can be painted with paints or markers on the fabric. You can use special stencils to make the drawing more successful. Bandanas decorated with precious stones, beads or sequins also look impressive.
After applying any decor, the product must be allowed to dry completely. You should always follow the instructions for the products you use to decorate your bandana. Fabric paints and markers may have special instructions for washing and caring for your bandana.
Types and features of tying
A bandana is a piece of material in the form of a square or triangle. The usual size of the piece is 60x60 cm, the triangular scarf is 1/2 square diagonally. For babies, a smaller square is used, taking into account the small size of the child's head. As a rule , a piece of fabric 50x50 cm or half of it diagonally is taken for a scarf.
This is the standard type of bandana. Its only feature is an originally tied knot, which can be located in the back of the head, on the side or on top.
Of particular importance is the fabric from which this item is made, as well as the presence of finishing and fittings. The style of the entire image as a whole can largely depend on this.
Previously, the choice of fabric for a bandana was more conservative; natural fabrics were most often used - cambric, linen, cotton fabric and knitwear. Now the range of fabrics for headscarves has expanded significantly, and their own stylistic features have emerged, which determine the choice of material for a particular look. For example, natural silk, batik, leather and high-quality leather substitutes, natural or artificial suede, fleece, stretch, fine-pile fur, and hand-knitted fabrics began to be used.
You can tie a bandana in various ways. They are worn on the head like a scarf, in the form of a headband or blindfold, in the form of small hats and tiaras.
Women tie their hair with it and braid it. Men, such as race car drivers, bikers and skiers, wear this item of clothing over their faces. People working in the Far North often use balaclavas to protect themselves from strong winds and frost.
The bandana has become a favorite item of clothing among young people, who use it even more democratically. They like to tie a scarf on their head, neck, wrist, and also wear it instead of a belt on their belt or decorate their handbags and backpacks with it. Here are the varieties of this headdress at the moment:
. It can be both female and male. It is a special way of weaving a long strip of material on the head.
Turban (or turban)- Bando . Used for women in the form of a headband made of two or several twisted strips of fabric.
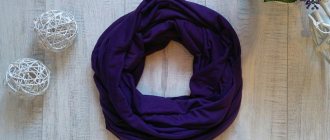
- Trumpet (or Buff) . Worn mostly by women. Most often this is a knitted sleeve that is worn over the head. It can be worn both on the neck and on the head.
- Bandana hat . Worn by both women and men. This is a sewing product with ties at the back of the head. It can be with or without a visor, with long ribbon ties, with a tightening cord, elastic band, snaps or buttons.
- Bonnet (helmet) . Only worn by women. This is a headdress in the form of a hood with a knitted elastic band in the neck area.
Master class on making a product
Making a bandana with your own hands is simple and does not require knowledge of the fundamental principles of sewing and cutting. Some types of bandanas do not require sewing at all, just the ability to tie a knot beautifully and a little imagination. In order to make such a bandana, you need a square piece of material, a scarf or a rectangle - it depends on what model you need to make. To “train” your hand, just stand in front of the mirror for a while and conduct a master class on yourself.
But some bandana models still need to be cut and sewn. But this is also not difficult, you just need to correctly transfer the pattern onto the fabric and assemble the parts according to the diagram.
Here are some interesting, universal models of bandanas with your own hands, which even a non-professional can sew using patterns.
Cutting and assembly diagram, option No. 1 (can be with or without a visor).
Cutting and assembly diagram, option No. 2.
On the head for women
The women's head bandana, with generally accepted methods of wearing, is distinguished by a wide variety of styles and finishes. This, of course, gives a big advantage to the fair sex to look creative anywhere and at any time.
The choice of fabric for this accessory is unlimited and largely depends on the overall look, as well as on the place for which the woman is wearing it.
Beach, plein air, barbecue, tourism and travel, as well as going out into sophisticated society - the bandana can be used everywhere, in different styles, colors and ways of wearing. You can be absolutely sure that this piece of clothing will make your look romantic and creative anywhere.
Below is a pattern that will allow you to sew a bandana for women without any special professional sewing skills. The pattern of a bandana without a visor with tied ribbons at the back of the head (without seam allowances) is as follows:
For men and boys
A man's head bandana is always more discreet. When choosing a headdress, men are more conservative, but nevertheless they show ingenuity when they need to quickly cover their head or face. Knitted T-shirts and T-shirts, scarves, headscarves, scarves or even light summer jackets and shorts are used.
"Legionnaire", the headdress of a French company soldier.
The favorite model of men is the “pirate”. It can be sewn from either cotton fabric or soft leather or leatherette. The color and pattern of the fabric are of decisive importance; it must be black or dark. The “pirate” design can be different: with ties, cords, ribbons or elastic.
The pattern diagram for a men's pirate bandana looks like this.
To create a childish look
The opportunity to sew a bandana for a boy using a pattern is a great way for a mother to show all her accumulated creative potential, because every mother dreams of presenting her beloved baby in the most favorable light. And all it takes is desire, a little imagination, patience and, of course, time.
Pattern of a summer headdress for a child (possible for a boy or a girl) with a visor and drawstring.
Why and when do chickens molt and what to do, how long does molting last for laying hens?
This model can be made with or without a visor. If a visor is planned, then the parts of the visor should be sealed with adhesive interlining.
The width can be chosen as desired. To assemble the drawstring, you can use a lace made from the main fabric, a ready-made braided shoe lace or an elastic band.
Measurements and pattern
It’s not at all difficult to figure out how to make bandanas for the whole family yourself. To do this, you just need to choose the appropriate fabric, take measurements and create a pattern. The standard parameters for adults are 61 x 61 cm.
It is worth considering that the volume of the head is different for all people. For example, if a product is being made for a girl and the girth is 55 cm, the pattern needs to be adapted. This procedure is quite simple. You just need to use the formula known from school, with the help of which the diagonal is determined. With a head circumference of 55 cm, the minimum length is calculated as follows: this parameter must be divided by the square root of two (55: 1.414). The result is 38.1 cm.
A pattern is made according to the calculated dimensions. It is extremely important to add small allowances to the obtained result, literally 1–2 cm. When the bandana pattern is ready, the fabric is laid out on the table, and everything is drawn on it using chalk.
how to cut and sew a bandana |
Hello to all lovers of lightweight headwear such as a biker bandana!
For boys, such a scarf for the summer is just what the doctor ordered. You can (and should) build and cut it yourself.
For the laziest, here are two ready-made patterns for quick cutting. sizes 50-52 and 55-56.
But try to build it yourself - it won’t take much time. You will need two measurements: - Head circumference OG
-bandana depth GB
In the video tutorial I explain in detail how to take measurements and make a pattern yourself. Here is a construction diagram for clarity:
and this is a video tutorial with the most detailed explanation of the clean execution of all the knots of the bandana.
Have a wonderful summer everyone, healthy boys.
Beautiful bandanas for your men!
How to sew a baby bandana
Model selection
Models of bandanas for children are very diverse. When choosing a bandana for a child, most parents prefer the following models:
- headscarf;
- transformable bandana;
- bandana with ties;
- various types of bandanas with a visor for sun protection.
It is best to choose the type of bandana taking into account the individual characteristics of the child. A bandana with ties is ideal for those children who often lose something due to high mobility. A hat with a visor will be the best option for those who live in hot climates and are often exposed to the scorching sun.
Materials, tools and equipment
To sew a bandana for a child, you need:
- textile;
- sewing machine or needle;
- threads in the color of the fabric;
- chalk;
- graph paper;
- scissors;
- pencil;
- ruler;
- elastic band (for a bandana with an elastic band);
- iron.
Recommended Fabrics
Children's summer hats should be made from light natural fabrics. Cotton and linen are perfect. It is better to choose fabric with different prints. This way the child will like the headdress more. The fabric market is so diverse that it’s easy to find material depicting your child’s favorite cartoon characters or simply a successful repeating pattern.
When selecting fabric, it is worth considering that it should not be thick. Preference should be given to breathable materials. They will help to avoid overheating of the heads, as a result, this will protect against sunstroke.
Measurements
When sewing a bandana for children, a number of factors should be taken into account:
- Gender of the child.
- Age, as children grow over the years, the bandana may become small.
- Interests of the child.
The average head circumference is about 45 – 50 cm. In each case, everything is individual and this should be taken into account. You can't do without using tape. It is best to add 5–10 cm to these parameters, in case of hemming edges and minor errors.
Pattern
For straighter seams, it is best to first make a pattern on graph paper. On it you need to sketch out the dimensions of the future headdress. It is always necessary to leave a small distance for further processing of the edges of the product.
After the shape is outlined, you need to cut it out, and then transfer everything from paper to fabric with chalk. Then a bandana is cut from the fabric.
Step-by-step instruction
- Fabric should be purchased with a reserve for unforeseen circumstances. The excess can be cut off or used to make another bandana. The minimum size will be 100 cm by 100 cm. Any product begins with the choice of fabric. This is especially important for children so that they don’t get a headache. It is worth buying fabric with a small margin. A square of 70 cm by 70 cm will be quite sufficient for sewing.
- At this stage you will need a measuring tape. She needs to measure the circumference of the child's head. Knowing all the data and applying a special formula, you can find out the minimum parameters of the bandana.
- Many mistakes in further operations are made due to incorrect patterns. At this stage, a drawing of the future product with all the necessary parameters is formed.
- Length correction is a very important operation that follows immediately after cutting. About 5 cm is usually left to form the seams of the product.
- An important step is processing the edges. They should be formed using a zigzag seam. You can use threads of different colors to make this. This will be a great solution for a girl's bandana. If it is intended for a boy, then it is better to use threads that match the tone of the fabric.
- Finally, iron the product with an iron or steamer. This is necessary to give it a complete shape. You should choose the right temperature, which will depend on the characteristics of the fabric.
- It wouldn’t hurt to add some decorative details.
How to decorate a headdress
The decor of a children's bandana can be a great place for imagination. This can be great fun for a child if you work together to create a design.
For girls, the best decorative elements are:
- Bows.
- Flowers.
- Butterflies.
- Icons.
More suitable for boys:
- Stripes.
- Icons.
- Embroidery
These features will help develop a child’s sense of style and develop individuality.
Bandana pattern
It is not difficult to make such an element as a bandana pattern. This is a unique accessory, the patterns of which do not differ from the pattern for creating a cap or other round headdress. The pattern of the model for the summer, size and other details will depend on the type of model. Below are diagrams for creating a classic square army model for men, interesting life-size pirate products and headscarf models for women, and simple master classes for their formation.
Bandana pattern for men
Classic square bandana for men
To make a classic square men's bandana, you need to take a large piece of fabric with dimensions of at least 60 by 60 centimeters. Any material is suitable for cutting. You can use cotton muslin, which is abrasion-resistant. Next, you need to draw a square on the fabric using a regular stationery or meter tailor's ruler. Then draw a square 60 centimeters long. This parameter can be slightly increased or decreased in size.
It’s easier, before sewing a bandana pattern with your own hands according to step-by-step instructions, make a drawing of a square right on the corner of a fabric flap or an awl. This way you can avoid unnecessary trimmings. It is worth pointing out that marker lines do not need to be made in the case of permanent markers. The contours of the future square should not have an ideal shape, but straight lines can give the bandana a neat and tidy appearance.
You might be interested in this Simple patterns for sewing yourself
Next you need to make a square pattern from fabric. The easiest way to initially make the cut is with sharp scissors. Then you need to try on the cut out headdress on your head. This stage involves fitting to inspect the size. If the bandana is large, it can be made smaller. It is imperative to process the fabric using a hemmed seam.
In the end, all that remains is to decorate the classic men's model. For example, a patch or machine embroidery is perfect for this. The registration emblem looks good on classic textiles. Be sure to iron the fabric thoroughly before decorating. Then the bandana pattern for a boy will be successful.
Basis for a classic square men's bandana
Women's headscarf
The women's headscarf is made using the same method as the men's classic bandana. You need to take a square cut of cotton or any other fabric and form a clear square with dimensions of 60 by 60 centimeters. Then make a line along the contour, forming a dart. Then try on the finished product by folding the fabric in half and tying it on the back of your head.
Basis for women's headscarf
Bandanas for babies
A bandana for a baby can be made like a simple women's headscarf or a regular men's classic model. You can also try making a model with a visor. To do this, you need to clearly form a pattern according to the template presented below, and carefully stitch it around the edges. Then you need to take the finished plastic model of the visor, cover it with fabric and carefully stitch all the protruding elements. At the end, connect the visor to the formed product and decorate as desired. To decorate a bandana for a baby, you can make a machine yourself or complement the product with machine embroidery.
Model for baby
Classic model
The basis for most models is a regular square made of bright durable fabric, where the side of the rectangle is equal to the circumference of the head. In this case, the fabric is folded into a triangle, the length of the fold - the hypotenuse of which is enough to tie a supporting knot.
How to dress a classic model:
- Fold the product into a scarf. Place the fold of fabric on the frontal part of the head. Tie the ends at the back of the head. Hide the bottom corner by wrapping it around the knot;
- Place the main part at the back of the head and tie a knot in the front. Women's version: place the ends of the scarf above the ear;
- Form a fabric strip from the scarf and tie it around your head to secure your hairstyle;
- Place the base on the front of the neck, and wrap the ends of the scarf around the neck, tying it in front with a beautiful knot;
- Tie a scarf - a bandana, like a pioneer tie, decorating the knot with a shiny brooch;
- Wrap the scarf around your wrist several times, securing the bandage with a beautifully designed knot.
- We have posted many different options for tying a headscarf on this page.
How to sew a classic bandana yourself:
- cut a square of suitable size from fabric;
- Tuck the edges in and hem with a hidden seam on the wrong side. Alternatively, you can zigzag stitch the edges of the product;
- roll up into a scarf.
This is interesting: Bandana pattern - bib for a baby
Product use
Tying a bandage is easy if you go to the mirror, gain strength and, just in case, call someone for help so that you can control the process of tying the bandage. So how do you tie a bandana? Process description:
- Take a huge square handkerchief and fold it in half diagonally. The corners of the created triangle should fit each other and not move in different directions.
- On a large part of the triangular headband, create a small flap 5 cm high. This will help the product fit well on the head and not fall off. The material should be tucked on the inside, where the lapel will not be visible.
- Connect the center of the long edge of the bandage to the central part of the forehead. Take the remaining sharp corners to the back of the head and tie them with a strong knot. A simple double knot is enough. Hide the free edges of the scarf under this knot. Adjust the product so that it does not fall on your face.
The work is completed. That's how easy it is to put on this headdress!
Useful tips
Sewing a bandana can be greatly simplified and improved by following these tips:
- Measurements for making a bandana can be taken by wrapping the tape 1.5-2.5 cm above the eyebrows, slightly above the ears and at the point on the back of the head that protrudes the most. It is better to measure your head several times to avoid mistakes. Ideally, to correctly measure your head circumference, you can call someone for help. This way the result will be more accurate.
- If you are afraid that the bandana will fall off when worn, you can purchase an elastic band 1.5 cm wide in advance and, when cutting, leave space to sew in the elastic.
- A good idea is to wash the fabric before sewing the bandana. This will avoid further shrinkage of the material.
- Since children's bandanas require less material, they can be made from various leftover fabrics that can be found in any home. And characteristic decor will help give the headdress a more childish look.
- If the bandana is made as a gift to relatives and friends, then you can embroider with beautiful and dense threads the initials of the person to whom the headdress will be presented. This will make the bandana unique.
- Bandana is a universal headdress in hot sunny weather. Wearing a bandana on your head will protect both children and adult women and men from sunstroke. It is worth remembering that black fabric heats up more in summer, so in order to protect from the sun when sewing a bandana, give preference to light tones of the material.
- It is best to wash this item together with colored items. The mode should be selected based on the type of fabric. This will help preserve the product for many years to come. The cleanliness of your headdress is very important, because if you neglect it, there is a high chance of dandruff and quick greasy hair.
Bandana sizes
Headgear - bandana has several design options.
Men's Head Bandana DIY Pattern
Option 1: bandana - headscarf: There are 2 types: - in the shape of a square, the parameters of the sides are calculated according to head circumference measurements. For example, for children with a square side equal to 50 (cm), for standard - 60 (cm), for large sizes - square side 70 (cm); - in the shape of a triangle, the parameters of which are calculated in the same way as in the shape of a square and taken as half a square. Option 2: bandana with ties: The size is calculated based on the circumference of the head. There is a method for accurately measuring the size of such a bandana: - using the head circumference parameters and detailed measurements of additional areas of the head, a paper pattern is made, with an allowance for gluing. Trying on this pattern will help you determine the size.
| Sizes of scarf bandanas General table of sizes of scarf type bandanas | |
| Diagonal (cm) Bandana size diagonally | Edge (cm) Bandana size by legs |
| 76 | 55 |
| 79 | 60 |
| 82 | 65 |
| 85 | 70 |
| 88 | 75 |
| *See also: jacket sizes. | |
DIY Bandana Patterns for Men
|
| Correspondence tables for women's turtlenecks General correspondence table for women's turtlenecks for different countries | |||
| Size Russian size | USA US size | EU European size | IT Italian size |
| 38 | 32 | 36 | |
| 40 | 2 | 34 | 38 |
| 42 | 4 | 36 | 40 |
| 44 | 6 | 38 | 42 |
| 46 | 8 | 40 | 44 |
| 48 | 10 | 42 | 46 |
| 50 | 12 | 44 | 48 |
| 52 | 14 | 46 | 50 |
| 54 | 16 | 48 | 52 |
| 56 | 18 | 50 | 54 |
| 58 | 20 | 52 | 56 |
| 60 | 22 | 54 | 58 |
| 62 | 24 | 56 | 60 |
| 64 | 26 | 58 | 62 |
| 66 | 28 | 60 | 64 |
| 68 | 30 | 62 | 66 |
| 70 | 32 | 64 | 68 |
| *See also: women's T-shirt sizes | |||
|
| Men's turtlenecks | Big sizes | 12-16 years old | Children's turtlenecks |
| Legend | Shoulder measurements | Measurements for waistbands |
A bandana on the head is a comfortable, beautiful and practical headdress for both women and men, as well as for children. This item can be easily sewn with your own hands if you know the basics of sewing, and how to use patterns and instructions from master classes on making such products.
Required Tools
When creating a bandana with your own hands, you do not need any special materials or tools. In addition to fabric, scissors are useful for work; they are used to cut the material. Pins will also come in handy. They are used to fix the pattern on the material. To transfer it, a piece of soap or chalk is useful. Measurements are taken using a centimeter tape.
To create the pattern itself, you should ensure that you have the following materials:
- eraser;
- rulers;
- pencil;
- paper
Among the consumables, threads should be highlighted. Their shade must exactly match the tone of the fabric. Depending on what model of scarf will be made, additional parts may be needed. You will also need an overlocker when sewing. If you don’t have it, don’t despair - you can select a mode on your sewing machine that allows you to process the edges of the fabric.
If desired, the product can be decorated with additional decorative elements. For example, stones, chains, lace or stripes are suitable for women. You can use appliques for girls and boys.
How to decorate
A bandana is a model that can be beautifully decorated using different materials. You may need additional beads, buttons, ribbons, openwork Swarovski beads, feathers, artificial flowers, clips, smooth and machine embroidery, sculptural items made of polymer clay, knitted inserts, miniature floral elements and other materials. Naturally, all of the listed decorative items can be used as desired.
As a rule, ribbons, brooches and beads are used to decorate a scarf or scarf. Stripes and stickers are often used on fabric. Models with a visor decorated with rhinestones or personalized embroidery in the very center look interesting. The option that looks stylish is when the scarf is designed in a patchwork style, that is, with the addition of various cotton materials and is literally created piece by piece.
Model decorated with a brooch
In general, you can make a headdress such as a bandana with your own hands from available materials, using only a ready-made diagram from the Internet and the simple step-by-step instructions given above.
The nuances of tailoring taking into account the model
As already mentioned, there are many types of bandanas. The choice of one option or another is made taking into account personal taste preferences. In any case, making a bandana with your own hands will be as simple as possible; to do this, you just need to strictly follow the instructions.
Classic square
This type of scarf is the easiest to make. You just need to measure the desired size and thus get a piece of fabric in the form of a square. For work you will need:
- suitable material;
- needle;
- threads;
- scissors;
- sewing machine.
The following actions are performed:
- The fabric is spread out on a flat surface.
- The pattern is drawn on it according to the calculated parameters with allowances of 2 cm.
- Each side is folded half a centimeter and ironed.
- Such manipulations are performed again.
- Each of the folded sides is stitched by making a basting seam.
- A women's or men's bandana is sewn on a machine.
It is not at all necessary to resort to using an overlocker; you just need to remove the basting. At this stage, the scarf made can already be used for its intended purpose.
Transformer
The original and multifunctional model is manufactured slightly differently. The process is more labor-intensive, but also not difficult. During production you will need:
- a piece of knitted fabric;
- scissors;
- needle;
- threads
We sew a headdress according to the following pattern:
- The fabric is laid out on the table.
- A rectangular piece is cut from it. When making a headdress for an adult, the parameters are 100 x 52 cm, and for children - 24 x 40 cm.
- The edges of the product are hemmed.
- The cut is folded along the side that is longer, twice. The wrong side should be on the outside.
- The workpiece is stitched and turned right side out.
This model is put on the face using the hole in the resulting cylinder. The remaining part covers the neck and head. The product looks stylish and original; as a rule, young people prefer this option.
With elastic band
An excellent solution for summer is a bandana with an elastic band. This headdress is in perfect harmony with all wardrobe items. It is recommended to give preference to light natural fabrics. During the sewing process you will need:
- fabric (one piece measuring 38 x 18 cm, and the second - 28 x 10 cm);
- needle;
- scissors;
- elastic band (length can vary between 10–14 cm);
- threads;
- set of pins.
When all the tools and materials are prepared, you can safely begin making a headscarf for the summer. The following actions are performed:
- A smaller piece of fabric is turned along its length by half a centimeter and hemmed by making a blind seam.
- The edges of the resulting workpiece are stitched from the inside out.
- The part is turned right side out.
- An elastic band is threaded into it and stretched along its entire length.
- The workpiece is stitched at a distance of about 2 cm from the edge. A zigzag stitch is used.
- The second piece of fabric is folded in the form of a fan along the width and fixed in this position with pins.
- The edges of this piece of material are inserted into the workpiece with an elastic band and stitched.
At this stage, the bandana on the head is considered ready. If desired, it is recommended to iron it additionally. After this, the product can already be worn.
Children's
To make a children's headscarf, you should use only natural materials. A bandana for a boy can be decorated with appliqués; for little fashionistas, embroidery is an excellent solution. To sew a headdress, you will need:
- piece of fabric;
- needle;
- threads;
- scissors.
A children's bandana is sewn according to the following pattern:
- Initially, a pattern is made. For this purpose, two semicircles are drawn on paper. Their diameter is 22 cm and their height is 6 cm.
- A pair of rectangular stripes is drawn. Their dimensions should be 8 x 85 and 10 x 33 cm.
- The resulting pattern is transferred to the fabric.
- When cutting, allowances of at least a centimeter must be made.
- A cut with parameters 10 x 33 cm acts as the central part of the product. Semicircles are sewn to it.
- The edges of the resulting workpiece must be processed.
- The circumference of the child's head is measured on the resulting part. The half-girth is measured on the remaining unused part.
- The workpiece is stitched to the marks made.
- The product is turned inside out.
- Ties are sewn to the bandana.
Such an easy-to-make item will protect a child’s head from the scorching sun, looks great and is comfortable to wear. When sewing a bandana for a boy, you can choose a fabric that depicts cartoon characters, ships or cars. For a girl, an excellent solution would be materials with designs in the form of dolls or flowers. You can also additionally decorate the product with beads, stones, and other decorative elements. You just need to show your imagination and not be afraid to experiment.
How to sew a bandana for a man with your own hands
Model selection
Men's bandanas, just like women's, come in different types. The most popular among men:
- classic square bandanas;
- transformable bandanas.
These types of hats are the most functional. They combine ease of use and versatility - the main qualities men value in a bandana.
Materials, tools and equipment
To sew a men's headband you will need:
- textile;
- sewing machine or needle;
- threads in the color of the fabric;
- chalk;
- graph paper;
- scissors;
- pencil;
- ruler;
- iron.
Recommended Fabrics
To make men's bandanas, it is better to choose natural and breathable fabrics - cotton and linen. If a man prefers a transformable bandana, then it is better to make it from elastic fabric. There are many modern materials on the market that can be suitable for both everyday wear and an active lifestyle.
Bandana for men. Photo.
You should take a responsible approach to choosing the color of the fabric, since the tastes of men and women in the field of clothing differ. It is more common for men to choose plain materials. You can choose a color for a bandana based on the overall range of a man’s wardrobe. It all depends on what colors predominate in his clothes. A universal option for making a bandana would be classic blue or black denim.
Measurements
The girth of a man's head is often larger than a woman's. This should be taken into account when creating a drawing. As a rule, the girth parameter varies from 55 cm to 60 cm. All parameters are individual and for these purposes the best solution would be to use a measuring tape.
Based on them, you should add 15 - 20 cm. This is done taking into account errors and the need to process the edges of the product, as well as further tying the bandana itself on the head.
Pattern
An important step when sewing a men's bandana is the pattern. It has its own subtleties, but is almost no different from women's.
The main differences are:
A detailed drawing should be prepared, this is done on graph paper. When marking, it is worth considering that you need to leave from 3 cm to 5 cm on each side, which goes under the hemming of the edges. On average, to sew a men's bandana you need to measure a rectangle of 80 cm by 40 cm or a square of 70 cm by 70 cm.
With these dimensions it will be possible to sew the most optimal option. Afterwards, using scissors, you need to cut out the part itself from paper, place it on the fabric and outline it with chalk. Only after this can you start cutting out the shape from the fabric.
Bandana pattern for sewing with your own hands.
Step-by-step instruction
- Fabric should be purchased with a reserve for unforeseen circumstances. The excess can be cut off or used to make another bandana. The minimum size will be 100 cm by 100 cm.
- The next step is to measure your head circumference using a measuring tape. Based on the measurements, the formula calculates the minimum parameters of the product.
- The most important stage can be called the pattern. During this operation, length parameters and errors should be taken into account.
- After cutting out the pattern, an important step will be adjusting the length of the bandana. About 5 cm is usually left under the seams.
- Afterwards it is necessary to process the seams. This is done to give the product the required shape and appearance. In the men's version, it is best to use threads that match the color of the fabric. When stitching, use a zigzag stitch. This type of seam is the most reliable.
- The final step will be ironing the seams with an iron. In order not to spoil the product, you should take into account the characteristics of the fabric and set the temperature.
- If desired, you can decorate the product.
How to decorate a headdress
The men's bandana version does not require a lot of decorations and details. It’s best to get by with a small badge that will complement the man’s image. It is best to attach the icon to the side. An excellent option would be a badge with your favorite performer or the branch of the military in which he served.
A metal skull on a black bandana will look good. This will perfectly emphasize charisma and make the headdress more individual.
Sewing a men's headband
To sew a bandana for a boy, a pattern will be very necessary. The pattern of a bandana for men is practically no different from that for women. To create a men's headband, you will also need a piece of selected material measuring at least 40 by 90 cm.
Description of work:
- Prepare a paper pattern using the selected drawing.
- Transfer the pattern to the material, do not forget to highlight the points for stitching. Having received 2 parts of the material, connect points one and two, after unfolding the pattern, repeat this on both the visible and back sides of the product, and then sew the seam on the machine (from point two to point one and then to the mirror image of point two).
- All that remains is to stitch the edges, giving the bandage a finished look. You should overcast them with an overlocker; with its help you can make a beautiful seam. You can also finish the edges with a zigzag stitch, folding the edges one centimeter or less, and sew with a simple stitch. If you want, you can sew the edges of the fabric with a buttonhole stitch; it is very similar to overlocking and looks more interesting. The stitching can be done with bright threads to highlight it and make the headband beautiful and original.
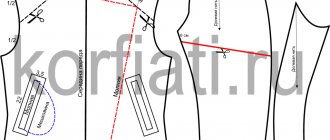
Bandana with ties: with and without visor
For the summer season, they are sewn from natural fabrics (linen, cotton) or natural knitwear (kulir, interlock). For cold weather, warmer fabrics are selected: fleece, suede, leather or even fur. I always recommend making a pattern out of paper, gluing it (make allowances first so that you have something to glue it with) and trying it on. Make changes to size, shape or add to the thickness of the fabric. If you look at the species, they can be
a) simple with ties.
b) without a visor
I am receiving signals from readers that the patterns may be small. I warn you that it is better to draw each pattern on paper, put it to your head and make changes. There are no perfect patterns because heads are different sizes.
c) with a visor
From the last two pictures you can see that the bandanas differ in cut.
Here is another bandana pattern
Many patterns and styles can be found in knitting magazines or from various needlewomen who offer the pattern for the finished product. For example:
Bandana headscarf
As a rule, it is a square of cotton fabric (chintz, calico, cambric) of standard size 60x60cm. For children they sew 50x50cm, for a large adult head - 70x70cm. There is also a bandana in the shape of a triangle (kerchief) and then the dimensions are half a square. I have already written about sewing a scarf and you can read how to process the edges in another article.
Many people wear this headdress in the summer, protecting their heads from the bright sun. But if you look closely, you can find such simple scarves tied on the arm, around the neck, and in other ways. I suggest watching the video and learning about different options for tying a bandana.
Women's bandana
As a rule, these are scarves tied in different ways. You can sew interesting headdresses, but for this you will need a bandana pattern.
In this style, pistons are installed and a lace is pulled through them. Or you can sew it with an elastic thread and the tie will also hold on.
On the Internet you can find the wording for a woman’s headdress made of a headscarf -
turban, turban .
Turban (pers.) (from Wikipedia) - turban; men's and women's headdress in the form of a piece of fabric wrapped around the head, common among a number of peoples of North Africa, the Arabian Peninsula, India and Asia. The turban is usually wrapped around a skullcap, fez or hat; the Shia clergy wrap a turban around their bare head. Its production usually requires 6-8 meters of fabric, but some types of turbans require up to 20 meters of fabric.
If you look closely, many hats resemble a turban, so you can actually sew them. Especially if you watch this video
Bando
Headdress - a bandage made of ribbons in women's outfits (hats, dresses, etc.)
You will need fabric (satin or knitted fabric) 30 x 65 cm. It must be sewn with a ring. For more details on how to sew a headband, read the description. A turban can be made from 2 headbands very quickly.
Transformable bandana or also called buff or tube bandana
It is knitted with a thin knitted fabric in the form of a tube on industrial machines, but it seems to me that it can actually be sewn from knitwear, although a seam will appear, which is not very good. The finished transformable bandana measures 26x53 cm.
All the charms and conveniences of such a headdress can be seen in the video
6. When preparing the material, I also came across such a concept as a pharaonic bandana or klaft (or nemes).
Nemes, or claft (from Wikipedia) is a royal headdress in Ancient Egypt, one of the symbols of power of the Egyptian pharaohs. It was a scarf made of fabric, usually striped (in most images - blue and gold), woven into a knot at the back and with two long side folds, cut in a semicircle and descending to the shoulders. An iron hoop or ribbons were attached to the fabric. Nemes served as protection from dust and sunburn and was a privilege of the royal family. Nemes covered the entire top and back of the head, leaving the ears open.
For more accurate patterns of hats, look in various printed literature, or there is the electronic magazine Leko No. 8, in which patterns can be made according to given dimensions and printed on a printer. headdresses for yourself and your loved ones .
Elena Semidelukha
Master Class. Summer bandana for children and adults
Summer is just around the corner! You will want to hide from the sun, so long-awaited!!! And a Panama hat is not always comfortable for a child. An alternative is a bandana. Last year I decided to sew bandanas for my children myself and was very pleased.
Many people asked to do MK, because there is not much information on the Internet. I'm very glad that I can help someone. So, here's what I was able to prepare.
The bandana will fit a head volume of 54 cm. We will need:
-fabric (if this is a summer bandana, then I recommend choosing a thinner fabric) 45*35
- underwear elastic band 2cm wide (I chose an elastic band with a lobe arrangement of the elastic bands themselves - they are softer and stretch well, and not cross ones - they are tighter) - 17 cm
1.Cut out two rectangles from fabric.
The first rectangle (the main part of the bandana) is 40*24cm. Let's not forget about seam allowances. 1cm on each side and we get dimensions 42*26cm
The second rectangle is the back of the drawstring bandana into which the elastic will be inserted. Its dimensions are 26*5 cm with seam allowances 28*7cm.
2. Next, we process the edges of the main rectangle along the length of the part. I think that the edge can be processed to suit every taste and desire. You can simply bend it and go in a zigzag pattern.
I liked the simple hem using a snail foot with a straight seam.
If you don’t have such a foot, I highly recommend purchasing it, because you can bend the edge very thinly only with its help without much effort.
Iron the seams and temporarily set the finished main part aside.
3. Fold the small rectangle with the front side inward along the length of the part and chop off the edges.
Next we sew, retreating 1cm from the edge (our seam allowance) and be sure to secure the threads. The excess part of the allowance can be trimmed, leaving an edge of at least 5 mm
We turn the drawstring out and be sure to iron it. My seam is on the side.
4. Take the elastic band and insert it into the drawstring. I use this handy device
We fix the edges of the elastic in the drawstring. To do this, simply sew together at a distance of 5-7 mm from the edge
5. Now the most important part of the MK is assembling our bandana. With the front side on the drawstring, a rectangle is placed as the base. Unfinished side along the short part of the drawstring.
We put the second edge on top and our drawstring ends up inside a large rectangle.
We move the drawstring to the edge in this way.
Then we turn it over with the chipped part down.
And now it is very important to carefully and correctly make the “accordion”. We bend the edge and place it on top of the drawstring with the gathered edges of the rectangle. It is important that the width of the new tab matches the width of the drawstring.
This is how it will happen:
and this is what it should look like:
When sewing, I secure each layer with pins, but for clarity, I had to take a photo without pins so that the folding principle would be clear. This is what my edge looks like with pins:
Now we need to flash this “sandwich”. The result is a fairly thick edge, but quite stitchable. We remove the excess part of the edge and be sure to trim off the sharp corners.
We process the edge with either an overcast stitch or a zigzag stitch. Our first edge is ready.
It is very important when assembling the second edge that the edges of the large rectangle overlap the drawstring in a mirror image. And, accordingly, our “accordion” will also be like a mirror image - in the other direction.
Be sure to iron the sewn edges and turn them inside out. You should get a fan like this when you open the bandana:
This is how the girl’s summer bandana turned out:
I hope that everything will be clear when sewing. If you have any questions, I will definitely answer!
To reduce the size of the bandana, it will be enough to reduce the length of the main part and the length of the drawstring. For size 48, I would advise removing the width of the main part by 2.5 cm.
Happy sewing!
The history of the appearance of the headdress
What is now called a bandana has undergone considerable changes over time, and completely new items of clothing have been “born”. The once-created headscarf has today turned into a very sophisticated piece of clothing, which is now worn by women, men, and children.
It was originally conceived by Spanish shepherds, vaqueros, to protect against dust and sand. Working in extreme conditions in the open air, in heat, cold and strong winds, shepherds wore a scarf around their necks or tied it on their heads in order to create more comfortable conditions for themselves.
At one time, this headdress began to be actively used by American cowboys. Cattle drivers, macho men and lone hunters wore a bandana over their face, neck and head. This saved them from the dust of sandstones, scorching heat, wind and gave their image a special charm, which was loved and captured by cinema.
This image was picked up by the hipster youth movement in the mid-60s. After the internal division of the movement along age and racial lines, the style finally settled among the “white” youth of 20 years old - hippies. It was thanks to hippies that the whole world learned a very special idea of wearing headscarves, which, however, also found its development in different directions and styles.
Women's headscarf
Even the simplest outfit can be quickly decorated with an unusual scarf, interestingly tied on the head. To sew a bandana for women, you will need to take:
- One meter of fabric.
- Soap.
- Ruler.
- Threads to match.
- Scissors.
- Sewing machine.
For beginners who want to understand how to make a bandana with their own hands, the pattern of this product will not be difficult.
Description of work:
- Prepare the silk and smooth it out on a smooth surface. Using a ruler and soap, draw a square 50 by 50 centimeters.
- Then take scissors and cut out a square. Use chalk to mark the width of the hem allowance (2 centimeters). Start tucking the seam allowances and iron the material. After this, baste the pattern and stitch it on the sewing machine.
- The basting threads will need to be pulled out, and the seams should be nice and even. The headband can be decorated with various rhinestones, large stones, ribbons, bows and stripes. This is how easy it is to put a women's bandana on your head. Remember that a girl's hat should match her clothing, especially her T-shirt.
Knitted bandana
The “buff” model is a cylindrical product that is worn as a stylish headdress on the head and neck. This will require less than a square meter of material. For children, the size of the finished headdress is used (24x40 cm). For adults, it is recommended to cut a rectangle of 100x52 cm. It is necessary to add allowance for the seams (1.5 cm).
We sew a bandana from elastic, durable knitwear.
The procedure for making a buff bandana from knitwear:
- The rectangular pattern must be folded in half along the longer side;
- Sew the cylinder from the wrong side;
- Hem the top and bottom edges by 0.5-1 cm, making a blind seam.
- Turn the product inside out.
Put on a knitted headdress, placing the opening of the cylinder on the circumference of the face. The rest covers the head and neck with folds.
There are a lot of techniques on how to sew a bandana. The type of product is the envy of the skill and imagination of the master.
Bandana for babies
The best version of a bandana for the little ones is a model with ties. Such a thing will stick well even to the most active child.
When choosing a material, you should definitely give preference only to natural fabrics - cotton and linen. It's safe for the child.
Before creating a pattern, you need to measure the circumference of the child’s head and add 20 cm to the resulting length - this will be the length of the future strings. You will need two patterns: one in the form of a semicircle and one in the form of a rectangle for the ties. You need to cut out 2 semicircles, as well as 2 rectangles.
As an example, we take: the central part is 30 cm by 10 cm and the lower part is 80 cm by 8 cm. It is necessary to sew 2 semicircles and a central rectangle. Then finish the edges of the remaining rectangle with a zigzag seam, after which the ties can be sewn to the main part so that an equal amount of material remains on both sides.
The bandana for the child can be considered ready.
How to decorate a headdress
The decoration for the bandana of the little ones must be selected with great care. In this situation, it is better to abandon any bows and frills. It's better to get by with a little embroidery. This does not pose a threat to the newborn. Careful embroidery will definitely not harm the baby’s health. For this type of decoration it is better to use bright shiny threads. They should not be selected based on the gender of the child. You should focus on eye color. Shiny colored threads will highlight them perfectly.
Sewing a women's bandana with an elastic band
A women's bandana with an elastic band can be made like a hat or like a cap. In the first case, it is necessary to cut the fabric according to the presented diagram, carefully stitch the ends of the product so that no threads appear. Next, you need to make holes in the prepared pattern, put pins in them and insert a cord or elastic band into the product. At the end, as in previous cases, you can make a decorative finish or use several different types of fabrics.
You might be interested in this: Sewing a steering wheel cover for a car: how to sew on a cover
Women's model with elastic band
Types of bandanas for adults and children
A bandana can be represented by a scarf, a bandana with ties, with or without a visor.
Bandana scarf with elastic pattern
There is also a model in the form of a hat, a transformer and a bandeau. A scarf is a cotton square of calico, calico and cambric material. It can be 50 by 50 centimeters or 70 by 70 centimeters. It can also be presented in the form of a triangle.
Bondo head bandana men's pattern
Bandana with ties - triangular linen or cotton model. This is also a model made of kulirka and interlock. Can be made from fleece, suede, leather and fur. It can be presented with or without a visor. A bandana in the form of a cap is a regular round knitted summer model with or without ties.
With visor
Sewing a women's bandana with a visor
The female model with a visor can be made using a plastic blank or dense processed fabric. In the first case, it will be a high-quality model to protect the eyes and head from the sun, and the second will act as an interesting decorative object and perform only the function of protecting the head from overheating. In any situation, it is necessary to make a pattern for the product, sharpen it well, and then form the finished product. After drawing the parts and cutting them out, you need to carefully iron the workpieces and begin stitching.
If desired, an elastic band can be added to the bandana to change the size. Then the step-by-step stage of the work changes and looks like this: first, the final model is created with an allowance for the elastic, the elastic is inserted, and then the visor is made and sewn to the product.
Pattern of a female model with a visor