How to hem jeans correctly? First of all, you need to correctly mark where to cut your jeans. To do this, you first need to align both legs of the jeans, baste the double hem seam and then hem the jeans using a sewing machine. If your jeans are very worn out and have holes in the knees, you can easily turn these jeans into shorts.
In this video you will learn how to hem jeans while maintaining the original seam.
In this video you will learn how to hem jeans using a sewing machine.
Don't forget to add a double hem width to your jeans shortening line.
Hemming jeans or hemming men's trousers is a reason to get the sewing machine out of the closet and try making a jeans hem yourself. Cutting jeans seems to be easy, but hemming them by hand is outdated, especially when you have a sewing machine at home. All you need to do is cut the jeans evenly, make two lines, and the jeans are hemmed. And why do the studio charge that kind of money? However, everything is not so simple. Only experienced and trained professionals can hem jeans correctly and accurately Moreover, it is possible to hem jeans “without problems” only on a special industrial machine capable of sewing thicker areas of denim seams.
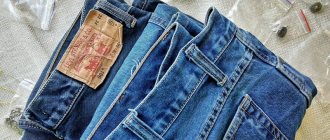
Before hemming the jeans, you need to accurately mark the bottom line of the jeans shortening and add the width of the double hem to this mark. There are many “folk” ways to determine the hem line. Including such a unique method as in this photo. Although why not? Perhaps it’s more convenient for you, and most importantly, it’s clearer how to mark the hem line of your jeans.
Choice of style and fabric
If a craftswoman decides to sew jeans with her own hands, she must start by choosing a style. If all operations are performed efficiently, the model will turn out incredibly beautiful and neat. But if it does not fit perfectly on a woman’s figure, there will be no pleasure from the result. Fashion stylists and designers say:
- For tall girls with thin legs, the “skinny” option is ideal. But those ladies who have full legs, massive shoulders or an overly lush bust will have to abandon this style. Straight, “banana”, “flare” styles are more suitable for them;
- classic fits almost all body types. These jeans are easy to combine with almost all clothing styles. Therefore, they are optimal for those beauties who do not like to spend a lot of time choosing a daily outfit;
- For representatives of the fair sex with ideal proportions, “boyfriends” are suitable. Visually, they will make the girl’s hips more curvy and her legs shorter. Short ladies and girls with curvy hips should refuse boyfriends. If a short girl really wants to sew boyfriend boots, she should wear them with high heels: pumps or stiletto sandals will perfectly complement the look.
When choosing fabric, you should pay attention to the way it is dyed. Denim must be dyed with natural substances, otherwise during wear the jeans will fade and stain your legs. Rub the fabric with your fingers or a damp cloth to see if the paint is coming off. If this happens, refuse to purchase such denim.
The density of the fabric is selected according to the season. Light-colored models designed to be worn in spring and summer heat are best made from lightweight denim. And winter options may well be dense, but working with such fabric will be difficult.
The more elastane fibers in the fabric, the more elastic the jeans will be.
The bottom line of the jeans leg should touch the floor
In the atelier they mark the hem line for jeans something like this. You, in jeans and without shoes, stand on the mat near the mirror with a lower view. The “extra” sections of jeans (usually one leg) are folded inward and the folded sections are pinned. On the back of the jeans, mark the hem line with chalk. From the heel side, the lower part of the trouser leg must touch the floor. If jeans are worn with high-heeled shoes, then even if it is slightly longer. After that, you put on the shoes you will wear jeans in, and the specialist adjusts the hem line, already focusing on the height of the heel of the shoe. Be sure to bring the shoes you will wear with jeans to the studio. This especially applies to women.
The hem length of jeans is adjusted according to shoes
After this preliminary determination of the hem line, you need to put on the shoes with which the jeans will be worn, and the final length of the jeans is adjusted according to the shoes and your wishes. Strongly tapered women's jeans can form an “accordion”, so they must be adjusted “individually”, taking into account many factors and your wishes.
Measuring the crop line of jeans is done one leg at a time, mainly the right leg, since the right leg is usually longer than the left. The adjusted hem line is marked with chalk along the back side in one or three places. There is no need to mark anything on the front of the jeans.
Belt
The blank of a one-piece belt is calculated as double the width of the belt plus a centimeter allowance on each side. The total width of the workpiece is 10 centimeters. The length is measured locally. The photo shows that the one-piece waistband of these men's jeans is curved. This is a wet-heat treatment. I could not resist. There was no need to pull it out. Anyway, after wearing and washing it will take the desired shape. This is generally typical for twill weave threads in denim fabrics. After all, these are jeans. Why iron them again?
Iron a centimeter allowance on one side of the waistband.
Sew the unironed edge of the waistband to the top edge of the jeans.
We lay out the belt in place on the slope.
We cut the jeans belt to length, leaving about a centimeter of allowance.
Turn the belt inside out. Sew together with an ironed seam allowance.
We cut out a corner.
Turn the belt inside out. Straighten the carved corner. From the side of the codpiece we do the same.
We sew off the bottom of the belt starting from the slope. We go around the bottom and top in one line. For rigidity, I previously inserted it into the belt. You can glue it, of course.
We return to where we started to delay. The result of stitching the waistband of men's jeans.
Iron the belt loops 2 centimeters below the waist, and half a centimeter at the top.
We stitch both at the bottom and at the top. To make it even stronger, let’s “beat” them with reverse, shifting the line. It would be nice, of course, to walk in a zigzag.
There is no need to bevel the hem line of jeans at the front.
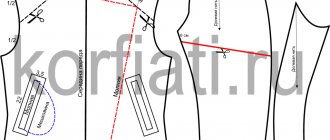
The next step is to accurately mark the hem line on both legs. To do this, first cut off the side marked on the fitting (right). There is no need to bevel the hem line in the front and do not ask the tailor to do this, since the technology for hemming jeans does not provide for this. Next, from the mark that was made along the back of the leg, draw a line (under the ruler) parallel to the factory line of the bottom of the jeans. And most importantly, before cutting your jeans, don’t forget to add an allowance (3-4 cm) to the double hem. Often, this requires “disassembling” the factory hem, clearing the seam of thread and ironing it. You can cut jeans only after marking an additional line, with an increase for the hem of the jeans.
Back pockets
You need to go over each detail of the pockets of future jeans with an iron, and then use it to organize the edges for hemming seams. The pockets need to be secured to the jeans with pins and stitched. It is worth duplicating the seam and finishing the ends with a zigzag.
Aligning both jeans legs
Half the job is already done, just one more leg of jeans left. But here, it seems, everything is simple. In fact, it is precisely in order to accurately mark the hem line on the second leg of jeans that the qualifications of a master are required. Inexpensive jeans are often sewn in semi-handicraft conditions, without particularly worrying about matching the length of both trouser legs. However. This also happens with factory tailoring. This is due to the technological features of mass production of jeans. That's why half of the jeans have different leg lengths, albeit slightly, but they do. Fold the jeans with the legs inside, align them neatly on the table, and you will see for yourself.
In order to accurately determine the hem line on the second leg of the jeans, you need, of course, to fold both trouser legs together and mark a line along the already cut-off trouser leg. It’s just that when you notice, everything seems to be perfectly straight, but when you hem the jeans and put them on, for some reason the legs of the jeans turn out to be different lengths. To avoid this, jeans folded and laid out on a flat table must be carefully aligned.
You need to check and match all the lines of the jeans: side seams, inner crotch, waistline, pockets, etc. You need to smooth out the existing wrinkles on the jeans with your hand so that there is no distortion and “wrinkles”. And only after you are sure that all the lines match, mark the second leg. To do this, you just need to draw a line with chalk along the edge of the already cut right leg. To this line you need to add (now above it) the width of the increase and mark the main line - the hem line of the jeans. This is approximately how marking the hem line of jeans is done in the studio. It’s not difficult, but without experience it’s very difficult to do it accurately, especially for some reason when jeans cost 7-8 thousand rubles.
You may not be able to mark it accurately the first time. So don't be surprised when you put on jeans. In this case, you can “disassemble” the hem and do it all over again. Well, after the first hundred jeans everything will work out perfectly.
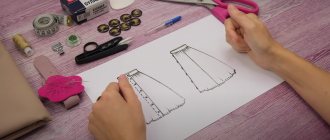
How to sew a skirt
Let's assume that it is necessary to redo the straight model at the waist, namely to reduce its width along the side seams. This work is carried out in several stages:
- At the very beginning of work, you need to try on the skirt and pin the excess material along the hip line.
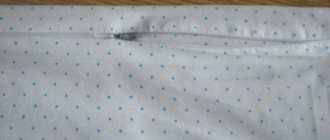
- Then you should turn the product inside out and mark the line of the new seam using chalk along the pins. After which the needles are removed, the belt and zipper are evaporated, the hem is disconnected, and the seams are ripped out.
- The side seams are machine sewn, leaving 15 cm free on the left side for sewing in a zipper. This place must first be swept away.
- The edges of the seams are folded together and processed with an overlocker. The right seam is pressed onto the front of the garment. The left seam must first be ironed in the area where the zipper will be sewn in, and then the part located below the future fastener must also be ironed onto the front half. After which the zipper is inserted.
- If there is a lining, you must remember to reduce its width as well. The lining is sewn in fewer centimeters than the skirt itself.
- Now you can start working on the belt. Having adjusted the length in accordance with the width of the skirt at the waist, the excess material must be trimmed and the edge of the belt stitched. Then use sewing pins to attach the belt to its original place, baste the future seam along the pins and sew the belt to the skirt.
- At the end of the work, a button is sewn onto the belt and the product is ironed.
It is clear from the instructions that it will not be easy for a person with no experience in sewing to cope with such work. It is much easier to find out how much it costs to sew a skirt in a studio and place an order.
Along with reducing the size, you usually have to change the length. We must remember that before trying on a skirt, before shortening it, you should wear shoes and a blouse or jacket, with which this item will be worn in the future. Then the hem line is marked with chalk or pins, the old hem of the skirt is peeled off and ironed.
Excess material is cut off and a new edge of the product is formed. The hem is sewn on by machine or hemmed by hand with a blind seam.
If you are not sure that you will be able to cope with this seemingly easy task on your own, it is advisable to listen to the advice of specialists and contact a studio to shorten your skirt; the price of the service will please any customer.
Not every sewing machine can sew hems on jeans.
You can “safely” hem jeans on a sewing machine only on old grandmother’s machines, such as the Podolsk sewing machine with a manual or foot drive. With such a machine you certainly won’t break anything, except maybe the needle. We strongly do not recommend sewing rough jeans, especially seam joints, on modern household machines. If you don’t have another machine, then it will probably be cheaper to have your jeans hemmed at a tailor.
This video shows a way to hem jeans using trouser tape. This method allows you to maintain the length of the trouser leg and reliably protect the hem of your jeans from rubbing out.
How to sew pants at the waist
The width at the waist also fails if the figure differs from the standard. Or, after successful weight loss, there is no opportunity to suddenly change your wardrobe. Elastic bands can help make jeans already on the waist.
Instructions:
- Measure the length of the elastic 10-12 cm shorter than the waistline on the back. For example, if the waist at the back is 30 cm, then the length of the elastic is 20-18 cm.
- On the inside of the jeans, leave an equal distance from the side seam to the right and left. It should be longer than the elastic band. Let's take 24 cm as an example.
- At the ends of the segments, make cuts with nail scissors 2.5-3 cm wide.
- Attach a pin to the end of the elastic and pull it from one hole to the other.
- Pin one end of the elastic, put on your jeans and adjust the tension.
- Sew both ends to the hole using a needle-back stitch all the way through.
Important! The cuts can be sewn in a circle using a buttonhole stitch to prevent the threads from fraying. Stitches run vertically
Insert the needle into the fabric away from you, pass the thread under the needle. Pull the needle through the resulting loop. Sew the cut in a circle.