Handmade accessories are more popular than ever now. Some people buy them from needlewomen, while others make them themselves. In both cases, headbands, hairpins, and jewelry made with one’s own hands are original and unique.
In addition, children of primary school age can be involved in creating masterpieces.
Take a look at the photo of the ears on the headband, made by yourself, they look very cute and attractive. Today we’ll talk about how to make such an accessory.
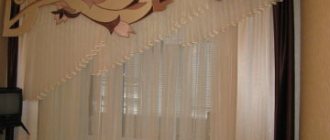
Fur ears for a carnival costume on a hoop
Fur ears will be a great addition to a carnival costume!
Your children will be delighted to appear as a little fox or kitten at a merry New Year's party, and adults will be happy to transform into heroes of Japanese anime cartoons or science fiction novels. This project can be done by anyone who can hold a thread and a needle in their hands, you don’t even need a sewing machine!
Where is the best place to use such masks?
The mask is the main attribute of theatrical performances, complementing the images of carnival and New Year's costumes, newfangled theme parties.
At the same time, not so long ago, a trend arose to decorate the walls of rooms with decorative animal heads using the origami technique. Such products have geometric shapes and serve as bright accents of interior design.
Fur ears: designs and materials.
You can also use suede, both artificial and real, or any dense textured fabric, such as fleece or corduroy. For the inside of the ear, choose a smooth, medium-density material in light shades, from white to pink. You will need, depending on the size of the ears, pieces of basic and additional material measuring approximately 10x20 cm.
We will tell you how to create a simple pattern and, following our description, you can design ears of any width and length. Please note that ears that are too long, without additional reinforcement, will fall down. But perhaps this is the effect that will suit your carnival look!
Let's get to work!
Pattern construction and cutting
Applying a ruler or centimeter to your head, determine the height and width of your ear. Draw a triangle with the length of the base equal to the width of the ear, and the corresponding height. Shift the height of the triangle left or right from the center of its base. Draw the shape you need, approximately as in the picture. Curve the base of your ear slightly.
Draw two ears on the back of the fur, turning the pattern over for one of them to mirror it. Using a sharp knife or razor blade, carefully cut along the outlined contour. Cut the base material of the fur, but do not touch the pile.
Slowly move the edges of the cut out part, straightening the fur pile. Cut out two similar parts from satin.
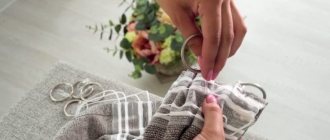
Progress
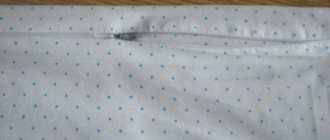
Place the fur piece and the satin piece in pairs with right sides facing inward. Sew, retreating from the edge 5-7 mm. Tuck the fur pile inside so that nothing sticks out anywhere after the seam. Leave about 3cm of seam open at the base of each ear.
Cut small triangles in the seam allowance near the corners of the ears and turn them inside out through the hole left. Straighten the pile.
Close the remaining seam by tucking the seam allowances inward. Fold the corners of the ears as shown in the photo and sew along the bottom edge, leaving a small hole at the fold.
Pass the hoop inside the ears, through the free space in the fold. Align the ears with the edges of the hoop and sew, wrapping around the “thread” on the inside, with threads matching the color of the hoop.
Source
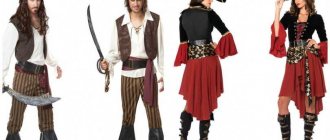
Making a Werewolf Costume
For the image of the mythical wolf man, prepare:
Creating the monster's head
We apply glue only on the sides, not reaching the bottom, leaving approximately two centimeters. This reserve will be needed to attach the ears to the fur head. It should look something like this.
We attach the ears to the head. We have two unglued centimeters left on each ear, in this place we cut off the pile as much as possible and push it into the holes made in advance in the head. In such a way that these two centimeters are completely visible from the wrong side. We apply glue and separate them and fasten them from the inside out.
Take an A4 sheet and outline the gloves; it is better to match them to the color of the skin. Apply the paper gloves to the underside of the fur and cut it out, retreating one centimeter from the paper. Then we stuff the gloves with newsprint or any other paper (this is necessary so that the fabric does not stick together) and glue the fur to the gloves. The glue has dried, take out the newspaper and the paws are ready.
For fur legs, we outline our feet, cut the fur fabric according to the pattern about 10 cm longer than the paper parts and glue it to the top of the sock, previously stuffed with newspaper. There are legs too!
The DIY werewolf costume for Halloween is almost ready, all that remains is to select accessories and apply makeup. We take a shirt and make it even older. This is where your imagination comes into play; you can tear it in different places and pour red paint on the tear site.
Create a wolf outfit in 15 minutes
There are those days when you confuse dates and time - sometimes it flies a day, or even a year ahead, and sometimes it suddenly seems that you have at least 3 more days left! And then, bam, the required date is tomorrow , and today it’s already 22.00, shops and all other places where one could get this most necessary thing are closed.
This happened to me too, but the situation was complicated by the fact that on the eve of this very day my elders had a birthday and, accordingly, at 22.00 we were still sorting out the gifts, and in general the fun was in full swing.
Don’t think that I’m an irresponsible mommy - I’m already thinking about the costume of Winter, who will play at the matinee, but then it got stuck. and meanwhile, by 9-00 I needed a Wolf costume, of course, not the Wolf itself, but the main attributes indicating that my child is the Wolf.
On the eve of New Year's matinees, this sketch for the master class may come in handy. I immediately apologize for the photo, I didn’t have much time, I didn’t start photographing the process right away, but I liked the idea and wanted to share it!