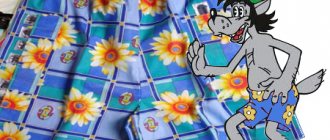
What fabric to choose for children's panties
To make children's underwear, you need to use natural fabrics. You can also use mixed ones, in which the proportion of artificial fibers does not exceed 5-10%. Moreover, the latter are more durable. They wrinkle less and are able to keep their shape well.
Children's panties
The most commonly used materials are:
- The cooler contains 95-100% cotton. The admixture of artificial material makes the fabric softer and more pliable. This thin fabric can stretch across, but cannot stretch in the longitudinal direction. The fabric is hygroscopic, the skin can breathe through it. This fabric is cared for in the usual manner for cotton.
- Interlock is a fabric that has increased density. This material is suitable for children's insulated panties. Can be washed at a temperature not exceeding 40 degrees. It is better to do this by hand rather than in a machine. Drying in the sun is not recommended. This fabric can be ironed.
- Ribana is a pliable and stretchable material. Stripes are clearly visible on its surface. This fabric is often used to sew T-shirts, T-shirts or shorts. 5% Lycra is added to it. When washing, you need to use water no hotter than 30 degrees.
- Bamboo fiber is not considered to be completely natural. This is due to the fact that in its production chemical methods of processing the source material are used. It is used to make children's underwear. It does not fade or fade. The material is able to absorb water well and does not rub the skin.
Note! To make children's panties, you can use any of the listed types of fabrics.
This is interesting: Pattern of Briefs and boxers for boys (height 92-170)
You can't stop sewing beautifully!
Children's room, Master class, Cutting secrets, Sewing techniques
Cut without a pattern. Sewing swimming trunks.
I decided to sew a set of underwear for my child from knitted fabric. My son loves boxer shorts (because they’re like his dad’s :)), but sometimes he also wears swimming trunks.
And since he is a clean child (in the sense, he likes to wear everything new and clean, probably like your children), we change our underwear every day and we need, oh, so much of it.
Therefore, after evaluating the cost and quality of a product sewn by myself and bought in a store, I realized that I was winning in many ways and sewed a set of underwear for my son.
I suggest you sew a T-shirt and panties for your child with your own hands. This is very easy to do even if you are a novice dressmaker.
First you need to buy fabric. How many? We measure the child’s hip circumference (if you want to sew only panties) and chest circumference (if you are also sewing a T-shirt), as well as the length of the products.
Then some simple calculations.
For example, my son has a chest measurement of 64 cm, which means the T-shirt pattern “fits” the width of the fabric, moreover, the panties pattern will also “fit” the same width, because the hip measurement = also 64 cm. (64.0 +64.0+approx. 10 cm seam allowances = 138.0 cm, and fabric width = 1.50 cm) another 12 cm in stock.:). T-shirt length 0.50cm. + seam allowances = 0.55cm.
I need to buy - 0.55 cm of fabric with a width of 1.40 cm.
I bought the fabric first and then sewed it, so I had 1.0m. fabrics 1.5 m wide. From this amount of fabric we got a T-shirt, boxer shorts and swimming trunks.
Pattern
I didn't have a ready-made pattern. I didn’t have time to look for a pattern and build structures, so I use the old proven method. I remove the pattern from the finished model. Fortunately, there are no difficulties with this.
I choose the biggest boxer shorts, a T-shirt and swimming trunks. (children grow quickly, so I take a larger size, the main thing is not to overdo it :))
I remove the patterns from them, before carefully ironing each item and giving it the correct (without stretching or deformation) shape. I sign every detail. Here's what I got:
Swimming trunks
Front half – 1 piece with fold; Back half – 1 piece with a fold; Gusset – 2 parts.
Boxer briefs
The back half of the panties – 1 piece with a fold; The side part of the front half of the panties – 2 parts; The middle part of the front half – 2 parts with a fold; Gusset – 1 piece with a fold.
Mike
Front of the T-shirt – 1 piece with a fold; The back of the T-shirt is 1 piece with a fold.
Remember that you need to check each part for proper cuts. That is, the side seam of the front half of the panties should coincide with the side seam of the back half, etc.
I also make a pattern for a T-shirt and swimming trunks, not forgetting to compare the sections of the patterns. And only after that I cut out the fabric items, adding seam allowances.
Sewing swimming trunks
The cotton jersey that I use for sewing children's underwear is easy to process, does not stretch or deform much, so even a regular straight stitch is appropriate here.
Important: before processing, be sure to check the stretch of the fabric, how it “behaves” when stitching and wet-heat treatment.
1. Place the front half between two gussets, baste and stitch.
2. Do the same with the back half of the swimming trunks. This is what should happen.
3. Stitch and overcast the side edges of the trunks, leaving a small open area for threading the elastic.
4. Overcast the step sections, fold to the width of the seam, baste and stitch.
5. Overcast the top edge of the trunks, bend them to the desired seam width and stitch. I do a zig zag stitch with a very small “zig zag”. Its appearance is practically no different from a straight one, and it adds stretch to the seam.
6. Insert the elastic band, the swimming trunks are ready
I don’t include a photo of my son in swimming trunks, the boy was shy.
Next time I’ll tell you about sewing a T-shirt and boxer shorts, stay tuned for the releases. In the meantime, you can buy fabric and make patterns.
With best wishes, Elena Krasovskaya:
This is interesting:
- What and how to sew from fur. Review, recommendations
- How to quickly sew a spectacular evening...
- How to sew a fashionable beanie hat with lining...
- How to sew a cape, pareo, skirt or kilt...
- Book “How to choose a sewing machine”
- We sew children's trousers. Processing the belt on...
Collecting before
Then we lay the second piece No. 1 face down. Let's sweep it up and this is what we get:
Line on overlocker:
Turn it onto your face:
Front side:
Wrong side:
Turn it inside out again and follow the same sequence of operations with the second half of part 2.
It turns out that both halves of part 2 will be inside the halves of parts 1, like in a kind of handbag.
We process it on an overlocker and turn it inside out:
We sew boxer shorts for a boy
In this master class I want to tell you how to sew boxer panties with closed internal seams. This technology is used for sewing any panties. Its main feature is that all the seams are “facing”, so wearing such underwear is most comfortable!
The lesson is based on panties for a child height 92cm.
Materials and tools:
We will need knitted fabric, preferably cotton: satin stitch or interlock. You can also sew it from ribana, but you need to take into account the degree of stretch for it.
I used stockinette stitch, density 150 g/m2. For one pair of panties you will need a cut of 60x40cm. You also need an elastic band 2.5 cm wide, the length of which depends on the child’s waist size - for a height of 92 cm it will be approximately 45-48 cm.
We will assemble the product using an overlocker with two needles and a cover stitching machine. If you don’t have one, you can use a regular sewing machine and a double needle for knitwear.
Let's take a closer look at the pattern:
Just four details:
1 piece - middle front, with a groove at the bottom, 2 pcs.;
2nd part - front side halves, 2 pcs.;
3rd part - leaflet, 2 pcs.;
4th part - back, 1 pc. with a fold. The pattern immediately marks the level of the hem of the bottom and the waist line, 2.5 cm each.
Fold the fabric in half. Lay out the pattern on the fabric along the grain line and outline it, indicating all the marks, leaving seam allowances of 0.7 cm on all sides.
I draw on the fabric with a bar of soap (washing soap is better), then when steaming the technical flats disappear. For these purposes, it is advisable not to use soap with cream additives, otherwise they may leave greasy streaks.
Before cutting out the parts, be sure to fasten them with needles.
Here's what I got:
Now you need to sew the groove on part 1.
We sew a stitch with the outermost needle of the overlocker along the white line marked in the photo, leaving a tail of thread about 7cm, in order to secure the seam by pulling the tail into the seam using a large needle or hook.
In the end you should get something like this:
We carry out this operation with the second half of part 1.
Collecting before
We take two parts 1 and one part 2. Fold them as follows: place part 1 face up, on it along a semicircular bend, face to face, lay out to make 2.
Next, place the second part No. 1 on top, face down. We fasten with needles or sweep away. This is what you should get:
We sew a line on an overlocker:
Turn it inside out and we get the following:
- front side:
- wrong side:
We turn it inside out again and do the same operation as described above, with the other half we did 2.
It turns out that both the first half of part 2 and its second part will be inside the two halves of part 1, like in a handbag 
We sew on an overlocker, turn it inside out and get the following:
Stitching the leaf:
Now we take part 3, both of its parts.
Next, from the back side of the front (from the front side, before that we attached it to the back side, as can be seen in the photo), attach the second part of the leaf in the same order. Secure with needles or sweep.
You should get 3 layers:
- the first part of the leaflet is face up;
- in front of the boxers face down;
- the second part of the leaf - face down.
We sew a stitch on an overlocker. If you do everything correctly it should look like this:
We connect the front with the back.
Now we need to connect the back of the panties (part 4) to the main part.
We lay out our parts as shown in the photo above. All parts are face up. Next, we combine the centers of part 4 with one part of the middle of the leaf (part 3), like this:
Next, we roll the front and back of the panties into a tube and connect the first and second halves of the sheet along the wrong side with the back of the panties inserted between them (part 4), like this:
In this place I have it secured with needles, but it is advisable to baste this part of the work!
We sew a line on an overlocker:
We turn the resulting “package” inside out, like this:
After being turned inside out, this is what the boxers look like:
We fold the front with the back face to face, in order to connect the side seams, pin them or baste them, stitch them on an overlocker.
Attaching the elastic band.
How to calculate the required elastic length?
Waist circumference - 5 cm = required length. In my case it is 48 cm.
We sew the ends of the elastic and pin it to the upper edge of the panties on the wrong side:
Now I turn off the knife on the overlocker and stitch the elastic to the panties, stretching it to the width of the panties:
Get it like this:
Now we iron the hems of the bottom and waistband by turning them back 2.5 cm. To do this, you can immediately mark them when cutting or using a ruler before ironing.
We sew the hems of the bottom and waistband using a cover stitch or with a double needle on a sewing machine.
Iron it again and voila! Our boxer panties are ready!
This is what the inside looks like:
This is what the front side looks like:
I hope everything was clear and interesting to you! If you have any questions, I will be happy to answer them.
Happy creativity everyone!
How to sew underpants for a boy
To sew them, a pattern for boy's underpants must be prepared. It can be done by taking the child’s measurements or using existing underpants.
The drawing will look like the figure below.
Pattern of panties for a boy
In the first case, it is necessary to measure the girth at the hips and the circumference of the legs. Based on it, you need to make the following details:
- A rear part is required, which consists of two halves (1).
- The central front part (2) is cut out. It must be in two copies.
- You will need two front side pieces (3).
You might be interested in: Patterning and sewing beautiful cosmetic bags with your own hands
What the pattern looks like can be seen in the corresponding figure.
If you have panties or swimming trunks for a sample, you can make a pattern based on them. In this case, they are placed on a sheet of paper and the pattern pieces needed to make the panties are made.
For work you will need the following materials and tools:
- A suitable piece of fabric.
- Threads suitable for this job.
- Elastic for the top of the panties.
- The sewing machine on which the work will be done.
The work of how to sew children's panties consists of the following steps:
- On both central parts, grooves are made at the bottom. To do this, they are folded in half lengthwise and seams are made.
Undercuts
- The front sides are sewn to the folded front ones.
Before
- Sew the front and back parts.
- An elastic band is sewn into the top, the fabric is wrapped and sewn up.
- If necessary, sew elastic bands in the same way in the leg holes.
Now the boy's underpants are ready. You can feed diapers in the same way.
Briefs for boys. Instructions for printing patterns and sewing
Level of complexity of the model - simple sewing
Technical drawing of the model:
When ordering a pattern, you receive a pdf file containing 1 sheet of patterns, which can be printed on several A4 sheets, after gluing which you will receive one large sheet with the contours of the patterns:
* To print the pattern in actual size, when printing in Adobe Reader, select “Poster” in the “Setting the size and processing pages” section. Then the image will be automatically divided into the required number of A4 fragments. If your version of Adobe Reader does not have the “Poster” function, you need to download the latest version of this program from the link https://get.adobe.com/ru/reader/ (this is a licensed free program). If you still have questions, visit our FAQ section!
The following designations are used on the pattern:
Cut details:
From the main material:
- Front – central part, 2 children.
- Front - side part - 2 children.
- Rear part – 1 child.
- Gusset – 1 child.
You will need 15 to 30 cm of high-stretch cotton knit fabric with elastane content. The elongation coefficient is at least 25%.
In addition, you will need a wide (about 2.5 cm wide) elastic band. The length of the elastic for the selected size is indicated on the pattern, on part No. 3 (another 0.3 cm must be added to the indicated length to sew down the ends of the elastic).
When cutting out, you need to add seam allowances of 0.8 cm and 1.5 cm along the hem line to hem the legs.
! Please note that the straight cuts of the gusset also belong to the hem line and therefore an allowance of 1.5 cm is also added to them.
Layout example:
Pieces of any size can be laid on a knitted fabric in one line, as shown in the figure, since the width of a knitted fabric is usually 180 cm (or 90 cm for circular knitted fabric). Therefore, material consumption will be determined by the height of the largest part (the back of the panties), taking into account seam allowances.
Sewing sequence:
All operations are performed on an overlocker and a flat stitch machine.
- Fold each of the center front pieces in half, face to face, and then fold the two pieces together, lining up the dart edges.
- Connect all 4 edges of the dart with one overlock stitch, and then unfold the pieces. Thus, you will have two parts of the central part of the front, folded to each other with the wrong side and connected together inside with a dart seam.
- Connect the resulting double part of the front with the side parts using a seam-overlock stitch. If desired, you can insert piping into these seams (Fig. a), stitch them on the front side with a decorative elastic stitch (Fig. b), or sew contrasting knitted trims on the front side (Fig. c) on a flat stitch machine.
- Connect the back of the briefs to the gusset using an overlock stitch, placing them right sides together. Please note that the side of the gusset facing the back is marked with an "A" inspection mark. The same control mark is affixed to the back.
- Join the other side of the gusset to the front of the briefs using an overlock stitch.
- Connect the front and back parts of the panties along the side seams using an overlock stitch, placing them right sides together. Turn your panties inside out.
- Fold the bottom edges of the pant legs 1.5 cm inward and sew a flat seam using a machine.
- Close the elastic band into a ring, overlapping its ends by 0.3 cm and connect with a zigzag stitch in small increments.
- Place the elastic on the front side of the panties along the top edge and stitch, stretching evenly, using a flat stitch machine.
Connecting the front of the boxers to the back
We connect the back with the main finished part.
Lay out the parts, right side up, as shown in the photo. Then we combine the centers of the gusset and the back.
We fold the front and back of the boxers into a tube and sew both halves of the sheet with the back inserted on the wrong side in this way:
It's better to sweep everything away!
We sew on an overlocker:
Turn it out like this:
This is what boxers look like:
We fold the front with the back, baste it and sew it on an overlocker.
Sew on the elastic
The length of the elastic is waist circumference + 5 cm. Pin the elastic to the edge of the panties.
Now we attach the elastic on the overlocker, carefully stretching it to the length of the product.
It turns out like this:
Now we iron the hems.
We sew the hems of the waistband and hem using a cover sewing unit or with a double needle on a sewing machine.
Our panties are ironed and our boxers are ready!
This is what the inside looks like:
This is what the front side looks like:
This is interesting: Pattern of boxer briefs for a boy (aged 5-6 years)
LiveInternetLiveInternet
Quote from kudryashechka's message
Read in full In your quotation book or community!
MK for sewing children's underpants (boxers)
https://www.familyklub.com/nashdom/showthread.php?t=6068 Boys' panties Good underwear for boys is quite expensive here.
This is what inspired me to sew it with my own hands, which I now do all the time. I can say that it comes out much cheaper and the boys really like it. Moreover, you can take into account the features of the figure. There is nothing complicated about it, it’s easy and quick to sew. So, I decided to share the process of making boys' underpants. Materials:
the best and most useful thing, of course, is to sew from thin cotton knitwear.
Equipment:
overlocker + sewing machine or coverlocker (or coverstitch machine) + sewing machine.
You can get by with just a sewing machine with stitches for elastic fabrics, but there will be more fuss and the appearance will be different .
You also need to stock up on a wide (2-3cm) elastic band, preferably soft, well-stretchable, threads, small buttons (if you decide to sew them on), machine needles for elastic fabrics.
Important!
The fabric must be pre-washed at the temperature at which you will always wash the item. If you use a dryer, then dry the fabric in it.
This way you will avoid shrinkage and deformation of the finished item. Pattern
The easiest way to get a good pattern is to buy good, comfortable panties and cut the pattern from them (which is what I actually did).
If necessary, I can share my patterns. Let's get started: 1)
Make a pattern.
You can sew a sample from an old T-shirt and adjust it to your figure, then your pattern will be perfect. 2)
The parts are ready: (1) - middle part of the front (2 parts), (2) - side part (2 parts), (3) - back part (1 part with a fold)
3) Connect the edges of the part (1) with an overlocker or elastic stitch on a sewing machine. This will be a decorative detail imitating a clasp
| This is a thumbnail image. Original size: 700×362. |
4) From the wrong side, iron the part to the left side
5)
From the front side, mark the stitching line with chalk so that on the wrong side you can grab the edge of the folded part.
6)
Topstitch with a double stitch along the intended line. Continue one of the lines downwards, stitching the middle seam to the end.
View from the wrong side
7)
Connect and sew all vertical seams of parts (1), (2), (3). Iron

Connect and sew a crotch seam. Iron
9)
Iron the bottom edge of the legs.
10)
Topstitch. It is best, of course, with a flat seam on a carpet locker or a cover stitching machine,
But you can overlock it with an overlocker and stitch it on a sewing machine, or you can only use an elastic stitch on a machine. I've listed some of the options here.
11)
Now let's move on to the top cut.
It is impossible to say exactly what length of elastic band is better to take, because you will need less soft elastic band, because... it stretches more easily, but is more rigid. It is better to determine it directly on the child .
12) Connect the elastic band into a ring and pin it evenly to the top edge.
Overlock with an overlocker (remove the knife) along the edge, stretching the elastic so that the material is aligned with the surface of the elastic. 13)
Fold the edge so that the elastic is inside, secure with pins and sew, again, stretching, with a flat seam on a carpet locker (or a cover stitch) or with a double stitch on a sewing machine.
14)
All that remains is to sew on the buttons and that’s it - the panties are ready.
A series of messages for “children”:
Part 1 - Pattern for a children's coat Part 2 - Panama hat for a girl... Part 25 - How to make a pattern for children's panties Part 26 - The second life of a T-shirt. MK swimming trunks. Part 27 - MK on sewing children's shorts (boxers) Part 28 - MK on sewing shorts for a boy Part 29 - Master class “We sew boxer shorts for a boy with our own hands”
boxer briefs pattern
And let me remind you that I also wrote about how to sew boxer shorts HERE. Very detailed master class. And HERE is how to sew children's swimming trunks. This is all useful information, now click on the cover and you will get a pattern of boxer briefs
All interesting and useful master classes on sewing are waiting for you HERE, and also see patterns HERE. Just click on the links and all the information will open in a new window.
For instructions on how to print patterns, see HERE
Your email address will not be saved somewhere after my reply to you, spam, etc. will not be sent. If you want to see other MKs , or need patterns, then click on the buttons and go to the right place.
Happy sewing!
More interesting posts:
Jeans pattern for a 2 year old girl
Categories:patterns, master classes and usefulness
Tags:baby underwear, panties
DIY swimming trunks for babies
Slips, bodysuits, rompers and blouses - how can an inexperienced mother understand this variety of clothes for newborns? What is useful and what is not worth buying? You will receive the answer to this question when 9 months of pregnancy come to an end. But experienced mothers will advise adding one more item to the baby’s trousseau – swimming trunks. You will be very pleased with this purchase, especially if it is hot outside and indoors. A bare-bottomed tomboy is good, but in panties - even better! One bad thing is that you don’t see them on sale often. Therefore, we suggest sewing comfortable soft panties for a boy (6-12 months) with your own hands.
Our master class contains detailed sewing instructions and a pattern, which you can draw yourself, following the specified dimensions, or simply print on a printer in A4 format.
Figure 1 shows half of the back piece of the briefs (the fold line is marked). Figure 2 shows the front part with a dart. [1,2]
For sewing we need:
- piece of knitted fabric 25 cm (100% cotton);
- 15 cm of elastic knitwear;
- 4 spools of thread;
- household overlock machine (4-thread).
1) Cut out one piece of the back of the panties.
Back detail of panties.
Two front parts.
Front detail of panties.
Add an allowance of 0.5 cm. 2) The elastic band around the tummy is cut out in one rectangle 35cm X 8cm. The elastic band around the legs is two identical rectangles 27cm x 6cm.
3) First of all, we grind down the darts of both front parts.
4) Iron the dart to the side.
5) Combine sides “a” (they are marked in Figures 1 and 2). To do this, we arrange the parts as follows: first, the front part is “face” up.
then the back piece is face down.
and finally the second back piece facing down.
6) Stitch the seam.
7) Iron the seam so that both front parts point in one direction, and the back in the other.
Now the front pieces put together form a single piece. For convenience, you can pin it with a pin.
We combine and stitch the side seams “b” (they are also indicated in Figures 1 and 2)
9) Making elastic bands. Sew the sides of the elastic bands (all three parts).
and fold the finished parts in half (lengthwise).
10) Sew elastic bands to the panties. Large one for the tummy, 2 smaller ones for the legs.
The elastic band on the tummy should be slightly pulled while sewing, so that the tension is even around the entire circumference. We're done. The underside of the panties should look like this.
From the front like this.
Swimming trunks for boys.
For a beginning seamstress, the most difficult thing is not to sew, but to find patterns for children's clothing . With the help of a detailed master class, it’s very easy to sew baby panties with your own hands! Sewing rompers and a shirt for a newborn is also easy! Especially for the site Handicraft Lessons Nimfa.