Fleece hat pattern
When sewing various models, a basic fleece hat pattern is used. It is adjusted based on your own measurements.
To determine your size, you need to take two measurements: the first is the circumference of the head, the second is the depth of the hat. How to correctly take head measurements is shown in the photo below.
The main part is one-piece, or is divided into an upper part - the crown and a lower part, which covers the ears.
By the way, there are models with elongated “ears” that turn into ties, and there are others without them at all. In this case, this part of the pattern is simply removed.
This is interesting: Pattern for a children's T-shirt for height 128-164
Materials and tools
To complete the work, each needlewoman must prepare the following materials and tools:
- centimeter tape for taking measurements;
- finished basic pattern;
- chalk or pencil for transferring the outline onto the material;
- knitted fabric with approximate size length = 50cm, width = head circumference + 2cm;
- fleece for lining;
- cutting scissors;
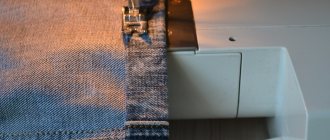
- sewing machine or overlocker, needle with a rounded tip for stitching knitwear;
- tailor's pins for chopping off parts;
- threads for sewing to match the base material.
Knitted hat pattern
Knitted women's hat
Even a novice craftswoman can sew a knitted hat. The process of its manufacture comes down to performing simple steps. The work will not take much time, but as a result you will be able to replenish your wardrobe with a new, original accessory.
Creating a pattern
At the initial stage of work, a hat pattern should be made. These steps can be completed easily and quickly. You must adhere to the following instructions:
- Draw a sketch of the future product on a piece of paper. In this case, a regular rectangle is drawn. Its upper part should be made semicircular.
- A small triangle-shaped cutout is drawn in the middle of the resulting semicircle. This is where the seam will be located.
- The fabric is folded in half.
- A drawing is superimposed on the canvas.
- The template is outlined.
- The workpiece is cut, but not clearly along the marked line. Be sure to leave allowances.
After this, you can start sewing a knitted hat with your own hands.
Sewing
How to sew a knitted hat is described step by step:
- A triangle is cut out at the top of each element.
- The location of the incision is stitched.
- The details of the future attire are stacked one on top of the other.
- The fabric is carefully folded and stitched.
This completes the women's knitted hat. All that remains is to iron it.
How to take measurements
A very important question is to take the correct measurements and construct the drawing.
Correctly taking head measurements
There is nothing complicated, but you still need to be careful. To do this, you need to take a centimeter and measure the circumference of your head. This will be the main size. In order to find out the size of the future hat, you need to subtract 4 cm from the main one (approximate values, depending on the density of the material). To build a workpiece you need to know the width. The resulting size should be divided by 2. Further work will be based on these dimensions. Below you can find out how to make a knitted hat pattern for a child.
Patterns for knitted hats
You can see even more cool patterns for hats and snoods made from knitwear below!
Fleece beret
A warm beret is perfect for both little girls and women. For kids, a model that covers the ears is more desirable.
The pattern is constructed as follows:
The lower element is taken from the main template, and the upper one is a circle with a diameter of 35 - 40 cm. The lining is ordinary - one-piece.
Sequencing
- Connect the back seam at the rim.
- Gather the edge of the circle or fold it into folds. They are evenly distributed, bringing the circumference of the circle to the size of the head circumference.
- Sew the circle to the rim.
- Sew the lining and insert it into the upper part. Stitch, turn inside out, and decorate with fabric flowers if desired.
Children's knitted hat
Having figured out how to sew a female model of a headdress, you can make a hat for a child. These steps are very easy to follow. The main thing is to get acquainted with the detailed master class.
Pattern
The construction of patterns for future hats is carried out in several stages:
- A rectangle with dimensions 24x25 cm is drawn on paper.
- At the top of this figure four wedges measuring 6x6 are drawn. For this purpose, a line is drawn from above at a distance of 6 cm, which is divided into four squares using vertical stripes.
- Points are placed in the center of the upper part of the square, which are connected to the edges by making curved, fairly smooth lines.
The result is a structure similar to a fence.
Sewing process
We sew a hat, adhering to the following pattern:
- The canvas is folded in half and the pattern is transferred to it.
- The fabric is cut along the drawn lines.
- The material is turned over so that the right side is on top.
- The side elements of the wedges are sewn together.
- By making a seam, all the wedges are connected in the central part.
- The side line is stitched down and the product takes on a completed look.
To decorate such a headdress, you can additionally make an original pompom for the hat with your own hands.
Sewing various models
For beginners, it is better to opt for simple styles, otherwise the hat may not work out. The most important thing here is to choose the right pattern.
Sewing a women's hat
It will require knitted fabric 1.5 meters wide and 0.3 meters long. First you need to find a pattern and print it. The size of the hat is equal to the circumference of the head (52 cm) - 4 cm = 48 cm. 48/2=24 – the width of the hat according to the pattern. You need to leave a centimeter on each side for the seams.
Cutting out the hat
To work you will need:
- Scissors.
- Pins.
- Threads to match.
- Knitting machine needle.
- A regular needle.
- Ruler.
- Centimeter.
- Soap.
We sew a hat according to the following pattern:
- Place the fabric wrong side down. The width of the main part is 25cm.
- Leave 1cm from the top cut for the seam.
- Divide the cut into 4 parts (24/4=6cm).
- Find the middle of each of the slices 6/2 = 3 cm.
- Connect the midpoints of the segments with points located at 6cm. Mark them with arcuate lines.
- Cut out the resulting model.
Sewing a hat
- Grind down the cap wedges along the top edge.
- Do the same with the lining of the hat.
- Sew down the middle seam on the main piece and on the lining. It is better to sweep the seams by hand to avoid the seams moving.
- Sew both hats (main and lining) together. Turn the main item inside out, place the lining in the hat so that they are right side inward, and align the seams and pin together to prevent the fabric from shifting.
- Sew down the parts using a zigzag stitch.
- Remove the pins and turn the product right side out.
- Open a small seam on the lining and turn the hat inside out through the resulting hole.
- Sew the ripped hole with a blind stitch.
This is interesting: Pattern Jacket with peplum for a girl
Beanie
It’s also worth figuring out how to make this incredibly comfortable and stylish knitted hat model. The work in this case is even simpler than in the previous one.
Constructing a pattern
To sew fashionable hats, you must first prepare a pattern and cut the fabric. The following algorithm should be followed:
- The paper is folded in four and a pattern is drawn on it, visually similar to a piece of paper. The bottom has a rectangular shape, and the top is slightly rounded. The width of this structure should be 12 cm. The height is 30 cm.
- The resulting layout is cut out along the contour.
- The paper base is unrolled, and the resulting template is transferred to the canvas.
- The fabric is simply cut, making allowances for the seams.
It is better not to throw away the pattern created according to this scheme, but to save it. With its help, in the future it will be possible to repeatedly create such original headdresses.
Sewing stages
A knitted hat is sewn according to simple instructions:
- The fabric blank is folded in half and stitched at the sides.
- Now the upper part of the product is processed. For this purpose, it is folded so that the created seam is at the top.
- Open areas are stitched.
- All seams are carefully ironed.
All that remains is to turn the product right side out. Using the same scheme, you can make a bath hat with your own hands. To do this, you just need to choose the right material.
Fleece balaclava
The balaclava perfectly protects the face from the cold piercing wind. Another undeniable plus is that it is easy to sew yourself.
The size of the window on the template is adjustable as desired, depending on which part of the face should be open.
- Fold the material in half, trace the pattern, then cut out the elements, not forgetting the allowances.
- To process the window, a piece of fabric is cut out that is larger than the future hole. Pin it to the front side.
- Sew along the outline from the wrong side.
- Cut a hole close to the seam, approximately 2 - 3 mm.
- Turn the square through the hole to the wrong side and pin it together with pins. Sew, retreating 5-7 mm from the edge.
- Further sewing is carried out according to the principle described above.
- Process the bottom cut by folding the edge, then stitch with a zigzag.
Winter fleece hat
In order to get a particularly warm headdress, a layer of insulation is inserted between the outer and inner layers.
Attention: when using insulation, the parts increase additionally on all sides by 1 - 1.5 cm. Otherwise, the hat will turn out to be small.
The ear areas are reinforced with a piece of jacket fabric, this will prevent blowing.
This manipulation is carried out as follows:
- Cut two circles from a piece of raincoat fabric, about 7 cm in diameter.
- Place the circle to the ear area between the layers of the cap and secure them with running stitches.
- Sew in circles.
An interesting video will show you how to sew a men's hat with your own hands.
What you will need
When figuring out how to sew a hat with your own hands, first of all, you should choose the right materials. Depending on whether you plan to wear a headdress, preference may be given to different options. It is appropriate to use the following options:
- knitwear;
- wool;
- velveteen;
- flock;
- fur;
- cashmere.
This list is far from complete. The fabric should be selected taking into account personal preferences and the desired result. In addition to the canvas itself, the following will also be useful in your work:
- threads of a suitable shade;
- needles;
- patterns;
- sewing machine;
- scissors;
- decor
If you are creating women's knitted dresses, you need to take care of the availability of yarn, as well as knitting needles or a crochet hook. In addition, in this case you will also need a diagram that allows you to create an extraordinary pattern. True, even products made using simple stocking stitch will look beautiful.
Features of work
To ensure that the loops do not fall down when cutting, the following rules must be observed:
- The share thread should run parallel to the loop column.
- To secure the cut out elements, it is better to use pins with large heads, otherwise they will simply go through the fabric.
- When cutting parts of a product, under no circumstances should you stretch the fabric wide or work on an unstable surface.
- When marking parts of the product, it is better to use soap, as dust from chalk can dull the needle, which may damage the loops on the fabric.
- It is better to choose thinner threads for basting.
To prevent the hinges from falling down, you can glue special gaskets from the inside with an iron, or treat the edges with colorless varnish. You can iron the finished headdress only in the direction of the loops.
Preparatory work
In preparation, you will need to purchase fabric, sewing tools, and a pattern to cut out the details of the product. One of the key points is to decide on the size.
Taking measurements
If you measure incorrectly, the headdress may turn out to be either too small or will slide down onto your forehead. Therefore, before cutting out, you need to understand the parameters. This requires two measurements:
- Wrap the centimeter around the head along the line of the eyebrows and the convex part at the back of the head. This will be the head circumference.
- Wrap a centimeter around the top of your head from ear to ear. Divide the result by two. This will be the depth of the product.
The standard is considered to be a product measuring 55-60 cm with a depth of 16-18 cm, however, there are models with an inflated crown.
Pattern and creation of parts
For beginners, it is better to use ready-made patterns that can be easily found on the Internet. Then print out the resulting drawing and begin transferring the pattern onto the fabric.
- Lay out the knitwear on a flat surface and attach the cut out parts to it with pins.
- Trace the patterns along the contour using soap, leaving a centimeter on each side for the seam.
In craft departments, you can purchase a chalk wheel or pen with special ink that is easy to wash off.
Cutting the material
You need to cut out parts from knitwear with very sharp scissors, as this fabric stretches a lot. You cannot pull the material, otherwise the parts will turn out crooked. The best option is to lay the fabric out on a flat surface and cut the fabric without stretching it.
The slippery stretch can be secured with masking tape, and its edges coated with clear varnish or glued with an iron and a special tape.
Fur hat with earflaps
A fur, warm earflap hat is an excellent solution for a harsh winter. Such a headdress not only helps to keep you warm in severe frosts, but also allows you to create a unique, stylish look. The sewing process is more complex than in previous cases, but the effort will definitely be justified. The main thing is to familiarize yourself with all the intricacies of performing such work and you can begin to perform basic manipulations.
Material selection
Such a headdress can be knitted using yarn, sewn from fleece and knitwear. True, fur products are especially in demand. Both natural and artificial materials can be used. Each of them has its own disadvantages.
When working with natural fur, you will need a huge number of specific tools. For example, a furrier's knife, hammers used to break seams and needles with a special shape. In addition, all structural elements must be sewn together using a special machine.
With artificial material the situation is much simpler. In this case, all manipulations can be carried out on a classic sewing machine. In addition, the cost of such fur is significantly lower than natural fur. True, artificial material is less resistant to wear and is not as durable.
When sewing a hat with earflaps, a lining must be used. As a rule, when creating it, standard lining fabric or fleece is used. With the help of this element, the product can be protected from wear. In addition, the headdress turns out to be much warmer and more comfortable.
Taking measurements
Before you start designing a pattern, you need to take a number of measurements. You will need the following values:
- head volume. Determined by drawing a centimeter along the base of the skull through the forehead. Designated OG;
- head height (first indicator). The measurement is taken from the junction of the neck with the skull to the eyebrows. The measuring device is carried out along the crown exactly in the center of the head. Designated as VG 1;
- head height (second indicator). In the diagram it is designated as VG2. The change is also made at the top of the head. The centimeter is passed through the ears under the chin;
- distance from one temple to another (РВ). The measurement is taken above the eyebrows;
- distance from one ear to the other (RU). The centimeter extends across the forehead slightly above the eyebrows.
After taking these measurements, you can build a diagram.
Features of creating a pattern
Beginning craftswomen should not resort to creating complex patterns. It is better to use the simplest option. Due to this, the risk of making mistakes is significantly reduced.
In this case, you need to draw a circle on paper. Its diameter should be half the volume of the head. You should also draw a rectangle, the height of which is equal to the second indicator of the head height. The length in this case is equal to the OG, but a couple of centimeters are also added to this indicator. One of them is placed on the seam, and the second on the lining.
To cut out the ears, you need to draw a couple of triangles. Their base should be equal to the distance from the edge of the ear to the temple. It is extremely important that these design elements also cover the cheeks.
Material cutting
After the construction of the pattern is completed, you need to move on to cutting out the parts. For this purpose, all elements of the future product are transferred to the selected material. It is recommended to cut them using a furrier's knife. If it is not available, you can use ordinary scissors. True, in this situation the fur is trimmed a little, and the seams will not be completely hidden.
When performing such actions, you need to take the knife in your right hand, and perform all manipulations in weight. With the second hand, the desired element is formed and unnecessary elements are removed.
Directly sewing
The next step is to sew together all the elements that were cut out. The fur needs preparation before performing such manipulations. It is extremely important that its edges are as neat and even as possible. In this case, it is recommended to answer the control points so that they accurately converge during the stitching process.
The elements are connected in such a way that the fur is inside. The cut out elements are placed on the middle finger of the left hand and take root with the help of the thumb. The marked points are combined.
The fur must be removed from the seams. It is tucked inside with a special tool that visually resembles a compass. If it is absent, such actions can be performed with a needle or finger.
Often when sewing earflaps, a furrier's stitch is used, which ensures the most durable connection of the parts. It is performed in the direction from right to left. It is extremely important that the step in this case is small. You should also ensure full thread tension.
The second stitch is made without offset, in the same place. After this, the needle is moved to the left side, making a stitch in place in the forward direction. The needle should go through one hole twice.
It should be taken into account that the material must be punctured on its own. Taking into account its elasticity and density, there are about 3 - 4 stitches for every centimeter. In this case, a small indentation of 1.5 - 3 mm must be made from the edge. In this case, the parts are sewn strictly in the direction of the pile. The fur that gets on the wrong side must be pulled onto the front side with a needle. After stitching the element, the seam must be turned into a joint. If the fur is short, you need to knead it with your finger. Smoothing it is strongly not recommended.
Hemming the lining
Using the same pattern that was used to create the hat, you need to create a lining. It should be taken into account that this material does not stretch well. Accordingly, there is a need to add allowances within centimeters.
The lining should be sewn from the inside out. To ensure maximum fit, perform these steps at the same time as sewing the fur. Be sure to turn the fabric to the inside. Due to this, the fabric will not fray.
The lining can also be sewn separately and then simply inserted into the finished product. It is fixed by sewing a seam along the contour of the headdress.
Decor elements
You can decorate the finished product by creating a visor in the forehead area. It is cut out in the form of a rectangle. This element must be sewn exactly in the middle. You also need to sew on the ties. Thanks to their presence, the ears, if necessary, can be raised up and fixed in this position.
You can also cut out ties from fur, equipping them with buttons and sewing them to the main structure. Laces are often used for this purpose. Such ties look stylish and attractive. In addition, they are much easier to sew on than fur.
Sewing a hat yourself is an incredibly exciting and quite simple process. Even without sewing skills, anyone can cope with such a task. You just need to choose the right model and you can start working. By showing perseverance, patience and attentiveness, you will be able to achieve excellent results.
Knitted turban
The turban hat is a headdress that came to Russia from Eastern culture, and which has long established itself in the global fashion industry. But in order not to spend a lot of money on a designer item, you can easily create a turban with your own hands, taking into account personal preferences and characteristics. Knitting needles, yarn and knitting patterns will help with this.
You can knit such a headdress with the simplest pattern, and a beautiful brooch can become the central decoration. The main advantage of a knitted turban hat is the fact that it is easy to put on and take off, because it does not need to be folded, unfolded and folded back every time.
You might be interested in: Rules for sewing diapers for newborns yourself
Exclusive knitted turban
A knitted turban hat with knitting needles can look different, but most models of this type of headdress are knitted quite quickly and relatively simply. The turban itself has several varieties:
- classical;
- eastern;
- retro.
Visually, they differ in the way the front is folded and the volume of folds, as well as the presence of decorations. There is also a turban headband that covers the ears but leaves the top of the head exposed. This option is best for fall, while the hat is a versatile item for fall, spring, and winter.
This turban hat is knitted for beginners using the one-piece method. It will not have to be connected or stitched, twisted or disassembled with separately connected parts.
Knitted turban hat
Materials for work:
- half-wool yarn;
- knitting needles No. 5.
You need to calculate the loops. The width should be 10-11 cm, in this master class there were 19 loops. The sample should be knitted from the resulting yarn, taking into account that the number of loops should be a multiple of six and +1.
Knitting an elastic band for a turban with knitting needles:
- 1st row - purl 1, knit 2, alternating loops are repeated until the end;
- The 2nd row and the remaining even rows also need to be knitted as in the first option;
- 3rd row - 1 purl, 1 knit stitch. behind the back wall and without removing it, 1 knit stitch. you need to knit it behind the front. Thus, this method of knitting three loops is repeated until the end;
- The 5th row is the same as the third.
The elastic band needs to be knitted up to 4 cm.
Turban pattern
In each front row, five additions are made in the manner described below.
Additions:
- in the first row after two front rows (5 increases);
- in the third front row - in front of the faces. and 1 purl. (5 increments).
Options for increases alternate. This will give a uniform expansion of the turban cap.
Note! To prevent holes from forming in the fabric, it is better to make increases before the purl loops.
Increases are made until there are 6 purl stitches on the outermost tracks.
On other tracks you need to stop adding when you reach 11 purls. Loop. edge loops should not be taken into account.
5-6 cm should be knitted without any increases. And then start making decreases: in the front rows, knit 5 times with 2 purl loops. In order to avoid distortion, decreases are placed in turn - first in front of the face, then after.
Tools for decorating a hat
Decrements are made until 1 purl remains. loop on every track except the middle one. You need to leave 2 purls on it. loops.
The loops should be divided into 10 pieces. Separately, you need to knit each half of 28-29 cm. They need to be positioned, cross-stitching the ends - the rims - along the edges.
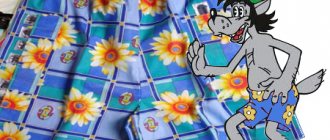
Children's hat with decorative ears and muzzle
It’s not at all difficult to sew a cheerful children’s hat. The most important thing is to make sure that the circumference of the baby’s head and the pattern match. This pattern is suitable for a child with a head circumference of 48 - 50 cm.
Algorithm of actions
- Cut out the necessary parts, adding 1 - 1.5 cm for allowances. If you are planning a double hat, then cut out an additional lining. The lining for a fleece hat can be knitted or made of basic material.
- Cut out the ears; they consist of four parts.
- Make an applique for the muzzle. The nose is sewn on by hand or with a frequent zigzag. Eyes and antennae - embroider with hand stitches.
- Sew the ears, turn them inside out and attach them to the gap marked with the letters AC, approximately in the middle of the segment.
- Connect the darts, first the frontal and occipital, marked with the letters D and G. Next, using a common line, sew the dart with the ears. Assemble the lining in the same way.
- Prepare the ties: cut strips approximately 1 cm wide. Since fleece does not fray, the edges do not need to be processed. Sew them on with a few stitches.
- Assembling the hat. Place the outer and lining halves facing each other and pin together with needles. Go through machine stitching. Leave a hole on the back side, approximately 5–6 cm long, for turning inside out.
- Turn the product inside out and sew the hole inconspicuously by hand.
This fleece hat looks very good when paired with a scarf and mittens. How to sew mittens is described in the article: Fleece mittens - quickly and easily with your own hands.
The hats presented below are made according to the same principle. Only the frontal-occipital dart is closed, and the top is stitched in a straight line.
With ears
This model is manufactured according to almost the same scheme as in previous cases. The only difference is that the pattern in this case is not rounded. In addition, it is equipped with additional elements in the upper part in the form of small corners that act as ears.
Sewing is carried out using the following technology:
- A single piece is cut out of the canvas.
- The workpiece is cut out, adding seam allowances.
- The side parts are stitched by machine. After which the product is turned inside out.
- At the top, the center of the accessory is marked with a remnant. From this point, equal sections are laid in both directions. They should be about 3 or 4 cm.
- In these places, folds are laid to a depth of about one and a half centimeters. The folds are directed towards the center.
- The folds are secured with pins, and a couple of lines are laid along their upper edge.
- The lower part is processed using an overlocker. After which it is folded and a seam is laid on a sewing machine. It should be approximately one and a half centimeters further than the fold line.
Also, the ears can be formed using a slightly different technology. To do this, it is enough to form a pair of grooves at the top, which will be symmetrical to each other.
Whatever model of children's headdress is chosen, the process of creating it will not cause any difficulties. The work will take a minimum of time, and as a result of it, the child will have an original, convenient accessory. Without any doubt, the baby will like it.
Required materials and tools
The main thing in sewing a children's hat is the choice of high-quality material with spectacular colors.
For one headdress you will need only 25 cm of knitwear and the following accessories:
- sewing threads matching the color;
- tailor's needles with a round eye;
- chalk or pencil for cutting;
- scissors;
- needle;
- sewing machine.
When choosing knitwear, you can pay attention to the following recommendations:
- If you use a simple sewing machine, you should choose denser fabrics. For example, fleece, ribana, footer with lycra or fleece.
- For sewing on a cover machine, you can use thin fabrics (kulirka or interlock).
- For the manufacture of children's products, fabric from unnecessary knitted T-shirts and jumpers is suitable;
Rules for taking measurements
A knitted hat for a child is sewn according to 2 main measurements. This is the circumference of the head and the depth (or height) of the product. For a hat with ties that covers the ears, you also need to know the measurements for the side depth of the hat.
The main measurements and measurement technology are given in the following table:
| Measurement name | How to measure |
| Head volume | Place the measuring tape above the ears at the level of the eyebrows, at the back - along the most convex part of the back of the head. |
| Cap depth | Measure the distance up to the forehead from the crown to the point between the eyebrows, back to the base of the skull and along the sides to the edge of the earlobe. |
| Rear Width | Measure the distance from your earlobe to the posterior center line at the base of the skull. |
To create a hat pattern, take any pattern from a sewing magazine as a basis or print out a ready-made pattern. You can also trace the outline of another baby hat and add seam allowances.
Simple version of the product
It is recommended to iron the fabric before cutting. If the knitwear has a pattern, it is necessary to position the pattern so that the objects are placed centrally or symmetrically around the center line.
A knitted hat for a child, the pattern of which can be created in just 10 minutes, can be single-layered or with a lining.
First you need to decide on the size of the hat: measure the volume of your head and choose the desired height of the product.
Next, to create a pattern you need:
- Divide the head circumference measurement by 4 and make a deduction for the stretch of the product (for dense fabrics, subtract 0.5 cm, for thinner and more elastic ones - 1 cm).
- On a sheet of paper, construct a rectangle with the following parameters: the width is equal to a quarter of the circumference of the head, taking into account the necessary deductions, the length is the height of the hat with an increase of 5 cm for the lapel (optional).
- On the left side, move 2.5 cm from the corner to the left, and down ¼ of the height of the cap. Connect the dots to get a dart.
- Round the upper left corner of the rectangle.
- The resulting part is ¼ of the cap.
Knitted hat for a child, a simple pattern. - To create half of the hat pattern, attach the resulting piece to a sheet of folded paper so that the side line with the dart coincides with the fold line, trace the template and cut it out.
Preparing fabric for cutting
The length of the fabric cut for the hat depends on how it will be cut:
- If the product is single-layer, then a fabric size equal to 1 cap length plus an increase for the lapel will be sufficient.
- For a two-layer model without a seam on the bottom fold, you will need double the length of fabric.
- If the hat is double-sided, made of knitwear of different colors, you need to take 2 pieces of fabric, equal in length to one size of the length of the hat.
Sequencing
The main characteristic of knitted fabric is its elasticity. It can stretch in one direction or in two. When cutting products, you should pay attention to the main direction of stretching and place the pattern strictly perpendicular to the direction of the stretching line.
For correct cutting you need:
- Fold the piece of fabric across the stretch line with the right side facing inward.
- Attach the hat pattern, trace it with chalk or pencil and cut out the resulting parts, leaving a 1 cm seam allowance.
- When cutting out two-layer products, the fabric needs to be folded across and separately cut out 2 parts with a fold at the bottom.
- To sew a hat with a lining, cut out 4 identical parts or 2 parts with a side fold.
LiveInternetLiveInternet
These tutorials will show you how to sew a hat from cotton T-shirt fabric.
If you have a new T-shirt lying around and don’t know what to do with it, then this option is the most suitable. If there is no T-shirt, then when choosing fabric in the store, make sure that it is completely natural. Option No. 1 - a hat with knots: 1. Prepare a T-shirt (fabric), a sewing machine, preferably an overlocker, a measuring tape, and scissors. 2. Copy and print the patterns for hats with one and/or two knots. Using a measuring tape, measure the circumference of the baby's head and, if necessary, adjust the pattern if it turns out to be too big or small. 3. Using an overlocker, connect the parts of the hat (just do not sew up the bottom edge through which the hat fits on the head). Finish the bottom edge in a circular pattern using an overlocker. Be very careful not to stretch the fabric, otherwise the edges will become wavy. If you don’t have an overlocker, you can zigzag the edges of the cap. To do this, first, stepping back from the edge 0.5 cm, lay a regular stitch, and then finish the edge with a zigzag stitch. In this case, you also need to be very careful not to stretch the edges when processing them. 4. Turn the bottom edge about 5-6 cm, pin it, and then sew it on a machine.
5. All that remains is to tie knots, with which you can adjust the size of the hat in height
Option number 2 - a simple hat:
1.
2.1 inches = 2.5 cm Fold the fabric in half. Attach a sample, outline, cut out, leaving 8mm. around the edges. Please note that the finished hat is 12.5cm in height, so the cutout is 10cm. Or we use a pattern, having decided on the dimensions (half head circumference + additional freedom).
In addition to the hat itself, we cut out a rectangular piece of fabric measuring 14x35cm. We take into account the stretch direction of the fabric. Fold the two halves of the cap together and stitch on the right side, leaving an 8mm margin. Then, fold the rectangular piece in half and stitch it.
Fold into an even narrower connected ring, straightening it to the right side. Place the ring in the cap that is still on the left side so that all the raw edges match. Pin all 3 raw edges together
Sew Turn the cap right side out and iron it with an iron and steamer.
Fold in the edges and iron again
Option No. 3 - hat with ears: 1. Pattern for a newborn. The circumference of a newborn's head is about 35-34 cm, and therefore 18-19 cm in diameter is enough for us to have a loose fit and for seam allowances. The pattern fits perfectly on A4 format. If you need a larger cap, display it on the monitor at the required scale and redraw it from above.
Pay attention to the dotted line on the pattern - this is where the fold of the fabric should go. 2. If desired, take fabrics of different textures or colors and cut out two symmetrical parts. 3. Now we need to draw small ears. To do this, we outline the pattern of the ears on the fabric folded right sides and sew the seams according to the pattern. In principle, the ears can be made conical or even long, like a hare’s. Here everything depends only on our vision of the subject - if we want a pussy, a bunny or a teddy bear, then we simply model the shape of the ears. It is not difficult.
4. Then we cut out the parts, leaving a seam allowance of about 3-5 mm. 5. Turn the ears inside out and, passing the thread along the edge, tighten them a little.
6. Now, look at the photo and sew the ears to the front side of one of the parts of the hat. 7. Sew two seams on the crown. Do not make too large seam allowances - 0.5 - 0.8 cm is quite enough. And the second part too.
9. Next, turning the seams 90 degrees, we make another smooth seam, forming a cap. 10. Turn the pieces inside out, straighten them and slightly iron the seams.
11. At the next stage, we insert the parts one into the other with their front sides. You understand the inside of the ears. All we have to do is make a seam along the edge, not forgetting to leave a technological hole for turning out about 5 cm or a little less.
12. We turn the cap inside out and sew up the technological hole by hand as discreetly as possible. The newborn hat with ears is ready. We try the product on our kitten, bunny, tiger cub or bear cub. We enjoy the result.
source: https://masterclassy.ru/shite/detskoe-shite/2887-sh...hkami-master-klass-s-foto.html
https://podarokhandmade.ru/print:page,1,41-kak-sshi...chku-dlya-novorozhdennogo.html
https://u-made.blogspot.com/2011/04/blog-post.html
Option number 4 - bee hat
Option No. 5 - double knitted hat: a quick way.
on exhaust gas 49cm the height of the cap is 20cm when finished
We take a piece of ribana along the fold and fold it in half again. Draw half of the cap - Draw the second half of the cap - Cut out. We take the cut details as they lie and make two lines - central front and back -
Now you need to turn the cap inside out. To do this, take one of its layers and turn it inside out - Carry out the third line - Steam the finished hat.
https://a2fluence.blogspot.ru/search/label/Patterns%20i%20MK?max-results=20
Knitted beret
First you need to choose the right pattern. The stages of the work are as follows:
- Secure the side parts.
- Iron along the seam.
- Attach the bottom to the side.
- Iron the seams.
- At the last stage, sew on the band.
If the product is made of thin knitwear, then you can sew a lining to it. Cotton is suitable for lining. You need to cut out the inside in the same way as the beret itself. The lining is sewn on after all the other main parts have been sewn.
Cute hat for a girl
You can sew a cute hat with ears for a girl. To avoid wasting time taking measurements, you can use a baby’s cap. You need to trace it on paper to get two parts of the pattern. (Front and back). Using the patterns, cut out the base and lining. Then cut out triangle ears.
Before sewing, you need to fasten the parts together with the right sides facing inward with pins. Attach the ears to the top seam line, having previously covered them with seams. Then sew them on a machine. You can make an applique in the shape of an animal by sewing on eyes, a nose and a mouth, or you can decorate the product with sequins or embroidery.
Lined
A lined hat is made from a knitted outer material and lining fabric. If you plan to wear a hat with a lapel, then the color of the lining should be chosen so that it is in harmony with the main color of the hat. To sew, you need to create a pattern or use a ready-made printed pattern. A lined hat can have a classic cut, a beanie shape, or a model with triangular ears.
To sew a hat with a lining, you need to do the following:
- Cut out 2 pieces from the main and lining fabric.
- Turn the hat base blank inside out and sew the back seam and darts.
- On the lining piece, sew a back seam and a front dart. Leave the middle undercuts unsewn.
- Place the lining piece into the base blank. The front sides of both parts should be facing each other.
- Sew the bottom edges with an overlock stitch.
- Turn the hat right side out through the hole in the lining. Sew the hole closed with a blind stitch.
Double sided
Making your own hats can be done by using just one piece of fabric. In this case, the product will look the same from the outside and inside. Before sewing it, a pattern is created. For this purpose, the following actions are performed:
- A sheet of paper is folded in half.
- A line is drawn from the fold equal to a quarter of the circumference of the head.
- The length of the future accessory is marked in the upper part.
- Based on the received marks, a rectangle is constructed.
- An indent of 2.5 cm is made at the top of the fold line.
- A distance corresponding to a quarter of the length is marked down.
- The resulting marks are connected, and the corner along the intended line is cut off.
- On the opposite side, the corner is smoothly rounded.
After creating the pattern, the following manipulations are performed:
- The fabric is folded in such a way that the fold lines on it coincide with the folds directly on the drawing.
- A solid element with marked undercuts is cut out. Be sure to include seam allowances.
- The middle undercuts are stitched.
- The workpiece is folded with the front side inward and stitched in a circle with one continuous seam. In this case, only a small space of 4 cm remains unsewn. It is necessary for subsequent turning of the product.
- Through this hole, the accessory is turned onto the face and sewn up using a hidden seam.
You can complement your headdress with a scarf equipped with a button closure. The same knitwear is used when sewing it. To create it, you should cut out a rectangle of suitable length, which is stitched along the perimeter from the wrong side. A loop is sewn on one of the narrow sides. The blank is turned inside out and a button is sewn to it.