Everyone needs to know how to iron a shirt correctly. This item is in the wardrobe of almost every man and every woman; it helps to create a strict and noble image. At the same time, the shirt looks impressive only if it is well ironed.
In this article we will present step-by-step instructions that will help you achieve perfect ironing results and look great in your shirt.
Ironing a shirt quickly is not as difficult as it might seem at first glance, you just need to know a number of rules
Useful tips for ironing a men's shirt
To make the ironing process easier, the following recommendations are offered:
- When washing a product in a washing machine, you need to set it to the “Easy Iron” mode intended for shirts.
- It is advisable to dry the shirt on a hanger, having straightened it first. In this case, folds will not appear on it and the fabric will not wrinkle.
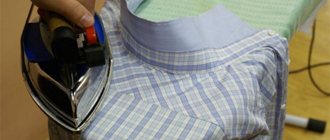
- It is advisable to iron the shirt while damp. To do this, you can resort to using a spray bottle. In the absence of one, it is advisable not to let the product dry too much.
- How to iron dark men's shirts correctly? It is recommended to iron such shirts from the wrong side, otherwise the fabric will soon lose color and become shiny. This rule also applies to products made from shiny fabrics.
- Each type of fabric needs its own ironing mode. An overheated iron will scorch or burn through your shirt. If the temperature is insufficient, it will be difficult to iron out “wrinkles”. Also, not all fabrics react equally to steam and moisture, so it is recommended to study the label on the product, which indicates care recommendations and the temperature setting of the iron.
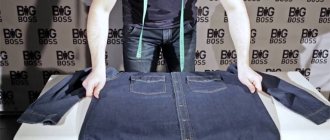
- First, you should iron the cuffs, collar, then the sleeves and fronts, and finally iron the back.
Attention! You should not iron unwashed shirts, as unnoticeable dirt and stains after ironing will be firmly welded to the material and will be quite difficult to get rid of.
If you follow these simple recommendations, the ironing process will not seem difficult, and things will retain their presentation for a long time.
Tips on material selection
Let's look at what types of fabrics exist and the main criteria for choosing them for men's shirts.
Cotton
Cotton fabrics today occupy one of the leading places when choosing for sewing men's shirts. This is simply an ideal material for this purpose, as it differs from others in wear resistance.
Cotton is easy to wash; stubborn stains can be safely boiled, as the material will not shrink. Excellent ratio between the cost of the product and its quality.
It is made in many countries:
- India,
- Egypt,
- North America,
- Central Asia.
Oxford
This type of material used in sewing men's shirts is one of the rough ones. The fabric is quite appropriate for casual style models. Oxford shirts are an excellent option for spending free time in an informal setting.
The coloring of this material has a unique difference from other options in that threads of colored shades are reflected in one direction, and white ones in another.
Today, formal, respectable clothing is made from royal oxford. Shirts for the stronger sex are made from a specially woven material that is distinguished by its softness.
Poplin
This type of material, despite its density, is smooth. Its calling card is small transverse scars, distinguished by their uniqueness.
Poplin is a fairly versatile material, so items for daily wear are often made from it. Most modern shirts are made from poplin.
They are easy to wash and convenient to iron.
Cotton twill
This type of material refers to cotton or twill fabric. Shirts made from cotton twill have a rich look thanks to the diagonal herringbone-like structure.
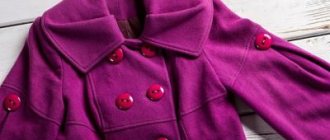
Flannel
The material is very soft to the touch. There are two types of flannel: cotton and wool.
Attention! Shirts made from this material are better than thin ones and can be worn every day, for example, to work.
Silk
The richest fabric for men's shirts, but not very practical. Products made from natural materials get dirty and wrinkle easily. Such products require special care.
How to care for things made of delicate fabrics is described in the video:
A men's shirt is one of the most important parts of the wardrobe of the stronger sex. We can say that this is the calling card of any man.
Remember that a perfectly ironed product always inspires respect and trust in a person.
Necessary equipment for ironing
Ironing a men's shirt with both long and short sleeves will be easier if you prepare all the necessary equipment in advance. What does it include:
- Iron with non-stick coating and steam function. If you don’t have such an iron, you can use a spray bottle.
- Ironing board with a special small board designed specifically for sleeves. The presence of such a device greatly simplifies the alignment of the sleeve and allows you to avoid the formation of arrows. If you do not have a small board, you can put a towel in the sleeve to get rid of the arrows.
- Spare water for refilling the spray bottle.
- A light or white towel made of natural material, preferably cotton. It is used as a backing on an ironing board or a product is ironed through it to avoid the formation of water stains and loss of color.
Ironing the sleeves
Shirt sleeves should be ironed without arrows. This is done like this:
- the sleeve is folded in half, seam up and it should be located in the middle;
- the seam is smoothed, the sleeve is turned over and also ironed;
- The sleeve is folded along the seam and ironed from it to the edge, starting from the shoulder and down.
Are arrows needed on sleeves?
Many have wondered: is it correct to iron shirt sleeves with or without arrows? According to etiquette, it is customary to wear a shirt without arrows.
But if a person does not plan to take off his jacket, arrows on the shirt are acceptable. It follows from this that arrows on the sleeves are in bad taste.
How to choose the temperature when ironing a shirt
For optimal results, you need to consider that each type of fabric needs its own temperature and humidity level. If the composition of the fabric is unknown, it is advisable to iron it at a minimum temperature. When the fabric contains polyester, the iron must be heated to 100 degrees. It is not advisable to iron artificial materials with high steam; the mode is set to minimum.
Products made from viscose are ironed at 120 degrees with steam treatment. But it is advisable not to wet viscose with a spray bottle, as unsightly water stains will remain.
Shirts made from natural fabrics are ironed at a temperature of 150 degrees and with plenty of steam. The product, which contains cotton and linen, will be ironed at 170 degrees with steam. Linen is the toughest material; it needs to be processed at a maximum temperature of 200-220 degrees and with a lot of steam to straighten out existing wrinkles.
Silk shirts should not be wetted with water to prevent stains and should be ironed dry. For silk products, use a minimum temperature and process from the inside out so that the shirt does not become shiny.
Important! If there is no label on the product and the composition is not known, you need to set the minimum temperature, gradually increasing it until the shirt begins to smooth out well.
How to choose the right temperature
Incorrectly set temperature on the iron can either ruin the item or lead to the fact that not a single wrinkle will be smoothed out.
In order to choose the correct temperature, look at the label sewn on the inside of the shirt.
If the ironing temperature is not indicated, but you know what the shirt is made of:
- Viscose shirts are ironed at 100 degrees;
- Silk – at 130;
- For cotton fabric, a temperature of 180 degrees is suitable;
- Linen requires 220.
If there is no label with the composition on the shirt, it is better not to risk it and first set the iron to the lowest temperature. You need to check it on the back from the wrong side. The temperature is gradually increased until the folds begin to disappear. At some point, the iron may stop sliding, and this is a sure sign that the temperature is too high. It must be lowered immediately so as not to damage the product.
Processing procedure for men's shirts
You should iron a men's shirt from the smallest details, moving on to the largest ones:
- Collar - first of all, the part of the product that is constantly in sight is ironed. You need to iron from the inside out, from the edge to the center, so as not to smooth out the folds in the corners of the collar. Next, turn it over to the front side and repeat the process. It is not advisable to iron along the fold, otherwise the collar will take on an ugly shape and lose its appearance. It is no longer possible to disguise such an oversight.
- Cuffs – you need to iron the sleeves starting from this part. The process is similar to processing a collar. The cuffs are unbuttoned and straightened on the board to avoid the formation of arrows, the double parts are unfolded, processed in a straightened form, folded and ironed along the fold.
- Sleeves - then we move on to the more complex part. It is important here that smoothed arrows do not appear, as they are indicators of poor taste. The sleeves should always be perfectly straight; to do this, straighten the fabric on the board, folding it in half, focusing on the seam. It is recommended to process the part from the shoulder to the cuffs, but do not go to the edge so that arrows do not appear. After ironing the sleeve on one side, it should be lifted and unfolded so that the seam is located at the bottom and in the middle. The rest is processed next. Repeat the operation with the other sleeve. For the process it is convenient to use a small special. board, but if you don’t have one, you can use a rolled up towel, which helps avoid the formation of arrows and speeds up the processing process.
- The fronts are the front parts of the shirt. You need to start from the side where the buttons are located, processing the area around them. Ironing over the top will leave an unsightly mark on the buttons. The direction of the iron is from the shoulder, up and down. Pockets are ironed from bottom to top to prevent wrinkles.
- The back is a voluminous, but simpler part of the shirt. Lay out the shirt on the board so that one of the sleeves is located near the long edge of the board. The direction of the iron is from top to bottom, from the shoulders to the edge. After ironing one half, position the shirt so that the second sleeve is near the edge of the ironing board. The remaining unironed part is processed at the end.
- Inspection is the final stage of ironing, during which you should make sure that all areas are ironed. If folds are found, they should be processed again.
After completing the work, you can put the product on or hang it on a hanger, having first fastened the top button.
How to do it right: step-by-step instructions with photos
Ironing a man's shirt correctly is more difficult than it seems at first glance. The shirt must be washed and dried properly.
It is best to iron an item that is not completely dry. Ironing begins with processing double small parts, usually from the collar.
It is necessary to inspect the shirt itself and perform the following actions :
- If there are special plastic parts in the corners of the collar that help it keep its shape, they need to be pulled out. But it’s better to do this before washing.
- Unfasten the buttons.
- Make sure that the item does not require repair - all buttons are present and there is no damage.
If the shirt is completely dry, or even dry, you can evenly spray it with water from a spray bottle and leave it in a plastic bag for a quarter of an hour.
Features of collar processing
The collar is laid out with the wrong side up. It is ironed by moving the iron from the edges to the middle.
Handle with care:
- space along the placket and around the top button;
- loop for the top button.
After this, the item is turned over and the collar is ironed from the front side. For materials that are difficult to iron, you can use the steam function.
If the shirt has fasteners in the corners of the collar, they are inserted and carefully smoothed. The fold of the collar should not be smoothed .
Cuffs
After the collar is ironed, move on to the cuffs:
- They are laid out wrong side up on the ironing board.
- Iron in the direction from the corners to the central part.
- Turn the part over to the front side.
- Iron with force from the corners.
- For cuffs designed for cufflinks, combine both loops and iron them together.
There are no folds on the cuffs, regardless of the style of the shirt with sleeves.
Sleeves
After processing the cuffs, iron the rest of the sleeve. To do this, first one sleeve of the shirt is processed, and then the second:
The part is turned with the seam up.
Iron, stretching and straightening the material so that arrows or creases do not form. In this case, the iron should no longer touch the cuffs, not reaching them one or two centimeters. They also leave the seams on the armhole side for later.- Turn the sleeve over and iron the central part. Turn the part over again and put it on the sleeve, starting with the cuff.
- Ironing begins by retreating 20 mm from the cuff.
- Smooth the bar on one side and then on the other side.
- Buttons on the cuffs are fastened.
- Iron the bar with the fastener.
It is convenient to iron the sleeves using a specially designed sleeve part that comes with the ironing board. Without this detail, it will be more difficult to properly iron long sleeves.
An alternative option is towels tightly rolled into a roll shape . In the same way, a duvet cover or other material can be replaced by a neatly folded and then rolled up blanket.
Shoulder part and yoke
After the collar and sleeves are ironed, the shirt is put on the ironing board from the narrower end so that it is convenient to iron the shoulder part.
Next they move on to ironing the junction of the collar with the shirt, and the seams on the armholes. When ironing shoulder seams, the collar should not fall under the iron again.
Shelf
Begin processing the shelves with the one on which the buttons are located . The front of the shirt is laid out lengthwise on the ironing board so that the shoulder part is on the narrowed side of the ironing board.
Shelf processing:
- straighten the fabric;
- near the buttons, the iron should be moved carefully, trying not to touch them;
- the iron is moved from bottom to top;
- after the part of the shelf near the collar is ironed with the tip of the iron, the device is moved to the lower edge of the product;
- repeat the processing on the second shelf.
If the strip is hard and multi-layered, it is recommended to first iron this part first from the inside and then from the face.
Back: “finish straight”
The back and side seams are much easier to iron. To do this, the product is placed on the ironing board so that the shoulder seam is on the narrow end of the ironing board, and the bottom cut is on the wide end. It is recommended to slightly stretch the side seam during the ironing process .
The step-by-step process of ironing a men's shirt is presented in the video:
Ironing a long sleeve shirt without an iron
Situations arise when you need to iron a shirt, but there is no way to use an iron. For example, the electricity has been cut off, the iron has broken down, and your shirt urgently needs to be ironed, or you need to get your clothes in perfect shape on the train before leaving the platform. There are several proven ways to iron a product in such situations:
- With wet hands. To do this, you need to lay the shirt out on the table, wet your hands and sweep the fabric with a sharp movement, as if shaking it off. Then you need to shake the product vigorously and hang it on hangers to dry or dry it with a hairdryer.
- Steam bath. Hang the product on a hanger in the bathroom, turn on the hot water and close the door to the room for 30 minutes. During this time, the shirt will be smoothed under the influence of steam. It is advisable that splashes of hot water do not fall on the material, otherwise stains and unevenness will form.
- On myself. Partially or completely spray the fabric with a spray bottle, put on the shirt and dry it on yourself. Under the influence of heat emanating from the body, the moisture will quickly dry out and the fabric will take on the desired shape.
- Using leveling solution. You need to pour the same amount of laundry softener, water and table vinegar into the spray bottle. Shake the mixture and spray onto the crumpled fabric. This method is not suitable for delicate and synthetic items, as stains remain on the fabric after treatment.
Attention! Before ironing the fabric, you need to wash your hands thoroughly, otherwise even minor dirt on your hands will transfer to the fabric.
Tips and Tricks
The “no crease” function is very helpful when washing clothes. It will help avoid severe creases. If the washing machine is not equipped with such a program, then limit yourself to a gentle spin. You should not set the maximum spin speed when washing shirts.
If the label is cut off
On the inside on the side seam there is a label with recommendations for washing, care and ironing of the product. If there are none or the shortcut is cut off, you will have to select the mode yourself:
- 100% cotton - optimally iron at 150°C, steam;
- polyester - the temperature must be reduced to 110°C;
- crushed cotton - ironed at 110°C without steaming;
- viscose - iron only when wet at an iron sole temperature of 120°C.
- a mixture of linen and cotton - requires ironing at a high temperature of 190-200°C and the use of a steamer;
- linen shirt - iron at high temperature - 210-230°C;
- dense fabric - press on the iron. Military and police shirts are made from this fabric.
A silk shirt is ironed a little differently: it needs to be completely dried and ironed through a thin fabric. Using a spray bottle or steam may leave streaks.
Tags and labels are best left untouched by the iron. They are made of synthetic fabrics that can melt from a hot sole. Or it can become rough and prick the body when worn.
If the iron breaks
Sometimes you urgently need to iron a shirt without an iron at home. For example, when there is no electricity, the iron breaks down. Don't panic, you can use one of the following tips.
- Special wash. Simply wash a shirt made of low-wrinkle fabric and hang it on hangers until dry. After this method there are no folds left. But you shouldn't wring out clothes. Just fasten the buttons, straighten the shirt, turn up the collar and wait for it to dry.
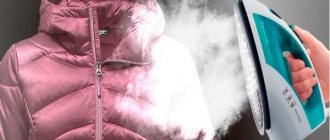
- Hot steam. You can turn on the hot water in the bathroom and hang a shirt on a hanger nearby. The steam will smooth out the wrinkles. A steamer will also cope with this task, if you have one in the house. You can also resort to using a boiling kettle.
- Irrigation. Take a spray bottle and pour one part each of vinegar, water and fabric softener into the flask. The water must be distilled or clean boiled. Instead of conditioner, you can use fabric softener. Hang the shirt on hangers and sprinkle with this miracle composition. After drying, the clothes will look ironed.
If the sleeves are short or the shirt is new
You need to iron a short-sleeved shirt in the same way as a long-sleeved shirt. The process is made easier by the absence of cuffs. A steam generator will help you iron a shirt that is difficult to iron with a regular iron. This item is indispensable in families where shirts are worn frequently.
The step-by-step instructions for ironing a new shirt will not differ significantly from the usual method. But it is more difficult to iron a shirt brought from the store. Proceed in two stages.
- First wash or rinse the shirt in warm water. If this is not possible, then moisten it generously with water and start ironing.
- Press the extra steam button frequently and apply pressure to the iron. If possible, use a steam generator.
It is difficult to iron shirts after boiling. If none of the usual methods help, try ironing the product through a damp cloth. If your shirt constantly wrinkles, for example, from riding in a subway car, or from sitting at your desk at work, then you have chosen clothes made from the wrong fabric.
If there is no board
Not having an ironing board doesn't mean you have to wear wrinkled clothes. Any hard, flat surface can perform its role. You can arrange ironing on a table or sofa. If the floor covering is not afraid of high temperatures, it is permissible to iron clothes on thick fabric on the floor. However, it is better to cover the surfaces with a thick blanket folded several times.
An unusual way to iron clothes without an ironing board is directly on yourself using a hairdryer. Put on a slightly damp shirt and dry it directly on your body with hot air. The method is suitable for women's clothing made from delicate fabrics. Using this technique, clothes are smoothed on a hanger.
Video on the topic
With detailed instructions on how to properly iron a long-sleeved shirt, you'll be able to complete the task with ease. But keep in mind a few more tips: cooled fabric wrinkles more easily. Therefore, if time permits, let the ironed part cool before moving on to the next one. You need to hang the shirt in the closet after it has cooled completely. Be sure to check the steam before ironing, it must be clean. Sometimes scale or rust flies out of the soleplate of the iron with steam. This will come as an unpleasant surprise. Therefore, it is better to iron a white shirt from the wrong side. The same should be done with dark tones to avoid streaks on the front part.
Modern equipment for ironing shirts
Irons that produce steam and spray water have been replaced by new progressive achievements:
- Steam generator - the essence of the device is similar to an iron, but the difference between a steam generator and an iron is that this device is able to smooth out even heavily wrinkled fabric due to the continuous flow of a powerful jet of dry steam.
- Steamer - an intense stream of hot steam can cope with wrinkled folds, disinfect and eliminate odors from the material, and give things a neater and fresher look. Clothes can be processed in a vertical position and without the use of an ironing board.
- Steam mannequin is an inflatable mannequin that effectively dries and smooths sweaters and shirts.
- A steam cabinet is a device that also dries and smoothes any items, including shirts, and gives things a fresh look thanks to hot steam treatment.
Statistics show that many males do not know how to properly iron shirts, as they consider it women's work. But sometimes even an experienced housewife cannot always cope with such a task, because no matter how you put the shirt down, creases, arrows and folds will still form. The simple tips listed in the article will help you iron a men's shirt quickly and efficiently.
Ironing the shelves and back
We place the shelf on the board, shoulder to the narrowed part. You need to start ironing the shelf from the front side. The spaces between the buttons are ironed from bottom to top.
The seam is ironed at the collar and further down. Place the shirt with the armhole side seam onto the board and iron.
Then you need to move the iron to the side seam and back. Lastly, the left shelf is ironed.
Is it possible to iron a shirt immediately after washing?
Shirts prepared for ironing must be washed and dried.
After ironing, shirts that have been worn at least once will not look fresh.
Do not iron wet or overly dry items.
The optimal moisture content of a shirt is if no moisture is released when you press it. If you use the “crease-free” mode during washing, this will simplify the further process.
A dry shirt can be moistened with clean water from a spray bottle.
Preparation
Before ironing you must:
- Check the cleanliness of clothes, iron and ironing board. When ironing, stains may become embedded in the material. A dirty or rusty tool will leave corresponding marks.
- Turn the item inside out. If you iron on the wrong side, it is easier to get rid of wrinkles in hard-to-reach areas. Ironing on the front side can damage the fabric.
- Spray the product with water. Dry material is subject to stress and damage. On the other hand, tap water may leave scale, so you can use distilled, filtered or boiled water.
- Check the information on the label. The labels contain instructions for caring for the item, indicating at what temperature it can be washed and ironed:
- silk – 250-300 degrees;
- synthetics – 175-230;
- linen – 320-400.