Rating: 4.76/5 (17)
The hat itself can quite create an image. Leading designers regularly release collections of hats - ironic, comfortable, funny and bright - they help create an individual style, combining fashion with convenience and comfort . But sometimes choosing outerwear is easier than finding a decent headdress to go with it. And then the craftswomen get down to business - they can sew anything, even a hat.
DIY hats!
VELVET BERET (SIZE 58-60) You will need: Fabric: velvet - 30 cm with a width of 150 cm, lining fabric - 30 cm with a width of 90 cm.
1. Bottom - 1 piece;
2. Crown - 2 parts;
3. Band - 1 piece.
First, sew the sides of the wall parts together using a 0.7 cm seam. Press the seams. After this, stitch the walls to the bottom. Iron the seam towards the walls, stitch to the edge or press it. Treat the lining in the same way. Fold the parts from the main and lining fabrics with the wrong sides inward, aligning the lower sections. Sew the narrow sides of the band (it will take the shape of a ring), and press the seam. Sew the band to the bottom edge of the beret, folding it right side together with the lining. Turn the band onto the front side of the beret and stitch it onto the wall, covering the stitching seam. If the band is made of leather, make its inner side from the main fabric (cut the part according to the shape of the leather band and stitch it to it along the longitudinal side, folding the right sides inward). Steam the beret carefully and attach the finishing parts.
Black velvet beret with a bow, secured with a brooch. It is recommended to sew such a beret from soft pile fabrics that drape well - velvet, loose drape. The bow is made of grosgrain ribbon in a contrasting color. The leather band also serves as a decorative function. The lining is best made from a thin lining or voile-type fabric.
BERET FROM CLOTH (SIZE 56-58) You will need: Fabric: cloth - 30 cm with a width of 150 cm, lining fabric - 30 cm with a width of 90 cm.
1. Bottom - 1 piece;
2. Crown - 2 parts;
3. Band - 2 parts;
4. Bow - 1 piece.
First, sew the sides of the wall parts together using a 0.7 cm seam. Press the seams. After this, stitch the walls to the bottom. Press the seam towards the walls, stitch to the edge or press it. Treat the lining in the same way. Fold the parts from the main and lining fabrics with the wrong sides inward, aligning the lower sections. Sew the narrow sides of the band (it will take the shape of a ring), and press the seam. Sew the band to the bottom edge of the beret, folding it right side together with the lining. Turn the band onto the front side of the beret and stitch it onto the wall, covering the stitching seam. If the band is made of leather, make its inner side from the main fabric (cut the part according to the shape of the leather band and stitch it to it along the longitudinal side, folding the right sides inward). Steam the beret carefully and attach the finishing parts. An unusual decoration is a large decorative bow, which can be made from bright drape or velor. Along the middle line marked on the pattern, pull the bow detail with a thread or fold it with several soft folds and attach it to the beret with a brooch. Since it is recommended to make the bow from non-fraying fabrics, there is no need to process the edge. The band is made of artificial leather.
DRAPE BERET You will need: Fabric: drape - 30 cm with a width of 150 cm, lining fabric - 30 cm with a width of 90 cm.
1. Bottom - 1 piece;
2. Crown - 2 parts;
3. Band - 1 piece.
First, sew the sides of the wall parts together using a 0.7 cm seam. Press the seams. After this, stitch the walls to the bottom. Press the seam towards the walls, stitch to the edge or press it. Treat the lining in the same way. Fold the parts from the main and lining fabrics with the wrong sides inward, aligning the lower sections. Sew the narrow sides of the band (it will take the shape of a ring), and press the seam. Sew the band to the bottom edge of the beret, folding it right side together with the lining. Turn the band onto the front side of the beret and stitch it onto the wall, covering the stitching seam. If the band is made of leather, make its inner side from the main fabric (cut the part according to the shape of the leather band and stitch it to it along the longitudinal side, folding the right sides inward). Steam the beret carefully and attach the finishing parts. The rigid beret is made of drape, backed with two layers of adhesive padding. The gasket is necessary in order to clearly fix the cone-shaped shape of the beret. The adhesive pad can be replaced with a regular linen border, but in this case the fabric parts must be carefully quilted with the border using oblique stitches in a circle so that the stitches are not visible from the front side. When stitching, do not tighten the thread too much. The seam on the bottom of the beret should be covered with a decorative piece made of drape or leather. The band is made from the main fabric. The lining is normal.
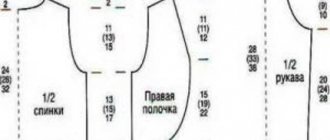
WOMEN'S Earflaps (SIZE 57) The crown consists of six wedges. The pattern drawing is given without seam allowances.
1. Wedge made of top material – 6 parts;
2. Visor – 2 parts;
3. Back plate and earpiece – 2 parts;
4. Lining wedge with insulation – 6 parts.
GAVROCHE CAP (SIZE 54-55) You will need: Fabric: spandex - 50 sq. dm, lining fabric - 50 sq. dm.
1. Wedge - 6 parts;
2. Visor - 2 parts;
3. Band - 2 parts.
1) Having made a pattern from paper, apply it to the fabric.
2) Sew the wedges on the wrong side.
3) We cut out the lining according to the patterns, stitch it and sew it to the cap on the wrong side.
Sew the visor along the outer contour and stitch at a distance of 0.75 cm. Sew it to the crown. Sew the band to the crown.
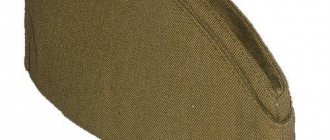
KEP (SIZE 56-58) You will need: Fabric: 50 cm of any fabric with a width of 80 cm, lining 50 cm with a width of 80 cm.
1. Middle part - 2 parts;
2. Side part - 2 parts;
3. Visor - 2 parts.
We make a pattern on paper, transfer it to fabric, cut out and sew first the two middle parts, and then the two side ones. Let's connect them together. We make the lining according to the same pattern as for the main parts. We sew the lining and sew it to the cap. Then we sew together the two parts of the visor and sew it to the cap. The visor is reinforced with cardboard or plastic spacer. The lower edge of the cap is finished with grosgrain ribbon.
BLOCK HAT (size 56) You will need: Fabric: broadcloth - 25 cm wide 140 cm, lining fabric - 25 cm wide 90 cm.
1. Bottom - 1 piece;
2. Fields - 1 detail;
Selecting a hat model
Here are some models of fashionable hats:
If you don't know how to choose a hat, then take a look here.
And we will sew something like this:
You will need: knitted fabric, which must have good stretch, since the hat must fit tightly on the head.
Fabric consumption: width 1.5 m. length 0.30 m.
The hat consists of: main part and lining (from the same fabric)
How to sew a hat for women from drape: pattern, sewing instructions.
Cap – Eugenia Kim, RUB 11,075/$245
Cap - OVS, 319 RUR/$10
Fedora hat – Janessa Leone, RUB 8,690/$215
Fedora hat – Rag&Bone, RUB 7,885/$195
HEADWEAR
VELVET BERET (SIZE 58-60)
You will need:
1. Bottom - 1 piece;
2. Crown - 2 parts;
3. Band - 1 piece.
Job:
First, sew the sides of the wall parts together using a 0.7 cm seam. Press the seams. After this, stitch the walls to the bottom. Iron the seam towards the walls, stitch to the edge or press it. Treat the lining in the same way. Fold the parts from the main and lining fabrics with the wrong sides inward, aligning the lower sections. Sew the narrow sides of the band (it will take the shape of a ring), and press the seam. Sew the band to the bottom edge of the beret, folding it right side together with the lining. Turn the band onto the front side of the beret and stitch it onto the wall, covering the stitching seam. If the band is made of leather, make its inner side from the main fabric (cut the part according to the shape of the leather band and stitch it to it along the longitudinal side, folding the right sides inward). Steam the beret carefully and attach the finishing parts.
Black velvet beret with a bow, secured with a brooch. It is recommended to sew such a beret from soft pile fabrics that drape well - velvet, loose drape. The bow is made of grosgrain ribbon in a contrasting color. The leather band also serves as a decorative function. The lining is best made from a thin lining or voile-type fabric.
BERET FROM CLOTH (SIZE 56-58)
You will need:
1. Bottom - 1 piece;
2. Crown - 2 parts;
3. Band - 2 parts;
4. Bow - 1 piece.
Job:
First, sew the sides of the wall parts together using a 0.7 cm seam. Press the seams. After this, stitch the walls to the bottom. Press the seam towards the walls, stitch to the edge or press it. Treat the lining in the same way. Fold the parts from the main and lining fabrics with the wrong sides inward, aligning the lower sections. Sew the narrow sides of the band (it will take the shape of a ring), and press the seam. Sew the band to the bottom edge of the beret, folding it right side together with the lining. Turn the band onto the front side of the beret and stitch it onto the wall, covering the stitching seam. If the band is made of leather, make its inner side from the main fabric (cut the part according to the shape of the leather band and stitch it to it along the longitudinal side, folding the right sides inward). Steam the beret carefully and attach the finishing parts. An unusual decoration is a large decorative bow, which can be made from bright drape or velor. Along the middle line marked on the pattern, pull the bow detail with a thread or fold it with several soft folds and attach it to the beret with a brooch. Since it is recommended to make the bow from non-fraying fabrics, there is no need to process the edge. The band is made of artificial leather.
BERET FROM DRAPE
You will need:
1. Bottom - 1 piece;
2. Crown - 2 parts;
3. Band - 1 piece.
Job:
First, sew the sides of the wall parts together using a 0.7 cm seam. Press the seams. After this, stitch the walls to the bottom. Press the seam towards the walls, stitch to the edge or press it. Treat the lining in the same way. Fold the parts from the main and lining fabrics with the wrong sides inward, aligning the lower sections. Sew the narrow sides of the band (it will take the shape of a ring), and press the seam. Sew the band to the bottom edge of the beret, folding it right side together with the lining. Turn the band onto the front side of the beret and stitch it onto the wall, covering the stitching seam. If the band is made of leather, make its inner side from the main fabric (cut the part according to the shape of the leather band and stitch it to it along the longitudinal side, folding the right sides inward). Steam the beret carefully and attach the finishing parts. The rigid beret is made of drape, backed with two layers of adhesive padding. The gasket is necessary in order to clearly fix the cone-shaped shape of the beret. The adhesive pad can be replaced with a regular linen border, but in this case the fabric parts must be carefully quilted with the border using oblique stitches in a circle so that the stitches are not visible from the front side. When stitching, do not tighten the thread too much. The seam on the bottom of the beret should be covered with a decorative piece made of drape or leather. The band is made from the main fabric. The lining is normal.
WOMEN'S Earflaps (SIZE 57)
1. Wedge made of top material – 6 parts;
2. Visor – 2 parts;
3. Back plate and earpiece – 2 parts;
4. Lining wedge with insulation – 6 parts. at the seams.
Sewing
A knitted hat for a child has a simple pattern that even an inexperienced craftswoman can handle. Sewing a hat takes no more than 30 minutes.
To complete the work you need:
- Place the cut pieces right sides facing each other and pin the edges together with sewing pins.
- Sew the edges on a machine and overcast them with an overlocker or a special machine stitch.
- To ensure even seams, iron the product with an iron.
- Sew the darts in one line. Carefully align the previously stitched seams to create a beautiful intersection of lines on the front side.
- Finish the edges of the dart with an overlocker.
- Sew the bottom of the hat with an overlock stitch and fold it inward by 2-2.5 cm. Pin the hem and sew the edge on a machine, departing 1.5 cm from the fold.
How to sew a hat for women from drape (with pattern)
Every woman wants to look beautiful and impressive even with the onset of autumn cold.
In the harsh climate of our country, it is impossible to do without a headdress. Therefore, fashionistas are faced with the question of how to ensure warmth and be stylish. This year, drape hats are especially popular. They are warm and perfectly complement the look of a girl in a coat or jacket. Now the store offers many options, but they are not original. It is not always possible to choose a hat of the color and style that suits your taste.
Instead of continuing the search, we suggest sewing it yourself, choosing a simple option for drape hats for women - a beret.
Rules for taking measurements
A knitted hat for a child is sewn according to 2 main measurements. This is the circumference of the head and the depth (or height) of the product. For a hat with ties that covers the ears, you also need to know the measurements for the side depth of the hat.
The main measurements and measurement technology are given in the following table:
| Measurement name | How to measure |
| Head volume | Place the measuring tape above the ears at the level of the eyebrows, at the back - along the most convex part of the back of the head. |
| Cap depth | Measure the distance up to the forehead from the crown to the point between the eyebrows, back to the base of the skull and along the sides to the edge of the earlobe. |
| Rear Width | Measure the distance from your earlobe to the posterior center line at the base of the skull. |
To create a hat pattern, take any pattern from a sewing magazine as a basis or print out a ready-made pattern. You can also trace the outline of another baby hat and add seam allowances.
Beret details and their pattern
This pattern is suitable even for beginners; its advantage is that the finished product is easy to sew and will hold its shape perfectly. To do this, you need to take measurements, and then start sewing the product.
The main thing that needs to be done before cutting the fabric is to take the measurements correctly , otherwise the headdress will have to be constantly adjusted when walking or it will put pressure on the head. To do this, you need to take a measuring tape and measure your head at the widest part.
IMPORTANT ! Do not tighten the tape too much or, conversely, loosen it.
When sewing, we will work with three parts of the future product: the bottom, the sides and the cachepin (ring).
Use a round base with a diameter of 30 cm, and in the center build a circle according to the size of your head.
To calculate the radius of a small circle, you need to use the following formula: r = head circumference / 2, where = 3.14. Next you need to cut out the cache-pin. This is a strip about 6 cm wide and length around the circumference of the head. It will need to be folded in half and sewn to the rest of the parts.
IMPORTANT! Don't forget about small seam allowances.
Rectangle fabric beanie
Now that you know how to take measurements and make a pattern, we’ll get to the point: the tailoring itself.
- Take a piece of fabric 55 cm high and OG wide (head circumference).
- Fold the front side inward. Matching the edges.
- We fasten with needles. Leave a small hole unattached (mark the boundaries with a pencil).
- We put a line where we connected with pins.
- The result is a pipe (conditionally).
- Combine one upper corner with the opposite one. The second one is exactly the same. There were 4 layers in total.
- We remove the second and third layers inside the structure. Connect the bottom layer with the top one. We pin it with pins.
- We lay a line along this place. But start stitching about 3 fingers away from the edge.
- But we don’t complete the stitching, but straighten the second and third layers and align the edges. We flash them the same way.
- We finish the line where we started.
- We look for a hole and turn the structure inside out. We straighten the cap.
- All that remains is to sew up this hole. We straighten the cap.
The Beanie hat is ready, wear it with pleasure. This model is quite simple, easy to sew.
Instructions for performing the work
According to the pattern given above, we only need to make a few seams.
- First, two rounded parts are sewn together: the bottom and the side. Baste all pieces before machine stitching. Carefully connect all the parts on the machine so that the finished product looks beautiful on your head. A small error can lead to deformation, distortion of dimensions and misalignment.
- Try on a hat to immediately notice all the flaws and correct them.
- After that, take care of the cache. It is connected into a ring, then folded in half and sewn to the product.
- After this, the seams should be ironed well. The work is done carefully, one centimeter at a time, using a special block or ironing board sleeve. Face seams can only be treated with steam.
- When finishing the work, you can place the beret on the glass jar to give the headdress its shape.
Your product is ready.
ATTENTION! The finished beret can be decorated with beads, homemade flowers, buttons and other details that match the color and shape.
How to close an English rib with a knitted seam?
A regular English rib can be closed with a knitted seam using knitting needles. To do this, start doing the following:
- Knit the first stitch.
- Remove it again to the same knitting needle where it was before.
- If purl goes further, then purl two stitches.
- Again, throw this loop back onto the knitting needle and now knit two stitches.
- So alternately knit two loops with front and back loops until you have knitted the entire row.
Close the elastic
We design a variety of berets with our own hands
Choosing fabric. To make your own beret warm enough for the off-season, it is better to choose thick woolen fabric, for example, loden or drape. A light and practical beret will be made from fleece; you can also use knitted fabric or cut up a boring sweater. Don't limit your imagination. With a stylish beret, we're all a little French!
Building a pattern
In order to sew a beret with your own hands, you will need to create a simple pattern. Let's take a circle with a diameter of 30 cm as a basis - this is the standard size of a beret. In the center of the circle you need to build a circle equal to the circumference of your head. To make the beret asymmetrical, the circle can be cut out by moving it to the edge.
How to sew a beret with your own hands - instructions and pattern
Let's calculate the radius using the formula familiar to everyone from school: R = head circumference / 2π. Let's say head circumference = 57 cm. Then R = 57 / (2×3.14) = 9 cm.
If the fabric chosen is elastic, then it is better to subtract 1-2 cm from the circumference of the head so that the beret fits well.
In total you will need to cut 3 parts:
round bottom of the beret (circle with a radius of 30 cm);
part with a hole for the head (ring from our pattern);
cashpen, simply a band.
We have already created patterns for the first 2 parts. As a cache-pin, you need to cut a strip with a length equal to the circumference of your head, and a width of your choice. To get a 3 cm high pot, the width of the part must be 6 cm. Don't forget to add seam allowances.
We sew with our own hands
Just 3 stitches! Sew 2 beret pieces in a circle using one. Second, connect the cache-pin into a ring. Using the third seam, sew a folded cache-pin with a hole for the head. Iron the seams thoroughly and, one might say, the beret is ready!
How to sew a beret with your own hands
If the fabric of the beret does not fray, then it can be worn in this form. And if it frays badly enough, then in order to prevent threads from remaining in the hair, you will have to sew a lining for the beret. You will need a piece of lining fabric or knitwear if you want to make the beret a little warmer.
From the fabric you need to cut 2 round parts the same as for the beret. Having folded the right sides, you need to sew them around the circumference, but not completely. Leave about 7cm unsewn. To sew a beret with a lining, turn it inside out. Place the lining into the beret with the right side facing inward. Align the pot and lining around the circumference of the head and stitch in a circle. Through the hole left, turn the entire structure inside out and sew up the beret. Now it's definitely ready!
The colors of the band and the top of the beret may vary.
Boutonnieres will help diversify your beret
And this is what an asymmetrical beret with an offset center looks like
Flirty bows are another decoration option for a beret
How to sew a beret with your own hands and not decorate it with a luxurious flower? The trend is large baroque brooches with sparkling crystals and vintage cameos in light lace. Choose what is right for you and welcome spring in a new beret!
What is the best way to close a 2x2 elastic band with a knit stitch?
This process is best done on knitting needles using an elastic knitted seam :
- If the elastic goes in a circle, start closing it in front of the two knit stitches.
- First, make one yarn over, knit an LP, insert the second knitting needle where the knitting needle was, insert it into the yarn over, and thread it through the previous loop.
- Next, yarn over in front of the purl stitch. Knit immediately purlwise.
- Then use another needle to slip the yarn over through the purl stitch.
- Pass the second loop again onto the outermost first one.
- Yarn over again in front of the purl loop, knit it and repeat the same thing as you did in step five.
- Now, according to this pattern, knit all the other two-by-two elastic loops.
Elastic seam for elastic 2 by 2