Processing seam allowances on curved parts
Seam allowances for curved parts, such as a collar, are cut before stitching along the connecting marks. After stitching, such allowances are cut more often almost to the seam line so that the fabric bends freely when turned out.
Processing allowances on sleeves
The fabric at the sleeve and side front seam allowances is cut into a “V” shape on the outside of the fold line. The cut is made first on one side of the allowance, then on the opposite side.
Layered cuts
At the inner curves of the armhole, cut one seam allowance and make V-shaped notches on the other to avoid excess thickness and folds.
Processing allowance at the intersection of seams
If a new seam intersects an existing one, the allowance at the intersection is cut only on thick and medium-density fabrics. Cut crosswise in the direction of the intersection of the seams.
LiveInternetLiveInternet
Quote from perlana
Read in full In your quotation book or community!
Sewing:Marking seam allowances and Little useful things from Tatyana Maksimenko
Little sewing tips Marking seam allowances / Seam allowance
More than once I have been asked about the method for marking seam allowances. But there was nothing to tell, she didn’t keep any tricks or wisdom in her bosom, everything was probably the same as everyone else’s. On straight sections I marked the allowances using a quilting ruler, and in most cases curved lines were drawn simply by eye. But if special precision was needed, then I put several control marks, measuring the distance with a ruler, and only then drew curved lines. And this approximate drawing (or more precisely drawing) suited me quite well, in general, I already feel these 5-10 mm allowances in my gut. But about a month ago, quite by accident, in the first handicraft store I came across, my eye caught strange bright buttons on the counter with one hole in the middle. It turned out that these are not buttons at all, but ingenious, complex engineering devices for marking seam allowances, invented at least by Leonardo da Vinci, or somewhere in the depths of a secret defense and space research institute. After the first experiment, I was so fascinated by them that I decided to definitely tell about them. Maybe I’ll open America to you, or maybe I’m the last person on Earth who didn’t know about this miracle, but I still can’t resist telling you...
Using these gizmos, you can mark seam allowances on any of the most complex curved (and straight, of course) parts. The set contains four “devices” for marking seam allowances with widths of 3, 5, 7 and 10mm. My most popular ones are 5 and 10mm. I haven’t used the 3mm width yet, and at first I couldn’t understand why this size was needed, but it’s probably just right for appliqué. So how does this unique device work? I trace the outline of the pattern. If you are in a big hurry, you don’t have to trace it, but this “control” outline will immediately help you see if, when marking the allowances, the pattern moves.
I insert a pencil or marker into the hole of the round piece of the size I need (in this case 5mm) and place the round piece under the pattern so that it fits into the groove and rests against it.
I gently, without strong pressure, follow the contour of the pattern, while holding the pattern with my other hand so that it does not move.
Well, not beauty, eh? A second, and the marking is ready. Space nanotechnology...
If you pass a non-semicircular corner without lifting the marker, it doesn’t turn out very well; the corner becomes rounded. I just correct it by drawing on a right corner so that I don’t forget when cutting how to cut it. Although the manufacturer could not be lazy, but add a laser angle analyzer or a portal to the space-time continuum in order to pre-analyze the future movement around the corner and make adjustments in advance.
Marking different widths of allowances 3, 5, 7 and 10mm:
In general, I recommend it. Now I can’t imagine cutting without them. From the same series of irreplaceable mini-helpers, I have, for example, a device for forming corners, without which I can’t imagine turning out, or, say, an ironing ham, without which I can’t even handle the iron. And I feel that there are a lot of such things that if you pass by, you won’t notice, and once you start using them, you won’t even know how you managed without them before.
https://vechernie-posidelki.blogspot.ru/2014/02/seam-allowance.html
Small usefulness
Accurate assembly of even the simplest things requires knowledge of some tricks. Moreover, most of them, well, it seems like such an obvious thing, but it doesn’t dawn on you right away... only after the nth time you take out the sewing machine. At least that's how it is for me. In general, this post is about small “useful things” that, I hope, will be useful to those who are starting to “make friends” with sewing.
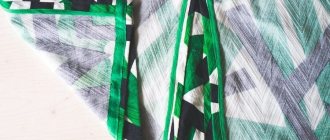
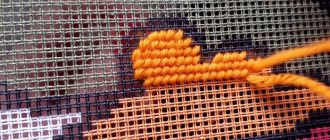
How to trim seam allowances for perfect turning?
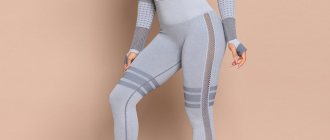
This question arises especially acutely when assembling products of complex shapes, such as in the photograph. What needs to be done so that after turning the seams do not puff up and all the lines and bends lie flat? In fact, there is nothing complicated. 1) After sewing the product, it is necessary to cut off the seam allowances close to the stitching, leaving no more than 5 mm, and in particularly difficult places and on small products, cut off more. Do not cut off seam allowances along the opening left for turning! 2) Make perpendicular notches on the concave seams. The steeper the bend, the more notches (photo 1). Cut small triangles on the curved seams. The stronger the bend, the more triangles you need to cut out (photo 2).
3) Cut off all existing corners (for example, the corners of the pillows, the bottom of the heart, etc.). 4) If the fabric is very loose and there is a fear that the edges may fray, especially during the turning process, then before cutting off the allowances and making notches, you can iron a thin adhesive interlining to the part. It stabilizes the edges somewhat and helps prevent fraying.
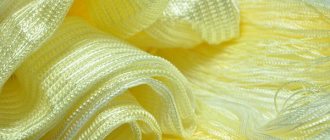
How to sew thin braid?
Well, with a wide braid everything is clear: pinned and stitched - no problems. But with thin braid (and the thinner the braid, the worse) difficulties arise. It is impossible to pin it, the braid “runs away” from under the foot of the sewing machine, warps and it is impossible to get a straight line. And if the braid needs to be laid out, for example, in a circle, then the situation can be even worse... I suffered with this braid and almost despaired when I came up with a way! So, you can solve this problem as follows. Before attaching the tape, adhere it to the fabric with clear double-sided textile tape (I use Hemline's Insta-Bond Tape). There are two options: cut a thin strip and glue it along the entire length of the braid, then remove the protective layer and glue it to the fabric. Or, on the contrary, glue a strip of tape onto the fabric at the place where the tape will be sewn (if the length is large, then don’t worry, cut off small pieces of tape and stick them one after another), remove the protective layer and glue the tape. The second method seemed more convenient to me. Align, straighten (the beauty of adhesive tape is that the tape can be peeled off and re-glued several times) and stitched. Voila! It turns out perfectly smooth. If you have not calculated the width of the adhesive tape and in some places it sticks out from under the tape, then you need to trim it before (!) ironing. This method is great for stiff braid. Delicate braid (satin or silk ribbon) is best sewn on by hand. The trick with adhesive tape will not work, it makes such a braid stiff and lifeless, and machine stitching does not suit it very well. I match the floss as close to the color of the braid as possible and sew with tiny basting stitches down the center of the braid. If the stitches are placed exactly parallel to the threads of the braid, then they “sink” into them and almost completely merge.
How to lay a straight line?
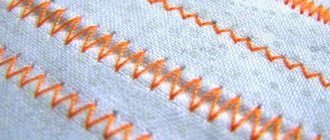
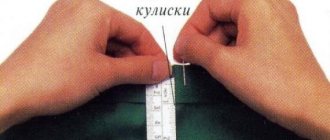
Another use of adhesive tape, and not necessarily special tape for fabric, but ordinary tape. If you need to embroider, stitch or quilt a straight line, you can, of course, draw it, but I’m afraid to do it too much, especially on light-colored fabric, and besides, there is a faster way. As a guide, you can place adhesive tape on the fabric and sew along the edge. Fast and accurate. This method is suitable for laying decorative lines, such as in a photograph or, for example, when sewing a drawstring on a bag.
How to accurately combine parts?
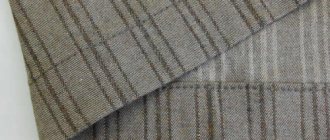
Or rather, how to accurately align the seams? Despite the fact that, as an illustration, I included a photograph of patchwork blocks, where, of course, all seams should be perfectly aligned, the problem of alignment arises quite often when sewing other products. For example, the side seams on the bag and the lining must line up exactly when sewing them together. To be honest, for a long time I couldn’t understand why I couldn’t get the perfect connection, until I finally got it :). But it turned out that all you need to do is pin the seams themselves, which should be aligned. Moreover, insert a pin exactly through both seams (photo 1). And bring the pin out exactly through both seams (photo 2). Place a stitch on the machine without removing (!) the pins (photo 3). Perfect alignment is guaranteed (photo 4).
How to sew on an applique?
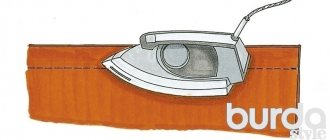
The applique can be sewn on without tucking the edges of the fabric inward. Sometimes this is completely acceptable and appropriate. But, if you want the cuts not to be visible, then you need to do the following. 1) Cut out a template from thick paper or cardboard exactly to the size of the part without hem allowances. Prepare hem allowances by making notches or cutting out triangles, depending on what kind of bends the part has (photo 1). 2) Attach the template to the part from the wrong side and iron the hem allowances onto it (photo 2). In those places where the fabric bends poorly, make additional notches or cut out triangles. 3) Remove the template. The applique can be sewn on.
Well? All for sewing?
https://vechernie-posidelki.blogspot.ru/2010/05/blog-post.html
Cutting allowances at corners
- To accurately turn out parts with sharp corners, you need to cut the allowances near the corner very carefully. First, trim the excess fabric across the top of the corner, leaving a few threads down to the seam.
- Cut both allowances diagonally along the sides of the corner, and the smaller the degree at the corner, the closer to the seam.