Problems with the sewing machine happen even to those women who carefully monitor it. How to cope with such a nuisance? Let's try to figure out the possible problems.
To avoid problems, the machine should be kept in a dry place, away from heating devices.
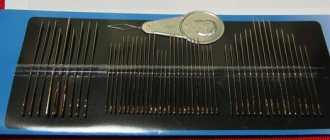
1. Threads and sewing needles vary in thickness and have their own numbers.
There are rules for what needles and threads to sew this or that fabric:
- - thin fabrics (cambric, chiffon, crepe de Chine, etc.) are sewn with cotton threads No. 100-80, needle No. 90;
Linen, calico, chemical fiber and staple fabrics - with threads No. 80–60, needle No. 90;
Light woolen fabrics and heavy ones made of chemical fibers - with threads No. 60–40, needle No. 100;
Heavy woolen fabrics - with thread No. 40, needle No. 110;
Coarse cloth, beaver, and burlap are sewn with thread Nos. 30–10 and needle No. 120.
True, it happens that the threads cannot be selected according to the tone of the fabric and the required thickness, then there is no needle, which is required. In these cases, you can sew with the most common needles No. 90 and threads No. 40.
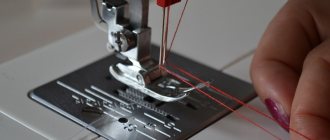
2. When you start sewing, the thread guide and needle should be at the top. Place the fabric under the presser foot, lower it down, lower the needle, make 2-3 injections by hand, turning the hand wheel towards you.
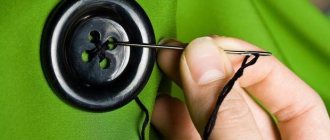
3. Threading the machine can be made easier. If the top thread runs out or needs to be replaced with another, you should not pull it out of the machine, you just need to tear it off the needle and tie new threads to it.
Then pull the knot through the entire device to the needle and there just tear off the rest of the old thread. All that remains is to thread the thread into the needle.
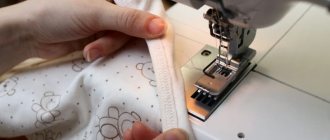
4. Do not help the machine by pulling the fabric with your hands - the needle may bend or break, and the stitching will be uneven.
5. After finishing the work, raise the presser foot, pull the fabric back and to the left, cut the threads, leaving the ends 6-7 cm long. Place a cloth under the foot, lower the foot with the needle to the bottom position.
Hold the flywheel and release the idle screw by turning it towards you. Remove the belt if the machine is mechanical, and unplug it if the machine is electric.
6. But it happens that the machine stops sewing: the thread breaks and loops, the stitching is uneven, the fabric does not advance, etc. We need to find the problem and fix it.
Malfunctions and their elimination
Upper thread broken
. The needle is not installed correctly (inserted too high or too low). Thread and needle numbers do not match. The needle is too sharp or dull or bent. The thread has knots or its thickness is uneven. The thread tension was too high.
Bottom thread breaks
. Maybe from too much tension. The bobbin case is not installed correctly. The bobbin is bent or has burrs. The threads on the bobbin were wound incorrectly. The stroke body is dirty or not lubricated. The bobbin case is clogged.
The machine is skipping stitches
- this means that the needle is not inserted properly or the thread is wound carelessly onto the bobbin of the shuttle. It may also depend on the quality of the fabric, as some machines do not accept synthetic and silk fabrics well. The seam can be improved by placing strips of thin paper or tracing paper underneath it.
The upper thread gets tangled
.
They forgot to thread it into the “plates” (regulator) of the upper thread or its tension is too weak. The thread thickness does not match the needle number. Machine stitch tightens seams
. The tension of the upper thread or the thread from the shuttle is too strong; the tension of the threads should be relaxed.
Fabric does not advance
. The teeth are lowered too low or, conversely, they are raised too high. Weak presser foot pressure. A lot of dust has collected under the needle plate.
The thread forms loops
. The thread is not threaded correctly. The thread thickness does not match the needle number. The tension of the upper or lower thread is weak, it is necessary to adjust the tension of the upper thread so that it meets the thread from the shuttle in the middle of the layers of fabric being sewn.
Uneven stitching
. The screw in the bobbin case is not screwed in tightly enough. The screw threads are clogged. The zigzag mechanism is not completely turned off (if the machine has one).
The needle tightens the threads in the fabric
.
The needle tip is broken, blunted, or the needle is too thick for light fabric. Cutting fabric
. Press the presser foot firmly. The needle is too thick, the stitch is too fine, or the thread is too thick. The needle is not inserted firmly enough. The needle is not installed correctly in the needle bar. The needle is dull or bent. The thread number does not match the needle thickness. The material is too thick. There are sharp burrs on the teeth, needle plate, and foot.
The needle breaks
. When pulling the fabric up during sewing, the needle bends and hits the mechanism with the shuttle - you should not pull the fabric out from under the foot; the bobbin of the shuttle or the shuttle itself is not inserted well, the needle hits the shuttle and breaks - you need to check how the shuttle is inserted; the needle is slightly curved and hits the shuttle mechanism.
The material is “collected”
. Incorrect tension on one of the threads. Weak or strong presser foot pressure. The sole of the paw has worn out. The tooth lift is too high. The needle holder is too short.
Heavy running of the machine
. The old grease has thickened. The machine is poorly oiled. Threads are wound between the bushing and the flywheel of the machine.
Basic, typical malfunctions and malfunctions in the operation of sewing machines: poor stitching, thread breakage, needle breakage. Skipping stitches in the stitching of a sewing machine and overlocker appears if a low-quality thread or needle of the wrong thickness is used. The size of the gap between the needle and the nose of the shuttle (loopers in an overlocker) also affects this. Defects such as “bias stitch” and broken upper and lower threads can usually be eliminated by adjusting the tension of both threads. But, if, after adjusting the tension, stitch defects do not disappear, then you will have to adjust the interaction of the shuttle stroke and the needle, the mechanism for advancing the fabric, etc. This is especially typical for the Chaika sewing machine. Moreover, if the installation parameters of the “Seagull” shuttle have gone wrong, then it is quite difficult to make such an adjustment yourself. But, basically, sewing machine malfunctions and malfunctions can be eliminated by correctly adjusting the thread tension, replacing the needle, lubricating and cleaning the machine.
— Incorrect threading. — Poor quality threads. — The thread number does not match the needle number. — The spring of the bobbin case lock has weakened. Inside the bobbin case you can find a very small screw, and if you unscrew it, the lock mechanism can be removed and you will find a long spring. Try to stretch this spring slightly, but it is better to buy a new bobbin case. — There are nicks and burrs along the way the thread passes to the needle. Carefully follow the path of the thread and, after detecting nicks, remove them with a small needle file. In older Podolsk-type machines, there may be thread cuts on the tensioner rod. Disassemble the tensioner and inspect the rod; if there are such cuts, remove them with sandpaper.
Looping the lower and upper threads. Bad line
— The thread on the spool and bobbin is unevenly wound. Do not wind the thread onto the bobbin by hand; use a special device for this. Evenly laying the thread on the bobbin ensures the same uniform thread flow. Hand-wound thread can get caught in other turns and pull the upper thread more than it should. As a result, loops appear at the bottom.
— The upper thread tension is too loose or the bobbin thread tension is too tight. Adjust the tension of the bobbin thread so that while holding the thread, the bobbin case does not fall down. Only with a sharp movement should the thread come out slightly from the cap. — There are scraps or pieces of thread between the washers of the upper thread tension regulator. Over many years of operation of a sewing machine, thread frays accumulate between the tensioner washers. Gradually they turn into seals that prevent the washers from completely clamping the thread. — The bobbin thread tension is too loose or the top thread tension is too tight.
— Dirt or fuzz or thread trimmings have gotten under the leaf spring of the bobbin case. — A slot has formed under the leaf spring on the bobbin case. This happens after many years of intensive use of the sewing machine. You should not fix bobbin case malfunctions yourself, except for cleaning and adjusting the thread tension. The best solution to fix a faulty bobbin case is to buy a new case. — Weak tension on both threads. - Strong tension on both threads.
— Weak pressure with the foot. — The sole of the foot is skewed, and it does not press the fabric with its entire surface. — The teeth of the rack have become dull. — The sewing machine feed is set to embroidery mode or the feed dog teeth are too low and do not grip the fabric well. The correct position of the teeth when sewing medium-thick fabric: with the maximum rise of the feed from the needle plate, the teeth should rise completely, but not higher than the height of the teeth. Their position too high will create a “fit” in the fabric or tighten it.
— The needle number does not match the thread number or fabric thickness. — The needle is bent. — The needle is not inserted into the needle bar all the way. — The needle does not pass through the center of the needle hole of the plate. The needle must pass exactly in the center of the hole in the needle plate. Make sure that the needle does not touch the rail while using the sewing machine. Incorrect needle position may be caused by a bent needle bar. — The needle bar position is set too low or high. - Incorrect sewing. While sewing, do not pull the material by hand; find the reason why the machine does not advance the fabric well. Adjust the presser foot pressure on the fabric.
The main causes of sewing machine breakdowns
Today, in many homes, among all the household appliances, there is also a sewing machine, which the mistress of the house uses to remake clothes or even sew new outfits. It is especially beneficial in cases where there are children. In order not to buy clothes for them often, you can have them altered. But this technique, even when used rarely, can break down.
Unfortunately, there is not a single model of sewing machine that will work forever. Even mechanical models from such a well-known brand as Singer sometimes fail. What can we say then about little-known manufacturers? What are the main causes of breakdowns, why do problems happen?
In most cases, minor breakdowns may occur that you can fix yourself. For example, we are talking about a broken needle. Apparently, it was chosen incorrectly for this type of fabric. Before you sit down to sew, you need to find out which needle is suitable for thin knitwear, and which one should be chosen for denim.
If threads often break, this means the same thing: they are incorrectly selected. It also happens that the stitches are uneven or the threads in them are loose. There may be several reasons for this phenomenon.
1. The sewing machine has a needle that is intended for a completely different model.
2. The needle and thread are incompatible and this leads to the problem.
3. The needle plate is broken.
4. The setting of the mechanism that is responsible for the movement of the needle is not adjusted.
5. The shuttle socket is broken.
If the problem is serious, you need to find out where sewing machines are repaired and take yours there or call a repairman to your home.
If the shuttle socket breaks, all efforts to create a seam will be in vain, since the thread will simply break. All it takes is a little more tension and that’s it – another break. When the needle plate is punctured, it is not yet a problem. If the defect is minor, you just need to clean it.
But there are also more complex problems associated with the motor (when it comes to electric sewing machines). If the motor does not turn on, the following problems may occur:
— breakage of connecting wires;
- break in one of the motor windings;
— there was a malfunction in the package.
This problem can be corrected in several ways: by replacing the motor or rewinding it. But first you need to check whether the wire in the cord has broken. But if it is an electronic sewing machine, the computer or control unit may fail. Then repairing such a sewing machine will be expensive, since these components will have to be completely replaced.
Skipped stitches
— The needle is too high when meeting the nose of the shuttle, and it does not grab the needle loop. — The needle is bent or the needle point has become dull. A curved needle can be identified in the light by twisting it on a flat and dark plane. — The needle is not installed all the way or incorrectly, on the wrong side. — Using the wrong type of needle for this sewing machine. Often, industrial-style needles are used in household sewing machines. They do not have a cut on the flask and are absolutely not intended for such machines. — The settings for the interaction of the needle and the shuttle are misaligned.
Of course, these are not all the malfunctions and malfunctions of sewing machines. The above list of faults is designed to eliminate them yourself, without contacting a specialist. Failures associated with wear of parts and malfunction of some components cannot be eliminated with your own hands without special knowledge and experience.
Basic, typical malfunctions and problems of sewing machines
: bad stitching, thread breakage, needle breakage. Skipping stitches in a sewing machine and overlocker appears if low-quality thread of the wrong thickness is used, as well as changes in the gaps between the needle and the shuttle or loopers in the overlocker. An oblique stitch, the upper and lower thread loops or breaks, including at the bottom - the reasons, as a rule, are weak or too strong thread tension. Sometimes the thread breaks, this is especially typical for the Chaika sewing machine, if the shuttle installation parameters have gone wrong, and it is difficult to make such an adjustment yourself. But basically, malfunctions and malfunctions in the operation of sewing machines can be eliminated by adjusting the thread tension, replacing the needle, lubricating and cleaning the machine.
Tips and tricks from customer service staff
Our operators receive calls throughout the day with complaints from users that their machine does not sew, leaves seams, or does not sew at all. To eliminate minor flaws or prevent serious damage, we have made several recommendations.
- Before you start sewing, check the thread tension.
- Choose the right thread-needle pair depending on the type of material you will be working with.
- Do not overload the machine, follow the manufacturer's advice on the duration of the continuous sewing cycle. This will prevent the motor from overheating and failing.
- Do not “help” the unit work: do not pull on the blade to speed up the process.
- If you find damage to the power cord or power supply, turn off the device and call a technician.
If basic troubleshooting methods do not help, there is no need to repair the equipment yourself. Due to lack of experience, you can get injured when disassembling the case, damage the internal mechanisms, or make the product completely beyond repair. It is better to contact an engineer of the Unified Service Service “A-Iceberg”, who will fix all problems in one visit in your presence.
Broken upper thread
Incorrect threading. — Poor quality threads. — The thread number does not match the needle number. — The spring of the bobbin case lock has weakened. There is a small screw inside the bobbin case; if you unscrew it, the lock mechanism can be removed and the spring can be stretched slightly. But it is better to buy a new bobbin case. — There are nicks and burrs along the way the thread passes to the needle. Follow the path of the thread and remove them. In old Podolsk-type machines they can be located on the tensioner rod, in the form of cuts. Disassemble the tensioner and inspect the rod, remove them with sandpaper.
Eliminate according to point 1.
Task No. 2:
Set the needle, according to Figure 1, to “Left injection” and “Right injection”.
Photo 10.
Left prick. — From the edge of the hole, on the left to the needle, 0.5 mm. Right injection – From the edge of the hole on the right to the needle 1 mm.
Fine tuning.
This fine tuning is done only on the left injection.
And so - look at photo 11:
- Loosen screw 6. 2-3 turns.
- Place the index finger of your left hand into the slot.
In front - in front of the finger, a worm and a worm gear. On the left are copy disks. On the right is the main shaft of the machine.
We need to use our finger, in a spacer, to push the Lever - the pusher of the zigzag slide No. 2, and the Lever - the pusher, the block of copying levers. No. 3 (See photo 11 for their location). While moving apart, we follow the needle. She should stand up in the same position as in photo 10.
Right injection, we will succeed automatically.
Photo 11.
Problem #3:
Repair and maintenance of sewing equipment at SuRem
Specialists service equipment from Astralux, Bernina, Merrylock, Veritas, Brother, Husqvarna, Janome, Singer, Jaguar, Podolsk 142, Juki, Aurora, Chaika, Pfaff.
Advantages of contacting us:
- You don't need to worry about delivering equipment to the workshop. The master will arrive for repairs at your home in Moscow at an agreed time.
- Having our own spare parts warehouse allows us to carry out repairs in the shortest possible time.
- After the repair is completed, the technician will give advice on the maintenance and care of the machine.
- We employ only professional craftsmen with extensive experience.
- The master will issue a guarantee for all types of work.
If the zigzag on your sewing machine does not work, you can leave a request to call a specialist on the website or by calling 8(495)213-18-17.
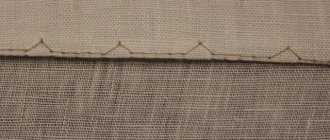
Signs of normal operation
Not everyone uses overlockers for ordinary household sewing, especially if the sewing machine is not used regularly, but only periodically. A zigzag stitch is used to process the fabric; with its help, you can get a neat and beautiful stitching around the edges of the knitwear. Signs of a high-quality zigzag seam:
- All stitches are the same, there are no differences in length.
- A constant step is maintained between adjacent punctures.
- The stitch goes smoothly across the material and does not tighten it. This problem often occurs when working with thin fabrics.
On dense material, zigzag processing almost always turns out well and effectively. But such a stitch looks bad on cotton and similar fabrics. These nuances relate only to the quality of sewing and the professionalism of the tailor/dressmaker, and do not affect the correct functioning of the equipment.
Troubleshooting
As mentioned earlier, looping occurs, as a rule, due to weak tension on the upper thread or too strong tension on the lower thread. In order to adjust the tension of 2 threads, you should make sure that there are no obstacles on their way to the material in the form of burrs, bends, dirt, etc.
When adjusting, you should not forget that weak tension is the cause of a weak seam (in this case, looping may be absent), strong tension is the reason for frequent breakage of any of the threads.
If the problem is not resolved using the thread tension regulators, you need to look at the pressure of the presser foot to the plate . To do this, set the needle to its lowest position (so that the comb does not stick out from the needle plate). We press the presser foot with our finger and see if the foot itself dangles. If it dangles, it means that the foot is not properly pressing the fabric against the needle plate during the sewing process, which prevents both threads from intertwining with each other on the material.
Fixing this glitch is very simple. It is necessary to inspect the bobbin case and the bobbin itself. To do this, insert it with the threads into the cap, pull the tip of the thread into the slot intended for it and, holding the cap with one hand, slowly pull the thread 5 centimeters with the second hand. We carefully monitor whether the bobbin lingers in the cap while pulling the thread. If the bobbin moves in the cap unhindered, install the entire set in the hook (bobbin holder), as before, pull the tip of the thread, and carefully monitor the bobbin delays.
If the thread slows down from time to time, this will cause looping. In this situation, we remove the needle plate and clean it from below between the comb teeth, as well as the set of shuttle parts itself. We lubricate everything.
We install the needle plate in place, tighten it and prepare the machine for work. We take a worthless rag and run it back and forth for 30 seconds so that the excess oil is gone. Then we begin adjusting the threads again.
If this does not give a result, therefore, the source is located deeper and this concerns the settings of the machine - from the compensation spring to disturbances in the operation of the shuttle (this is the simplest thing) and from the incorrect ratio of the camshaft to the main shaft to a misaligned adjustment of the thread feed mechanism.
In such situations, knowledge of the machine’s design is necessary, so it is worth seeking help from an adjuster.
Causes
The key to why a seam begins to loop is that the thread is not properly tensioned. Often the top thread loops, causing loops to appear at the bottom of the seam. In this situation, you can try to increase the thread tension. If the fault disappears, it means that the wrong settings were simply selected from the very beginning. If no changes occur, deeper adjustments are required. As a rule, to fix the problem, the shuttle stroke is debugged.
Looping of the lower thread occurs much less frequently, but adjusting its tension is also more problematic. A loop appears when the thread is not pulled completely into the stitch. The reasons for this can be very different. Some of them are elementary and quickly removable, others require thorough intervention.
The most common causes of constant or periodic seam looping are the following.
- “Slowing down” during the movement of the thread in the stitch. Regular maintenance and timely cleaning of the machine can protect against this trouble. Slowing down can also be caused by incorrect selection of threads. Poor thread quality is one of the main factors in looping. This happens due to the fact that when sewing, an excess of thread is created, which is not tightened in time, resulting in a loop.
- The most difficult thing is to reveal the reasons for the repeated looping. This problem can be caused by anything, from inaccurate adjustment of the shuttle stroke to minor scuffing on the shuttle. Sometimes it may take a very experienced specialist a lot of time to discover the causes of such a malfunction. It is almost never possible to solve a problem on your own. The danger of episodic meandering is its unpredictability. Only now the machine sewed almost flawlessly, and suddenly the seam became poor quality. Tension regulation is not enough in this matter, since the reasons are hidden in the design of the machine.
- Reduced stiffness of the upper thread tensioner spring. During operation, the tensioner spring gradually becomes weaker and is unable to transmit the required force to the thread pressure washers (plates, clamping disks). This leads to excess thread and, as a result, the appearance of loops. A compressed axis of the tension regulator can also prevent normal compression/release of the spring. The tension of the thread changes almost constantly and as a result of deformation of the coils of the spring.
- The tensioner plates are not fully clamped or not clamped at all . When the presser foot is raised, the clamping discs are released, and as a result of lowering, they are compressed and clamp the thread. In some episodes, compression does not take place, the thread is not stretched. The thread begins to move freely, as a result of which the sewing machine sews with loops at the bottom. Basically, such a defect is associated with mechanical wear of the plates, for example, the appearance of rust, warping, and so on on their surface. To resolve the issue, the tensioner module is completely disassembled and adjusted.
- Incorrect bobbin thread tension setting. This problem occurs often and every time it causes the lower thread to loop. As a rule, it is associated with the desire to adjust the tension of the threads independently. The tension force of the lower thread is increased by a screw on the bobbin case. The operation is simple, but there is a high risk of overdoing it. As a result, the thread tension becomes excessive.
- Scores and defects on the surface of the shuttle. This problem often appears after long-term inactivity of equipment. Roughness, scuffing, and unevenness on the surface of the shuttle create obstacles during the movement of the thread, which will eventually result in a loop.
If burrs appear on the bobbin case, you can simply change it and sand the hook.
Preventive measures
Often, problems during the sewing process occur due to improper use of the unit and lack of maintenance. It is necessary to configure the equipment in strict accordance with the documentation of the machine manufacturer. Very important:
- carry out correct threading;
- keep tension under observation;
- choose threads and needles in accordance with the type and thickness of the fabric;
- lubricate the machine in due time and remove dirt;
- keep it in a dry place out of the reach of children.
Threads and needles must match the material being processed. It is contraindicated to sew thick fabric (twill, tarpaulin, denim, etc.) with a thin needle, otherwise the product will be damaged.
The thickness of the needle and thread is indicated in the number marking.
Shuttle lock
Remedy by operator:
- poorly tensioned upper thread
- excessive upper thread length
- the beginning or end of sewing is carried out outside the fabric
Remedy by mechanic:
- narrowed space between the bobbin holder and its finger
- There is interference when the bobbin rotates
- lack or lack of lubrication in the shuttle device
LiveInternetLiveInternet
–Categories
- Needlework (1839)
- Knitting (1117)
- Sewing (420)
- Embroidery (266)
- Sewing (31)
- Zelnik (286)
- For facial beauty (99)
- For healing (71)
- For hair beauty (62)
- For body beauty (49)
- Practices (207)
- Women's (2)
- Hello (134)
- Healing (111)
- Domostroy (82)
- Magic (69)
- Crystals (48)
- Star Reading (44)
- Chakras (40)
- Useful things (40)
- Conspiracies (29)
- Pleiades (28)
- Vedas (25)
- Forecasts (22)
- Mantras (22)
- Gayatri Mantra (4)
- Flowers (22)
- Rules of life (19)
- Charms (18)
- Reiki (18)
- Prayers (14)
- Yoga (11)
- Meditations (8)
- Rituals (7)
- Mudras (2)
- Channelings (1)
- Decoupage (1)