Children's clothing is not a cheap product. This is especially true for outerwear: jackets, street pants and overalls. In fact, in terms of the cost of materials, these products are almost no different from knitted clothing, because raincoat fabric is inexpensive! You can learn how to sew children's overalls with your own hands right now. Let's start with a jumpsuit with a hood with Velcro.
This type of fastener is quite simple: sewing a zipper is much more difficult for beginners. And at the same time, Velcro is suitable for outerwear for infants (newborns), because in a stroller-cradle the wind will certainly not blow into the space between the Velcro.
Materials (for overalls size 68):
- Raincoat with print – 0.8 m
- Winter insulation (in our case – silicone 150) – 0.8 m
- Lining fleece “lamb” (artificial sheepskin) – 0.8 m
- Threads to match the main fabric or contrasting ones
- Velcro tape – 25 cm
- Unnecessary thread for basting
- Tailor pins
Children's overalls, insulated, Grasser pattern No. 797
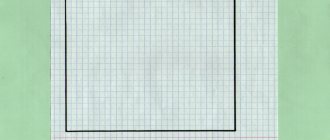
To adjust the print scale, use the Test Square! The test square for checking the A4 scale is located on the first sheet of the A4 pattern file. A test square for checking the scale of printing on a plotter is located on the sheet with the pattern details, in the file for the plotter.
Overalls pattern. Children's overalls, unisex, with insulation and lining. Central zip fastening with internal wind flap. Drawstring at the waist with an elastic band. On the back, front, and bottom of the product, amplifier parts are stitched from a denser material to prevent abrasion. Straps made of elastic braid, with fastex fasteners and adjustment buckles - for adjusting the length of the straps of the product. The bottom of the overalls is adjustable in width with a velcro fastener and has an internal windproof “skirt” with an elastic band at the bottom.
Increases in the pattern to the overall girth: Fri: 19 cm, Pb: 18 cm.
Length of the product along the side seam from the waist to the bottom of the product, in cm: height 92 - 52.5 cm, height 98 - 57 cm, height 104 - 61.5 cm, height 110 - 66 cm, height 116 - 70.5 cm, height 122 - 75 cm , height 128 - 79.5cm, height 134 - 84cm, height 140 - 88.5cm, height 146 - 93cm, height 152 - 97.5cm, height 158 - 102cm, height 164 - 106.5cm
Length of the product along the crotch seam from the waist to the bottom of the product, in cm: height 92 - 34.5 cm, height 98 - 38.5 cm, height 104 - 42.5 cm, height 110 - 46.5 cm, height 116 - 50.5 cm, height 122 - 54.4 cm, height 128 - 57.9 cm, height 134 - 61.3 cm, height 140 - 64.8 cm, height 146 - 68.3 cm, height 152 - 71.7 cm, height 158 - 75 cm, height 164 - 79cm
Recommended material for sewing: we recommend using raincoat fabrics with a membrane and lining fabrics for this model. As well as new generation synthetic insulation with a protective layer on both sides, for example, ISOSOFT 100 g/m2. For reinforcement parts (to strengthen areas subject to friction), you can use dense Oxford-type raincoat fabric with a density of 150 D; or Thermo adhesive material; or put the top fabric as a second layer.
Our bib overalls are made from raincoat fabric with a membrane and ISOSOFT insulation 100 g/m2
Consumption of the main material for the product, with a width of 140 cm, (total consumption, top + reinforcement):
height 92 - 1.1 m, height 98 - 1.15 m, height 104 - 1.2 m, height 110 - 1.27 m, height 116 - 1.45 m, height 122 - 1.55 m, height 128 - 1.69 m, height 134 - 1.75 m, height 140 - 1, 75m. height 146 - 1.85m, height 152 - 1.92m, height 158 - 2.05m, height 164 - 2.15m
Consumption of the main material for the product, with a width of 140 cm, (top only): height 92 - 0.8 m, height 98 - 0.95 m, height 104 - 1 m, height 110 - 1.05 m, height 116 - 1.05 m, height 122 - 1.27 m, height 128 - 1.32 m, height 134 - 1.36 m, height 140 - 1.4 m. height 146 - 1.45m, height 152 - 1.6m, height 158 - 1.65m, height 164 - 1.7m
Consumption of the main material for the product, with a width of 140 cm, (amplifier only): height 92 - 0.38m, height 98 - 0.4m, height 104 - 0.43m, height 110 - 0.45m, height 116 - 0.47m , height 122 - 0.5 m, height 128 - 0.51 m, height 134 - 0.52 m, height 140 - 0.53 m. height 146 - 0.54m, height 152 - 0.55m, height 158 - 0.58m, height 164 - 0.6m
Lining consumption for the product, with a width of 140 cm: height 92 - 0.92 m, height 98 - 0.97 m, height 104 - 1.03 m, height 110 - 1.07 m, height 116 - 1.1 m, height 122 - 1, 17 m, height 128 - 1.22 m, height 134 - 1.27 m, height 140 - 1.32 m, height 146 - 1.41 m, height 152 - 1.55 m, height 158 - 1.68 m, height 164 - 1.73m
Insulation consumption with a width of 140 cm: height 92 - 0.9 m, height 98 - 0.95 m, height 104 - 1 m, height 110 - 1.05 m, height 116 - 1.1 m, height 122 - 1.22 m, height 128 - 1.38m, height 134 - 1.38m, height 140 - 1.58m. height 146 - 1.67m, height 152 - 1.82m, height 158 - 1.9m, height 164 - 2m
Non-adhesive material, width 90 cm: 0.33 - 0.45 m.
Accessories:
1. Contact tape (“Velcro”), 2 cm wide, 10 cm long. 2. Central zipper tape – 1 piece, length: r.92 – 26cm, r.98 – 27cm, r.104 – 28cm, r. .110 – 29cm, r.116 – 30cm, r.122 – 31cm, r.128 – 32, r.134 – 33cm, r.140 – 34cm, r.146 – 35cm, r.152 – 36cm, r.158 – 37cm, size 164 – 38cm
3. Elastic braid, 2.5 cm wide, 1.35 m long.
4. Elastic braid, 3 cm wide – 1.15 m. 5. Fastex (semi-automatic fastener) – 2 pcs. 6. Double-slit adjustment buckle (30mm) for straps – 2 pcs.
You can purchase all the materials for sewing the product in our online store
Pattern details are given with allowances for processing.
Sewing difficulty level – “For advanced”
The photo shows a bib overalls sewn at the GRASSER bureau using pattern No. 797
We sewed bib overalls from raincoat fabric with a membrane, ISOSOFT insulation 100 g/m2
The model is wearing bib overalls size 66-128, the model's height is 131. The photo also shows a jacket sewn according to
pattern No. 796.
We want working with Grasser patterns to bring you pleasure, and the sewing process to be understandable, so a file with a very detailed description is attached to the pattern, which discusses all stages of work on the product, with step-by-step PHOTOS OF SEWING TECHNOLOGY! The description also provides detailed information about the required consumption of fabric, materials and accessories.
From the equipment we will need:
- Universal sewing machine;
- Iron with steam for WTO;
- Ironing table or console
- Standard (double-foot) foot, walking foot, or Teflon foot
- (depending on the type of raincoat fabric), single-horned foot;
- Hand needle for estimating work;
- Machine needles Microtex No. 80;
- Paper scissors;
- Scissors for cutting materials;
- Press for installing accessories, attachments for buttons depending on the diameter.
The pattern in your order will be available in two printing options:
1. For printing on A4. You need to print the pattern on a regular printer on A4 sheets, then glue the sheets together, cut out the pattern and you can sew!
2. For printing on a large format plotter. The details of the top pattern for height 152 are located on a sheet measuring 60*210 cm. The details of the lining pattern for height 152 are located on a sheet measuring 60*159 cm.
Table of measurements for choosing the size of pattern No. 797:
LiveInternetLiveInternet
I took the pattern from Ottobre 1/2013 mod 11. It is not designed for insulation, so I widened it by 5 cm on each side, 1 cm went into allowances. Insulation - holofiber 200 1. For now we are only dealing with raincoat fabric. We cut out the details of the front and back, I have a regular damper. Don't forget to add 5 cm to the side seam. I randomly cut the front to insert a reflective edging
2. Sew in reflective piping. Let's delay. The edges look at each other
3. Cut out the insulation. I connect the insulation with the raincoat fabric, so I lay the parts of the raincoat fabric on the insulation and it is necessary to sew the insulation and the raincoat fabric with hand stitches. I don’t do this, BUT it’s necessary, I just secured it with needles, because I had to connect it differently with a crowbar. Cut it out
4. We get these details
5. Sew the side seams. We cut the insulation close to the seam
6. Sew the crotch seams. We cut the insulation close to the seam
7. We sew the central seam along the entire butt))))) and to the place where we will have a lock. How to sew the center seam. One pant leg is on the wrong side, the other is turned right side out, and the pant leg is inserted into the pant leg. We combine the front sides. Sew it together. Cut the insulation close to the seam
8. We turn it inside out and check if everything is fine, if everything has grown together))))
9. The part that remained under the lock and not stitched, we sew it up with hand stitches
10. After sweeping away the area for the lock, the allowance was folded and basted to the insulation
11. On a separate piece of raincoat fabric we draw a frame for the future castle. The castle will be framed. Here it’s up to everyone to choose how they will make the castle, in a frame or not. There are so many ways. I made it TYPE in a frame))))) The size of the frame is the length of the lock * 1.5 cm. It can be 1 cm, it can be 2 cm. Who does what?
12. Combine the central seam of the frame and the central seam of the trouser legs (this is exactly what we basted). It is necessary to do this strictly precisely, to combine them.
13. We stitch the frame on a typewriter (strictly along the line). After stitching, we cut along the center line, and at the end we make cuts to the corners. In the photo you can see they were drawn with a pencil. Next, turn it out and sweep it away. I thought I took pictures of this process, but it turns out I didn’t.
14. At this stage, I changed the slider on the lock to a more beautiful one. They changed the slider and left everything as is. I blunted it and shortened the lock, and shortened it in the other direction. Don't do that
15. Since the jumpsuit has elastic at the back, we make a drawstring. I took regular knitwear and sewed two parallel lines
16. Here you can see two parallel lines on the front side and a drawstring on the back. We stretch the elastic into the drawstring. We will sew one end together with the elastic band. Let's pull the elastic band on the other side and assemble it. We sewed the second end of the elastic.
17. Now let’s do the lining and cut it out. I have a yoke made from the main fabric, someone makes it from fleece. I have a lining fabric for the legs, some people do the same from fleece, but I love it when a child flies into his pants at once. We choose the material that glides well. I have the cheapest lining fabric, since it was the only color that matched, but it would be advisable, of course, to take something more expensive and thicker. My pants will have a bend. Therefore, 10 cm per bend. Why so much? I explain - 6 cm goes into the fold and 4 cm remains in the pants so as not to stain the lining fabric. Damn, I hope I express my thoughts clearly. In total, the front and back of the inner part of the overalls should be equal to the front and back of the main fabric. PS: - we don’t cut out the low ones yet, we will make them later in one piece.
18. Sew the yoke first. Along the back and side seams. We sew the legs from the lining fabric in the same way. Sew the center seam. Sew a yoke with lining legs))))
19. I cut out the bottoms without a side seam, but as a single piece
20. Sew the bottoms to the trouser legs, sew them along the raincoat fabric
21. Along the back on the yoke, we do the assembly. I did it using an elastic thread
22. We make the straps, I didn’t dwell on them in detail, since everything is simple. We connect the lining with the main part along the top, inserting straps between them, cut off the insulation close to the seam, cut the seam at the curves
23. Connect the bottoms of the main fabric with the lining fabric. Look at the photo how this is done
24. On the low ones, the insulation was also cut off close to the seam, everything was turned out through the zipper hole. Delayed low trouser legs
25. Having tried on the overalls on the child, I realized that elastic is needed in the sides, we also make a drawstring, insert the elastic, tighten it, and secure it with stitches. If the pattern is successful, you won’t have to do this.
That's all at this stage, go have some coffee and gather all your will into a fist, as the most unpleasant stage begins. This is sewing in a lock. If someone does this with a bang, then I bow to such people, someone would teach me 26. we crease the allowances under the lock at the lining
27. Apply the lock and stitch it to the main fabric. We make sure that the lock is located strictly in the middle. At the end of the lock we put a piece of raincoat fabric, just for beauty
28. We sew the lining fabric to the lock and the main fabric. We will sew the lock directly onto both the lining and the main fabric. One seam. What I'm doing is a gag; the lock is sewn in differently. How? In general, we need to figure it out
Everyone at this stage, let’s go again and drink some tea or something even stronger)))) and prepare ourselves mentally to sew in the lock exactly the first time.)))))) 29. Sew in the lock. First on one side. The lines were interrupted at the end, then on the other side, the line was interrupted. Then the line at the bottom that connects the right and left sides, we finish the frame. Be sure to check that there are no folds in the fabric on the front side and straighten out the entire fabric well on the back side. We peel back the top of the overalls for beauty. I removed the castle again, as if making a second frame. We remove the basting and squeal with pleasure that we did everything the first time.
30. Let's see how it looks from the inside out.
31. We finish the straps, here whoever wants it. I cut out these rectangles, turned them inside out, and inserted a thin layer of padding polyester. Then I will insert the strap, sew it up and sew on the Velcro
32. This is what the straps will look like. I didn’t finish them completely, because the princess fell off, and there’s no Velcro in the right color
32. This is how the straps will look from the side. Right now there is no Velcro, I fastened it with a needle.
33. The finished overalls look like this, we squeal with pleasure that we did it ourselves)))))
34. Trying on the overalls on the hostess. That's how we immediately became interested in the runner
Here you can see the drawstring under the armpits. I described it a little higher why I made it View from the back
Source
Decor and finishing elements
As a child, you can afford the most naughty clothes, and the ways to decorate them are varied. You just need to follow a few rules:
- decorations should not come off easily if the child is still small;
- decor should not be made using synthetic paint that spreads.
Everything else is just for the good!
Embroidery should be applied to the pieces before they are sewn. But decorative patches, patch pockets, etc. – whatever suits your needs.
Thermal appliqués in the form of boats, animals, leaves and flowers look good. It is enough to simply iron them over the finished item.
IMPORTANT! Don't overdo it with decorative elements. Give preference to those that are difficult to tear, spoil, or tear off. Think about how you will wash your new clothes. Often, a patch pocket with an applique is quite a sufficient decoration.
Types of overalls
How much yarn is needed for a scarf
Pattern of children's overalls with a hood
This master class uses a pattern for children's overalls from Ottobre magazine No. 4-2009 (model 1). This jumpsuit in the magazine is wide, but is made without insulation. Therefore, in order to get a thinner model with insulation, we did not increase or decrease the templates. Accordingly, in order to get a wide winter overall for a well-fed baby, you need to add 2 cm in width on both sides. Well, if you want to get a warm, but thin overalls, use thinner insulation - for example, Slimtex 200.
Overalls: beauty and comfort for a child
Jumpsuits are recognized as one of the most convenient and practical items in a child's wardrobe.
In both the winter and summer versions of this suit, the child is maximally protected. In winter - from the cold, in summer - from dust and dirt. The baby's movements are free, maximum comfort is ensured: nothing falls off, nothing comes unfastened if the clothes have a zipper or Velcro. Sewing a children's overalls yourself is not difficult, you just need to show a little patience and diligence.
You can decorate such clothes in any way - with many pockets, embroidery, appliqué.
When sewing, pay attention to the following points:
- The seams should not be rough, especially if the clothes are summer.
- The fabric may contain a small percentage of synthetics so that it does not shrink when washed, but if we are talking about a summer jumpsuit, then this admixture should be small. A damp-resistant demi-season suit will be synthetic, but then it is better to provide a “breathable” lining.
- It is better to choose a spacious cut so that the baby is truly comfortable.
- Velcro is easier to sew on than a zipper, but it will be easier for an older child to accidentally undo them.
A jumpsuit made of raincoat, water-resistant fabric will solve the problem of autumn dampness. A summer jumpsuit made from natural fabrics will be ventilated and can be easily washed after vigorous games. A denim top and pants are the most practical option for walking.