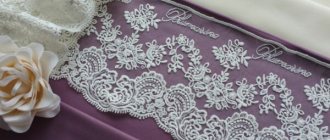
Dresses made from guipure are delicate, feminine, and sophisticated. In order not to spoil the product, you need to pay attention to each sewing knot. Know how to finish the neckline, how to disguise seam allowances, and turn up the bottom of the sleeves and hem. Then the product will not only be beautiful, but also comfortable to wear. And it will look like a professional couturier.
Guipure is a material that is distinguished by its transparency and the presence of a mesh on which lace fragments are placed. Some types of guipure can stretch, others cannot. The most important thing is that the fabric is transparent and has an uneven density. Therefore, it is impossible to simply unnoticeably fold the dress along the neckline and hem it or stitch it to the edge. But there are other ways to handle this node.
Processing the neck of a guipure dress without lining
An unfinished neckline of a dress, if it is unlined, will prick and look sloppy. There are several ways to solve this problem.
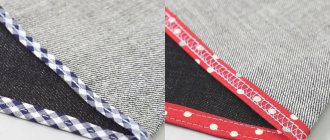
Processing with bias tape
The easiest option is to trim the neckline with bias tape to match the fabric. This method of processing is justified if the dress has other similar elements - inserts of satin fabric, trimming the outside of the relief seams with satin ribbon, satin bows. In other cases, bias tape will reduce the cost of the product.
Tip: regular trim can look a little rough. Therefore, you can cut it yourself from organza, silk, satin or lining fabric.
Folding the neck allowance
The second way is to bend and hem the guipure. You can modify it somewhat and cut out a facing, baste it and sew it on. Cut allowances as much as possible. Then bend it so that the neck extends 1 mm to the wrong side. Iron and secure in the shoulder seams or hem by hand.
Tip: if the facing is cut out of organza of a matching shade, it will be less noticeable under transparent guipure. However, both the hem and the facing will be visible. Therefore, you can sew a scalloped edge of guipure along the neckline or choose matching lace. In this case, you can fold the seam allowance to the front side, since it will be hidden under the trim.
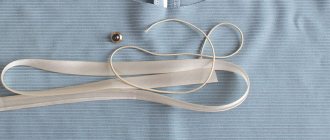
Soutache on the edge
This type of treatment for the neck of a guipure dress is also possible. To do this you will need the product itself and soutache. Soutache is a flat textile cord with a groove in the center.
- On the front side, strictly along the neck line, soutache is laid out.
- It is sewn on with a small stitch, which is laid along the groove.
- Now along the soutache cord, grabbing the guipure, you need to walk with a satin roller or a frequent zigzag.
- Next, the allowance is cut close to the soutache cord.
It is important to choose the color of the thread. They must exactly match the tone of the fabric.
Tip: to prevent the soutache from slipping off during sewing, it can be glued to the guipure using a regular glue stick. It is invisible and washes out well after washing.
This option is also good because the neckline does not stretch over time, since the soutache is thin but strong, and the guipure edge does not become shaggy.
How to sew a lining to a dress
How to sew a lining to a dress
A lining is necessary for many dresses. It serves as a soft “layer” between the body and thick, warm fabric; outfits made from light translucent materials do not “see through” with it. The ability to sew it correctly distinguishes a confident craftsman from an inexperienced beginner, and this skill can be considered mandatory for a tailor. A lined dress is a professionally sewn, finished product that can be created even at home, provided you have a regular sewing machine.
Processing the neck of a guipure dress with lining
If the dress has a lining or otherwise a cover, then the task is to combine the cover and the dress itself.
- Fold the front side of the guipure dress with the back side of the lining.
- Sew along the neckline.
- Cut off the seam allowances and notch where the neckline is rounded.
- Turn the dress inside out.
- Iron.
- Since the finishing seam may be rough, tape two layers at the shoulder seams.
In such a dress, you can also use the method of finishing the neck of the dress with guipure, more precisely, its scalloped edge. Scallops can be stitched on top of the product by hand or inserted between the guipure and lining layers.
Choose the option that you like and suits.
Rules for creating and working with lining
- For lining, choose fabrics that are pleasant to the touch, which, as a rule, do not stretch (cambric, rayon). If the edges are very frayed, they will need to be over-sheared or processed.
- To cut out parts, use the same patterns as for elements made from the main fabric - fronts, backs, sleeves.
- In a dress with facings along the neckline, the lining fabric is cut minus their width.
- When cutting, you need to leave allowances - the same as for the main parts, except for specially stated cases.
- Darts, seams in the shoulders along the front and back are sewn separately on the main elements and the lining.
- When cutting a skirt, the length of the part made from the main material should be on average 10 cm longer than the lining (the exception is a decorative two-layer hem with a “peeking out” underskirt).
What do you need for work?
To sew such a dress, we will need:
- Product pattern. You can use a ready-made pattern from a magazine as a basis.
- Tracing paper for translating patterns.
- A simple pencil for drawing lines.
- Stationery scissors for cutting paper.
- Tailor's scissors for cutting fabric.
- Main fabric. It is advisable to take elastic and light fabric that drapes well and does not wrinkle.
- Lining fabric. It is best to use natural cotton fabric (chintz, cambric, calico, viscose).
- Polyester thread for sewing cuts. If this work is performed on an overlocker, then three spools will be needed. To stitch the sections you will need a reinforced thread.
- Tailor's chalk, pins, measuring tape.
The need for a lining for a dress
In what cases will we sew a dress with lining:
- If the fabric is loose, transparent, mesh.
- If you are planning a white dress.
- Guipure and lace necessarily require at least a partial cover.
- A cover is necessary if the main product has a complex cut with a large number of seams so that they do not rub the body.
- Natural breathable, hygroscopic, hypoallergenic lining fabrics will make life easier for people with sensitive skin and allergy sufferers.
- For girls with excessive sweating, a dress with a lining will cause less trouble.
- After all, a luxury finish requires the products to have a lining.
LiveInternetLiveInternet
—Categories
- Knitting (146)
- Knitting (25)
- Border, binding (22)
- Crochet (19)
- Magazines and books on knitting (7)
- Car (3)
- Sewing (72)
- clothing for women (25)
- processing of individual clothing units (6)
- underwear (4)
- men's clothing (3)
- children's clothing (2)
- hats (1)
- Cooking (10)
- Jewelry (6)
-Music
—unknown
—Search by diary
—Subscription by e-mail
—Interests
— Regular readers
—Communities
-Statistics
How to work with lining in a sleeveless dress
A lined dress is often modeled sleeveless. To accurately connect the elements, you need to prepare them separately. Make allowances and carry out wet-heat treatment. Before sewing the lining to a sleeveless dress, sew the darts or make a relief, attach a zipper, sew the armhole, leaving about 3 centimeters short of the shoulder seams. You can also finish the stitching directly on the line. True, this is not convenient for everyone, so it is permissible not to cover small fragments.
Progress
- It is necessary to trim the seam allowances on the dress and turn the elements to the face.
- Sew the seams on the sides on the top and lining using a common stitch.
- The seams are processed with an overlocker and ironed - it is worth using a special backing for ironing.
- Pull the seams at the shoulders towards you, placing your hand between the top and the lining on the wrong side (you can pin the pieces in advance with pins, right sides facing each other).
- Stitch and iron the shoulders at the top and bottom of the product.
- Close the unstitched areas on the neckline and armholes, slightly pulling the parts towards you for convenience.
Preparing for work
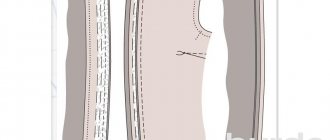
Our product will consist of four parts:
- Shelf.
- Back.
- Sleeve.
- Skirt.
Before sewing the product, you should transfer the magazine pattern onto tracing paper. To do this, place a sheet of tracing paper on a drawing from a magazine and outline the part. Please note that in some magazines models are given without allowances, and therefore you will have to add a centimeter on each side of the pattern.
Raglan modeling
If you have a raglan sleeve, but for the lining we need a regular sleeve, then we perform the following operations:
- Along the shoulder seam we set aside the length of the shoulder and mark it on the pattern.
- On the sleeve pattern, place a notch in the middle of the dart, then extend the cut to the very bottom of the sleeve.
- We glue or pin the patterns of the back, as well as the shelves, to the sleeve pattern along the armhole from the very neck to the beginning of the rounding.
- We draw the contours of the new armhole.
- Cut out the pattern.
- Cut out the lining.
Advice! Before making the cover, make sure that the main dress is almost ready and iron it.
Sew the lining by hand:
- When cutting the cover, we minimized darts, as well as features of a complex cut, but if darts remain, sew them.
- We sew the lining parts together with machine stitching.
- We process all the allowances with an overlock stitch, or with a frequent zigzag stitch on a sewing machine.
- Iron the lining.
- Iron the seams and fold the lining.
- We process all cuts.
- We cut together the lining parts with the main dress.
- Make sure that all the main seams match, paying special attention to the armholes and neckline.
- We hide the allowances on the wrong side.
- We sew it with a blind seam by hand, paying attention to the fastener, if there is one.
Advice! If the dress has sleeves, then connect the lining sleeves in several places around the armhole, side and shoulder seams, and at the bottom of the sleeve.
Features of sewing a lining
There are two main ways to sew a lining to a dress.
- Manually, securing it to the facing of the cuts on the neck.
- Grinding the cuts using the lining itself.
To cut out parts from lining fabric for a product with facing, you need to place its elements on the front and back along the corresponding lines, and transfer the internal outlines to the drawing. If the product has a zipper, it is necessary to process only the neck, sewing the item in advance before this stage.
Progress
- Stitch the darts and seam lines of the lining, press along the seams.
- Overcast the armholes and fold the hem.
- Pin the allowances for the fastener, turning them on the bottom cover to the wrong side, and on the top - to the face.
- Sew the necklines along the edges, sweep and then iron the edge.
- Sew in a zipper and attach the lining to the zipper.
- Secure the edge of the armhole along the seam allowances of the sides and shoulders.
The pattern is cut along the sleeves - set-in varieties are made without a bottom layer. If the element is one-piece, the length along the shoulder is set aside on the front and back and the armhole is drawn to the end of this segment.
Raglan modeling
- Measure the length of the shoulder along the seam on the shoulder (or dart), marking the end of the segment with a dot.
- Cut the one-piece sleeve drawing at the level of the middle of the dart and finish the cut at the lower end of the part.
- Glue the front, back and sleeves along the axis of stitching - from the edge of the neckline to the starting point of the rounding.
- Draw the armhole as for a standard sleeve.
- Cut out the lining, leaving up to 1.5 centimeters for seam allowances and hem allowances.
Stages of work on how to sew a lining to a dress
Processing of the neckline, armholes and fasteners of a sleeveless dress.
We begin working with the cover at the stage when all that remains to be done on the main dress is the neckline and clasp.
Working with the lining:
- We do all the seams and darts.
- We process all the cuts and iron them.
- We bend the hem and stitch it.
- We sew the armholes.
- We connect the main dress with the cover face to face, matching the seams along the shoulders with the side ones.
- We process the zipper by sewing it between the lining fabric and the main fabric. To do this, turn the fabric of the cover inside out, pin the zipper to the fastener line, as well as to the neck.
- Baste, then sew the zipper into the seam, see picture.
- Fold the upper ends of the zipper so that they are between the layers of fabric.
To fix the neckline and armholes of a sleeveless dress, we simply use the lining as a large facing, processing them simultaneously on the main fabric and on the cover.
In this case, it is better to leave the shoulders and sides unsewn so that we can easily turn the resulting product inside out. Processing the neckline and armholes simultaneously with the cover:
- We fold the blanks for the shelves and backs with those made from lining fabric and pin them together.
- Turn back the seam allowances.
- We sew the parts together in pairs along the armhole and neckline, leaving shoulder and side seams.
- Turn it inside out.
- We chop and then sew the front to the back along the shoulder seam.
- We sew the main parts along the shoulder seams, then the lining.
- We perform the side seams in the same way.
- We sew in a zipper, similar to the previous description. See the picture.
A dress cover performs many functions, one of which is to give confidence to its owner, since such an outfit will not rise when walking and will not puff up.