Beginners often have a question: how to calculate the number of stones that will be used on a swimsuit.
We turned to Svetlana Gerasimova, founder of the Lana sewing workshop and school, for expert advice. I believe this is a purely visual issue. All comes with experience. You need to have some observation: you see different swimsuits, you know how many stones are on them, and over time you begin to predict how many crystals will be needed for a swimsuit.
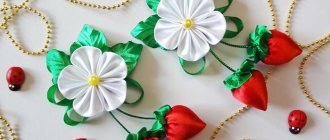
How to glue rhinestones onto a leotard for rhythmic gymnastics?
Share on social media networks:
The costume is an important component of the performance of any young gymnast, on which the overall impression of composition and skill depends. Therefore, attentive mothers think through the image of an athlete in advance and very carefully. Clothing decorated with rhinestones looks the brightest and most incredibly beautiful, which then needs to be washed carefully. Their radiance and magical shimmer in the spotlight create a delightful aura of brilliance around the participant’s outfit. If you decide to create a costume yourself, then let's look at how to glue rhinestones onto a leotard for rhythmic gymnastics. Decorating a gymnastics costume with shiny stones can be divided into a number of main stages. Let's look at each of them.
How to reduce the number of crystals
There are tricks that can reduce the number of crystals and reduce the cost of a swimsuit, without losing the visual aesthetics of the swimsuit:
- Using vinyl. This material is difficult to work with, but soft vinyl can cover large areas of a swimsuit without compromising the shine of the swimsuit.
- Using glitter, which also enhances the shine of the swimsuit.
- Use of mirrors. We don't really like mirrors, as they are short-lived (scratched, broken) and can be dangerous for gymnasts.
- Any texture “eats” the viewer’s attention and reduces the need for a large number of crystals. Therefore, if the task is to reduce the budget, then you can use a large number of volumetric elements. For example, embroidered lace.
- Using sequins. Both small and large sequins attract attention, allowing you to reduce the number of crystals.
Required tools and materials
How to glue hot fix rhinestones? To glue rhinestones onto a leotard for rhythmic gymnastics, we will need the following details:
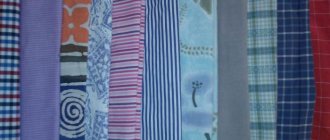
- Rhinestones. There are various types of them: adhesive, thermal rhinestones, sew-on. As their name suggests, adhesive ones are attached using a special glue; sewn ones must be basted to the fabric. The third type is attached to the material under the influence of temperature; most often, craftswomen use an iron. Under its influence, the adhesive layer on the crystals melts, and the rhinestones firmly adhere to the swimsuit.
Important! The most beautiful, incredibly high quality and incredibly impressive are the world famous Swarovski crystals. A swimsuit decorated with such rhinestones will be magnificent and unique.
Important! Note the tweezers with curved ends. It is more convenient for them to capture small decorative elements.
- Glue. The basis for attaching rhinestones to fabric comes in two types: transparent CLEAR glue or white PVA-based REST glue. The first option is characterized by instant drying, while PVA requires 10-15 minutes. The glue that sticks out doesn't matter as it will dry completely clear. But you absolutely cannot smear it, because it will be impossible to remove such traces.
Important! Before starting work, we recommend that you practice and adapt to one or another type of adhesive base. This is best done on a small part of the material.
- Substrate. It can be whatever is convenient, the main thing is that it is tight and fits in size. An example would be a book, folder, small tablet, etc.
- Applicator for thermal rhinestones. If the decoration is decorated with this type of rhinestones, then this device will greatly simplify the process of embroidering your costume. It allows you to glue rhinestones to materials for which it is impossible to use an iron: chiffon, velvet. And additional attachments are convenient and designed for a wide variety of crystal sizes.
Important! In addition to these basic tools, there are a few other things you may need for convenience. For example, provide small trays or containers for rhinestones. Additional lighting in the form of an adjustable table lamp would not be amiss.
LiveInternetLiveInternet
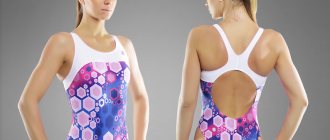
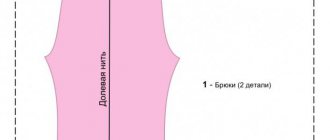
Monday, January 20, 2014 18:41 + to quote book Many times I have had the opportunity to explain how a costume for gymnasts and acrobats is sewn. There are ready-made costumes in this diary, but they are so complex that posting a detailed MK on them would only scare people. But you need to start with something simpler. I once sent my daughter to gymnastics and made her first training suit from a simple men’s T-shirt. Since then, a lot of water has passed under the bridge, the experience and complexity of the costumes have increased many times over. I want to share with beginners why step on a rake when you can use the experience of others. We’ll agree right away, I’ll write in detail step by step so that no unnecessary questions arise. HOW TO TAKE MEASUREMENTS: You need to undress your subject for measurement down to their underpants. The less clothes he wears, the greater the likelihood that he will not have to redo and adjust the finished suit. And this is not good. You need to unsolder the rhinestones around the seams, try to match the details of the appliqués when suturing them, the pattern gets lost and all that. Tie an elastic band or cord loosely at your waist. The person being measured must stand straight, do not turn his head after your actions, do not bend, do not bend. Ask her/him to straighten her back slightly, exhale and relax. Girls especially like to suck in their stomachs to appear slimmer. This is of no use. We will make all the allowances and allowances for a good fit of the suit on the figure during the process of creating the pattern, but for now we measure the exact dimensions of the figure in its pure form. I take measurements for a sports swimsuit a little differently than for regular clothes.
1. Shoulder width is measured from the back from the low point of one shoulder to the other. The centimeter tape should lie directly on the shoulders. 2. Shoulder length from the low point to the base of the neck without fanaticism. It’s better to let the shoulder be narrower and the neckline wider, so that it later “strangles” the athlete. 3. We measure the neck circumference not at the base of the neck, but in its middle, where the stand-up collar will end. 4. We measure the width of the back below the shoulders, 6-8 cm between the hands, without running over the hands. 5. We also measure the width of the front 6. Chest circumference around the figure. Make sure that the measuring tape on the back does not sag. 7. Remove the waist circumference directly from the elastic band tied at the waist. 8. Body circumference along the bottom edge of the panties along the side lines. 9. Vertical circumference of the body. Pass a measuring tape between the legs and connect at the high point of the shoulder at the base of the neck. 10. Arm circumference at the armpit. 11. Wrist circumference. 12. Sleeve length. There is no need to bend your arm, let it hang along your body. 13. Front length from the high point of the shoulder to the elastic at the waist. 14. Back length from the high point of the shoulder to the elastic at the waist. If these two measurements differ little (the figure is straight and not slouched), you can take a measurement from the back waist over the shoulder to the front waist and divide the measurement in half. Measurements 13 and 14 will be the same. 15. Width of panties at the back. Mentally divide the distance from the bottom of the panties on the sides to the very bottom line of the panties and measure so that the judges at competitions do not later reduce the mark for “incorrect costume.” The butt should be closed. 16. At the same level, measure the width of the panties in front. 17. Side seam length to waist. Please raise your hand. I place the measuring tape with the 0 point in the armpit, lower my hand, press the tape and measure to the elastic band at the waist line. The armhole of our future suit should fit tightly around the arm, otherwise when moving the suit will be pulled away from the body, and this is unsightly and inconvenient for an athlete to work with. 18. From the elastic at the waist along the side, measure the height of the panties. For babies I take 7-8 cm. For older ones from 150 cm tall and above 9-10 cm. 19. The length of the skirt at the back from the elastic at the waist along the protruding part of the buttock to its bottom, where the leg begins. 20. We measure the length of the front skirt along the middle of the figure from the elastic band to the bottom edge of the panties. To avoid mistakes, ask your child to hold some thick book between his legs and measure to its top edge. 21. Measure the circumference of your hips at the most protruding points of your buttocks. This should be the largest volume below the waist. 22. Chest height from the high point of the shoulder to the protruding point of the chest. 23. Center of the chest - the distance between the protruding points of the breasts. For babies, the last two measurements are taken from the nipples. I always mark these points. as controls, so that when marking the pattern on the suit, you don’t “expose” your breasts. 24. Figure girth 4-5 cm (in adults up to 6-7 cm) below the waist. It is customary for gymnasts to sew their skirts below the waist. 25. Sleeve hem. Insert a book or ruler under your arm tightly and measure the distance from the low point of your shoulder to its upper edge. HOW TO BUILD A PATTERN: Sports suits are sewn from very elastic fabrics (suplex - in common parlance - lycra). Moreover, such fabrics stretch in both directions very well. And stretch mesh too. Therefore, “so that the suit fits,” when creating a pattern, I make allowances from the measurements for width and length. I immediately take two sheets of paper, place them on top of each other and bend them in half lengthwise. The center line of the pattern runs along the fold. Perpendicular to the fold, I set aside the width of the shoulders minus 1 cm divided by 2. From the extreme point to the fold, I set aside the length of the shoulder, marking the high point of the shoulder. From the extreme point downwards I measure 3-5 cm (depending on the size of the suit) and bevel the shoulder line. From the high point of the shoulder to the 3-5 cm mark I draw a segment Shoulder length minus 0.5 cm. From the beginning of the construction along the fold I measure the vertical girth of the body minus 5 cm divided by 2. From the bottom point perpendicular to the fold I put 2.5-2.75 cm for babies, 3 cm for adults. I make the neckline: on the back for little ones 1.5 cm, for adults 2-2.5 cm, in the front 5 cm and for adults no more than 7 cm. I draw the neck lines by eye, smoothly rounding them. From the high point of the shoulder down, I measure 14 - 1 cm and through this point I draw a perpendicular to the fold. I measure on it (measurement 7 - 5 cm): 4. If measurements 13 and 14 are different, then we build a waist line for the front. From the high point of the shoulder down, measure 13 minus 1 cm and draw the front waist line. as in the photo. From the point of the waist up, measure measurement 17, draw a perpendicular through it to the fold length (measurement 6-4 (5) cm): 4. And from the waist to the resulting point, draw a segment measuring 17 in length. The result is the armpit point. Approximately halfway between this point and the low point of the shoulder, draw a perpendicular to the fold. Place half the width of the back and half the width of the front on it. Roundly connect the armhole lines of the back and front. Down from the waist line, take measurement 18. Draw a perpendicular length from it (measurement 8-5 cm): 4. Connect the waist and bottom of the panties along the side line, measure 18. Measure the width of the panties divided by two in front and back, as shown in the photo. Connect the leg girth lines smoothly. Mark the sewing line for the skirt on the pattern below the waist. We cut out the pattern along the lines of the back. We put one piece aside, and on the second we cut out the neckline, armhole and panties along the lines of the front pattern. On the front part we mark the protruding points of the chest using measurements 22 and 23. I build a sleeve for girls that is symmetrical along the middle line. I fold the paper in half and set the sleeve length +1cm along the fold. I put it down perpendicular to the fold (measurement 11 - 1.5 cm): 2. From the top point along the fold I measure a measurement of 25 minus 1-1.5 cm and through it I draw a perpendicular with the length of half of the measurement 10. I connect the points of the wrist and the armpit and slightly (no more than 1 cm) deepen the seam line inward in the lower third part of the sleeve. I draw a line for the cuff of the sleeve. In the upper part we bend it outward, towards the armpit, inside the pattern. If you don't trust your eye, connect the dots with a straight line and divide it into 4 segments. From the top dividing point, draw a perpendicular 1.5 cm up, from the bottom - down 1.5 cm. And draw a line through the 1.5 cm points and the middle point of dividing into segments. Skirt. The classic skirt on the swimsuit hugs your figure. We build it as a straight line, and then, closing the darts, we make it wider towards the bottom. The width of the pattern is the circumference of the hips (MEASURE 21) divided in half plus 0.5 cm. From the waist down, measure half the length of the back to the waist and draw a line across the skirt. Using this line, we will build grooves. When everything is built, measure 4-5 cm from the waist down (or the distance you chose) and mark the stitching line for the skirt, cut off the top of the skirt along this line. We cut the pattern along the side line, cut off the side undercut. We cut out recesses on the back part and on the front part. We cut the skirt parts from the corners of the darts along to the bottom line and connect the darts on the parts end-to-end. 1.
This pattern can be modified to suit any style. Nowadays it is fashionable to make two-layer skirts and flared skirts are often used, especially for babies. I will make the “sun” in two layers. The bottom layer is according to measurements 19 and 20, and the top one is 3 cm shorter. We take measurement 24, divide it by 3.14 and get the diameter, to construct the stitching line for the skirt, we complete the bottom line according to measurements 19 and 20. Even now, instead of a skirt, they sew on details like a mold, cut in a spiral, or with petals, or triangles. Stand-up collar (if planned) length - measure 3 +1.5 cm, width at your discretion (I usually make it 3 cm in finished form) Now you need to clearly draw the style of the swimsuit, combine all the shaped lines of the front and back parts and transfer the shaped ones lines on the pattern, indicate the color and fabric of each part. Also, think about the order in which the fabric parts will be connected and on which sides of these parts, when cutting, seam allowances should be made. To ensure that the suit does not lose its shape and elasticity, the parts are overlapped with a seam that allows the fabric to stretch unhindered. We mark the lines on the pattern that will have an allowance with a tick. 3.
4.
We cut the patterns into pieces along the shaped lines. If the model is supposed to have a lot of small details or narrow stripes, then first cut a solid base from flesh mesh for the front or back, and then cut the pattern into parts for cutting the fabric. 4.
We choose the fabric and mesh for sewing (actually this is done at the very beginning). 1.
2.
3.
I would like to offer you addresses where you can buy materials for swimsuits. Here is an excellent Italian matte supplex and flesh-colored Italian mesh of excellent quality https://blesk-straz.ru/ More stores in Moscow and part-time online stores https://www.estadance.su/tradinghouse/fabrics and also https:/ /www.estadance.ru/dostavka-v-regiony.html I have been buying fabrics and mesh for suits in these stores for many years. I trace the details of the pattern onto the fabric with a gel pen in a color close to the fabric. I check and mark the seam allowances and cut out the cut details. 17.
18.
19.
20. 21.
22.
23. 24.
25.
26.
27.
28.
29.
30.
We also cut a strip of flesh-colored mesh 2 cm wide to process the teardrop cutout on the back. 18.
If you do not want to make a stand-up collar, then to process the neckline we cut the same strip of mesh 3 cm wide. We assemble the front and back parts of the swimsuit. We cut off the parts with needles with a ring at the end so that we can immediately sew on the machine without interference. Be sure to check the size and symmetry of the assembled parts; to do this, fold the parts in half lengthwise. On the back we cut out a droplet 12 - 15 cm long. 1.
2. 3.
4.
5.
6.
When both halves of the suit are pinned together, we combine the side lines and check the lengths of the parts of different colors to ensure they match in length, so that when stitching everything matches exactly. We select threads according to the colors of the parts. I sew such suits only with lavsan threads, they are very durable (and this is important for a tracksuit): 45l or 55l. 10. 11.
12. 13.
We sew the details of the costume one by one, each time changing the top threads to the desired color. You can use a flesh thread for all the details, especially since we now use colors that are close to flesh in color for sewing. On the machine we place a zigzag seam with a width of 3.5 - 4 mm, a stitch length of 1.5 - 2 mm. In fact, it’s better to choose the length and width of the seam yourself using scraps, since all machines have their own settings. I use only machine needles special for stretch fabrics. The packaging says TWIN STRETCH, STRETCH or SUPER STRETCH. 12.
13.
The parts are assembled in layers one on top of the other. First we sew the first part. Immediately cut off the seam allowances close to the stitching. 14.
15.
Then we adjust the second part, cut off the allowance, then the next one, and so on. 19.
20. 21.
22. 23.
To make it more convenient to continue sewing, you can iron the parts. Biflex can withstand fairly high heating temperatures. I iron with steam on almost three points. BUT! Be sure to give the iron time to normalize the heating temperature for about 5-10 minutes after plugging it in. And try it on a scrap piece to be sure. When the parts are assembled, I mark the sewing line for the skirt on the front side. 20.
Decorations. You can decorate your suit with appliqués made of fabric in contrasting colors, or shiny fabric with a holographic effect. I use shiny fabrics only based on supplex. The main thing is to check that the fabric does not crawl at the cut, like torn tights. Applications are made flat, and now voluminous. And we will do just that. In addition, you can paint on fabric with fabric paints. I am quite satisfied with the DECOLA contours made in Russia (our St. Petersburg ones), they are inexpensive and adhere perfectly to the supplex. In addition, there are French JAVANA, MARABU and VIVA paints (they have simple contours, contours and paints with glitter and contours for creating pearls) made in Germany, but they are much more expensive. We use them too. They also make draped parts from mesh and guipure - stretch, etc. We cut out flowers and leaves from supplex with a hologram. We pin one part of the flower onto the shoulder and sew it with a zigzag, and stretch the second and melt the edges on the candle so that they become wavy. We sew the second flower along the centers of the petals with straight lines. For applique threads I take the color of the supplex base, here the base is black. 27.
28. 29. 30.
31.
32.
33.
28.
Suppleflex with holographic printing is strictly forbidden to be ironed!!! Therefore, after grinding the parts with appliqués, we do not iron them, no matter what the result is. For now, I’m processing the details separately on the droplet on the back. The method of processing using the “rulik” technique is to sew a strip of mesh on the wrong side. then we fold the free cut, bend it to the front side and stitch it from the front side along the edge. I use the seam under the letter D - triple zigzag stitch length 2 mm. thirty.
31.
Finishing the decor. My pattern goes from the flower along the body mesh to the shoulder and then along the back. That's why I sew this shoulder. When connecting meshes I use only a 5mm wide zigzag, the stitch length is about 2mm. 32.
33. Lay down newspaper and pin it to the base. I usually draw on an ironing board, and I also have a piece of linoleum on my work table, so I simply secure it with needles and rings. I also pin the part for coloring on top so that it does not move out of place. I'm making a drawing. I try not to make the lines too thick. If there is too much paint, blot it with napkins or toilet paper. Then we arrange the droplets - pearls - and break off the fabric part. While we are painting, the paint begins to dry out, so we try to remove the part from the paper faster, otherwise it will take a long time to peel the paper off the already dried parts. That’s why we attach the newspaper to the table, otherwise it will rise along with the fabric and can stain the suit. I hang the patterned pieces suspended on a rope with clothespins to dry. If the parts are large, you may need help. If you do get a part of the costume dirty (this happens), feel free to wash the entire part with soap, dry it and start drawing again. At the same time we draw on the sleeve. 37.
38. 39. 40.
41.
While the paint dries, we will paint the bottom of the skirts. Each with its own color in a tight zigzag pattern. When making a seam, we try to stretch the mesh to create a shuttlecock along the edge. If the skirts are cut from two parts, I sew the side seams first. 41.
42.
43. 44.
Well, we’ve come to decorating the costume with rhinestones. There's a lot to talk about here. Rhinestones come in different qualities and manufacturers. They are made in China, Korea, the Czech Republic, and Austria from plastic and glass of different colors. And some are coated with a special compound, causing them to glow with the colors of the rainbow. The highest quality and (alas) expensive Swarovski rhinestones made in Austria. But they are worth it, the quality is excellent. They are made from optical crystal and even cubic zirconia. There are 14 edges on them of different sizes. which gives a very bright shine. Why am I persuading you? Let me just say that I only use Swarovski. There are some that are placed on a special glue, and there are rhinestones with a ready-made glue backing, which are glued with a special applicator; it heats the rhinestones to 170 degrees, the glue melts and the rhinestone sticks to the fabric. All these years I have been confused by the question, why do most craftsmen use rhinestones that need to be glued? They often bring swimsuits made by someone else and ask them to fix them, on which the rhinestones have come off. Washing such suits is a big risk, the rhinestones fall off. After the competition, children crawl on the carpet and collect a “harvest” of fallen rhinestones. The rhinestones themselves become dirty with glue during the gluing process and lose their bright shine. I don't understand!!! But you probably already understood that I only use hot-fix rhinestones (HOTFIX) article 2038 (it used to be 2028). They are a little more expensive, but reliable and bright. A suit with them can be easily washed without damage. I often ask my girls to show me their old swimsuit to check its condition. If the suit was washed carefully in warm water up to 40 degrees, not rubbed too hard and not soaked overnight (as we like to do), then in 3-5 years no more than 10-20 pieces fall off the suit - this is despite the fact that the suit is from 1500 to 4000 pieces. Well, draw your own conclusions. I long ago found an online store that deals only with Swarovski products and delivers them directly from Austria. Their prices are the lowest for these rhinestones and I really like the service, you can pay with a card via the Internet and delivery is not delayed. And there are discounts. And you can order any quantity. And they have glue and applicators and large sew-on rhinestones too. I recommend. https://www.sw-strazy.ru/ For work, I usually order whole packages - 1440 pieces in each gross, but you can also have 20, 50, 100, etc. Yes, please note that when ordering, you need to print not the number of packages, but the number of pieces. Because the first time I got confused, it’s good that they always call back and clarify the order. I bought myself a color card, it’s very convenient, you select colors and sizes, and then order. By the way, they can bring you something to order; they have deliveries often. I mainly use size SS16 - the most convenient, sometimes in order to lay out the second row I use a smaller size - SS12, or a larger size - SS20. I tried 48 and they are big, but I realized that if you want to put large ones, then it’s better to take sewn-on 10 mm ones. And now I don’t take hot fix anymore than SS30. 1.
2.
3.
4.
5.
6.
7.
The applicator has several nozzles for different sizes of rhinestones; there are flat ones for the largest ones, which are best heated from the wrong side. The tips are not labeled, I select them by size myself. I just insert the rhinestone into the recess. it should be flush with the edge of the notch. Before gluing the rhinestones, I place the paper base from the self-adhesive film on the table, glossy side up, the part with the glued rhinestones comes off without a trace. 1.
2.
3.
4.
How are rhinestones glued? According to everyone. I like to glue the seams connecting the pieces, sometimes in one row, sometimes in two rows in a checkerboard pattern. It depends on how much the swimsuit is ordered for. You can glue rhinestones scattered if you have colors that match the fabric. Can be glued in groups. as accents to highlight certain elements. 7.
8.
9.
The bottom of the sleeves is a cut, I work it in two or even three rows in a checkerboard pattern. This treatment prevents the cut from twisting and stretching unnecessarily, but also does not limit the elasticity of the fabric. 9.
10.
When I glue rhinestones in a row, I leave gaps as wide as the rhinestones themselves to maintain the elasticity of the costume. Stones glued end to end create inconvenience for the athlete; it feels like there are cords attached to the suit that do not stretch and interfere with the performance. I’m sewing a suit for a doll as a sample, so to save money I’ll glue the rhinestones on scattered. The sticking process itself: select the step (the distance between the rhinestones), which also depends on the cost of the costume, the step is no less than 2.5 cm and no more than 5 cm. Lay out the rhinestones in a small area, if you like everything, start gluing. We place the applicator on the rhinestone vertically and count to five, lift the applicator and press the rhinestone to the fabric with something so as not to literally burn your fingers two or three times. I use a ruler. If you have a thimble, you can use it. Experience shows that pressing the rhinestone tightly while heating is not so important; it is more important to press it after, when it cools down, it sticks more firmly. Do not glue rhinestones close to the seam lines, it will be inconvenient to sew the parts together, you will break the needles, and the seam will not turn out smooth. I add rhinestones around the seams, if necessary, on the finished swimsuit. 17.
18.
19.
20.
21.
22.
23. 24.
When I sew fabric pieces, I use stitch G on the orange circle. I cut off excess allowances close to the line. Sew the second shoulder, sew the sleeves into the open armhole, sew the side seams and sleeves in one line. If there is alternately fabric or mesh along the seam line, I raise the needle, rearrange the adjusters and continue the seam continuously. This is if you don’t need to change the threads. And if necessary, I change the threads. Then I tie the ends of threads of different colors. so that they do not come out on the front side. 23.
24.
25.
26.
27.
28.
We process the neck. We sew the short edges of the stand and fold it slightly onto the long side by 5-7 mm. I sew it with a straight triple orange A seam. I cut the allowances to 1-2 mm. I turn it right side out. I combine the sections of the stand and neckline on the front side (if you don’t have experience, pin the stand along the neckline) and sew it on a machine. 26.
27.
28. Be sure to check how the side lines look and how the parts fit together. If necessary, add rhinestones. Glue the rhinestone onto the stand. thirty.
31. 32.
33.
We combine the skirts with each other and pin them to the swimsuit with the cut down along the stitching line. Attaching the skirt. I often use a triple zigzag stitch under the letter D, it's easier to unravel if necessary (Or an orange G). 33.
34.
35.
36. 38.
39.
On swimsuits I use shirt snaps. 42.
43.
44. 45.
Fitting. 45.
46.
47. Well, it was precisely for this moment that I sewed Varenka. That's it, I'm good to go. And I wish you good luck! If you have any questions, write.
| Categories: | sewing suits for sports Suits for sports (Patterns) |
Tags:
leotard for rhythmic gymnastics
Cited 190 times Liked by: 17 users
Like share
0
Like
- 17
I liked the post - 190
Quoted - 4
Saved
- 190
Add to quote book - 4
Save to links
Liked17
0
Choosing the color of rhinestones
When matching stones to the color of your suit, you need to attach rhinestones to the material of the swimsuit.
Important! The bright and spectacular appearance of the stones indicates a suitable shade of rhinestones, while a dull appearance indicates that this option should not be used.
The purpose of rhinestones is to shine brilliantly on a swimsuit, as well as to accent patterns and designs, if necessary. In addition, the stones should be combined as closely as possible with the athlete’s form, emphasizing her individuality and beauty.
Important! The color of the rhinestone does not have to be the same shade as the swimsuit. You can use bolder and more contrasting tones. For example, on a black suit, white crystals will look especially bright.
Determining the optimal size of rhinestones
The abundance of stones gives stunning shine, and the combination of rhinestones of various sizes further enhances this effect. How to stick rhinestones on a leotard for rhythmic gymnastics, depending on this parameter?
Important! The optimal size of stones depends on the size of the swimsuit. For small ones, ss16 is quite suitable, and for large ones - ss20.
Small stones are best suited for laying out patterns and designs on an athlete's costume. But to accentuate individual parts, it is better to use large rhinestones. For example, flowers or brooches are best made using stones with a diameter of ss30 or sew-on stones.
Important! The use of rhinestones of various sizes will enhance the play of light and shine of a gymnastics leotard, making it look more versatile and sophisticated.
Caring for products with rhinestones and crystals
Products with rhinestones certainly require careful care and delicate handling during washing and ironing:
- you should not soak such things;
- Hand washing at low temperatures is recommended;
- It is better to use liquid detergents for delicate fabrics;
- the use of conditioner is unacceptable, since the substances included in its composition significantly reduce the adhesion of the adhesive;
- during ironing, direct contact of the hot surface of the iron with decorated areas should be avoided;
- should be ironed through gauze or any other material.
How many rhinestones do you need?
Once you have determined the color scheme of your design, the presence of certain elements and their sizes, be sure to calculate the required number of stones.
- Density of adhesion of rhinestones to the fabric of a swimsuit.
- Crystal size.
- The number of all colors, as well as the volume of the area to which each of them is applied.
Important! Of course, the calculations will only be approximate. Be sure to add 20% to the result obtained. This supply will be quite enough.
Arrangement of rhinestones on a swimsuit
How to beautifully embroider rhinestones in a drawing? The next step in creating your work of art is laying out the selected drawing. The following tips and recommendations would be appropriate here:
- On a symmetrical swimsuit, place the stones symmetrically around the center of the suit. Otherwise, follow the pattern.
- The combination of colored stones with AB effect rhinestones gives the swimsuit volume and a more original look.
Important! AB effect crystals are stones that create a rainbow shimmer depending on the direction of the light.
- Rhinestones in pure shades - Hyacinth, Fuchsia, Light Rose or Light Siam, etc. can mark a design on a swimsuit. And AB-effect stones will add shine.
Important! Using rhinestones only with the AB property will give a negative result - instead of a bright original costume, the viewer from afar will contemplate just a shiny spot.
- The variety of colors and sizes of stones makes the swimsuit more expensive and elegant. The main thing is a reasonable approach and measure.
- For the mesh part of the suit, it is best to use AB crystals of the following diameters - ss: 12, 16, 20 and 30.
- The placement of stones can be carried out in a random or checkerboard order, which depends on the number of rhinestones.
Important! Experienced craftswomen sometimes skip the stage of laying out the stones. And if you are going to do this for the first time, then we advise you to take a photograph of the laid out drawing, and only after that proceed to gluing. This photo will undoubtedly help you in your work.
Gluing shiny stones
So, we moved on to the question of how to glue rhinestones onto a leotard for rhythmic gymnastics?
- Prepare the fabric: it should be clean and washed, we even recommend treating it with a special degreaser. This will improve the adhesion of the crystals to the material.
- For beginning needlewomen, we recommend starting work by sticking stones on the sleeves and skirt of the suit, gradually moving towards the center. This way you will better master the technique and the main part of the costume will turn out more impressive.
Important! You only need to stick rhinestones on the swimsuit in a stretched form.
- Place some kind of base under the material. For example, for the sleeves, roll up a standard folder for papers, and for the main part, try placing a book with a large hard cover.
- Glue for rhinestones on a leotard for rhythmic gymnastics is applied directly to the material. To do this, it is rational to use a tube with a dispenser. This will greatly simplify the gluing process for you.
- Then, using thin tweezers, the crystals are carefully laid out on a layer of glue. So, step by step, a beautiful ornament is created.
Important! The glue completely dries after 24 hours.
Examples of finished swimsuits with the number of stones used
This situation was not always the case. When I first started, I often faced budget constraints. Despite this, swimsuits became richer every year. I clearly remember a slight state of shock when, when counting the crystals on a swimsuit for Anastasia Dzhurkina based on a painting by Carol Buck, it turned out that 200 sewn-on Swarovski crystals were used on it. This was a record for our workshop. At that time, such a number of sewn-on crystals seemed unrealistic. Now the average swimsuit in our workshop has 200 sew-on crystals.
Anastasia Dzhurkina in a swimsuit made by the Lana workshop. year 2013.
200 sewing stones, 7750 glue stones.
In my memory, the use of a large number of stones on swimsuits began with one of the masters, who used more budget lines of stones, but covered almost the entire area of the swimsuit with them. When clients ordered a swimsuit from us, they expected to see a sticker comparable in quantity to that of that master. This prompted us to increase the number of stones. The only difference was that I always used the highest quality materials. Therefore, the cost of the work was appropriate. Until Stellux crystals came out, I only used Swarovski crystals. The Stellux line made it possible to slightly reduce the cost of swimsuits without losing quality.
If we talk about the swimsuits from our workshop, which had an extremely large number of stones, then we can mention the swimsuits for Janika Wartlaan. We always put the maximum number of crystals on swimsuits for Yanika. They always received many compliments. For example, despite the fact that the mesh was not glued on the Perfect lace swimsuit, the swimsuit gave the impression of being very rich.
Janika Wartlaan in the “Perfect lace” swimsuit by Lana. 2015
346 sewing stones, 7720 glue stones.
I am extremely grateful to Vera Nikolaevna Shatalina, thanks to whom we started working for Dina and Arina Averin. Swimsuits for Dina and Arina are always decorated without budget restrictions. When creating swimsuits for them, we are always guided by the interests of design.
Arina Averina in the “Matryoshka” swimsuit from the Lana workshop. 2018 325 sewing stones, 10,696 glue stones.
Let me note that we always use strictly Swarovski or Stellux for sew-on crystals with AB coating (an abbreviation from the French language “Aurore Boréale”, which means “Northern Lights”). This is due to the highest quality of the coating, which shows high wear resistance during product operation.