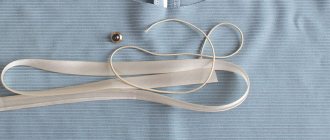
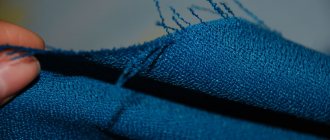
Bias binding is a special tape cut at an angle of 45 degrees relative to the grain or weft thread. It is used to process product cuts to give them a neat, aesthetic appearance and prevent possible fraying of the edges.
Braid (galun) is known as a type of bias tape. Available in both glossy and matte. Previously it was a ribbon woven from gold threads. Nowadays it is used to trim the edges of products.
The bias tape is used to process:
- sleeve edges;
- hem;
- neck;
- pockets;
- collar and placket.
It should be matched to the color of the main fabric if you plan to use it only as a edging. However, trim often acts as a decorative material. If it is not matched to the color of the product or even in a contrasting shade, it becomes an active decorative element that attracts attention.
It comes in different widths, different colors, can be ironed along the side allowances and single-layer.
Bias tape: what is it used for?
To edge the edge of the item, bias tape is used. It looks very beautiful in a deep rich tone on a light fabric.
Making a edging is much easier than sewing a facing or edging to a garment, so if you are sewing using heavy or coarse material, or transparent fabrics, then a tight facing is not suitable.
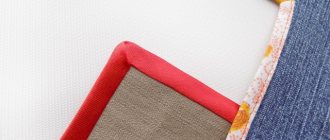
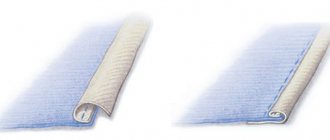
Denim edging
In this case, a strip of bias tape (preferably tulle) will look better. The edging thickens the edge of the product and can act as a spacer. The softness of bias tape allows it to be used for edging any type of material, with a variety of curved borders that are difficult to process with hemming. A strip of fabric can also be used to edge the bottom of a part, in cases where it is not allowed to process it by hemming the bottom.
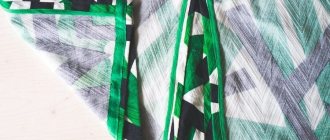
Edging is used to highlight the edges of collars, sleeves and pocket edges, as well as the sides and bottom borders of jackets. Mostly bias binding is made from a material of a contrasting tone, squared or patterned. Such decoration immediately attracts attention, therefore all steps of the work must be carried out very carefully; the strip of binding must be of equal width at all intervals of the product.
Processing process
To prepare classic single tape, fold the long sections of bias tape toward the center, leaving room for the middle fold. It is necessary to iron the fabric in half lengthwise, making one edge slightly larger than the other.
You may be interested in: Patterns and sewing procedure for a women's belt bag
Note! To prepare a double-fold (Italian) edging, fold the cut fabric in half lengthwise and then in thirds.
Main advantages
Today you can find products on sale in a variety of sizes and colors, so you can choose the option that is most suitable for your specific needs.
Excellent characteristics of edging tapes:
- do not stretch;
- retain their shape for a long time;
- do not fade in the sun;
- easy to sew;
- are produced by industry in a wide range of colors.
You can also note strength, durability, high flexibility, resistance to UV radiation and deformation.
How to make bias tape from fabric
DIY bias binding is quite difficult to do.
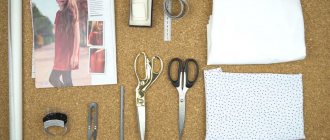
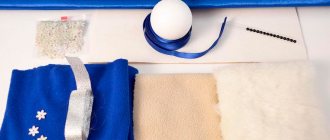
Materials and accessories for work:
- Textile. You will need a piece of finishing material from which the strips will be cut. The width of the fabric from which the edge is cut is generally taken to be about 50 cm, with a material width of 120 cm.
- A large ruler, preferably a meter.
- Small ruler.
- Chalk or fabric pencil. There are special markers for light fabrics.
- A sheet of A4 paper and a regular notebook sheet.
- Newspaper or tracing paper. Any printed material, except office paper, as it is thick.
- Desktop.
- Sewing machine.
- Sewing threads.
- Scissors.
- Iron.
Fabric yardage
Master class on implementation
Making the cut:
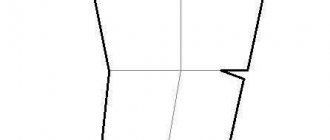
- First you need to outline the knitwear for the bias tape. It is advisable to draw at an angle of 45 degrees to the grain thread. But 40 degrees is allowed. It doesn't matter.
- Now you need to mark the cuts at 45 degrees. For an angle of 45 degrees, take a regular sheet of office paper or a small notebook sheet and fold it from one corner. If the sheet of paper is smooth and not torn, then when it is folded, an angle of 45 degrees will always form.
- Next you need to draw all the corners.
- A little trick. To avoid confusion when stitching, it is recommended to draw all corners in the same direction.
- Next you need to cut strips of binding.
- The corners are connected and secured with needles.
- All seams are fastened and a piece of newspaper or tracing paper (any thin paper) is prepared.
Sleeve edging
Technology of working on the machine:
- It is necessary to place the needle at the intersection of the corners and start stitching the seam;
- The stitch length is 2-2.5 mm;
- For fastening, 2-3 stitches are enough;
- You should get an even stitch, with bartacks at the beginning and end;
- From the inside out everything is now neat. You can remove the newspaper or tracing paper;
- If there are pieces of paper left in the fasteners, carefully remove them with a needle.
The last step is to work with the iron. After work, despite the paper, the machine shrank the material a little, that is, the fabric is not even, but slightly wavy. At the end, the excess is cut off and ironed at a temperature of 120 degrees.
What is a collar?
This piece of clothing is a white strip of fabric that is sewn to the inside of the tunic. It would seem why it is needed, but the collar has certain functions that it performs:
- protects the skin from contact with rough material used to sew military uniforms, so that the skin is not injured;
- It is not always possible to wash a uniform issued on time, and therefore the collar also plays a hygienic role.
We started thinking about the need for collars during the First and Second World Wars. The neck must be clean to avoid the formation of difficult-to-heal wounds. When there is active combat, there is no time for personal hygiene, but maintaining the health of soldiers is also an important task. Gradually, collar collars became part of the tradition, and now their wearing is consistent with military regulations.
How to sew bias tape along a sleeve armhole
Subsequence:
You might be interested in this: The procedure for sewing a petticoat for dresses and skirts
Neck trim
- It is necessary to cut off the excess on the sleeve, with an overlap of 1 cm inward on the front and back.
- To process an armhole in a jacket with sleeves, you need a strip equal to the length of the armhole. For size 42, one meter will be enough. You can buy it at a fabric store, it will work well in tulle or silk, the cost is about 20 rubles*/m.
- Next, you need to smooth out the folded edge of the bias tape on one side with a hot iron.
- Place the strip of fabric with the right side on the side of the jacket, on the border of the armhole, and make a straight stitch on the overlocker, with a 1 cm indent from the edge.
- The ends of the binding fabric must be sewn on top of each other with a yarn over.
- Next, you need to bend it over the armhole allowance and sew them together, retreating from the edge of the bias tape by 0.5 mm. This stitch will be the most important, because it keeps the folded edge inside, preventing it from coming out onto the front part, so when worn, the item will look more neat.
- Make cuts on the seam allowance with scissors, every 3 cm. Cut the bias tape to the size of the seam allowance.
- Sew the edge of the bias tape and the seam allowance using a machine (you can use a zigzag stitch). Fold the edges inward and sew your own running stitch.
- Sew the folded edges of the armhole on the overlocker, remove the basting stitches, and iron with a hot iron. Work is done.
Trimming corners
Rules for using braid
When choosing edging tape, be guided by what fabric you are using it for. You need to give preference:
- dense braid if the base is complex or heavy;
- for light fabric, choose the simplest and loosest braid;
- the most elegant is an openwork edging; it can look perfect on a guipure dress or skirt.
How to finish a neckline with bias tape
Step-by-step instructions for processing the neck:
- To begin with, an oblique strip is cut to the size of the neck and approximately 4 cm wide.
- Place face to face with the beginning of the neckline. Next you need to sew a line 1 cm from the cut.
Leather edging
- Next, the most difficult stage of the work begins: it is necessary to adjust the binding slightly, so that ultimately it does not tighten the throat and does not stretch itself over time. On straight places, tighten less than on oblique ones, i.e., on curves, tighten more strongly.
- For a beginning seamstress, this is quite a difficult task, so it is advisable to pin the bias tape to the neck of the product with needles and baste it, this is necessary in order to see how the fabric lays, and if something happens, redo it. Next, the binding needs to be sewn on a machine.
- Everything must be done neatly and symmetrically. Fold the product in half and check. If the neckline is intact, then, having reached the starting point 4 cm, the stitching is interrupted and tightened using a connection.
- If the product is made correctly and symmetrically, the neck size remains the same, then cut the seam allowance to 0.4 cm.
You might be interested in How to create your own fabric bird
Basting process
- Next, you need to straighten the neckline from the front part and retreat 1.3-1.5 cm from the seam connecting the binding with the neckline. The main thing is to straighten the seam perfectly so that the allowance is the same. It is recommended to trim off the excess.
- Fold the seam allowance to the edge, fold it over, closing the seam, stitch it 2 mm and baste it 2 mm. Fold the ends of the binding inward.
- After the neck is sour cream, sew a line along the front part into the seam of the binding.
- It is necessary to iron the roll (strip of fabric) carefully so as not to wrinkle it, use the tip of the iron to carefully guide the binding onto the stitching, you can pull it a little. And the seam will be almost invisible.
- Trims made of suede or leather are very popular. To process the product, you can use artificial leather or Ultrasuede suede.
How to iron correctly
- The advantages of these fabrics are that their edges do not fray, hardly wrinkle, and are easier to work with. To edge the material, you just need to fold it and that’s it.
- For example, to make a leather trim 15 mm wide, cut out a strip 4 cm wide. They are also cut along an oblique line and should overlap 5 mm diagonally.
- Next, the strips are folded in half with the wrong parts so that on the side that will be on the front part of the product there is 20 mm, and on the wrong side - 25 mm. At the end, the strip needs to be basted to the product and that’s it.
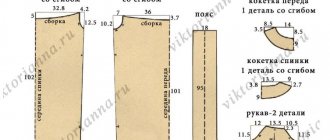
Execution diagram
Processing a rounded cut of a product
- To prevent the edges of the material from fraying, reinforce the edges with non-woven fabric. The adhesive duplicating base is laid from the wrong side.
- Insert a cut of the product into the pre-prepared edging. Baste it by hand. When basting, it is important to slightly stretch the binding from the wrong side and baste from the front side.
- Sew the edging to the edge of the product.
pokroyka.ru
Overhang edge trim
Both types of overhang have uncovered elements at the ends. For a cornice overhang, these are the end parts of the rafters, and for a gable overhang, these are the ends of the sheathing. It is necessary to arrange them carefully, while protecting them from bad weather. In addition, eaves overhangs require the installation of gutters along them. In general, the finishing of the end part of the overhang is the finishing of the edge.
And what it is made of depends on the roofing material you used. By the way, often the roofing kit already includes a kit for decorating and finishing the edges.
Before filing the roof eaves, it is necessary to trim vertically, along one line, all protruding rafters or fillets. They need to be cut strictly at the same distance from the wall. Then the ends of the rafters are combined with a strapping board, onto which a front board (usually metal) is nailed.
The front board is usually included with metal, ceramic and bitumen shingles. This part is also made from wood coated with paint or a protective compound. It is on this board that gutters are subsequently mounted.
The gable overhang is treated like this. First, trim the sheathing boards protruding beyond the wall. The cutting line should be parallel to this wall. The end board (wooden or metal) is nailed to the cut edges of the sheathing and to the end of the ridge beam. The end part of the board is covered with roofing material equal in length to the length of the cornice.
Necessary threads and needles
When sewing curtains made of organza or tulle, you need to choose thin threads (No. 40). When choosing the color of the threads, you should focus on the color of the original product, making sure that all the elements look harmonious and coherent. If it was not possible to choose a tone, then the threads should be selected several tones lighter than the original color. Thus, they will not stand out from the general palette.