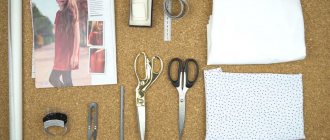
Machine seams are divided into connecting, edge and finishing seams. In turn, each of these main types of machine seams has its own classification. For example, a connecting seam can be a topstitch, an overstitch, an overlay, etc. If you need to know how to perform a particular type of seam for labor lessons, or simply need a table of machine seams for self-development, then you can use the information in this article. Please note that machine stitching and machine stitching are different concepts. A machine seam refers to a method of joining or finishing the edge of a fabric, and a machine stitch is a method, a pattern for forming a stitch with a sewing machine.
In this video you will see what stitches a sewing machine can make. Subscribe to our channel, you will learn a lot of useful tips.
Connecting machine seams
Stitch seam
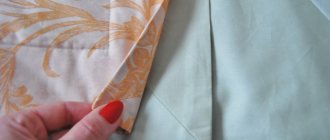
This machine seam is used when connecting shoulder and side sections, connecting a bodice with a skirt, sewing down sleeve sections, as well as when sewing a sleeve into an armhole, etc. The parts are folded right sides together, basted and stitched, stepping back from the cut to the width of the seam.
Wet-heat treatment of fabric (ironing) can be done edge-on (the sections retain their position after steaming), flat-ironed (the sections are ironed in different directions) and ironed (the sections are ironed on one side). The seam width is from 0.5 to 2 cm. A stitch seam can be made either without a fit or with a fit of one of the edges of the garment parts being sewn.
Flower nursery Green Gate
Do you like indoor or garden flowers? At the Green Gate nursery you can buy rooted cuttings and divisions of various domestic and perennial garden flowers. We have a constantly updated collection of anthuriums and hibiscus. Flowers and plants are sent by mail.
In this video you will see what kind of machine sewing stitches the Brother sewing machine performs.
You can't stop sewing beautifully!
Videos, REVIEWS, Recommendations
Hello, friends.
Not only beginners are concerned about choosing a method for processing the bottom of a product, but also experienced tailors.
Especially if the item was invented by the author independently, without using a ready-made pattern from a magazine or other sources.
It is important to take a competent approach and choose a method so that the resulting product is of high quality and beautiful.
The good thing is that sewing science offers many options.
In the last publication we looked at 9 out of 18 methods for processing the bottom.
Shall we continue?
Part 1 – 18 ways to process the bottom of the product and sleeves. Instructions.
Part 2 – How to process the bottom of the product and sleeves. 18 ways – You are here.
Note: At the end of the publication you will find a video with a more detailed overview and instructions for implementation.
Let’s continue the review of the group: “Treating the bottom with an open cut hem”
Method ten: Hem with open cut and adhesive material
Instead of a securing stitch, an adhesive web is used.
For execution:
- First, the preliminary preparation steps are repeated;
- The cut is refined, irregularities are trimmed;
- Stitched with special stitching. car or by choice;
- Fold to the wrong side along the intended line, hem width approx. 0.7 -2.5 cm. At this stage, you can lightly iron the folded edge to fix the cut;
- Next, put an adhesive web of suitable width into the folded hem and iron it.
Note: When choosing a method for processing the bottom, remember that the adhesive web may come off when washed.
The glue web method is simple and works well for knitted fabrics. For items made of heavy and dense fabric, it is better to choose a different method.
Method eleven: Processing the bottom with a double needle
This method is used mainly on knitwear, jeans and sports-style items.
For execution:
- Prepare sections of the product;
- Process the bottom of the product and sleeves using an overlocker;
- The hem allowance is folded to the wrong side and ironed;
- Thread the sewing machine with two or three spools of thread;
- Stitch with a double or triple needle. Using such stitches allows you to maintain the elasticity of the finished seam.
If the material of the product does not fray too much, processing can be carried out without stitching the sections.
Group: Processing the bottom with a closed cut hem
Method twelve: Closed hem
Processing the bottom with a double hem or hem with a closed cut is performed quite often. Used in sports, casual style, household items, etc.
The processing steps eliminate the need to stitch the cut.
In this case:
- The cut is bent towards the wrong side along the intended line twice;
- They notice;
- Sew with a stitching stitch. The width of the hem depends on the model and type of fabric; values from 0.7 to 3-5 cm are allowed.
Method thirteen: Processing the bottom with the “Moscow” seam
This processing method is most often used on thin, delicate fabrics: chiffon, fine crepe, silk, etc.
The “Moscow seam” can be used to process sections of flounces, frills, bottom sections of skirts and dresses, various scarves, shawls made of thin fabrics, tulle curtains, etc.
For execution:
- The seam width allowance (0.3 - 0.4 cm) is folded to the wrong side of the part;
- Along the folded allowance, a stitch is laid close to the edge at a distance of 0.1-0.2 cm from the fold;
- The excess is carefully cut off to the very line;
- The stitched edge is once again folded to the wrong side, so that the machine stitch is on the wrong side almost at the very second fold;
- Lay the second line.
Additionally on the topic:
Video “How to perform the Moscow seam”
Method fourteen: Finishing the edge with scallop stitching
This method can be done manually or using a sewing machine, after first making sure that this decorative stitch is available.
Used on blouses, dresses, skirts as a decorative element.
For execution:
- Repeat the preliminary stages of section preparation;
- First process the bottom with a double hem (see above);
- A line is laid along the processed edge, creating an imitation of a scallop:
- Iron the bottom.
Additionally on the topic:
Types of decorative stitches, how and where they can be used
Group: Bottom processing using additional materials or decor
Method fifteen: Finishing the edge with a hem
This method for processing the bottom is not often used.
You can use it to maintain the length of the product if there is a lack of fabric, if the bottom of the product has a curly shape or you need to strengthen it and secure the product at the bottom.
Not suitable for heavily flared products.
For execution:
- Prepare the edge by cutting the threads and smoothing out any unevenness;
- Lay out the product on the table;
- Cut out the facing of the required width in accordance with the shape and size of the bottom;
- Duplicate facing;
- Stitch the open top edge of the facing;
- Apply the facing to the cut with right sides facing each other;
- Grind the sections, the seam width is 0.7-1.0 cm.
- Iron, cut off allowances;
- Turn the facing inside out and iron it;
- If provided according to the model, lay a finishing stitch.
Additionally on the topic:
Video How to trim the top edge of a skirt or trousers with a facing
Method sixteen: Scalloping the edge
This type of processing is processing by turning a figured shape in the form of scallops. Not to be confused with decorative stitching!
Execution steps:
- The bottom is marked with festoons of the selected shape and size;
- If provided according to the model, duplicate the bottom;
- Next, repeat the steps of the previous processing option (see above).
Method seventeen: Processing the edge with a flounce, frill
Used to decorate various products: dresses, skirts, blouses, lingerie products, etc.
For execution:
- Preliminarily cut out and process flounces/ruffles of the required length and width;
- The flounce/frill is placed face down on the front side of the main piece;
- Baste and grind on the flounce side, distributing the gathers (if any) evenly along the entire length of the part. The width of the seam on the frill side is 0.7 - 1.0 cm.
- The flounce/frill is folded down and the seam is ironed.
Additionally on the topic:
Flounces, gathered ruffles. Cutting and processing.
Shuttlecocks. Frill. Connection with main parts.
Group: Processing with a belt or cuff
Method eighteen: Finishing the edge with a belt or cuff
Often used in sewing blouses, shirts, and dresses. It is also found in outerwear: jackets, jackets, coats. A stitched cuff is used to process the edge of the sleeve in various products.
The general execution scheme is as follows:
- After preliminary preparation of the bottom, cut out a belt or cuff of the required width and length;
- If necessary, sew the belt/cuff into a ring or process it in short sections;
- Apply to the edge of the product with right sides facing each other;
- Baste and stitch from the waist/cuff side along the entire length of the part. The seam width is 0.7 - 1.0 cm.
- The allowances are cut off and overcast;
- The belt/cuff is folded down and the seam is ironed;
- Lay the finishing stitch (according to the model).
This method of sewing a belt with an open cut. If you need the cut to be inside the waistband, the processing is similar to the steps when edging the cut with tape (see above).
Additionally on the topic:
How to sew a light blouse with a stitched bow belt
How to sew a knitted dress in a couple of hours
For details on performing the remaining 9 out of 18 methods for processing the bottom of the product and sleeves, see the video review:
Summarize.
We looked at 18 common ways to process the bottom of a product and sleeves.
Each can be extended using:
- various methods of edge processing - overcasting, edging, etc.;
- additional materials - braid, lace, fringe, sequins, etc.
When sewing a product, you can safely conduct experiments, choosing the appropriate method depending on the type, purpose of the item and the properties of the materials from which it is sewn.
If you have any questions or impressions, write in the comments to the article or under the video on the channel.
I wish you beautiful sewing projects, Elena Krasovskaya
This is interesting:
- 18 ways to process the bottom of a product and...
- We sew a pareo for the beach ourselves.…
- Typical processing sequence...
- A selection of useful assistant services for…
- How to change a trouser pattern if you...
- How to sew from velvet. Processing features…
Adjustment stitch
The machine sewing stitch is performed in two steps. First, we sew the parts to the required seam width and steam them “on edge”. Fold the top piece to the right side (turn the seam allowances to the top piece). We sweep, iron, lightly fixing the folds with an iron, and add a finishing stitch.
The distance between lines depends on the density of the fabric, style and fashion. If you make the allowance of the upper part 0.3-0.5 cm narrower than the lower one, then the open cut of the part will be closed with the top stitch.
A - adjustment seam with an open cut. B - adjustment seam with a closed cut.
Overlock seams
They are used for processing sections to protect them from shedding. There are three types: edged, framed, split.
Overcast seam in piping
We fold the two parts right sides inward, aligning the cuts. We connect them with machine stitching at a distance of 5-7 mm from the cuts. We turn the parts right side out and sew out the resulting edging measuring 1-3 mm.
Overlock stitch in frame
Performed in the same way as in edging. When basting the hemmed edge, we form a frame measuring 4-6 mm.
Split overcast seam
Performed in the same way as in edging. When basting the hemmed edge, place it on the fold.
Overlay machine stitch
There are two types of machine overlay seam: with an open cut (for joining parts of gaskets in order to reduce the overall thickness of the seam) and with a closed cut (for attaching yokes, patch pockets and other patch parts).
In the first case, parts of the parts are placed one on top of the other with a cut offset of 1.5-2 cm and connected with a straight or zigzag stitch.
In the second case, the cut of the invoice (upper) part is folded inward to the required amount, ironed, placed along the marked lines on the main (lower) part, basted and adjusted. The width of the seam depends on the model of clothing.
A - overlay seam with an open cut. B - overlay seam with a closed cut.
Butt seam
Used for joining parts made of cushioning fabrics where a minimum seam thickness is required. To make the seam, we cut out an additional strip of cotton fabric with a width of at least 20 mm and a length equal to the length of the parts being joined. We place the sections of the parts end-to-end on a strip of fabric and adjust them onto the strip at a distance of 5 mm from the sections. We connect the sections with a zigzag machine stitch.
Double reverse seam
A double reverse seam (French) is used when sewing products made from transparent fabrics, as well as some types of bed linen. See How to sew bedding.
To make a reverse seam, the parts need to be folded with the wrong sides, aligning the cuts, and stitched at a distance of 0.3-0.4 cm from the cut (A). Then bend the parts along the seam line, turning them face to face and stitch a second time, retreating from the edge 0.5-0.7 cm (B). In this case, the allowances of the first seam are closed inside the second.
Reliefs
There are stitched ones and with a cord.
Progressive reliefs
We outline the location line of the relief on the front side of the part. We bend the part along the marked line with the wrong side inward and stitch it at a distance of 1-3 mm from the fold.
Reliefs with cord
To make the seam, we cut out an additional strip of fabric, the width of which is equal to the thickness of the cord + 10-15 mm. On the front side of the part we mark the location of the relief with 2 lines, the distance between which is equal to the thickness of the cord. Next, we transfer the lines to the wrong side. Then, on the wrong side of the part, we apply a strip of fabric so that the sections of the strip extend beyond the marked lines at the same distance (5-7 mm).
We chop off the strip and the part in several places with pins. We adjust the part to the strip, laying finishing lines on the front side of the part along the marked lines. We thread the cord with a pin between the two lines.
Overlock seam
A facing seam is a type of stitching seam and is used to connect such parts of a product, as a result of turning them out, the seam will be located along their edge, and its reserves inside, between the parts (collar with a collar, sides with edging, neck with facing, etc.)
The parts are folded with the right sides inward and joined with a stitch seam. Then the parts are turned right side out, the seams are straightened and swept out to form a transition edge, which makes the seam invisible from the outside. The transition edge is formed by the upper part, which moves to the lower side by 0.1-0.2 cm.
In cases where the overcast seam is made without a transition edge, after joining the parts with a stitch, it is recommended to turn them inside out, iron the seam allowances, and then fold the parts again with the wrong side inward along the machine stitch and finally iron them.
When turning edges and processing collars made of non-fraying fabric, the width of a regular seam is 0.3-0-5cm. From fraying fabric - 0.4-0.7 cm.
Stitched seams
They are used to connect side, shoulder and other sections of product parts. Stitched seams can be pressed, pressed and ribbed.
Pressed seam
To make a seam, fold the two parts right sides inward, aligning the reference lines and aligning the cuts. We sew the parts along the reference line or with a seam equal to:
- 10 mm – when sewing the main parts (shelf, back)
- 12 mm - when sewing the main parts for products made from fraying fabrics in outerwear and non-fraying fabrics - in light clothing
- 15 mm - when sewing the main parts for products made from fraying fabrics in light clothing
- 5 mm - when sewing extensions for items made of non-fraying fabrics in outerwear
- 7mm - when attaching extensions for items made of fraying fabrics in outerwear and non-fraying ones - in light clothing
- 10 mm - when sewing extensions for items made of fraying fabrics in light clothing
We spread the seam allowances in different directions and secure the seam in this position with an iron, that is, iron it out.
Pressed stitch seam
It is performed in the same way as an open-iron seam. The difference is that we bend the seam sections to one side and secure them in this position with an iron.
Stitch seam on edge
It is performed in the same way as a pressed seam. Only iron the seam sections away from the fold.
Machine hem stitch with closed hem
A hem seam with an open cut is used for hemming the bottom of the product and sleeves in products made from raincoat and cotton fabrics, as well as in the manufacture of linen (A).
The trimmed edge of the product is folded to the wrong side by 0.7-1 cm, ironed, after which the entire allowance for the hem is folded to the wrong side and secured with machine stitching at the very fold. The width of the external hem of the seam is determined by the purpose of the product and is taken within 1.5-5 cm.
A variation of this machine seam is the “Moscow seam” (B) - stitching the edge of the part with a double machine stitch. This seam makes it possible to obtain a narrow hem (hem) and is used mainly when hemming flounces, frills, and heavily flared hems of dresses.
Fold the seam allowance to the wrong side and stitch it at the fold (at a distance of 1-2mm), then cut off the excess allowance almost to the line, fold the stitched edge again and fasten all three layers of fabric with a second machine stitch, laying it next to the first. See also Basic ways to hem a skirt.
Covering seam
We fold the two parts with their right sides inward, cutting out the bottom part by 8 mm. We bend the cut of the lower part with the lower part and grind them down at a distance of 2 mm from the cut. Iron the seam on the side of the top part and stitch the parts with a second machine stitch at a distance of 2 mm from the seam. Note: the sewing seam is used in the manufacture of bed linen and workwear. When cutting, the seam allowance on the side of the top part is equal to the width of the finished seam. That is, 6mm, on the side of the lower part - double the width of the finished seam + 2mm.
Types of connecting seams
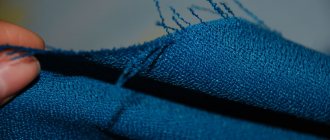
They are used when processing cuts of the neck, sides, bottoms of the product, sleeves in order to protect the cuts from shedding. Edge seams include hem seams, overcast seams, and edge seams.
Open cut edge stitch
This machine seam is sometimes called “Hong Kong” (A) and is used to process sections of parts, which are subsequently customized to other parts (yokes, bodice, patch pockets, etc.). In addition, this seam is used to process the edges of items made of dense fabrics (the edge of the hem, the edge of the hem of a coat).
We cut out a strip of fabric 2.5 cm wide (triple the width of the edging plus 1.5 cm) at an angle of 45 degrees to the direction of the warp thread (lobe). Apply the facing to the section of the product being processed, aligning the front sides, grind it, wrap the section of the product with the facing, baste it and stitch it from the front side into the stitching seam. We process the open cut of the hem of a coat or skirt made of thick fabric with an edge seam (from lining fabric) and hem it to the product manually for each stitch of machine stitching.
Hem stitch with double needle
What you will need
- Double needle and thread matching the fabric
- Straight stitch
- Universal foot
Install the twin needle and thread the top two threads, adding a second spool pin or cone stand.
Prepare the fabric: baste the cut if the fabric is fraying too much, and iron the edge of the fabric inside the product.
Sew with a double needle from the right side of the fabric. Use an auxiliary guide to maintain equal fold distance throughout the entire length of the stitch (Photo 1).
Photo 1. Here, masking tape is used as a guide.
The left needle should make a puncture as close as possible to the tissue cut. The stitching on the wrong side can simultaneously serve as an overcast for fabrics that are not very loose (photo 2).
Photo 2. View of stitching with a double needle from the inside: the bottom thread goes between the two top threads
For double needle hems on jersey items, see the article on stretch fabrics.
Closed-cut edge stitch
This machine seam is often called “rulik” (see diagram above - B). It is performed in the same way as with an open cut, only the facing is cut twice as wide (5cm).
The facing is folded in half, ironed, placed on the front side with cuts to the section being processed, basted and stitched with a seam of the accepted width (0.75 cm). Then a strip is wrapped around the cuts and secured on the wrong side. Iron it again and place a second machine stitch into the stitching seam or attach it on the wrong side using hand-blind stitches. See also Processing the neckline with bias tape.
Finishing seams with edging
They are used in the manufacture of uniforms, as well as for decoration. These include a topstitch with edging, a facing seam with edging, and an overlay seam with edging.
Stitched seam with edging
To make a seam, we cut out a strip of fabric with a finishing material of width (edge width + L) * 2, where L is the width of the seam for stitching the parts (10, 12, 15 mm). We bend the strip along the middle with the wrong side inward and iron it. We apply a strip to the front side of one of the parts, aligning the cuts. We sew the strip to the part with a seam of width L from the side of the strip. We fold the two parts with the right sides inward, aligning the cuts, and grind the parts, placing a machine stitch in the stitching line of the strip. Iron the stitching seam.
Overlock seam with edging
The seam is made in the same way as a stitched one, with the only difference being that after joining, we turn the parts right side out, placing the seam on the fold.
Overlay seam with edging
This type of seam is performed in the same way as a stitched one, with the only difference being that after joining, we turn the parts right side out, ironing the media in one direction. We adjust the cuts on one side.