If you sew your own bed linen, you can save some money and get a high-quality home textile product. To make a kit yourself, you need the correct selection and calculation of materials. You definitely need to know how to make a linen seam for bed linen. Following the correct sewing technology allows you to maintain the integrity of the materials during washing. Therefore, the linen seam must be strong enough and even.
Covering seam.
Today we have a sewing seam.
And this is the last seam we are considering from the group of connecting seams. After reading the article you will learn about how the hemming seam is made and where it is used. And about the fact that in addition to, so to speak, the classic, traditional sewing seam, there are modified, that is, slightly modified, with new properties, but still sewing seams.
The sewing seam is quite difficult to make, but it is very durable and can be used as a decorative stitch, on both sides.
The sewing seam is used when sewing bed linen, sportswear and equipment, men's shirts, special work clothes, denim clothes, skirts, trousers, clothes that need to be washed very often, etc.
A distinctive feature of a closed seam is that two lines are visible on one side of the seam, and one on the other.
Connecting seams.
Covering seam.
Classic, traditional, standard, whatever you want to call it, the backstitch can be done in several ways.
Option #1.
The peculiarity of making a sewing seam using this method is that before you start sewing the seam, you need to clearly determine the size of the allowances.
Because when making a sewing seam with option No. 1, the width of the finished sewing seam will directly depend on the width of the allowances. The denser and thicker the fabric, the wider the allowances are left, which means the seam is wider.
When cutting, the width of the allowance on the side of the upper part is left equal to the width of the planned finished seam. The width of the allowance on the side of the lower part is left equal to the width of the planned finished seam multiplied by 2, plus 2 - 3 mm.
The standard is considered when the distance between the lines of the hemming seam is maintained at 3 - 10 mm (depending on the properties of the fabric, according to the model), and the second line is made at a distance of 1 - 2 mm from the fold.
Covering seam, option No. 1, made from the wrong side.
We connect the parts right sides to each other. In this case, the lower part protrudes beyond the first by the width of the planned finished seam.
We wrap the allowance of the lower part (2 widths of the allowance of the upper part plus 2-3 mm) onto the allowance of the upper part.
And we lay the line at a distance L = 1 - 2 mm from the cut of the allowance of the lower part.
Now, with the other, free, flying, opposite side of the part, we go around the remaining open cut and the laid line.
In order to lay the next line exactly along the edge of the fold, we turn over the connected parts and on the wrong side of the product, at a distance L = 1 - 2 mm from the fold, we lay another line.
As you can see, the sewing seam looks like this:
1) on the one hand, as a fold laid and stitched with the product,
and 2) on the other, as an adjustment seam with a closed cut.
Covering seam, option No. 1, made from the front side.
If you need or have such a desire to decorate the front side of the product with a sewing seam, then for this you need to do the same steps, but only at the very beginning the parts need to be folded with the wrong sides facing each other.
Option #2.
If it is fundamentally important to connect the parts with a backstitch exactly along the drawn contour lines, then you need to use option No. 2.
Covering seam, option No. 2, made from the wrong side.
We connect the parts with their right sides facing each other along the drawn contour lines and
We delete copying, basting or any other hand stitch that has become no longer necessary. If she was, of course.
We lay out the lower and upper parts in different directions, and iron the allowances in the direction where (as you plan) the hemming seam will be.
We cut the bottom allowance to 3 mm.
And we turn the upper seam allowance to the desired width and sew a line at a distance L = 1 - 2 mm from the fold.
Covering seam, option No. 2, made from the front side.
The same backstitch can be done on the front side. To do this, you need to do everything the same as in the case of placing the finished sewing seam on the wrong side, only at the very beginning you need to fold the parts not with the right sides facing each other, but with the wrong sides.
And now, if you lay another line through all the layers close to the very first one, then the hemming seam made by any of the options suggested above turns into a lock seam.
The sewing seam is detachable.
There is such a type of sewing seam as a flying seam. That is, the seam itself is not fixed with a stitch on the main parts, but seems to “float in the air in free flight.” This seam is used to connect parts and at the same time close sections of thin, loose fabrics.
Basic sewing mistakes
Errors may be the following:
- The fabric is stretched on one side and gathered on the other. To do this, it is recommended to pre-chip or sweep the parts.
- Fold in fold. This occurs when the initial stitching is not carefully aligned.
- Protruding fabric in the seam. Occurs when the stitching is crooked or the allowance is incorrectly trimmed.
And in this video you will learn in more detail about linen seams, and you will also be able to make inexpensive and stylish bed linen yourself.
Linen seam
In this article we look at the linen seam . The linen seam is made on a machine, which means that according to the method of execution it belongs to the class of machine seams, and according to its purpose it belongs to the connecting seams.
Linen seams are a separate group of seams that are highly durable. They are called linen because they are used in products subject to frequent washing, mechanical stress (twisting, abrasion, stretching, tearing), and aggressive chemical effects of washing powders.
The covered seam (Fig. 1), the lock seam (Fig. 2) and the double seam (Fig. 3) have strong fastening of the cuts, as a result of which they do not fray and the threads do not move along the allowances.
These seams are not only made in a special way, but also on “special” fabrics. For linen: bed, underwear and table, only fabrics of plant origin are used: cotton and linen.
These fabrics are not only hygienic, but also very durable. When applied to linen seams, cotton is more versatile: it is used from thin underwear to rough work overalls. Linen, as a rule, is used for linen seams in summer products: trousers, skirts, jackets.
How to baste a linen seam correctly?
Basting is carried out on a wide surface in the direction from right to left. Several stitches are threaded onto the needle. The knot and the tack are placed on the outer layer of the material. This is required to be able to fix the thread. Before fixing the thread, you need to make sure that the stitch itself is not crooked, whether the connection is loose or whether it is too tight.
To temporarily secure the fabric fragments, you will have to make several small stitches. To prevent the fastening from becoming unraveled, it is necessary to leave a few centimeters of thread edge. When sewing fragments of fabric, the stitching should not be done strictly along the basting seam, but rather tightly along the basting stitches near the allowance. This way the basting threads can be removed without much difficulty.
Now everyone can figure out how to make a linen seam for bed linen. Pillowcases, duvet covers and pillows can be made independently by a simple housewife. Now you don’t have to pay dearly for a set of bed linen.
Double linen seam
A double linen seam is more “delicate” compared to a closed seam. It is used in bedding and underwear products: sewing pillowcases, duvet covers, nightgowns. But it is also used when sewing delicate fabrics: chiffon, nylon, voile and the like. In these cases, it is called according to the fabric: French, that is, exquisite.
Why French? It is known that the French, lovers of everything refined and refined, have long set the tone in fashion, and in that distant time there were no overlockers. It is also known that their favorite thin fabrics have high flowability. And tailors figured out how to wrap the crumbling cuts beautifully and securely. And so the “French” seam was born. In our time of overlockers, this seam is also relevant when sewing thin fabrics, since the overlock stitch is too rough for transparent fabrics.
Already in relation to bed linen, the French seam began to be called linen seam. We also know that cotton does not have high flowability, but in these products it is exposed to aggressive influences that the overlock stitch cannot withstand. In addition, this seam prevents the accumulation of textile dust, fiber particles and feathers from pillows and blankets.
This linen seam is also sometimes called a reverse seam because during its execution the seam must be turned to the other side. But this name also “turns me out.”
The double seam is performed in two lines in succession. To perform it, the parts are first folded with the wrong sides inward, the cuts are aligned, and the first line is stitched at a distance of 0.3-0.4 cm; then they are turned inside out, the seam is straightened along the entire length with your fingers and a second line is laid at a distance of 0.5-0.7 cm from the edge. The first seam allowance should be covered inside the second seam.
To ensure that the seam is clean, of high quality, and the threads of the fabric cut do not peek out, it is necessary to straighten the cut before sewing and make sure that the stitching is even and not narrower than the first line.
These seams are labor-intensive, and they are used mainly in cases where there is no overcasting machine, if they want to sew high-quality products, and at home.
Covering seam
The seam is intended for products subject to frequent washing, mechanical stress, stretching, and tearing. This seam is coarser, denser, stiffer and is used in denser, coarser fabrics, in contrast to the double seam. For example, when sewing bed linen, men's clothing: sports trousers and shirts, sports and workwear, soldier's underwear, tents and the like. For bedding, it is even more convenient than double bedding, since it is flat and textile dust and fluff does not accumulate in the seams.
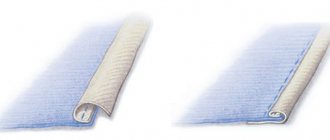
The seam is made in two lines. To make a sewing seam, the parts are folded with their right sides inward, releasing a cut of the lower part by 0.7-0.8 cm, depending on the thickness of the fabric; This cut is used to bend around the top cut and a stitch is laid at a distance of 0.1-0.2 cm from the cut. Then the parts are laid out with their right sides down, the seam is folded to the side, covering the cut, and adjusted at a distance of 0.1-0.2 cm from the fold.
People are also looking for a double closed seam . Either I missed something, or I’m afraid to disappoint you - it doesn’t exist in nature. Maybe it's a seam lock?
The lock seam is made with one stitch on a two-needle machine with a special device. These are industrial machines. The width of the finished seam is 0.6-0.7 cm. If the stitching were not a chain stitch, but a lockstitch, then the seam could well be called double or mirror, which is confirmed by the seam pattern.
Today we met and learned how to perform a very important and useful linen seam : double seam, closed seam.
Share your opinion in the comments: which seam did you like best, did everything work out and will you use them in your work?
Ask questions. If the article was useful, share it with your friends on social networks, I would be grateful for your likes. By subscribing to the news, you will not miss new lessons, and will also receive a useful book as a gift, “Sewing machine for home use.”
Linen seam for bed linen
Why do you need a high-quality linen seam for bed linen? Thanks to it, special strength and beautiful appearance of the products are achieved. This is practical - such a bed can often be washed, subjected to stress and become unusable. When processing fabric with a linen seam, a special device is used - a foot, which simplifies the process and ensures reliability in further use. Not everyone has specialized equipment at home, so the sewing algorithm is different.
Due to their increased strength, linen seams are used in products whose use requires frequent washing, chemical and mechanical exposure
Common mistakes during sewing
Not everyone knows how to make linen seams for bed linen correctly and often make mistakes.
We list the most common of them:
- The fabric can be stretched on one side and slightly gathered on the other. To solve this problem, you must first sweep or chop off fragments of fabric;
- A crease forms in the fold when the original stitching is not aligned neatly;
- The linen seam is made with protruding fragments of textiles.
How to make a linen seam at home?
This sewing technique is special; it is somewhat more difficult to perform at home than when produced in a factory.
Types of linen seams for sewing at home
There are 3 main types of technique: hemming, double and hemming. The latter is used for cutting and sewing such an element of bed linen as a sheet. Thanks to a well-made seam, the edges are smooth and neat. The width parameters can be any, and to prevent the fabric from deforming during washing and ironing, it is recommended to make the hem wide enough - from 4 - 5 to 30 mm. Before sewing, mark with a clerical pencil or soap. If desired, make a mark.
Main types
There are several types of such seams: hemming, double and hemming. Each of them has its own characteristics and advantages.
Double
Used when it is necessary to tuck the cut edges of the fabric into the seam. It is used for sewing duvet covers and pillowcases.
p, blockquote 6,0,0,0,0 —>
p, blockquote 7,0,0,0,0 —>
To do it, you need:
- fold the parts of the product inside out and carefully trim the sections of fabric;
- step back 3 mm from the edge and sweep away the parts;
- stitch in the usual way, trim the edge;
- turn out the parts and sweep along the wrong side;
- stitch, retreating from the edge by 5-7 mm;
- remove the basting.
h3 2,0,0,0,0 —>
Zaposhivochny
Used to make bedding parts, as well as some types of clothing.
p, blockquote 9,0,0,0,0 —>
To create you need:
- put two parts together, face inward, sweep;
- connect them at a distance of 1 mm from the fold;
Podruchny
Used to create a bed sheet. The use of this seam allows you to make its edges smooth and neat. The width is arbitrary, can be from 5 to 25 mm. The wide hem does not deform after washing and is easy to iron.
p, blockquote 12,0,0,1,0 —>
Before sewing, you need to mark with soap or a pencil. Additionally, you can make an outline, but it is not necessary.
p, blockquote 13,0,0,0,0 —>
Linen sewing seam
Even finishing the edges with an overlocker cannot replace a strong and reliable linen seam
The second name for this seam is denim. The execution algorithm looks like this:
Algorithm for step-by-step execution of a sewing seam
- the parts are placed together with their front sides facing inward;
- the cut at the bottom of the material is 0.8 cm;
- the resulting cut should bend around part of the material from above;
- The stitch is stitched.
The sewing seam is intended for products subject to frequent washing, mechanical stress, stretching, and tearing.
What is a stitching foot?
The set of the most ordinary sewing machine often includes a foot for creating a narrowed hem on thin textiles. Such an element can be made in different sizes and differ in design. However, this foot is great for making linen seams correctly.
However, it will not be possible to immediately obtain a high-quality seam using such a device. You will have to devote some time to working out the technical part in order to practice properly.
Double linen seam
Double linen seam is more “delicate” compared to closed seam
The double linen seam is simple and is performed using a softer technique. The execution technique looks like this:
- the prepared patterns are carefully folded in half, the inner sides facing each other;
- the cut is leveled, tacked with a distance from the edge of up to 0.5 mm;
- parts must be turned inside out;
- The resulting seam is finished by hand, the next line is placed a little further (remember to hide the allowance of the first side of the second).
The material sewn using this method does not turn out as aesthetically beautiful and neat as a sewing seam - it is located on the side and is not elastic. If you don’t have a machine for stitching edges, it is advisable to resort to this technique.
Double reverse seam
Pieces of fabric for joining
If the parts of the product have not been previously cut, first read the instructions on the allowance technique.
We fold the parts with the wrong sides inward and make a stitch at a distance of 5-6 mm from the edge
This sewing technique should be performed in such a way that the top stitch hides the inner seam cut. Do it carefully, avoiding protruding threads.
We turn the parts right side inward, placing the bends of the seam at the same level
Standard: the first line is at a distance of up to 4 mm from the cut, the second line is up to 8 mm from the edge of the product.
Double reverse stitch – used when sewing pillowcases and duvet covers
What seams are used when sewing bed linen?
We list a few seams that can be used when sewing:
Double . It is used in situations where there is a need to tuck cut pieces of fabric into the seam. This option is more suitable for pillowcases and duvet covers.
Let's look at how to make a double linen seam for bed linen:
- Fold several pieces so that the wrong side is inside, and then trim the fabric sections;
- Make a retreat of approximately 3 mm from the edge, and then sweep away the textile fragments;
- Sew in a simple way, and then trim the cut side;
- Turn the product inside out and then sweep along the inside;
- You need to make a retreat of 5-7 mm from the edge;
- At the very end, you can remove the basting.
This linen seam is often used in the manufacture of bed linen.
Zaposhivochny. It is used for the manufacture of bedding items and several types of clothing.
To make a linen seam, you need to:
- Place the two separate pieces right sides together and then baste them;
- In this case, the length of the seam allowance for the lower piece of fabric should be slightly larger;
- At a distance of approximately 1 mm from the bend, the ends must be connected. It is imperative to ensure that each bend is even and that there are no bends left on the material;
- After this, the basting can be removed;
- Unfold the fabric fragments to the sides, secure the cut with a seam, and then baste;
- It is necessary to stitch in such a way that the line is placed at a distance of 2 mm from the folded side;
- After this, the basting must be removed and the created pillowcase or duvet cover smoothed out.
The parts are folded with the wrong side inward if you want the linen seam to be on the outside.
Hemming. Used for making bed sheets. The edges of a product with such a linen seam will always be neat and even. Any width can be from 5 to 25 mm. The extended hem does not change shape after washing and is easy to iron. At the place where the hem seam will be, markings are made with soap.
Patchwork, hand stitches
A seam in which the edges of pieces of fabric are sewn together is called “patchwork”. The process is quite long and labor-intensive, so the products are highly rated. There are three options for sewing: the “forward needle”, “backward needle” and “secret” techniques.
Finishing hand stitches “forward needle” and “back needle”
It is necessary to mark the allowances using chalk or a pencil. The parts are pinned together and sewn together.
Making a blind seam by hand requires maximum precision and accuracy.
Edge machine seams
What does this category of seams mean? It includes three groups of seam types - edging, hemming, and hemming. The first ones are divided into:
- with an open cut - used in outerwear and when creating edging;
Open cut edge stitch
Edge stitch with closed edges
- ordinary edging seam - used for turning valves and collars;
Overcast seam in piping
Split overcast seam
Overlock stitch in frame
Edged cut - a method of clean processing of allowances
- stitched type - used for stitching the bottom of jackets;
Hem seams with edged edges and stitched lining
Hem seam with open and closed cut
Sequence of making a hem seam with a closed cut
How to hem a sheet
Calculation of a sheet when processing all 4 sides of it
Many people are interested in the question: how to hem a sheet by machine or by hand? The most reliable fastening option is a linen seam.
Mark 2 cm on the face of the fabric from one and the other raw edge
If desired, they are complemented by edging or stitching, which provides protection against terry and deformation. It is also advisable to use a hem stitch to prevent distortions in the cut.
Fold the cut edge to the wrong side 1 cm, and then another 1 cm and iron it, sew a line from the wrong side of the fabric to capture the entire hem
Before starting work, it is important to inspect the fabric to see if there is any defect, and immediately note the sides that are not suitable for use. Wash the material, run an iron over the fabric - this will protect against possible problems with the size of the finished product (some fabrics tend to run together). To prevent the fabric from shifting, pin the desired areas around the perimeter with pins. Their heads should be turned towards the cut - when the basting of fabrics begins, you need to remove the needles one at a time.
Our handmade sheet is ready
It is important to pay attention to the quality of the pins - if rust appears on the surface, it should be thrown away immediately, because stains cannot be washed off.
