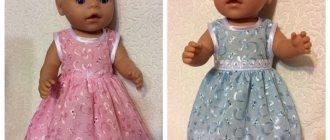
In every girl's wardrobe there are several pairs of tights that lie idle. They can be used for other purposes, for example, to sew a beautiful doll for a gift or to decorate your own apartment. Creating dolls from tights is not difficult, you just need to practice a little, and then even beginners will create real masterpieces. The products will be distinguished by their realism, and some types of toys even resemble a smaller copy of a person! This article will tell you more about how to make a doll from tights with your own hands.
Do-it-yourself dolls made from tights
How to make a doll from nylon tights
Before you start working, you need to decide on the theme, material and technique for making the trinket. Despite the fact that nylon dolls have appeared on the Hand Maid market recently, they have managed to create their own “families”. Pops, frame models and tumblers are made according to the same principle, but with some nuances.
Sock doll: description of the toy
Various toys made from socks
A sock is an excellent basis for making various toys. The advantages of this type of doll are the following factors:
- Inexpensive material that is easy to work with.
- The toy comes in an interesting color.
- There are no huge number of seams, no need to prepare a pattern.
- Aesthetically attractive shape for any type of doll.
- The material is pleasant to the touch.
- The product is small in size.
What does the simplest sock toy look like?
Important! An additional advantage is that some models can be made with children, developing fine motor skills and imagination in children.
Preparation of material
For crafts, it is better to choose new matte nylon hosiery without adding latex (or its content should not exceed 3%).
To make the fabric stronger, denser and not “give” snags, the tights should be boiled in a solution of water and bleach (about 200 ml of bleach for 1 liter of water), stirring continuously.
Whiteness can be replaced with activated carbon tablets. Since the products change color during the cooking process (unstable dye is washed out), the boiling time depends on the desired shade.
Then, to restore elasticity, the tights are rinsed in clean water and then left for several minutes in a container with fabric softener.
The texture is painted with aniline dyes. To get the desired shade, you will first have to experiment with dyes until you get the optimal color.
The quality of the stuffing determines the density of the crafts and how they will keep their shape. Therefore, choose a material with springy fibers (sintepon, padding polyester, holofiber). You can check the elasticity of the canvas by simply squeezing it in your hand.
Types and options
There are several most popular types of tights dolls. They are most often made by both professionals and amateurs. This list includes:
- Pop doll. It has such a strange name because its most expressive parts are the face and butt. Most often, such dolls are made small and must be in a sitting position.
- Full size doll. This option is made using tights and filler. Looks like a small copy of a person.
- Only the doll's head. It is done without the body, focusing on the facial features.
- Frame doll. It is made using a specific frame. Plastic bottles, wire and other available materials can be used as a basis.
Master class for beginning craftswomen
To begin with, you can make a simple tumbler from nylon and padding polyester (holofiber). The product is soft and has a round or oval shape. It is easy to make and does not require special skills.
Corpuscle
- cut off the part with the toe and heel of medium length from the tights (tights for dolls can be replaced with stockings or socks);
- stuff it with holofiber or padding polyester and sew up the edge of the product;
- sew the neck area with a “forward needle” seam, wrap it with thread several times and fasten;
- from below, in the area of the seam of the sock, insert a needle and, stretching it inside the blank, pull it out in the center, in the navel area, make a stitch, and then return the thread in the opposite way and fasten it;
- we form the legs. Select two balls at the base using an overcast stitch;
- In the same way we “sculpt” the face of the craft. For the nose we sew a circle with a smaller radius. And for the ears, we separate small parts on the sides of the head and tie them together with thread at the base;
- for the handles you need to take two narrow strips of nylon, fold each in half and sew, leaving a hole at the base. After stuffing, they are sewn to the body.
Note!
- Kinusaiga technique for beginners: what is it, a description of creating paintings from threads
- How to weave a figurine from rubber bands: how to learn to weave animals, toys and what you can make from rubber bands on a slingshot
- How to make flowers with your own hands from paper, fabric and scrap materials. We create bouquets of homemade artificial flowers
Head
Now we design the face, depending on the intended image.
- mark with dots the place for the eyes and mouth;
- embroider eyelashes with three black stitches (shorter for a boy, longer for a girl);
- draw the mouth with acrylic paints or embroider with red floss threads;
- stick a needle with a threaded bead in the place for the eye, and then bring it out from the inside to the corner of the mouth and pull it a little. You have created an eye and a cheek at the same time (repeat the manipulation on the second half of the workpiece’s face);
- cut off the stocking tail from the top of the baby doll, and sew a wig from yarn instead;
Cloth
Select textiles for the stocking doll's outfit at your discretion.
Important! Due to the special structure of the tumbler, its body is first dressed, and the sleeves put on the handles are sewn separately.
The step-by-step photo instructions show the execution of the toy in stages.
Nylon gnome
For the New Year holidays, you can sew wonderful gnomes that will decorate your apartment and protect the comfort of your home. The technology for making such gnomes is very similar to the technology for creating a pop doll.
Step 1. Sew the body and head, filling the nylon with small padding polyester balls. The nose and mouth are made according to the same principle as the butt. Only the body of the gnome needs to be sewn without legs.
Body and head of a gnome
Step 2. Sew a holiday shirt from any fabric you have on hand. In this case, fleece is used.
Shirt for a gnome doll
Step 3 . Sew the mittens to the made shirt and fill them together with the sleeves with padding polyester.
Sleeve with mitten filled with padding polyester
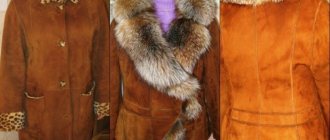
Step 4. Finish the New Year's shirt with fur.
The doll's shirt needs to be trimmed with fur
Step 5. Sew small pants for the gnome doll, preferably from red or blue fabric.
Blue pants for a gnome doll
Step 6. Roll out two small rolls of padding polyester.
Padded padding roller
Step 7: Roll them around a small stick to make a tight roll.
Sintepon is wound on a stick
Step 8. Place the prepared rollers into your panties - one in each pant leg.
The bolsters fit into pants
Step 9 . Put the finished shirt on the body of the future gnome.
The shirt is worn over the body
Step 10. Carefully sew the shirt collar to the doll's head to secure it in place.
The doll's head is sewn on
Step 11 . This is roughly what a half-finished doll should look like. This means that work is in full swing.
The gnome is half ready
Step 12. Put on your pants and carefully sew them to the body.
The pants are sewn to the body Another photo of the process
Step 13: Attach the hair. It is advisable to use a small strip of fur for this.
Next the hair is sewn on
Step 14 . Use PVA glue to fix the hair if necessary.
Hair is securely fixed
Step 15 . It is not necessary to cover the gnome's entire head with hair, since the top of the head will be covered by a hat.
The top of the head can be left hairless
Step 16. Start making the doll's feet. To do this, cut two small circles from nylon.
Nylon circle for doll feet
Step 17. Make small bags from nylon and fill them with padding polyester.
This bag needs to be filled with padding polyester.
Step 18. Sew the finished foot to the trouser leg so that the padding polyester is not visible.
The foot is sewn to the trouser leg
Step 19. This is what the finished leg of a nylon gnome should look like.
Finished leg of a nylon gnome
Step 20 . Do the same procedure with the second leg. Make sure that the legs are the same size, otherwise it will greatly spoil the appearance of the toy.
Make the second leg in the same way. Two legs of the future doll
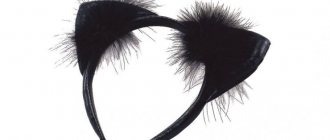
Step 21 . After the gnome is shod and dressed, sew on the hat. Its color should be the same as the color of the trousers.
At the end the cap is sewn on
Step 22 . The little New Year's nylon gnome is ready! You can make several of these toys and decorate your entire apartment with them.
New Year's gnomes made from tights
DIY flower pots
In our new article, we share the best flower pot ideas! The most original and beautiful options, step-by-step manufacturing instructions, useful tips - all this can be found in this article!
Happy snail
Charming characters of the animal world will make not only children, but also adults smile.
For example, a snail made of synthetic materials can be planted in a pot next to a flower, or attached to a wooden stand. For work you will need: flesh-colored nylon, stuffing (sintepon, synthetic padding), textiles for the sink (print - to taste), eyes, yarn or feather boa for a wig, felt or foamiran for a cap, wooden stand (can be bought at a craft store) , acrylic paints, glue gun, thread.
Note!
How to make flowers from cold porcelain: chic floristry and DIY crafts for the New Year step by step
How to make cold porcelain from potato, corn starch, liquid, without soda. Recipes and cooking methods
How to properly make a birdhouse with your own hands from scrap materials: we create an original birdhouse according to sketches
- tightly stuff a piece of tights or a sock with fiber;
- Fill the folds with stitching in the places where the body bends;
- glue the eyes and wig, draw a smile, eyebrows and cheeks with acrylic;
- make a cone out of fabric or foamiran and attach the cap to the wig;
- transfer the bagel pattern (40X4cm) onto the fabric with a 1.5 cm seam allowance, and then cut out and sew the part from the wrong side;
- Turn it right side out and not very tightly (to roll the bagel for the house), but fill it evenly with padding polyester. Secure the bending points of the spiral with thread;
- connect the shell to the body using glue or sew with invisible stitches;
- Place the snail on the stand using a glue gun.
We sew with children: New toys from old socks to bookmarks 50
15. Pet toy
The sock is a mysterious and little-studied subject. For some, it is just a wardrobe detail, but for others, it is a whole testing ground for the implementation of interesting ideas and unusual handicrafts. A sock is also an excellent material for making toys with your own hands. The main thing in this matter is imagination! After all, when we start sewing a toy, we don’t yet know exactly what will happen.
To create unique toys from socks with your own hands, both plain and colored socks are suitable. They can be of various sizes and textures. For example, children's white socks can be turned into cute snowmen. Nylon socks filled with padding polyester or plain cotton wool can make cute baby dolls.
To create such toys, you need to prepare nylon socks, buttons or special parts for the eyes, and glue. In order for the doll to have clothes, hair, and a hat, scraps of fabric or colored socks are suitable. It is better to take threads for sewing parts to match the product.
A “sock snake” that can be placed at the base of a door or window will help keep out drafts. Fill a pair of socks with stuffing (such as old beans or other socks) to prevent air leakage. 10. Make knee pads for your child
You can use old socks to make miniature knee pads for babies who are starting to crawl. take a pair of old socks and cut off the toe. Take the bra pads and attach them to the inside of your socks. Such knee pads will protect the child from bumps and scratches when crawling, and in cold weather they can warm the legs. 14. Cup cover
A sock can protect your hands when holding a hot mug or cold jar. A cup cover can be made in a few minutes by cutting off part of the sock above the heel and finishing the edge with glue or thread.
- 1 pair of socks, preferably terry;
- threads;
- needle;
- scissors;
- padding polyester;
- ready-made eyes.
Turn the socks inside out. We make markings: one sock is the monkey’s body, its upper part is the head; the lower part, where the elastic band is, is the hind legs, the rest, together with the heel, is the torso. We mark the second sock: the upper part is the muzzle, the elastic band is the paws, from the rest we cut out two ears and a tail.
We begin to sew the pattern from the first sock: we sew the paws without fastening the lower part of the body, turn it inside out and stuff our toy. We sew the blanks from the second sock - paws, tail and ears, stuff them and attach them to the body with hidden stitches. Then carefully baste the muzzle, filling it in the same way. We attach the eyes, the monkey is ready.
Funny and funny toys made from socks. Make your kids happy
Cheerful clown
For work you will need: a white or silver Christmas tree ball, pieces of hosiery in red and flesh colors, padding polyester, acrylic paints, satin and metallized ribbons 1.5-2 cm wide, eyes (paper, printed on a printer, or plastic), foamiran, orange yarn or sisal.
- Roll a small dense ball of padding polyester and cover it with red nylon. Glue it in the center of the ball. The clown nose is ready;
- For the ears, take two pieces of rectangular padding polyester and wrap them in flesh-colored nylon. Sew the edges and trim any uneven edges with scissors. Connect the corners with thread and tighten. Use a glue gun to attach the ears on the sides of the workpiece;
- Glue the clown's eyes in the marked places. Use acrylic to draw eyelashes, eyebrows, cheeks and mouth. The paint can be replaced with felt parts of different colors;
- “put on” a red wig made of yarn, sisal or a feather boa on the top of the ball;
- A rectangle is cut out of a piece of foamiran and glued together in the form of a cone. Attach it to the wig. You can glue a pompom felted from wool to the top, and decorate the base with a ribbon with a bow. This is a cap for a toy;
- To hang the decoration on the Christmas tree, glue a ribbon loop to the back of the cap.
And the symbol of 2021, the “bull,” after hanging on the Christmas tree, can serve as a talisman even after the New Year, if the toy is glued to a magnet and placed on the refrigerator.
Complex crafts
Wonderful dog made from two socks
This craft will be a little more complicated, but no less attractive. To start the creative process, you need to prepare 2 socks, padding polyester, a needle and thread, rags and ribbons, scissors and a felt-tip pen.
We'll start the process by creating the torso, the front of the sock will become the head, and the heel will be the butt. From the remaining sock we will make legs. On the toe, clearly draw the contours of the figure with a felt-tip pen and stitch along them, remove the rest with scissors. In order to remain able to turn the sock inside out, you should leave a hole where the seam is and sew it up after filling.
There is also a sock, from which we prepare the paws, muzzle, ears and tail. Any stick will help you fill small details. Now we assemble a cute dog from the parts, don’t forget to sew on the eyes and nose. All that remains is to cut out the hanging ears, you can add a lining, and at the end we sew them diagonally to the head. You can decorate the toy decoratively, this is at the discretion of everyone.
Theater hand puppet
This doll will help organize a puppet theater for children. All that remains is to come up with a plot story and scenery.
We separate the bun from the head with an elastic band, stuff it with padding polyester, and then put a hat made of a colored sock on the head. We also form the head with padding polyester and create eyes and a nose for the doll. Let's make a mouth out of the heel, fold an oval piece of felt in half and glue it into the dented heel.
This way you can create any fairy tale and cartoon characters.
DIY singing caterpillar
To create this wonderful toy we will need:
- terry bright socks;
- felt and foam rubber;
- cardboard;
- foam ball;
- tinsel and eyes.
First, let's design the caterpillar's mouth, cut out a template from cardboard, fold it in half and glue it to the inside-out front of the sock. We cut out two semicircles from foam rubber and apply glue to the cardboard. Now we move on to the external design of the cheerful caterpillar, using red felt cut out from a template to create a mouth. We make the eye from a foam ball, divided in half, and we cut off the top of it. We can also use tinsel to make a super fluffy hairstyle.
Pops
Dolls made from tights received this comic name because of the outstanding size of their butt and face. The trick to the craft technique is that the feet, butt, hands and head are attached on top of the clothes.
There can never be too many bobbleheads
So, let's move on to practice.
- We take the selected nylon sock and stuff it tightly with filler (it is better to put two pieces of padding polyester - first a large one, and a smaller one on top). If you want the baby doll to have no legs but be able to stand, insert a circle cut out of cardboard or other durable material into the bottom of the sock.
- Tie the sock in a knot at the top. You've got a kind of carcass.
- Now you need to mark a line where the neck of the toy will go. To do this, go over it with a basting stitch, and then pull the thread and wrap it around a few more times.
- You can make a baby doll with legs in the same way. We sew a couple of short stitches diagonally on both sides of the carcass and tighten it. We fix it for strength.
- Next we make the doll’s navel. To make it, we insert a needle into the seam of the toe so that it appears at the location of the future navel, after that we grab some nylon threads and again pierce the baby doll with a needle, securing it along the seam of the toe.
- The buttocks can be done immediately after the navel, without even tearing off the thread. They are made in the same way, only if when tightening the navel the thread was inside the doll, then when making the butt it should be outside.
- To make ears, tie the thread in two places crosswise.
- The nose can be made like the legs, just take a smaller diameter. Or just outline the contours with thread and then pull it off.
- It is better to embroider the baby's eyebrows and eyelashes with floss thread (or woolen thread).
- Some craftsmen demonstrate in their master classes how to sew eyes and sew cheeks at the same time. To do this, you need to make several stitches from the corner of the mouth to the baby doll's eye and immediately sew on a bead or button. Repeat the same on the other side, moving without tearing off the thread.
- For the doll's mouth you will need a red thread. To embroider it, insert the needle into the very top of the head and pull it out where the corner of the mouth should begin.
- Cut the elastic that you tied into a knot at the top of the head and cut it into two parts - these will be the arms of your baby doll. You just need to fill them with filler and sew them to the doll’s body.
- Hair can be made from colored nylon socks or tights, threads, knitting yarn, artificial threads and any other materials. Give the baby doll the desired hairstyle, for example, for a girl baby doll curls or braids are suitable, and for a boy you can simply make bangs from an elastic band and put a hat on him.
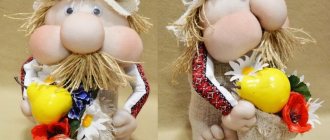
- Next comes the turn of clothes for the doll - it all depends on your imagination. You can dress your little one in very children's clothes, like rompers, panties with a T-shirt or a bodysuit, or you can sew a chic suit or dress.
You can also find a slightly different manufacturing option. The difference is to first stuff the two corners of the sock with stuffing, tie them tightly and cut them off. You should end up with two balls - these will be the handles of the baby doll, and then the elastic band will remain for modeling the hairstyle. You can also make a very large sculpted nose by embroidering the nostrils and shaping the wings. If you want to use artificial eyes, it is better to glue them with hot glue.
Having mastered the simple technique of making stocking dolls, you can try yourself in creating a frame baby doll. To do this, at the beginning of the work you will need to wrap the cut-off lower part of a plastic bottle with padding polyester, pull a nylon sock over it all and model the face directly “live”, adding filler if necessary. The handles will need to be made of wire.
Popik Mashenka
For work you will need: nylon, padding polyester (holofiber), yarn, eyes, cotton fabric in cheerful colors (to taste), satin ribbons.
Note!
How to make candles with your own hands: instructions for making wax, gel, scented, homemade decorative candles with a wick
- What you can make from foamiran with your own hands: we create flowers, Christmas tree decorations, snowflakes, three-dimensional paintings (photo + video)
- DIY glass crafts: what can be made from glass bottles, liquid glass, broken glass (photo + video)
Important! For realism, the face of a doll made of nylon tights should be flesh-colored. And “makeup” done with light indelible paints (for example, acrylic for batik) will breathe “life” into it.
To learn how to sew butt dolls from tights with your own hands, watch the video.
Socks are an excellent material for needlework
Sometimes a completely unexpected thing can become a material for work - such a nondescript piece of clothing, like a sock, in the hands of a master suddenly turns into a cute doll, a wide variety of animals or gorgeous soft baby dolls for babies.
All these rag men or toys are valuable not only because you can easily and quickly make them with your own hands, but also because you have the opportunity to endow each product with a certain disposition and character, control the facial expressions of the dolls, giving their faces a wide variety of expressions and features . In the master classes you can see how plastic and realistic these baby dolls and other sock crafts are.
Durable nylon socks or tights are suitable for making products. Choose a material with a complex weave so that arrows do not suddenly appear on it. As for color, master classes often suggest using nude, white or light pink, but if you plan to make baby dolls from nylon socks in the form of negritos or mulattoes, then take brown or black material.
Frame dolls made of nylon and padding polyester
“Aerobatics” in the manufacture of interior toys are frame models. They are more endowed with human traits than others. Therefore, when constructing a figure, it is necessary to maintain proportions in accordance with the anthropometric data of the person. Only for the craft, the measure of measurement is her head: the height of the model is equal to the size of 7 heads, where the size of the neck and torso is 3 heads, the legs from hip to knee are 1 head, and 2 heads are the legs from the knee.
Therefore, it is better to start working with the head and hands, and then calculate the size of the “skeleton”.
The frame of a nylon doll can be made of wood, wire, or even from an empty plastic bottle (it all depends on the master’s idea).
The easiest option is to use a plastic bottle under the base. To do this, you need to insert a container wrapped in padding polyester into the body of the craft.
You can complicate the task a little and make the doll's hands on a wire base. This will allow the toy to take different poses and fix them.
When making a wire base, as a rule, two types of metal are used. Thick wire will support the body, while thin wire will support the limbs.
The video at the end of the article “a doll made from a stocking on a wire frame” will help you master the simple technique of its execution.
In the Internet era, it is very easy for craftswomen to share experiences and exchange ideas. Stocking dolls have recently occupied their niche in Hand maid, so more and more original techniques for working with textile toys appear in new entries on the “Country of Masters” website.
Dolls made from nylon tights perform a decorative function. Using pleats from padding polyester, you can “sculpt” any shape and image. Enlarge or reduce facial features and body parts of the toy. Artificially age a character (Baba Yaga, gnomes), or emphasize some typical features (grotesque nose or butt). And the available materials and ease of execution allow even a child to complete the craft.
MK - DIY policeman doll
The method of sewing such a toy is in many ways similar to making a baby doll. The only difference is that you must first make the frame. Thanks to this, the policeman will become mobile and will be much more interesting to play with.
- Make a wire frame, the length of which should be about thirty centimeters.
- Separately wrap your hands with electrical tape.
- For shoes, small loops are twisted on the legs.
- After that, make the head and draw the face.
- Using yarn, sew on hair.
- Make fingers from small pieces of wire and immediately wrap them with padding polyester.
- Sew fingers and even nails.
- Screw the finished palms to the main frame.
- Wrap the entire structure with filler and place it in tights.
- Sew on the head.
The method of sewing such a toy is in many ways similar to making a baby doll.
Design and sew a uniform for a police officer.
Dolls made from nylon tights - photo selection
Please repost
1+