Elegant headdress - turban
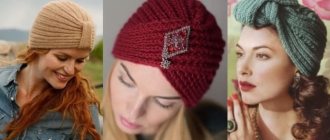
If you haven’t had time to do a beautiful hairstyle, but you want to look fashionable and elegant, put an elegant turban on your head.
The turban became fashionable among Europeans back in the 40s and remains very popular to this day. This headdress is loved because it makes it possible to create a feminine, charming image.
An oriental outfit looks equally beautiful with a coat or with long chiffon dresses or pantsuits made of shiny or matte silk.
At the most difficult moment, a bandage made from a scarf will help out.
You can simply wrap the scarf around your head and then pin it with a brooch. But this is not a reliable structure; it is better to sew it yourself.
To sew a turban, all you need is a little time and a piece of plastic fabric.
The craftswomen learned how to sew a fashion accessory from a T-shirt, which was quite boring.
- Take a piece of fabric and fold it in half to make a rectangle measuring 60 by 30 cm.
- Round the edges at the top. If this is a piece from a T-shirt, then the hemmed edge will become the bottom of the product!
- Baste face inward, leaving the bottom edge.
- Machine sew the top and sides of the future product.
- Without removing the product from under the machine foot, pull the thread slightly, making the top and side sections gathered.
- Turn the product inside out, put it on a mannequin, if there is none, then on a three-liter jar.
- Grab the fabric from both sides, connect in the middle.
- Seal with stitches.
- Next, grab the material below to create a fold, and also secure with stitches.
- Make another group of folds and secure with thread.
- Cut off the remaining fabric, leaving 2 cm for the hem.
- Wrap the “tail” in folds and sew it onto your hands.
- Turn it inside out and place it over the can to create a gather at the back of the head.
- Try on the finished turban!
You can also watch a video on how to sew a turban from knitwear:
The choice of fabric depending on the purpose of the accessory
Traditionally, a turban is not a ready-made headdress, but a piece of material wrapped in a special way. Initially, it was worn on a hat or scarf, which prevented slipping and made it possible to obtain more volume. Modern turbans are different; when they are made, the fabric is not twisted, but stitched.
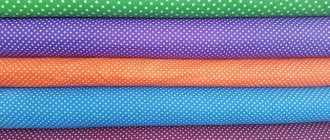
In order for the accessory to turn out to be of high quality, you need not only to know how to sew a turban with your own hands and find a pattern, but also to decide on the fabric. Most often, natural material is taken as the basis, for example, silk or brocade. But in fact, there are no strict restrictions in the selection of fabric - you can use any one you like. The only requirement is that it must be flexible and drape well.
You can make an original turban with your own hands from the following materials:
- chiffon or silk - used to create a stylish and elegant accessory;
- viscose, cotton - suitable for sewing a summer hair turban, which you can wear to the beach and for walks;
- cashmere or velvet - used for the manufacture of autumn and spring models;
- brocade - used to create an elegant, catchy turban.
If the headdress is made for winter, it can be made from natural or artificial short-haired fur or wool blend fabric. It is strictly not recommended to sew such a turban from fabrics that are too dense or rough, since this will cause the product to lose its plasticity. Knitwear is considered a universal option. It can be used to make both light and warm turbans. Also, knitwear is ideal for sewing a children's masquerade turban. But if this particular material is chosen, it must be of high quality.
The most fashionable colors of turbans for women are wine, powder, black, sand, gray.
Velvet
Brocade
Cotton
Chiffon
Knitted turban with brooch
We make a turban from knitwear. Choose a chunky knit for a truly warm beanie. This season, the most fashionable colors will be blue, chocolate, rich brown and gray.
You will need:
- knitted fabric, 20-25 cm wide;
- threads, needle, brooch for decoration.
The pattern is the simplest, as in the first case - a rectangle. Also fold the fabric in half, sew the side seams, and decorate the center of the product with a beautiful brooch. Next, proceed according to the scheme described above.
Fashionable models and colors for the 2018-2019 season
In the new season, two styles of turbans have become favorites:
Oriental flavor. Abundant decoration, oriental patterns. Such turbans are often tied immediately before going out and are not sewn together in advance.
Bohemian chic. Simple cut, minimum horizontal lines, laconic finishing, combination of fabric and fur. In this case, the models are stitched together in advance.
Stylizations like a turban or turban are common; ethnic motifs are in trend.
Popular colors of the season:
- Wine.
- Black.
- Powdery shades of pink.
- Bottle glass color.
- Milky shade of white.
- From beige to sand.
- All shades of gray.
Is there a difference between a turban and a turban?
A turban is often called a turban.
A turban is also a headdress made from a sheet of fabric that is wrapped around the head several times. Such accessories are worn by the peoples of India, North Africa, and Asia.
To make a turban, they take 6-8 meters of fabric, sometimes even 20 meters of brocade, velvet, and cashmere. Mandatory decoration are brooches and strings of pearls.
In India, the cloth was soaked in water and then wrapped around the head to keep it cool all day. This is how they escaped the scorching sun.
Today you can see girls wearing a turban, hiding their heads from the sun or walking around the city in it.
Some fashionistas wrap pieces of fabric in different colors to create a fashionable look.
Indian men still decorate their heads with this intricate design.
A turban is much smaller than a turban. Initially, only the stronger half wore it, then the girls adapted it to suit themselves.
There are several ways to create this accessory. Each eastern people has its own way of tying this hat.
How to wrap a turban:
- Take a long strip of material.
- Take one end in your teeth (so that your hands are free), stretch the other diagonally.
- Wrap it around your head at an angle, gradually covering open areas.
- Continue this process until a small tip remains of the fabric.
- Tuck it under the fabric and secure with a brooch.
The next method is from a scarf.
- Take a long scarf and cover your head.
- Throw one end over the other at the back of your head.
- At the front, tie them on the forehead with a strong knot.
- Next, wrap one end into a loop and pass through a loose knot.
- Thread the other end through the loop, then do not pull too hard on the ends of the scarf.
- Tuck the ends under the structure itself.
- Instead of a knot, you can cross the ends of the scarf on your forehead, make a loop, and pass the other end of the scarf through it to form a second loop.
- Tighten the loops tightly again to prevent the structure from falling apart.
- Hide the ends.
How to choose a model based on face type
The next step after determining the type of fabric for sewing is choosing the appropriate style. Each type is suitable for a specific face shape:
- Those with oval-shaped faces are the luckiest. Any turban will suit them, except very high ones, which visually lengthen the face even more.
- For girls with elongated facial features, low-cut dresses with horizontal folds and seams are ideal. Don't even try to wear bulky items.
- A turban with a raised style will complement the look of someone with a round face.
- To soften the features of a square face, it is best to choose an accessory with light folds and draperies and a minimum amount of jewelry.
- For girls with a triangular-shaped face, it would be best to wear a voluminous headdress with a lot of jewelry.
What will you need at work?
Before you make a turban, you should choose a suitable model. Thanks to this, the work will be completed as quickly as possible and will not cause even the slightest difficulties. Such products may differ in the direction of the folds, volume, as well as height and even shape. A suitable model is selected taking into account the shape of the face. In this case, you need to adhere to the following recommendations:
- elongated. It is recommended to give preference to low versions of the turban with a variety of decor and folds located horizontally;
- round. Tall models are considered the best option;
- square. The choice should be made on products with light folds and abundant drapery;
- triangular. An excellent solution would be a heart-shaped turban with rather complex decorative elements;
- oval. Almost all turban models are suitable for owners of this face shape. You should only refuse excessively high options.
In addition, the work will require diagrams. Ideally, they should be printed on paper. This will make sewing much easier. In addition, the following will be useful in your work:
- fishing line;
- threads of a suitable shade;
- pins;
- scissors;
- sewing machine.
Info! Even without sewing experience, creating such a headdress will take a maximum of a couple of hours. It is best for beginning needlewomen to create a turban with their own hands from knitted fabric. It can be draped and stitched with ease. Therefore, it will be possible to complete the work even without any special knowledge and skills.
Taking measurements and creating a pattern
At the initial stage of work, measurements should be taken. Otherwise, the turban may not fit properly on the head, will not retain its shape well, or will fall off. You only need two values. You need to determine the depth of the future accessory and head circumference.
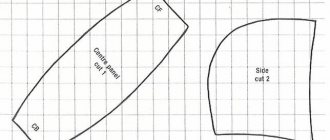
Measurements are taken by using a centimeter tape. After obtaining the desired results from the pattern, a pattern is created. It is extremely important to take into account that depending on the chosen scheme, the complexity of the work may vary significantly. Beginning needlewomen should not immediately take on too complicated patterns. It is better to start with simple diagrams in the form of a regular rectangle.
Material
A modern women's turban is made of fabric or yarn. As for fabric options, the favorites are models made from natural raw materials - cotton and knitwear. Soft and light cotton models are ideal for summer and early autumn, while knitted ones are denser and warmer.
Any woman can make a turban from a cotton or knitted scarf. It is easier to do this from a material with a light texture. You need to cover your head with a scarf, placing its ends at the back. The ends are tied into a knot, twisted separately and fixed in front above the forehead. All that remains is to design a beautiful knot; you can decorate it with a brooch or beads.
A bright scarf is also suitable for making a turban, but not square, but rectangular in shape. As an original option, you can combine two scarves of different colors.
Knitted turban-shaped hats are distinguished by a variety of yarns. Wool products are the most in demand. The option made from fluffy mohair looks stylish and romantic. Acrylic additives are often included in woolen items; there are also completely synthetic options (polyester), which look, in principle, no less neat and beautiful. In addition, things with the addition of synthetics are easy to care for and more durable.
In addition, the yarn can have an original color scheme - melange, gradient or sectional. Also, such hats are often decorated with a brooch or pebble in place of the knot. The knot itself, made with original knitting, can act as a decorative element.
As for the pattern of knitted turban hats, the following techniques are popular: regular stockinette stitch, pearl pattern (or “rice”), English, French, relief rib, 2x2 voluminous rib. Such hats are knitted with embossed braids and voluminous braiding. The elements of the openwork pattern look elegant.
By the way, if you knit a turban yourself from thin yarn, you also need to make an additional base from larger threads so that the hat holds its shape (make it in garter stitch).
Useful tips
Despite the variety of ways to tie a turban and stylistic solutions, some tips are universal for every fashionista:
- a turban draws attention to the face, you should take care to look beautiful;
- so that out of habit your hair does not interfere with tying a turban, gather it in a bun or fasten it with a fixing agent;
- When using an additional bandage, make sure that it does not cover your ears;
- the cushion lining will help make the turban quite voluminous even with the shortest haircut;
- the image will seem incomplete without fashionable accessories;
- pulling the fabric too tight can cause headaches, so don't overdo it when tying the turban.
Simple version of the product
It is recommended to iron the fabric before cutting. If the knitwear has a pattern, it is necessary to position the pattern so that the objects are placed centrally or symmetrically around the center line.
A knitted hat for a child, the pattern of which can be created in just 10 minutes, can be single-layered or with a lining.
First you need to decide on the size of the hat: measure the volume of your head and choose the desired height of the product.
Next, to create a pattern you need:
- Divide the head circumference measurement by 4 and make a deduction for the stretch of the product (for dense fabrics, subtract 0.5 cm, for thinner and more elastic ones - 1 cm).
- On a sheet of paper, construct a rectangle with the following parameters: the width is equal to a quarter of the circumference of the head, taking into account the necessary deductions, the length is the height of the hat with an increase of 5 cm for the lapel (optional).
- On the left side, move 2.5 cm from the corner to the left, and down ¼ of the height of the cap. Connect the dots to get a dart.
- Round the upper left corner of the rectangle.
- The resulting part is ¼ of the cap.
Knitted hat for a child, a simple pattern.
Preparing fabric for cutting
The length of the fabric cut for the hat depends on how it will be cut:
Sequencing
The main characteristic of knitted fabric is its elasticity. It can stretch in one direction or in two. When cutting products, you should pay attention to the main direction of stretching and place the pattern strictly perpendicular to the direction of the stretching line.
