Overlocked loops
This type of loop can be done by hand. Or you can do it on a sewing machine by selecting a special mode for this. The point of overcasting is to prevent the fabric from fraying on the button hole. This loop can be made either in the same color as the product or in contrast. It depends on the idea of the item of clothing being made. So, how to make your own buttonhole by hand?
First, you need to mark the locations of the cuts with chalk or a special marker, which subsequently completely disappears. You need to draw on the front side of the future product. You need to start and finish sewing a loop with a thread using bartacks. They can be clearly seen in the next picture.
You need to make fastenings in this way: several even stitches forward, then back and forward again.
It is necessary to sheathe the place of the product where the slot will subsequently be made not tightly, leaving a small gap. So the thread with which we sew the loop will remain intact. You need to overcast one side first, and then the other.
But you won’t be able to make a perfectly even overcast buttonhole by hand. Therefore, the manual method is relevant only for those needlewomen who do not have sewing machines. However, given the presence of this miracle of technology, which facilitates tailoring work, the process will not be fundamentally different. The loops will only become smoother and neater. But still, we’ll take a closer look at how to make buttonholes with your own hands using a sewing machine.
First, again, we mark everything with chalk (it is important that it is always sharp) or a marker on the front side of the clothing, linen, etc., based on the size of the button. The second is to install a special foot on the machine, which is specifically designed for sewing buttonholes. It looks something like the one shown below.
Next, we select and set the desired mode, not forgetting to first select the type of loop we need.
After stitching, carefully cut holes between the stitches with a thin blade. That's it, the stitched loop is ready.
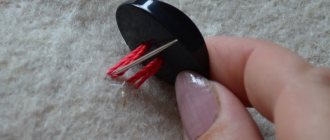
How to secure threads for weaving baubles
An important point that you need to pay attention to before starting work is securing the threads. If this is not done, the weaving process will be seriously slowed down: the threads will fall apart, the knots will move out, and the fabric, accordingly, will be crooked and of poor quality.
There are fastening methods that are suitable for weaving at home or while traveling. They look like this:
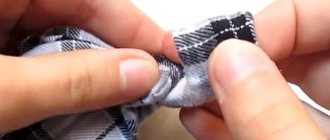
Distribute the threads on a flat surface and secure with tape, leaving a few centimeters of free edge. If they are too slippery, you can tie a knot on the free part: this way the bun will definitely stay in place.
If you don’t want to tie a knot, you can do without it: throw the free edge of the threads through a thick notebook or smooth board of a suitable size, and secure them with a regular office clip.
A slightly labor-intensive, but proven method: each thread that will be used in the pattern should be tied around a regular pin. But the pin can be attached anywhere: to a car seat, to jeans, a tablecloth or any other surface covered in fabric. This is an ideal way for people who prefer not to waste time on the road.
Another way of fastening is to tie the threads into a bundle and hook it with a pin to the knot.
All that remains is to choose the appropriate option, and you can start weaving a bauble from threads.
Loops made from tucked cord
That's how graceful and airy they look.
How to make buttonholes by hand? This is not very difficult, and even not the most experienced seamstress can do it.
To make a roll (this is the second name for this loop), you need to cut a strip of fabric on the bias (5 degrees), the width of which will be 3 cm. The length depends on the intended size. The loop should be sewn with stitches of approximately 1.5 mm, no more. Large stitches will make it difficult to turn the roll out later. The strip should look like a funnel: at first a little narrower, and then wider. After the future loop is stitched, the excess fabric along the seam must be carefully cut off. This will make it easy to turn the steering wheel and it will remain level.
You can turn the loop out using a needle, hooking it onto the remaining thread and pushing it inside with the blunt end. Use a thimble, it will protect your fingers from injury.
After the cord is ready, it needs to be ironed by pinning one end to the ironing board. The roll does not need to be ironed, but only slightly ironed, holding the iron against its weight, because the product should remain round and not become flat.
Now the loop from the tucked cord can be sewn to our product.
Making curtains
How to make eyelets for curtains by hand, from threads with a needle, loops for hooks.
How to sew curtains with loops so that the product looks beautiful and serves as a worthy element of the interior? Before starting work, you need to decide what shape to make the eyelets for the curtains:
- simple rectangular
- narrowed at the junction with the curtain
- fashion items (for example, in the form of a tie or bow)
- stitched parts or models with fasteners.
Metering
Curtains with loops are draped in folds, so the total width of the two panels should be 1.5 or 2 times wider than the window opening. In order for the curtain to hang 3-5 cm above the window frame, the cornice should be mounted at a distance from the top line of the curtain by the planned length of the curtain or use a ceiling mounting option. The space between the canvas and the cornice will be occupied by hanging elements. To sew, you will need to know several quantities:
- length from the cornice to the top of the canvas
- curtain length
- width of one canvas
- distance between stalemates
- width of one hinged part
- the number of canopies (the more there are, the smaller the folds of the curtains will be).
Uncover
Sewing curtains with hinges with your own hands begins with cutting out the parts. The curtain itself is a piece of fabric of a certain length, which is carefully cut from the canvas. Hanging elements may have a curly shape, so a pattern will be required for the selected model. Even rectangular patches are cut out according to a ready-made template. Cutting different models requires an individual approach.
Rectangular parts are cut out from fabric folded along the grain. For a trapezoid model, the fabric is folded across the grain thread. Each detail of the tie is cut out separately.
Making loops
How to make loops on curtains correctly?
- The fabric for the rectangular piece is folded in half, right side inward.
- Sew the seams, leaving one narrow edge of the part unstitched.
- Turn the product right side out and iron it thoroughly.
- Fold the unembedded fabric inside the part and stitch it.
- If desired, the outline of the pata is sewn with a finishing seam.
Similarly, they make curtain loops with their own hands with a configuration in the form of a bow, tie or other shape. The parts are folded right sides to each other, stitched, etc.
Sewing on loops
To connect the patties and the curtain fabric together, several methods are used:
- You can sew a curtain by sewing a double-folded loop on the wrong side.
- Make a loop from one edge of the hanging element, sew the second edge from the inside of the curtain. Depending on the design decision, the button to which the second edge of the pata will be fastened is sewn either from the face or from the back.
- Instead of a button, textile adhesive tape is successfully used.
The increasingly popular method of hanging curtains is used in any residential premises. These can be simple curtains for the kitchen with hinges or luxurious products for the living room or bedroom.
To make curtains with hinges with your own hands, you will need a little patience and accuracy. The emphasis is on making loops - the main decorative element of the curtains.
Source
Loops from a straight strip of fabric
Let's look at the instructions on how to make buttonholes by hand.
For this loop, a strip 3.5 mm wide is cut out, and its length will be 4 cm plus two button diameters. This strip is folded in half inward, inside out, and then the folded edges are sewn together. You need to step back 1 mm from the edge. Next, fold the strip in half, but crosswise, forming a triangle on the fold, and run a transverse stitch along it. We bend the ends. The loop can now be attached to the fabric. We equalize the ends. We attach it to the front side at a distance of 4–6 mm from the cut of the item. It is possible to finish the edges of this fastener by hemming or hemming.
Sewing loops
How to make a rug from nylon tights with your own hands
Let's move on to the process of sewing loops. Simple curtain hinges are the most practical. You need to make rectangular marks on the fabric for the buttonholes (chosen width and length). Having finished marking, cut out a rectangle. And so we repeat the procedure according to the number of future loops. Then we move on to processing the loops. To do this, you need to fold the rectangle so that the front side is on the inside. Use a machine to sew the edges of the rectangle using a secure stitch. The distance from the edge of the rectangle should be 7 mm. Using this method we sew all the rectangles together. After completing this processing, turn the rectangles right side out. And steam it with an iron to obtain flat and even pieces. We process the remaining edges. We connect the finished strips with a blanket stitch or a regular sewing stitch. The loops are ready.
You can see an approximate loop diagram in the photo.
Sewing curtain loops
Stitching loops
These loops are difficult to make. But there is a little trick that will make the tailor's job easier. To ensure that the fabric does not fray and is accurately marked, it is necessary to use masking tape.
How to Make Buttonholes by Hand: Step-by-Step Stitching Instructions:
It should be noted that such loops are used, as a rule, in the process of making thick outer clothing such as a coat.
We learned the basics of how to make buttonholes by hand. But sewing is a creative process. And fantasy occupies not the last place here. It’s especially cool to think and work on how to make the fasteners into a real decoration for the whole thing, and, of course, then wear this original product with pride.
Source
How to make a buttonhole on a sewing machine?
For craftsmen who are comfortable with a sewing machine, we can offer another option - to make a buttonhole with its help. Your task is to process the cut loop. In this case, it is necessary to overcast the edge with a zigzag stitch to the nearest mm. You can also punch a hole on the machine - there is a special function for this. Be careful and always practice on rough fabric to avoid disappointment .
And remember - don't be afraid to do crafts! Almost anyone can do all the loop options! Source
A few words about adjustment
Making a rug from mesh, threads and pompoms
There are a number of models that provide the ability to adjust the position of the door leaf in 3 directions.
Adjustment of hidden hinges of interior doors is carried out using a hex key. The location of the adjusting screws for adjusting the position of the leaf is provided in that part of the mechanism that cuts into the door frame:
- adjustment in the horizontal plane is carried out by a screw located on the surface of the element;
- vertical adjustment is carried out with a screw located vertically;
- To ensure the necessary pressure, the adjustment mechanism is an eccentric.
If we are talking about the position of the blade relative to the box, the available stroke is 1 mm up-down, left-right and is done by turning the screw on both hinges at the same time. The depth of the clamp can be changed by tightening 2 eccentrics with a hexagon.
Source
We sew hinged loops
Today I would like to present a master class “How to make hinged hinges.” Such loops decorate clothes and are more often used in elegant clothes. There are slotted hinges, and there are hinged ones. So today I’ll talk about how to make hinged hinges yourself.
They are also called rulik ones. The rule for making such loops is to cut out a strip of fabric only along the bias thread (that is, at an angle of 45°). This rule applies to fabrics that do not stretch along the lobe thread, do not stretch along the transverse thread, but only stretch along the bias.
But now there are a lot of all kinds of knitted fabrics, fabrics with the addition of elastic threads. Just from such fabrics that stretch both along and across, I can make such loops by cutting out blanks, both along the oblique thread and along the longitudinal thread. They look almost equally beautiful.
So: I take crepe satin fabric
(it doesn’t stretch), I cut out a strip of fabric 2 cm wide, the length required. If you need several loops, then it is better to cut out a longer strip of fabric, sew it, turn it inside out, iron it, and then cut it into the required amount. If I need two loops, then I take a strip 10 cm long and 2 cm wide. We got a little distracted. We take our strip, fold it in half, you can iron it, or you can straight away with the machine.
Closure of the dress with hinged loops and covered buttons
Of course, it is very troublesome to unbutton and fasten so many small buttons, so along with such a fastener, a zipper is often installed in the side seam of the dress.
How to make an even row of loops of the same size? And how to make a thin, round and dense roll? Let's consider one of the methods.
Making rolls
Step 1
We cut out long strips 3 cm wide strictly at 45 degrees to the grain. It is best to do this with a circular knife on a rug with markings.
Step 2
Fold the strip in half lengthwise, facing inward, and sew a fine stitch 3 mm from the fold. The strip should be slightly stretched under the foot. At the beginning of the stitch you need to make a funnel to make it easier to turn out. Trim seam allowances to 6 mm from the stitching.
In order for the roll to be tight, it is necessary that from the fold to the cuts there be three times the width of the roll, no less!
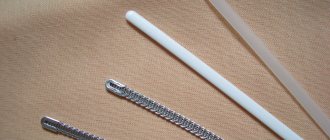
If the fabric is slippery, then you can turn the roll even with a larger allowance width. The ends of the stitch threads are not cut off, but inserted into an embroidery needle and tied well. There are special decker needles for turning, but they are difficult to turn out very thin rolls. They are more suitable for rollers with a width of 5 mm.
The needle is inserted into the funnel with its eye and pulled through the handle. The roll is turned out with tension, like a stocking. The harder it is to turn the steering wheel, the tighter it will be. To make the roll even and round along its entire length, you need to wet it and pull it on the ironing board like a string and let it dry.
Step 4
Cut out a template from paper exactly according to the cut of the part at the fastener with the same allowances. Place the buttons in a row with the desired pitch and mark the loops between them.
Draw a button from the edge of the clasp and draw a line down the center of the button. This will be the edge of the loop. The loop should extend beyond the edge of the fastener by half the diameter of the button. If the roll is rough and not slippery, then you can add another 1 mm beyond this line to make the buttons easier to fasten.
Step 5
Pin the roll exactly according to the markings of the loops onto the paper template using thin silk pins.
Sew the roll onto the paper precisely according to the markings of the edge of the fastener.
Remove the pins and fold back the edge of the paper with an allowance. Check if the loops are straight.
Step 6
Place the template with loops on the front side of the part, align the allowances and stitch along the previously laid stitch along the loops. Tear off the paper; it breaks easily along the line.
Trim the loop allowances along the edge of the piece and, using pressure and steam, iron the loop allowances well to flatten them. This way they will stand out less on the dress.
For the same purpose, so that the loops do not go through, glue the edge of the lining with a strip of non-woven fabric.
Step 7
Sew the lining along the fastening line exactly to the stitching line.
Unscrew the lining and stitch along the seam allowances 1 mm from the seam. This way the loops will be sewn on more firmly and the lining will not roll away.
Turn the lining inside out and iron it along the fastener. The loops are ready.
You can also use a ready-made satin roll if it matches the color and texture of the main fabric.
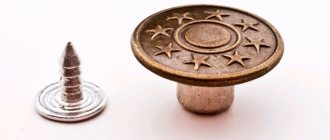
Covered buttons
How to quickly and accurately make tight buttons? Now on sale there are kits for covering buttons of different diameters and from different manufacturers.
The smallest ones are from PRYM - with a diameter of 11 mm. They can be bought at sewing supply stores. There are no instructions in Russian for these sets; there are pictures that can help you figure out the sequence.
Step 1
It is necessary to glue the fabric with thin adhesive or non-woven material! Otherwise, it will crumble along the edges and slide along the metal button.
Step 2
On the box there is a template for the blank that needs to be cut out.
We cut out the required number of circles along it.
Step 3
Along the edge of the template you need to sew a line with a small hand stitch, place a button in the center of the circle and pull the line together. Secure it with several cross stitches.
Step 4
And just now put the button into the white template, put the latch part on top and press it down with the blue template. Click! Ready!
These are the neat little buttons we ended up with.
LiveInternetLiveInternet
—Categories
- infertility treatment in Russia (45)
- help treatment of infertility (44)
- infertility treatment regimens (44)
- hormonal infertility treatment (44)
- infertility treatment St. Petersburg (44)
- treatment of immunological infertility (44)
- treatment of infertility in women with folk remedies (44)
- infertility treatment using IVF method (44)
- infertility treatment in Israel (44)
- treatment of infertility with sage (44)
- gynecologist infertility treatment (44)
- traditional treatment of infertility in women (44)
- city infertility treatment center at the Mariinsky (10)
- tubal infertility treatment (9)
- treatment of male infertility with folk remedies (8)
- diagnosis and treatment of infertility (8)
- infertility treatment saki (8)
- treatment of male infertility reviews (7)
- male infertility folk treatment (7)
- sanatorium infertility treatment reviews (7)
- infertility treatment drugs (7)
- treatment of infertility with herbs (7)
- eco infertility treatment center (7)
- infertility treatment center Mariinskaya hospital (7)
- doctor treating infertility (7)
- Mariinskaya infertility treatment center (7)
- infertility treatment with leeches (7)
- infertility treatment forum (7)
- hospital infertility treatment (7)
- infertility treatment in Moscow (7)
- male infertility causes and treatment (7)
- IVF infertility treatment (7)
- treatment of infertility with folk remedies (7)
- infertility causes treatment (7)
- treatment of female infertility (7)
- infertility treatment methods (7)
- secondary infertility treatment (6)
- city hospital for infertility treatment (6)
- infertility treatment prices (6)
- city infertility treatment center (6)
- traditional treatment of infertility (6)
- fertility clinic (6)
- treatment of infertility in men (6)
- sanatorium infertility treatment (6)
- infertility treatment center (6)
- treatment of infertility in women (6)
- infertility treatment reviews (6)
- treatment of male infertility (6)
- infertility treatment (6)
- city infertility treatment center at Mariinskaya b (0)
- city infertility treatment center at Mariinskaya b (0)
- city infertility treatment center at Mariinskaya b (0)
- city infertility treatment center at Mariinskaya b (0)
- city infertility treatment center at Mariinskaya b (0)
- city infertility treatment center at Mariinskaya b (0)
- city infertility treatment center at Mariinskaya b (0)
- city infertility treatment center at Mariinskaya b (0)
- city infertility treatment center at Mariinskaya b (0)
- city infertility treatment center at Mariinskaya b (0)
- city infertility treatment center at Mariinskaya b (0)
- city infertility treatment center at Mariinskaya b (0)
- city infertility treatment center at Mariinskaya b (0)
- city infertility treatment center at Mariinskaya b (0)
- city infertility treatment center at Mariinskaya b (0)
- city infertility treatment center at Mariinskaya b (0)
- city infertility treatment center at Mariinskaya b (0)
- city infertility treatment center at Mariinskaya b (0)
- city infertility treatment center at Mariinskaya b (0)
- city infertility treatment center at Mariinskaya b (0)
- city infertility treatment center at Mariinskaya b (0)
- city infertility treatment center at Mariinskaya b (0)
- city infertility treatment center at Mariinskaya b (0)
- city infertility treatment center at Mariinskaya b (0)
- city infertility treatment center at Mariinskaya b (0)
- city infertility treatment center at Mariinskaya b (0)
- city infertility treatment center at Mariinskaya b (0)
- city infertility treatment center at Mariinskaya b (0)
- city infertility treatment center at Mariinskaya b (0)
- city infertility treatment center at Mariinskaya b (0)
- city infertility treatment center at Mariinskaya b (0)
- city infertility treatment center at Mariinskaya b (0)
- city infertility treatment center at Mariinskaya b (0)
- city infertility treatment center at Mariinskaya b (0)
- city infertility treatment center at Mariinskaya b (0)
- city infertility treatment center at Mariinskaya b (0)
- city infertility treatment center at Mariinskaya b (0)
- city infertility treatment center at Mariinskaya b (0)
- city infertility treatment center at Mariinskaya b (0)
- city infertility treatment center at Mariinskaya b (0)
- city infertility treatment center at Mariinskaya b (0)
- city infertility treatment center at Mariinskaya b (0)
- city infertility treatment center at Mariinskaya b (0)
- city infertility treatment center at Mariinskaya b (0)
- city infertility treatment center at Mariinskaya b (0)
- city infertility treatment center at Mariinskaya b (0)