A hand-sewn pillow will bring a lot of pleasure both during use and at the work stage. In addition, handmade products are in fashion these days.
A chair cushion is an indispensable thing, especially on a hard chair. It will add comfort and character to the interior.
If you analyze the assortment of chair cushions in the store, the cheapest is a piece of foam rubber covered with fabric.
Therefore, sewing will not take much time. Even a beginner can handle it. Moreover, you can sew using leftover fabric, i.e. the product will be zero waste, which is also welcomed today.
Where to start: design and fabric
Before you start sewing, you should carefully plan what you want to achieve. First of all, what function will the cushion on the chair perform: a decorative option, when beautiful and interesting aesthetics or comfort will be more important.
The choice of material for sewing a seat on a chair is extremely important so that the cushion lasts as long as possible.
Based on this, select fabric and filling.
Also, before starting work, carefully measure the chair to know the dimensions of the future product. Perhaps it will be a round pillow.
Types of chair accessories
Accessories for chairs and stools have been actively used in interior design for several hundred years. Housewives have always sought not only to decorate the room with handmade products, but also to add comfort. Over time, special linings for furniture began to acquire more functional features. Special devices appeared that fixed the furniture accessory and prevented it from slipping out of place. These could be used:
- ties;
- buttons;
- rubber bands.
Such functional elements became an additional decorative accent.
The seats, which were sewn by housewives, can in turn be divided into the following:
- in patchwork style;
- knitted;
- quilted;
- twisted from ropes and plaits;
- mini rugs made of threads and pompoms.
Knitted round crocheted seats used to be often found in apartments, but even now they have not lost their popularity. Made with your own hands, they give the interior a special soulfulness and warmth. There are chair cushions created using patchwork and tapestry techniques; soft seats are often sewn from scraps of fabric or wool pompoms. Beautiful decor in the form of buttons, bows, ribbons, and ribbons complements the hand-made product.
Materials and tools
To sew a pillow you will need:
- Fabric: for top and lining;
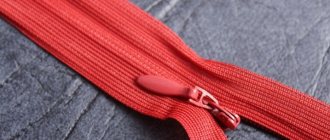
- Zip fastening;
- Foam rubber or other filler;
- Template paper;
- Scissors;
- Sharp knife or stationery knife;
- Pins;
- Chalk or soap.
The material of the top and bottom of the pillow can be of different colors and patterns, for example, the top has a floral pattern and the bottom is plain. You can make a side insert from companion fabric. For example, the main fabric is plain, and the side insert is polka dot.
A necessary item for women in an interesting position
Pregnant women need orthopedic products to improve their well-being and prevent pain. The pillow is an excellent support for the bones.
In addition, the fetus in the womb will always be in the correct position. If you use the products after childbirth, birth wounds will heal quickly.
How to sew a chair cushion with foam ties
It is better to sew pillows on a rectangular chair using foam rubber.
If you use padding polyester or other filler with rounded edges for padding. First, measure the chair. Place a piece of paper on the seat, trace the outline of the seat and cut it out.
Place the resulting template on the foam rubber and cut out the pillow stuffing with a sharp knife.
Cut out the lining pattern. To do this, place the template on a cloth and trace it with chalk or a piece of soap. Don't forget to increase the thickness of the foam. For example, if the foam is 1 centimeter thick, then add 0.5 cm on each side plus a seam allowance of 1 cm.
Cut 2 pieces from the top material.
Cut strips for ties 5-6 centimeters wide and 30-40 cm long, although they may be shorter depending on the chair and the availability of fabric. The main thing is that it is comfortable to tie.
Place the strips right sides along the long edge and sew one long edge and one short edge. Trim the seam at the corners and turn the strips inside out. Sew the other end.
Place the cut out pieces of the top right sides together. Step back 5 cm from the edge and pin the ties: one on each side of the bottom and one on the top of the pillow.
Pin or baste with thread. Sew by machine, leaving 15-18 cm unsewn to insert foam rubber.
Fold the corners of the pillowcase and measure 1 cm from the corner and stitch.
Cut off excess and turn inside out. Insert foam rubber.
Fold the unstitched edges inward. Sew by machine.
The pillow is ready.
Pattern
Making a pattern is very simple. To calculate the size of the fabric, measure the diameter of the chair for which you are going to sew a pillow. When you fill it, the size will decrease slightly, so the material needs to be calculated with a margin. For the volume of the product, you need to add 2.5 cm on each side of the diameter of the chair. Thus, if the diameter of the stool is 35 cm, add 5 cm to it, it turns out that you need a square of fabric with sides of 40 cm.
Fold the cut square in half, and then in half again. In our case, the length of the sides of the folded square is 20 cm. You should also get a side length equal to half the diameter.
Now take a measuring tape and a marker (or pencil, chalk). Your radius will need to be laid out over the entire quarter of the square (for us it is 20 cm). Measure the length of your radius on the tape and attach it to the lower right corner of the fabric diagonally to the left, make a mark. That is, the diagonal from the mark to the lower right corner should be equal to your radius. Then turn the measuring tape to the sides, like a compass, and make several more such marks throughout the quarter. Connect the marks into a single line, a quarter circle should form.
Take scissors and cut the fabric along the resulting line. Cut the material, you should get an even circle. Do the same with another piece of fabric, since for one pad we need two identical circles.
We have prepared for you a detailed video course “Sewing Basics”
Get it now for free!
get a course
Chair cushion for beginners
Required:
- Textile
- Sintepon
- Threads
- Sewing machine
Make a pattern according to the shape of the chair. Mark the places where the ties will be attached.
Make markings for stitching in the form of diamonds or squares. Not a required step. The quilted one will be more elegant.
Cut out the blanks. Cut out the front part without allowances. Bottom and 2 layers of padding polyester with an allowance of 2 centimeters.
Immediately transfer the stitch markings to the front fabric.
Fold the cut pieces and pin together.
Make stitches by hand. Insert thread into a needle with a large eye. Fold it flat and tie a knot. Start from the middle and stitch all the squares.
Cut out 2 strips for the ties, each 40 centimeters long, and the headband.
When calculating the strip for the rim, take into account the protrusions on the pattern. The fabric required is larger than the size of the chair outline. Therefore, you need to add 10-15 cm.
Sew the strips for the ties, folding the wrong side inward. Sew with a zigzag stitch.
Bend the strip for the rim on both edges by 0.7 cm.
Finish the edge by sewing on the headband. To do this, baste the fabric, covering the bottom and top layers.
Having reached the rounded part, make small tucks on each side so that the rim fits neatly.
Fold the corners.
Having reached the marking of the ties, baste the ties, folding each in half.
Sew using a zigzag seam. The pillow is ready. All that remains is to put it on the chair.
What are the product items?
Next, let's look at the finished models. One of the classification criteria is the material, another important criterion is the functional purpose. The shape and dimensions of pillows vary.
It all depends on what the person’s needs are. Basically, the products remember the shape of the body, thanks to this they do not deform.
Quilted chair cushion
Fold the fabric with the right side inward and cut out blanks for the pillow with a seam allowance of 2 cm on each side.
On each side of the pattern, mark the place for pintucks on the front side. To do this, you need to find the middle of the product by applying a ruler to the corners.
To mark the side points, apply a ruler to the point marked in the middle and measure 12 cm in each direction.
Round the corners: fold the fabric and cut it into a semicircle.
Transfer the corners to other parts of the pattern, attaching a piece with the cut out corners.
Combine padding polyester and fabric. Pin together.
Make marks for the ties.
Cut out ties from the main fabric or bias cotton tape 30-35 centimeters long. Sew on a machine.
Pin the ties to the marks. Sew the workpiece on the machine, leaving room for turning the product inside out.
Cut off excess padding. Turn it inside out and stitch the seam.
Make tucks. To do this, sew threads along the previously marked points several times.
DIY seats
A housewife, even one who does not have much experience with sewing equipment, can make a chair seat with her own hands. The main goal is to decide which technique for making the product would be appropriate, taking into account the skills of the needlewoman and the materials at hand. Even softening rugs made from an old carpet, carefully cut according to a template and edged with decorative tape, are perfect for chairs.
https://www.youtube.com/watch?v=G5GJJdiUxM0
Simple carpet seat
You can make a furniture accessory from an old carpet. With proper cutting, 1 standard carpet can yield from 4 to 8 seats. Products are decorated and sometimes repainted in a different color using fabric dyes. A chair seat made of carpet can be sewn according to templates taken in advance from the surface of the furniture on which it is planned to be placed.
It is convenient to make a template from thick cardboard; it is placed on the back side of the carpet and outlined with tailor's chalk. When cutting, add 2-3 cm to its edges so that the product extends slightly beyond the outline of the furniture.
The accessory can be made either in the form of a small pillow filled from the inside with padding polyester or holofiber, or in the form of a flat cape.
If the housewife chooses the option of a flat pillow, then the cut out parts of the future product are applied to each other with the wrong side, sewn along the edge on 3 sides, retreating from it by 1-2 cm. One of the sides remains open and is used for stuffing the product with soft material. After stuffing the pillow, it is decorated along the edge with braid or ribbon, and the fourth side is sewn. For decoration, select fittings that match the color of the background of the main product.
Seats made of fabric or patches
A popular accessory is a DIY chair seat made of cotton or knitted fabric. Patchwork style is a technique in which a product is sewn together from small pieces of old fabric of various shapes, colors and sizes. The simple technique was used to create pillows, blankets and other household items and served to save fabric.
To make a patchwork seat you will need the following materials:
- canvas, previously sewn from scraps, from which parts will be cut out;
- filler (sintepon or holofiber);
- cardboard or thick paper for making a template;
- bias tape for edging the product;
- pins;
- tailor's chalk;
- scissors;
- sewing machine.
Fabric is purchased with a margin of 10-20%, so that there is enough for allowances and compensation for possible errors during cutting. The production of the seat is carried out according to the following steps:
- We make a template from cardboard or paper, apply it to the seat of the chair for which the product is being sewn, and outline the outline.
- We place the template on the wrong side of the fabric and outline it with tailor's chalk. For one seat you will need 2 parts.
- Add 1-2 cm to the outline of the part for seaming allowances.
- We apply the template to the padding polyester and draw out 1 part. We do not add allowances.
- We cut out the fabric parts and fold them together with the wrong sides according to the template, sew them together, placing a padding polyester part between the layers.
- We chop off the “sandwich” with pins and sweep it away.
- We sew the product, at the same time edging it with bias tape.
- If necessary, decorate the product with braid, ribbons, buttons and other sewing accessories.
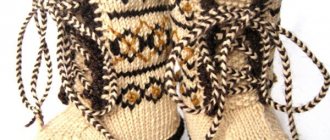
How to crochet a seat
The crocheted seat looks beautiful. It is not difficult to make if you have knitting skills. To do this, select threads that match the color of the overall room where the product will be used. Then a knitting technique and color scheme are chosen, according to which the order of thread selection is distributed. A crocheted seat, made in the shape of a circle with a radial pattern, where the colors alternately replace each other from the center to the edge of the product, looks beautiful.
Crocheting a seat using the radial technique is done as follows:
- Knit a simple chain of 5 loops and close it into a ring.
- Work the second row of loops over the first, moving in the circle and making one yarn over before inserting the hook into the next loop.
- In this way, knit several rows and change the color of the thread, tying the end of the previous thread to the beginning of the new one.
- Knit another 3-4 rows and change the thread.
- Proceed according to this plan until the knitting reaches the shape and size of the chair seat.
- Fasten the thread. The product is ready.
Decoration
Whatever option for making pillows is chosen, they can later be decorated with additional decorative elements. But here it is worth considering what this piece of furniture will be needed for. If the pillow is needed only as a room decoration, then it can be decorated with beads, beads, sequins and much more. If it is used for its intended purpose, then it is better to discard such elements.
You might be interested in this: Simple patterns for felt dolls: sew them yourself
Applications
To ensure that nothing causes inconvenience when sitting on a chair, you need to decorate the pillows with materials that are not too bulky. These can be various applications, fringe or buttons. The latter not only decorate the product, but also keep the filler from clumping.
Buttons
It is better to cover buttons with fabric. The color is chosen like the pillow or one that matches it. After this, the surface of the product is marked so that the decorations are located at an equal distance from each other. In the indicated places, the buttons are firmly sewn to the pillow.
DIY pillows
Thus, it can be seen that it is quite easy to sew seats on stools with your own hands. It is enough to stock up on the necessary materials and patience. And ready-made decorative elements will subsequently decorate and update the appearance of the apartment.
Classification by shape
The shape of the pillow also plays a huge role. It should be chosen in accordance with the expected effect.
Round
One of the most popular options for chair cushions is round, with a hole in the center. It is these models that allow you to create a curve in the lumbar region, which is most comfortable to work with. Additional properties include:
- versatility of use;
- ability to relieve tension in the hip region;
- excellent resistance to heavy weight.
Rectangular
Rectangular-shaped pillows are great for consumers who spend long periods of time sitting.
The advantages include:
- large assortment in terms of sizes;
- ability to reduce fatigue;
- good fixation on the surface of the chair;
- reducing the load on the spine.
Service life of seats
The photo shows two seats for chairs that have been in use for 5 months. It is clearly visible that the left pillow has already lost its presentation (they sit on it much more often).
That is why it is better to sew or knit a cover that can be washed. And make a soft pillow inside separately.
You can take a purchased seat as a basis and make a cover for it yourself to give the product a new life.
When choosing a filler, pay attention to this. The most short-lived synthetic winterizer will be, it sags and rolls up faster. Whereas foam rubber will last longer.
You can fill the seat cushion with compressed sawdust, down, and feathers. If you have old sleeping pillows, they can also be used to make wonderful seating. A cotton blanket will also work.