Home > Useful > How to put an inscription on a T-shirt yourself and print it out if necessary
Despite the fact that popular things with prints are not difficult to find on sale, many are interested in how to make an inscription on a T-shirt at home. There are several reasons for this desire for handmade:
- Reluctance to meet a person wearing the same clothes.
- The inability to choose a statement that suits you.
- The desire to express exclusively personal feelings to your counterpart.
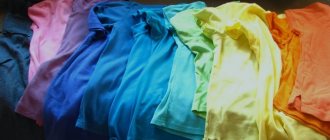
You can choose the most suitable text for printing on T-shirts
Original printing on T-shirts can, of course, be done inexpensively by many companies specializing in this service. Ivanych GROUP is one of them. But no one has yet canceled the value of handmade products. Therefore, if you want to create a unique item for yourself or your loved ones, our article will help you learn several ways to apply text to T-shirt jersey.
What you need for work
To make embroidery on a T-shirt, you will need a number of materials and tools. Their quality cannot be neglected. If the embroidery will be done on a light T-shirt, the threads must first be checked to see if they are fading, so as not to spoil the item when washed.
- Embroidery threads . This can be floss or silk for embroidery. The main criterion when choosing them should be the reliability of the manufacturer. If the embroidery is done with beads, you will need to buy transparent or translucent monofilament to secure it.
- Beads . Needed for additional decor. You need to choose a calibrated material that, when working, lies on the fabric as evenly and accurately as possible.
- Water washable marker . You can buy it at a craft store. Using this tool, the contours of the drawing are drawn. They will disappear when the T-shirt with the finished embroidery is soaked in water. Marker marks on the fabric should not be heated before washing.
- Scissors . Needed for cutting threads. It is most convenient to use small scissors with the ends of the blades slightly curved upward. Outwardly, these embroidery scissors resemble manicure scissors.
- Needle . You should choose a sewing needle for working with threads and a beading needle. It is not advisable to use a tapestry needle with a rounded end when embroidering on a T-shirt, as it can damage the fabric. It is important that the instrument is free of rust.
Have you already embroidered on T-shirts?
Not really
Editorial Voice
Matryona
Fan of embroidery and sewing
Ask a Question
You cannot use a hoop for embroidery on knitted fabric .
They will lead to its deformation. To prevent the fabric from stretching under its own weight, you need to place it on the table.
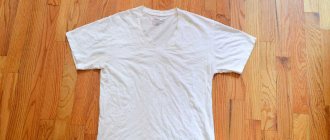
Selecting and preparing a T-shirt
Before you make a print on a T-shirt at home, you need to prepare everything for work. It is especially important to choose the right base; the quality of the drawing depends on it. It is advisable that the T-shirt be made of natural fabric, at least 80% cotton. This fabric produces a clear print. Synthetics do not hold paint well and are difficult to paint. In addition, some methods of applying a design require the use of a hot iron, which can damage the fabric.
The T-shirt can be any color. But it is desirable that it be plain, without factory prints and patterns. When using thermal transfer printing, it is recommended to use white fabric.
The T-shirt should be loose. If the style is tight, the pattern will quickly crack.
Before you make a print on a T-shirt with your own hands, you need to prepare it. If the item is not new, you can simply iron it well so that the base is even. Unworn items must be washed. This is important because:
- factory products are impregnated with compounds for better storage;
- they are often starched to keep their shape;
- Cotton may shrink after washing, and then the pattern will be distorted.
After washing, the T-shirt should be dried and ironed well. Then it is pulled onto a hard, smooth base, but the fabric should not be stretched too much. This could be a sheet of cardboard, thick paper, or a piece of laminate. With thermal transfer printing, you can simply lay out the T-shirt on an ironing board or on a table covered with fabric.
When using paints, it is necessary to place a backing inside the T-shirt so that the design does not bleed onto the back.
Before applying the print, the T-shirt must be washed and ironed
Embroidery on knitwear: types of stitches
T-shirts are made from knitted fabric, which can be either single-colored or variegated. Manufacturers can decorate the product themselves using appliqués, stripes, embroidery, or sell it without additional decoration.
To make embroidery on knitwear beautiful, you need to decide what stitches can be used on it. Since the material of T-shirts is thin, with very small eyelets, a number of seams that are used for embroidery on sweaters are eliminated.
- Stalked . This is one of the basic seams. It is in many ways similar to the “back needle” seam. Each new stitch starts from the middle of the previous one and slightly overlaps it. Used for fine inscriptions and creating outlines of a picture.
- Tambour . This seam is also used to make thin, elegant inscriptions and outlines of patterns. With this technique, the thread on the right side forms a loop, which lies on the surface of the fabric and is held there by the next loop, starting from the highest point of the first.
- Forward the needle. Also a basic stitch, which is used for embroidery on knitwear. In this case, the stitches can be drawn in a straight line, or placed in any direction, including rays.
- Cross . Oblique stitches of equal length intersect along class=”aligncenter” width=”500″ height=”400″|fcw3qayjh5a| src=”https://miazar.ru/wp-content/uploads/2020/04/77525307111.jpg” class=”aligncenter” width=”500″ height=”400″|fcw3qayjh5a| src=”https://miazar.ru/wp-content/uploads/2020/04/77525307201.jpg” class=”aligncenter” width=”500″ height=”400″[/img]
- Smooth surface . A common technique for embroidering knitwear, in which the stitches lie close to one another. The length of the stitches can be the same or different, depending on the selected satin stitch embroidery method. With this technique, several colors of thread can be used in complex patterns, or one if a monochrome pattern is created. When you don’t have much experience in embroidery, it is better to choose a pattern for one color. The satin stitch is used to create various patterns, which may have a contour made in a different technique, or be without a contour.
- Goat . This stitch is similar to a cross stitch, but the stitches are made longer and cross at the top. Also, for a greater decorative effect, you can complement the goat with short stitches using the “forward needle” technique, which will cover the crossing points.
- French knot. This method is chosen for voluminous embroidery on a T-shirt. A thread is wound onto a needle, which forms a pattern on the surface. Depending on the number of turns, knots or rollers will be obtained. Flower embroidery looks especially beautiful in this style. They turn out tender and elegant, similar to the real thing.
The type of seam used depends on the personal preferences of the embroiderer and the chosen pattern.
HOW LETTERS ARE EMBROIDERED ON FABRIC WITH STITCH STITCH IN DIFFERENT COUNTRIES
In the old days, the most important element of embroidery was the application of a monogram. Often it was additionally decorated with a crown and ribbons. All elements were applied using satin stitch, but the tape could also be made using a cordon stitch.
Cordone seam
In different regions, satin stitch embroidery of letters had its own distinctive features. In Switzerland they were more openwork than in England. The outlines of the monograms were applied with a straight, tight cordone seam. After this, the material remaining inside the markings was cut out, and the void was filled with triangular grids. Italian craftsmen sewed in two colors and did it with satin stitch, complemented by a cordone seam.
Usually, for beginners, this method seems to be a very complicated and labor-intensive process. But it’s enough to study the theory and watch a few practical lessons on the Internet to understand how to beautifully embroider a name or monogram on fabric with your own hands. Undoubtedly, this work is quite difficult and requires attention, but after enough training, you can get beautiful and original clothes for use for various purposes: a shirt, dress, jacket or trousers.
Satin embroidery
Embroidering an inscription on a T-shirt
If the letters are large, it is best to strengthen the inscription on the reverse side with non- woven fabric .
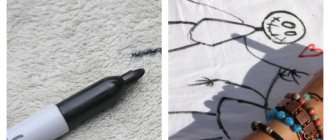
It will hold the fabric and prevent deformation during washing. If the inscription is embroidered lightly, in which the outlines of the letters are drawn in one line, it does not need to be strengthened. To transfer a design to fabric, the outline of the pattern or letters is drawn on paper and placed under the fabric. Then, using a water-soluble marker, the design is transferred to a T-shirt.
Satin embroidery
Most often, preference is given to satin stitch embroidery. In order for the drawing to turn out smooth, you must have experience in this technique.
The outline of the pattern is filled with a simple satin stitch or alternating short and long stitches - depending on the volume of the pattern. It is important to pay attention to thread tension : seams that are too tight will deform the fabric, seams that are too loose will sag.
Editorial Voice
Matryona
Fan of embroidery and sewing
Ask a Question
It is necessary to fasten the thread at the beginning and end of the work so that the wrong side remains neat. Without this, the work will look ugly.
Cross-stitch
Cross stitch is one of the classic techniques that is often chosen to create folk-style patterns or complex images. The main feature of this type of work is that the embroidered area turns out to be very dense when completely filled.
To get a good result, you need to perform a series of simple steps step by step.
- Applying water-soluble or pull-out canvas . Without it, embroidering will be very inconvenient. To prevent the base from moving at the beginning of the work until it is held in place by the crosses, it is worth basting the canvas along the edge.
- Embroidery process . Cross stitch should be done from left to right, making sure that the direction of all the top stitches is the same. Otherwise, the pattern will turn out extremely sloppy.
- Removing the canvas . Depending on the type, it is pulled out or left to dissolve in warm water.
Cross stitch looks good on fairly thick T-shirts. If the material is very thin, the pattern will deform it.
Beadwork
The pattern embroidered with beads is quite heavy , so you should not choose too large patterns or heavy beads.
For work use a beading needle and monofilament. To make the embroidery look as neat as possible, you should work in rows and not in spots. It is especially important to follow this rule when creating an inscription on clothing.
Bead embroidery on knitwear, like thread work, is done by hand. What thread tension is sufficient will have to be determined by personal feelings. This is not difficult for experienced craftswomen.
Materials and techniques for applying text
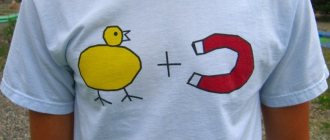
Before figuring out how to make an inscription on a T-shirt with your own hands, you need to familiarize yourself with the required consumables. Regular paint will definitely wash off from things during washing. Therefore, for such creativity it is necessary to stock up on special materials and equipment. You may need:
- Special thermal stickers with the text that suits you.
- Stencils with the desired images.
- Gel colored glue.
- Acrylic paints for fabric.
- Special markers for fabric.
- Spray paint in cans.
- Children's plastic bricks with raised letters to make slogan T-shirts.
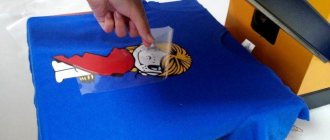
- Transfer paper
- An iron that can act as a heat press.
- Color inkjet printer.
Acrylic paints for fabric and gel glue
And, of course, anyone who is interested in how to make an inscription on a T-shirt needs to know that images are best seen on white things. Moreover, the fabric is preferably cotton.
Text may not be very clear on thin items.
After seeing this long list, some of you may be immediately disappointed in your desire to DIY the trendy item. But don't despair, this list of materials provides several different application methods. Let's look at them.
Schemes and sketches
SATIN EMBROIDERY PATTERNS
Before you start working, you need to stock up on letter patterns. It’s easy to find various options on the Internet - just choose the one you like, print it out and apply letters on the fabric.
Scheme option
HOW TO EMBROIDE LETTERS ON FABRIC
Letters can be embroidered on fabric in several ways. Some of them are accessible even to beginners, while others will require quite a bit of experience. In any case, you need to know the most common ones.
MACHINE EMBROIDERY
To embroider initials or the entire name, you can use a sewing machine. The method of doing the work is similar to hand sewing, but beginners need to know how to properly set up the machine to apply an inscription:
- It is necessary to remove the teeth of the lower conveyor.
- The foot is removed to make stitching easier.
- The presser foot lift lever lowers.
- The needle drops into the material. To secure the thread, you need to make a few stitches in place.
- You can start embroidering the design.
- When the job is finished, the lever holding the fabric rises.
Using a machine you can create real masterpieces
BEADWORK
There are different ways to apply letters to fabric with beads. For example, transfer the letters from the diagrams to clothing and sew decorations one at a time inside the outline, filling the space. Or you can first create a letter, and then stitch it in several places to the material. For this, special patterns are needed - according to them, the beads are strung on a thin wire or fishing line so that it takes on the desired shape. When everything is ready, all the letters are applied to the fabric and sewn tightly.
Bead embroidery pattern
EMBROIDERY MONOGRAM
There are two options for embroidering letters in satin stitch.
In the first of them, the work is performed in the following sequence:
- The monogram you like is transferred to the fabric with a pencil.
- A chain stitch is made along the contour of the pattern - the loops come out of one another, and the needle moves towards itself.
- After this, the letter is embroidered along the inner and outer contour.
- To add volume, the space between the seams is filled with a chain stitch.
- A thread contrasting with the main color is used to wrap around the thin parts of the monogram.
- In the middle of the wide parts of the letter, small stitches are laid with additional thread.
According to the second option, the action scheme is as follows:
- A letter is applied to the fabric according to the pattern.
- A stem stitch is passed along its contour.
- The inner thin sections are sewn with a thread-splitting stitch.
- The space between the outer and inner contours is filled with a stem seam.
- Wide parts are embroidered using satin stitch.
You might be interested in this About embroidering icons of the Mother of God using beads Embroidering a monogram using satin stitch