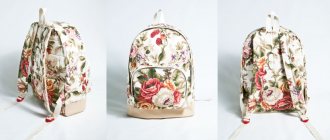
Types of patches
There are several ways to patch a hole in your clothing. Patches can be made from the same fabric as the damaged item. There are products made from adhesive, thermal film, and lace. Thermal patches are most convenient for repairs. Stickers with embroidery, rhinestones, sparkles, and any prints are suitable for decoration.
Adhesive fabric
The material is used when unwanted abrasions occur on clothing. The area that needs to be patched is first steamed with an iron. Then the patch is glued using an iron. To consolidate the result, sew along the contour on a machine with threads to match the product.
Thermal patches
Stickers are made from satin, satin, flock, cotton, faux leather, denim or velvet. There are reflective and neon varieties. Such appliques on trousers or shorts can radically change the appearance of the item. Thermal patches are often used to strengthen elbows and knees on sports and hiking clothing.
The peculiarity of the sticker on jeans is that once applied, it cannot be removed without damaging the product.
View this post on Instagram
A post shared by Handicrafts Belarus (@selentochki.by) on Mar 24, 2021 at 5:01am PDT
Other types of patches
If you don’t have fabric stickers on hand, you can use a piece of the same material that has the damage. The flap is taken from an inconspicuous area of the product, for example, in the pocket area. Cut out the required patch size and sew it to the damaged area. Where the fabric was taken, another material is sewn on.
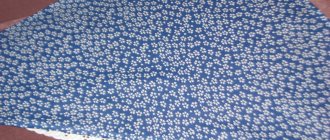
Lace patches are quite impressive, especially on jeans. They are attached in the same way as standard ones. Most often, guipure is used to create such patches: light for dark jeans, black for light ones.
Repairing holes in jeans at the knees manually and using a machine
Today, scuffs or cuts in a product are not a problem; they are a trend in youth fashion. A beautifully designed hole in jeans can turn the product into a stylish and unusual addition to a modern look. To hide imperfections, you can use leather appliqué, ethnic style or factory-made thermal appliqué.
Master class: how to fix a hole in jeans using a leather patch
- Trim the excess threads and sew the hole edges using a buttonhole stitch by hand, overlock or zigzag.
- Prepare a leather patch of the chosen shape.
- Place it at any angle and sweep it.
- Sew with a machine artistic stitch along the edge of the patch or make a stitch.
In order for the applique to have an aesthetic appearance, its sections can be processed with zigzag scissors.
Video on the topic
Master class: how to fix a hole in jeans using ethnic style
- Give the hole a certain shape. Cut off any protruding threads or make a fringe along the edge.
- Choose a colored piece of cotton or linen fabric for a patch on the knee.
- Cut the fabric patch 1-1.5 cm larger than the hole.
- Baste from the wrong side so that the front side of the patch is visible through the cut.
- Sew the patch along the contour using a machine stitch or sew it on by hand.
- Around the outline of the patch, lay several rows of embroidered stitches with a Bulgarian cross, which looks like a snowflake.
Select the thread for the cross to match the color of the patch. For embroidery, it is better to use acrylic threads or floss.
Master class: how to repair a hole in jeans with factory-made iron-on appliqué
- Choose a sticker and interlining larger than the cut in the product.
- Flatten the cut. Glue the non-woven fabric on the inside with an iron so that the adhesive layer is on the front side of the product.
- Apply a sticker to the problem area.
- Baste with thread or pin it with tailor's pins.
- Apply a damp cloth to the thermo-application and iron on the patch.
- Iron the napkin until completely dry.
- Give the sticker time to cool.
- The product is ready!
You can use parchment paper instead of a wet wipe. To prevent the sticker from coming off and the product losing its aesthetic appearance, it is advisable to sew it along the edge to the jeans.
Features of choosing stickers for different fabrics
At home, it is best to decorate cotton items using iron-on stickers. It is recommended to sew a patch onto other fabrics. It is important to choose a picture that fits into the overall design of the clothing.
Fine cotton and jersey
This type of textile perfectly withstands the application of thermal patches. For cotton T-shirts, choose elastic appliqué options. Iron for 10 seconds. The patch on a cotton surface lasts long and firmly.
Nowadays, thermal transfers are used to decorate knitted and fabric cotton sweaters, sweatshirts, and pants. These are drawings printed on thermal film or photographic paper. Sublimation ink is used to make thermal transfers, which allows you to get a bright and durable image.
Thick fabrics
Thicker thermal applications will help repair clothes and items made from thick fabrics. The iron exposure time is 2–3 minutes. If the applique was applied using a printer, the item should not be washed within 24 hours after gluing.
Thermal patches for jeans allow you to strengthen the product both outside and inside.
Workwear, children's and winter clothing
These types of items often have reflective or protective stickers attached to them. Appliqués with the symbols of the enterprise are attached to the workwear. For children's outerwear, patches on the knees and elbows will be relevant, protecting the fabric from scuffs and tears. In this case, the sticker must be dense and resistant to friction.
Delicate and thin fabric
A boring item can be transformed with 3D or holographic stickers. They are combined with leatherette, silk and synthetics. However, you should work with such materials carefully. For delicate fabrics, it is preferable to use textile-based stickers.
Bolognese fabric
For clothes made from Bologna, dense thermal appliqués are used. Before applying the sticker to the jacket, it is important to thoroughly straighten the surface of the item without leaving wrinkles. Place a picture on top and a cotton napkin on top of it. Heat with iron for 1-2 minutes.
Features of thermal stickers and their varieties
You should choose a thermal appliqué for clothing based on the following parameters:
- Material. The basis of the sticker is thick flock fabric. The design can be fabric or embroidered.
- Design. Thermal appliqués are available in children's, lace, rhinestone, sports, and with the logo of famous brands.
- Size. Stickers come in different sizes: small (1 cm wide) and large (up to 25 cm wide or more).
In addition to classic stickers, you can use thermal film. A design is applied to it with special ink. Using high temperature it is transferred to fabric. Film stickers stick to things for a long time.
Depending on the adhesive used, embroidery can be permanent or temporary. Permanent ones cannot be removed from a thing without damaging it.
The sticker can be purchased at a fabric or accessories store.
Instructions for applying different types of thermal adhesives
To apply the patch correctly and beautifully, it is necessary to do this taking into account the variety of decorative materials and base fabric.
Decal:
- To apply it to a surface, you should first examine the tags on the clothing and make sure that it can be applied with a hot iron.
- Straighten the surface.
- Remove the protective film and attach the design to the fabric.
- Cover the top with a cotton napkin.
- Iron with an iron heated to 150 degrees for 10 seconds. The steam mode cannot be used.
- If there is a hole in the product, first fill it with adhesive interlining from the outside.
- After this, apply the sticker and iron it with an iron. The size of the sticker should be slightly larger than the hole in order to completely cover it.
- You need to choose a thermal patch that is suitable in size. You can change the shape yourself by cutting off the excess with scissors.
- Apply to the damaged surface and run a hot iron over it. Some types need to be pressed rather than ironed.
- The exposure time depends on the fabric of the product. On average, 30 seconds is enough.
- For synthetic materials, it is advisable to place a cotton cloth under the iron.
Hot-melt adhesive patch:
Thermal film:
Applications without adhesive layer:
- For these decorative elements, the adhesive base is purchased separately in the form of a roll.
- An adhesive layer is attached to the reverse side of the picture and pressed with a hot iron to the paper part of the roll.
- After this, the excess base is removed.
- The adhesive part of the sticker is applied to the front side of the clothing, covered with paper and pressed with a hot iron for 20 seconds.
- The paper is removed after cooling.
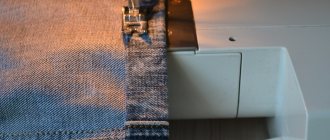
Fabric-based patches may not have an adhesive layer. They are sewn on by hand or on a sewing machine. First, they are basted in one thread, then stitched along the contours.
Useful video on the topic:
Description and purpose
Glue web is the thinnest material, reminiscent of a spider's web. It has a non-woven base, transparent light structure. It is produced in the form of a long double-sided adhesive strip with a width of 0.5 to 5 cm. If you need a narrower strip, you can cut it wide, while the functionality of the thermal adhesive tape is completely preserved.
The web is inexpensive. One roll lasts a long time. It is designed for fastening the edges of fabric without the use of secret machines. In this case, threads are not needed, and the fastening functions are performed by glue. It's cheap, but less reliable, as is the case with thread stitches. Recommended for items that are not washed often, such as coats.
With frequent washing, the glued edges fall off.
How to decorate a jacket or down jacket
When working with outerwear there are some nuances:
These details make the gluing process a little more complicated:
- If there is a hole in the product, its edges must be carefully tied with thread.
- Place the item on the ironing board, trying to move the filler away from the desired area.
- If the sticker is applied to a sleeve or pant leg, you will need an ironing sleeve or a large towel. The piece of clothing is pulled onto a stand or a towel is inserted inside.
- Apply the application to the damaged area and cover with cotton cloth on top.
- Iron on medium heat.
- Using a thin needle, sew along the outline of the sticker.
Interesting video on the topic:
Types of web tape for gluing fabric
There are 4 types of fastening tapes:
- Adhesive web on paper base. One side of the tape is covered with a protective layer of paper. Used to create appliqués and patches. The adhesive side is attached to the patch and cut along the contour, after which the paper covering is peeled off, and then the patch is glued to the product.
- Thread stitching technological. It has elasticity and prevents seams from stretching due to stitching in its own coating.
- Non-woven tape for hems. The adhesive sides do not have a protective layer. It is attached in 1 step: the tape is placed between the hem and the fabric of the part, after which this place is subjected to heat treatment, and the 2 parts are fastened together.
- Thread stitching on the bias. Used to strengthen the rounded edges of parts and prevent their deformation during wear and washing.
How to make a thermal sticker with your own hands
Transfers for clothes are sold at any craft store. However, you can make a self-adhesive patch with your own hands. This is done in several ways:
What is it and where is it used
This tape is not an analogue of dublerin, because is a set of glue threads connected to each other into a thin layer, forming a single web, which allows you to cut out a part of any configuration and size from it. Under the influence of heat, the glue begins to melt and spread over the surface of the material. Drying after a while, the glue holds the parts together.
Cobwebs for clothing repair are actively used in the clothing industry at 2 levels:
- individual (in sewing studios);
- mass (in garment factories).
It serves as a cushioning and gluing material for cut parts that cannot or should not be joined in any other way (for example, by hand or machine basting). Most often, this method of laying and fastening parts is used in sewing in clothing factories. It allows you to reduce production costs and reduce the cost of the final product.
Washing and caring for items with thermal transfer
To ensure that repaired clothing lasts longer and does not have to be patched again, you must follow the rules for caring for the item:
- Products with thermal transfer should be washed with laundry soap at a temperature of no more than 40 degrees, preferably by hand. Press several times, then place on a towel, blotting the product.
- If machine washable, use the delicate spin setting. A variety of detergents can be used.
- Do not rub, do not use brushes or hard sponges.
- Stain removers and bleaches must be excluded so as not to change the color of the sticker.
- It is better to iron the item from the inside out, without heating the iron too much.
We recommend videos on the topic:
Installing patches on jeans between the legs
There are several options for fixing holes. You can make the patch by hand or using a sewing machine. It can be either an invoice or a lining.
Repairing Holes with an Overlay Patch
The hole can be treated with a patch, which is decorated with fringe on all sides.
Repairing holes with a backing patch
You can also bend the cut edges of the hole to the wrong side. Sew from the right side of the folded edge of the product.
Japanese technique "Boro"
The technique originated in the Middle Ages in the Land of the Rising Sun. Boro art consists of numerous parallel stitches of equal length, hand-crafted. They resemble darning with coarse threads. For ease of use, needlewomen advise using long needles.
- To repair damage to jeans, choose thin denim, cotton or linen fabric.
- To work, choose a flap of any shape. The seam allowance should be 3-4 cm.
- Finish the outline of the cut or hole with forward stitches using a needle. In this case, the damage will not stretch further.
- Parallel to the outline of the hole, use a washable felt-tip pen to draw parallel lines for future embroidery. The distance between them can be 0.6-0.8 cm.
- From the wrong side, baste the prepared patch.
- Apply smooth stitches along the marked lines, which should be longer on the front side than on the back side.
- You need to turn the stitch onto the next row from the wrong side. Continue embroidering in the opposite direction.
- Make several rows of stitches on the bottom and top of the patch of different lengths, as well as on the sides.
Lace patches on jeans
Ripped jeans have been trending for a long time. Craftswomen are trying to transform them and make them more stylish. Lace is used for women's trousers. If the holes are on the hips of the product, buttocks or in places above or below the knees, then patches will make the jeans special.
Master class: masking a hole in the thigh with a patch
- Take measurements of the hole.
- Prepare a lace patch. Cut out a motif from it, which should be 3-4 cm larger than the cut.
- Give it a neat look. To do this, you need to process the sections manually using a buttonhole stitch or a zigzag stitch.
- Iron the hole with a damp cloth to even out all the cuts.
- Place a lace patch on top. Baste it or pin it with tailor's pins.
- Sew a patch along the edge of the hole.
Small floral designs can be cut out of the lace fabric and patches placed around the damage or down the side seam of the pant leg.
Master class: filling a hole in jeans with a lace patch
- Give the hole a certain shape. Rip all the edges in it. The fringe should not be more than 0.5-1.0 cm.
- Cut out the lace flap. Its size should be no less than 2-2.5 cm than the hole.
- From the wrong side, place the patch on the hole and baste.
- Turn the product inside out. Sew a lace patch along the edge of the hole on the front side.
- The product is ready!
Craftswomen do not recommend using lace patches to repair damage in the fold areas. They wear out quickly.