Choosing yarn for knitting a helmet
When knitting a baby product, it is important to choose the right yarn. The yarn should not be:
- stretching;
- prickly;
- causing redness in the child upon contact with the skin.
When knitting a helmet, it is better to choose yarn with merino, wool blend (acrylic with wool), and better without adding mohair. For additional insulation, a lining made of fleece or cotton jersey can be sewn into a knitted helmet. You can also knit a double hat-helmet.
In this case, the inner part is knitted from soft yarn, and the outer part from wool. The lining hat is knitted with knitting needles without elastic, purl stitch. For spring-autumn models, it is better to do without excessive insulation, since overheating the head is more dangerous than hypothermia.
In winter models, an indicator that the knitted hat is too thin will be a cold back of the child’s head after walks.
Measurements In order for a knitted helmet to be comfortable, you will need to take 3 measurements before starting knitting:
- head circumference (measured from the forehead line to the occipital protuberances);
- measure the distance from the eyebrows to the end of hair growth on the back of the head - this will be the depth of the hat;
- measure from eyebrows to chin - this indicator will show how open the face will be.
A properly knitted helmet will not slip over your eyes or put pressure on your cheeks or throat. Therefore, it is important to carefully take measurements and choose the appropriate yarn.
This is interesting: Pattern for children's beanie hat and snood (size 48-54cm)
Hat-helmet: pattern according to measurements
To create a pattern you will need to take three measurements:
- Head circumference (measured across the brow ridges).
- Depth to the elastic band (from the eyebrows, through the crown, to the edge hairline).
- “Window” for the face (from eyebrows to chin).
- Forehead height.
- a (from eyebrows to hairline).
Advice! All measurements are taken with a tightly stretched tape to avoid distortion of the product in the future.
The pattern is built from the semicircle of the semicircle of the cutout for the face. If the fabric stretches a lot, subtract 2 cm.
- Width W is head circumference/2-radius+0.5cm.
- Forehead height B - finished measurement.
- Wedge width L= head circumference/4. The wedges are drawn by hand, the distance between them is darts. Angle a in wedges should be within 80–90
O.
- Distance H – head circumference/4+2cm
Next, the pattern is transferred to the part folded in half.
What parts does the helmet consist of?
If you are planning to sew a product for the off-season, then it is enough to choose thick and stretchy fleece fabric for the front and inside, and if the baby will wear a hat in winter, then you will need a padding polyester piece for the lining. All 3 parts are identical.
Advice! The front fabric part is sewn 1.5-2 cm larger than the back part and insulation.
And one more additional part is a binding made of ribana or cashkorse, approximately 4–5 cm wide. Its length is calculated according to the following formula: length of the semicircle for the face * 2 * coefficient. stretchability of the binding
Important! To determine the stretch coefficient of the binding, you need to measure a piece of binding without tension, for example, 10 cm, and then stretch it as much as possible, it will be 13.5. Divide 10/13.5=0.74
How to take measurements for a helmet
To avoid errors in measurements, listen to the following tips.
- When measuring the circumference of the head, pass the tape over the child’s ears, because all people’s ears fit to the head to varying degrees, and this structural feature must be taken into account.
- Helmet depth to elastic band. It is more convenient to take this measurement in two stages from the forehead to the highest point of the head (crown), and from there to the neck.
Additional measurements are the width of the forehead and from temple to temple through the chin. Adding these values, we get a cutout for the face in a helmet.
Making a hat-helmet pattern for a boy
When all the necessary measurements have been taken, you don’t have to build a pattern from scratch yourself, but use one ready from the Internet, but taking into account the measurements obtained.
Advice! Even if you decide to trust the finished pattern with the indicated dimensions, try it on so that the finished product does not have to be altered!
When creating a pattern, the main thing is to take into account the fabric from which you are sewing, or rather, its stretch coefficient. The same model, sewn from different types of fabric, may vary by size or more!
How to sew a hat-helmet with your own hands
Of course, the market for children's goods is crowded, but it often happens that you don't like anything on offer. Then, having spent a minimum of finances and a little free time, you can get an exclusive item, sewn with maternal love and care.
What fabric is suitable for such a hat?
It all depends on the time of year when the child will wear a hat.
A helmet hat can serve not as a main hat, but as a scarf, so that the wind certainly does not blow and the baby does not catch a cold. After all, it fits tightly to the head, retaining heat. It is better to sew such a model from cotton, with the addition of elastic threads, this fabric has excellent stretch and you can sew the model without a fastener, it will be easy to put on and take off. For warmer models that act as the main hat, fleece of varying degrees of density is used. And the rich palette of shades will satisfy any fashionista!
Woolen fabric with elastane is wear-resistant and pleasant to the body, and cotton jersey is used for lining.
The insulation is traditionally synthetic winterizer or isosoft.
Advice! A practical solution is membrane inserts on the ears. They provide maximum protection from the wind and prevent the child from sweating.
We sew a hat-helmet for a boy with our own hands
When the pattern is ready and the fabric has been chosen, the most difficult, and at the same time interesting thing remains - sewing!
- We transfer the resulting pattern to the fabric and baste along the contour of the part. Using a pencil or tailor's felt-tip pen, draw lines along the basting.
Advice! If the fabric is colorful or printed, you can transfer it to the front side.
- Sew together the three central wedges of the hat. Darts can be “recessed” by 1.5 cm.
- Sew the back seam.
- We combine the side darts and make a seam, deepening it by 1.5-2 cm.
- We repeat all the points for the back part. You will get 2 hats.
- We close the pre-prepared binding into a circle, fold it in half and baste it.
- We fasten the parts of the hat, insert the binding inside, pin it together and grind it on a machine.
- In the central part of the wedge connection, the fastening is done manually with several stitches.
- The edges of the hat are processed using an overlocker or stitched with a fine zigzag.
All! Warm and comfortable hat - the helmet is ready! A nice bonus - it is double-sided!
LiveInternetLiveInternet
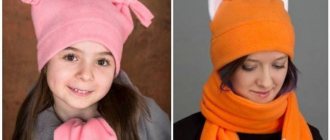
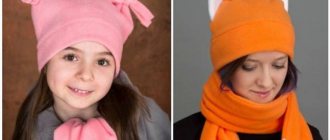
Winter children's hat with ears, made of fleece. Double hat. The lining of the hat is also made of fleece. Fleece is a light, soft, elastic material. Fleece is machine washable and dries quickly. Despite the fact that the fleece is based on a knitted fabric, the sections do not need to be overcast, because... Due to the brushed surface, they do not crumble. You can sew fleece with a regular machine stitch - convenient for those who do not have knitted stitches on their machine. Size: head circumference 48 cm. How to sew a fleece hat (with ears): Cutting: 1. cap wedges 8 parts (4 wedges - top of the hat, 4 wedges - lining of the hat) 2. lapel 1 part 3. bottom ears 4 parts 4 .top ears 4 parts 5. ties 2 parts. When cutting, it is necessary to take into account the fraction. On the pattern, the direction of the lobe is shown by an arrow. On the lapel, the lobe goes along the fold. The lobe is located along the edge of the fabric. How to determine the share if there is no edge: because fleece is a knitted fabric with a brushed surface; to determine the grain, you need to try to pull the fabric in different directions - in the direction of the grain, fleece stretches the least (almost no stretch). Fleece may have a pile direction, which must also be taken into account when cutting. The pattern is given without seam allowances. Seam allowances: seams - 1 cm, along the arched part of the ears - 0.5-0.7 cm. Pattern of a double children's hat with ears. Sewing: 1. Fold the bottom ones right side inward and stitch, not forgetting to insert the ties. Turn out. 2. Fold the top ears right side inward and stitch. Turn out. 3. Fold the lining wedges right side inward and stitch. Press the seam allowances in different directions. If desired, unstitch the seams. Unstitching - placing stitches on parts to secure seam allowances. It is used to secure seams on fabrics that are difficult to wet-heat treatment. The seam allowances are laid out on both sides and secured with two parallel lines. 4. Fold the wedges of the top of the hat with the right side inward and stitch, not forgetting to put in the top ears (stepping back 3.5 - 4 cm from the top of the hat. Press the seam allowances in different directions. 5. Fold the flap in half with the right side inward and sew along the short side. Allowances iron the seam in different directions. If desired, stitch the seam. 6. Place the lining in the hat with the internal seams facing each other, aligning the cuts. Baste the lower ears to the lining of the hat, aligning the center of the ears with the seam. Fold the flap in half lengthwise and baste the seams and cuts to lining the hat. Sew. To reduce the thickness of the seam, overcast the seam. Photo: View of the hat from the inside. Photo: Double children's hat with ears (made of fleece):
This autumn children's hat with ears is made of fleece. A very simple hat model - even novice seamstresses can handle it. Fleece is a light, soft, elastic material. Fleece is machine washable and dries quickly. Despite the fact that the fleece is based on a knitted fabric, the sections do not need to be overcast, because... Due to the brushed surface, they do not crumble. You can sew fleece with a regular machine stitch - convenient for those who do not have knitted stitches on their machine. How to sew a hat for a child: Size: head circumference 46 cm. For larger or smaller sizes, explanations on construction are given. Cutting: 1. main part of the hat 1 piece 2. lapel 1 piece 3. ears 4 pieces 4. ties 2 pieces. When cutting, it is necessary to take into account the fraction. On the pattern, the direction of the lobe is shown by an arrow. The lobe is located along the edge of the fabric. How to determine the share if there is no edge: because fleece is a knitted fabric with a brushed surface; to determine the grain, you need to try to pull the fabric in different directions - in the direction of the grain, fleece stretches the least (almost no stretch). Fleece may have a pile direction, which must also be taken into account when cutting. The pattern is given without seam allowances. Seam allowances: seams - 1 cm, along the arched part of the ears - 0.5-0.7 cm. Pattern of a children's hat made of fleece. If you need to sew a hat of a different size: The length of the main part of the hat is the circumference of the child’s head + seam allowances. The length of the lapel is the circumference of the child’s head + 2 cm + seam allowances. The ties and ears can be left the same. Lapel height is optional. Depending on the size, slightly reduce or increase the height of the main part. Sewing: 1. Fold the ears right side inward and stitch, not forgetting to insert the ties. Turn out. 2. Fold the lapel in half with the right side facing inward and stitch along the short side. Press the seam allowances in different directions. If desired, unstitch the seam. Unstitching - placing stitches on parts to secure seam allowances. It is used to secure seams on fabrics that are difficult to wet-heat treatment. The seam allowances are laid out on both sides and secured with two parallel lines. 3. Fold the main part of the hat in half with the right side inward and stitch along the short side. Press the seam allowances in different directions. If desired, unstitch the seam. 4. Baste the ears to the wrong side of the main part of the hat, retreating 7.5 cm from the seam. Fold the lapel in half lengthwise and baste the seams and cuts to the wrong side of the main part of the hat. Sew. To reduce the thickness of the seam, overcast the seam. 5. Turn the hat inside out, fold it in half (so that the seam is in the middle), and stitch.
Knitted helmet for a boy with pompoms
Funny helmet for a boy with pompoms.
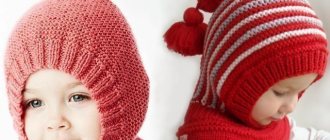
And now a model for boys - a knitted helmet with two pompoms from the design studio Drops. You will get a very warm helmet for winter, because it is knitted from 100 percent alpaca, soft and comfortable. Description of the winter hat for sizes: from 1 to 3 months; up to 9 months; up to 1.5 years; up to 2 years; up to 3 - 4 years. Head volume: 40/42; 42/44; 44/46; 48-50; 50-52 cm. You will need: - Alpaca yarn from Drops (100% alpaca, 167mt/50g) - 150/150/150/200/200 grams; - circular and stocking needles No. 4.5.
Density: 18 p. = 10 cm (two folds in stocking stitch). Garter stitch when knitting in the round: 1 row of knit stitches, 1 r. - purl.
Detailed description of knitting a children's helmet hat:
- Cast on 144/153/162/180/198 sts with double yarn and knit 8 rows in garter stitch.
- Continue with the 7x2 rib pattern: * P7, k2. *. Having knitted 3/4/4/5/5 cm, decrease 1 stitch in each purl row, knitting the first 2 purl stitches at once (=128/136/144/160/176 stitches). Make such decreases 4 more times in every second row (=64/68/72/80/88p.), (=K2, P2). Next, continue with a 2x2 elastic band until the height is 11/12/13/14/15 cm. Mark the center of the front and back of the helmet with colored thread. The reference point for the height of the cap is now from here!
- Then knit in stockinette stitch (knit all stitches) to a height of 1/2/2/3/4 cm from the new mark. Transfer the central 10/10/12/12/14 stitches in the front part to an additional thread (=window for the face).
- Next, the helmet cap is knitted in straight rows “back and forth.” From each edge, after 1 row, you must decrease 1 stitch 2/2/2/3/4 times and at the same time, above the central back marked point on both sides, add 1 stitch 4/4/4/5/6 times (= 58/62/64/72/76 p. At a height of 11/12/13/14/15 cm to round the front hole, add 1 p. 4/4/4/5/6 times from each edge after 1 p. Then cast on 6/6/8/8/12 sts and close the knitting into a circle (=72/76/80/90/98 sts).
- When you knit 19/21/22/24/26 cm from the mark, bind off all the loops.
- Fold the helmet in half and sew the top seam.
- Around the face hole, cast on 68-88 sts, including the set sts. Tie 1 p. purl p., second r. - persons.p. Next, knit with an elastic band 2x2 4/4/5/5/6 cm and close the loops of the helmet. Fold the strip inward and sew.
- Make 2 pompoms with a diameter of 4 cm and sew them in the corners at the top of the hat.
Hat helmet for both boys and girls from the top of the head
How to knit a helmet from the top of the head, see the description.
When talking about knitted hats and helmets, one cannot fail to mention the method of knitting from the top of the head. This model of a children's helmet is knitted just from the top of the cap. And you can knit it for both boys and girls. Size: 1.5 - 2 years, head volume 48-50 cm. For knitting, prepare: - Naco Pop Mix (25% wool, 75% premium acrylic, 120m/100g); - knitting needles No. 5. Density: 15 p. = 10 cm
How to knit a hat and helmet from the top?
- Using knitting needles, cast on 4 stitches and knit 6 rows in a circle with knit stitches, in the last 2 rows. add 2 stitches evenly (=6 stitches).
- Next we expand the helmet. To do this, in every second r. Increase 6 stitches evenly 9 times (=60 stitches). Then - another 14 rubles. no additions.
- We make the top of the rounding for the front hole of the helmet. Set aside 10 stitches for an additional thread and knit further in straight rows. In the next 4 r. after 1 r. on the sides, cut 1 stitch on each side (=46 stitches).
- Design of the back of the hat. Mark the center of the back of the helmet. Next time knit like this: 15 knits, 2 together (remove the loop, knit the next knit, then put it on unknitted), 12 knits, 2 together, 15 knits. Do 2 more p. contractions in every second p., reducing the intervals between decreases by 2 p., so that the decreases go one above the other (= 40 p.). Then 8 r. in a straight line.
- In persons.r. cast on 12 sts (chin line) and close in a circle (=52 sts). Tie 11 p. elastic band 1x1.
- Hat shirtfront: divide the work into 4 parts (16 stitches for the front and back, 8 stitches for the hangers + 4 stitches for the raglan). Then continue knit stitches, adding 1 st on each side of the raglan stitch. Such additions must be made 6 times every 1 r. Finish the hat with four p. elastic band 1x1.
- Face window. Along the edge of the neckline, cast on 35 stitches, throw it onto the knitting needles and set aside 10 stitches (= 45 stitches) and knit 4 rows. with a 1x1 rib, then bind off all the loops.
- If you want the face cutout of the helmet to fit more tightly, run 1-2 rows of spandex from the inside.
- Tie a chain of chain stitches for tying and thread it along the neck line.
How to thread spandex thread into a hat?
Free hat-helmet pattern
Details Blog October 14, 2017
The cold weather is coming, it's time to warm up. Scarves and hats always get tangled and treacherously crawl out of the collar of the jacket and slide off the ears.
Let's sew a hat-helmet)))
For you, a helmet-hat pattern designed for 2-thread footer, any thick knitwear with good stretch. If you take fleece, which does not stretch well, you need a larger size, but then you will need to adjust the height!!! We sewed several samples and we strongly recommend that before completely assembling the hat, try on the top layer on the child and make sure that the hole for the face is comfortable for him height and width. It fits differently in different materials!!!
As usual, the pattern comes with seam allowances.
Hat sizes range from 46 to 58 girth
size 46
size 48size 50size 52size 54size 56size 58
PHOTO of hats made using this pattern, craftsmen Lena Plenkina and Natalia Kesberg
Even lines for you! Always yours Igolkina Masha)))
easysew.info
Fashionable charmer
If you want to prevent it from blowing into your ears, thread a string and tie it with a bow.
The next model in the selection is an original winter helmet for girls with ears. The model combines both a hood and a helmet. You may be indignant - what kind of winter hat is it if it doesn’t fit snugly to your face! But we must forgive the designer, he comes up with models, and we apply them to life. You need to stretch a string along the opening for the face and tighten the wide neckline with it, then the wind will not be scary. And any girl will be delighted to wear such an interesting hat. You will need: - Eskimo yarn from Drops (100% wool, 50met/50g) - 250 grams of different colors; - circular knitting needles No. 9.
How to knit a hat and helmet for a girl with ears?
- Using knitting needles, cast on 70 stitches and knit in the round: 1-4 rows: pearl stitch (1 row: knit 1, purl 1; 2 rows: over the front stitch - knit, over the wrong stitch - purl) in red; 5-8p.: stockinette stitch (all stitches) in black; 9-20 rubles: face stitch with red thread;
- From 21 to 60 p.m. knit in stockinette stitch in rows “back and forth”.
- Fold the hat in half and sew the top seam in a loop.
- Tie the neckline for the face 3 times. single crochets, fold the edging inward and sew.
- For the helmet ears, cast on 9 sts with knitting needles and knit in stockinette stitch. In every r. knit 2 stitches along the edges at once. You need to make 4 such parts: two red and two white. Fold them in pairs of different colors (red and white), tie them with black thread in single columns.
- Sew the ears with a neat seam to the helmet.
- Sew on 2 buttons.
This is interesting: Children's hat pattern (size 40/41-52/53)
Taking measurements and calculations
When you are planning to knit a hat for your child, you definitely need to take his measurements. The fact is that usually in lessons on how to knit a helmet for a boy, the pattern involves the use of certain tools and threads that are different from those at hand. In addition, each needlewoman can produce a completely different knitting density using the same tools and the same yarn.
To knit a helmet-like hat, you will have to measure:
- Head circumference. A measuring tape is placed along the bridge of the nose and across the back of the head.
- Facial armhole. Measure the circumference of the face.
- Planting depth. This measurement is the distance from the bridge of the nose to the base of the back of the head, divided by 2.
- Neck height. The tape is applied vertically to the baby's neck.
- Chest width. Most often, this requires measuring the length of the shoulder, although it is possible to knit a piece of a larger size.
Accurately taken measurements will allow you to knit the item the first time, without the need to unravel and re-tie the fabric due to a mismatch in size.
Accuracy is important when taking measurements
Practical helmet with elastic band. The simplest scheme
The simplest knitting pattern.
This helmet hat, knitted with an elastic pattern, tightly fits the baby's head and ears. The facial window is small, covering even the chin. Size 52-54 cm You will need: - 75 g of Gedifra Merino de Luxe yarn (150m/50g); - knitting needles No. 3.
Description of knitting a hat in the form of a helmet:
- Using knitting needles, cast on 152 sts and knit 14 cm with a 2x2 rib (k2, p2) in the round.
- Close off 54 stitches for the face holes of the helmet cap, close off 54 stitches, continuing further in straight rows of 12 cm.
- Pick up 54 stitches again and go to circular knitting - 8 cm.
- We decorate the top of the children's helmet. Knit all stitches in 2s together and then continue in knit stitch while continuing to decrease. Divide all items into 10 parts. After 1 r. decrease by 1 p. each has 10 sectors. The remaining 10p. Pull together with working thread and secure firmly.
- Crochet the window for the face of the helmet with two rows. double crochets.
Another way to make a helmet hat for a child with a shirtfront using knitting needles in a jacquard pattern in a video tutorial from the experienced craftswoman Svetlana Bersanova MK:
How to sew a fleece hat and helmet for a child? Helmet pattern?
How to sew a fleece hat and helmet for a child? Helmet pattern?
- Fleece is a very convenient material for sewing a hat-helmet for a child. I suggest you sew this fleece helmet with your own hands:
When sewing the helmet, fleece of two colors was used: white and blue for the lining.
Helmet pattern:
For a very detailed master class with a description of the work, see this link.
Another helmet pattern: pattern
A very warm and beautiful fleece helmet for a boy:
Pattern:
For details of all stages of work, see the link.
Do not forget. These are just options. Make your own adjustments, use your imagination and your helmet will be the warmest and most beautiful!
Good luck!
- The helmet hat is very comfortable for a baby, boy or girl, it is warm and you will no longer need a scarf.
And the fleece fabric is soft and warm, and in addition you can additionally make a warm lining, for example, from faux fur.
Here is the pattern for the helmet:
And here is the process of sewing a hat:
You will get such a cute hat! You can sew on a fluffy pompom or decorate it with embroidery or appliqué.
Here is another master class on sewing a fleece hat for a child.
- Fleece is a very warm material and quite easy to care for. Sewing with it is also quite easy. You can even do this without a pattern, by eye. Just first take measurements from the child's head. To make everything clear, watch the following videos:
- A fleece hat is a very warm, soft and comfortable hat for a baby. And even more so if we are talking about a hat and helmet for a child made of fleece, then this is generally an ideal option for caring mothers. A child in such a hat will definitely be warm. Moreover, such hats are perfect for both boys and girls.
Here is an example of one such hat
To make such a hat, you can use the following pattern:
- I suggest making this wonderful helmet from fleece:
The helmet pattern will be placed on three sheets:
Each pattern sheet can be downloaded separately using the following links: sheet 1, sheet 2, sheet 3.
Then we cut out the parts of our helmet from paper, then we need to put the pattern parts together: 3a + 3b and 4a + 4b.
The result should look something like this:
Now we sew one side of piece 1 and the other side of piece 1. Repeat the same with the two remaining pieces. We also sew the red pieces together, turn them inside out, and the top of the hat is ready. Sew the two sides of the hat together.
Now we sew the two pieces from figure 4. Once it is sewn together, turn the piece over so that you get a complete complete circle, sew it to the top of our helmet.
That's it, our hat-helmet is ready.
info-4all.ru
Universal model with lining
This is a description of how to knit a hat-helmet for a newborn or older boy. The headdress is quite simple to make, even beginners in knitting can handle it.
A two-layer hat for boys fits tightly around the head, protecting the neck and ears.
Finished product dimensions
The given parameters are calculated for size 46-48, corresponding to the circumference of the head. If necessary, you can reduce or increase the width and height of the product according to your child’s measurements.
Tools and materials
The helmet-hat shown in the photo was knitted using specific yarn and tools. We used:
- children's yarn (250 m/100 g) – 2 skeins;
- circular knitting needles No. 3.5 and 4.5;
- large pin or loop holder;
- markers.
Instead of circular ones, to create a headdress for small children, it is better to take a set of stocking tools - it is more convenient to knit small things on them.
Creating the outer layer of the headdress
Knitting a hat begins with the top part. It is performed using a scarf pattern, following these steps:
- Cast on 74 stitches onto the smaller tool and connect into a ring.
- Tie 2.5 cm with 1x1 elastic band.
This is what an accessory for a boy looks like with a lining on the back
- Slip 5 stitches onto a large pin - this is where the armhole will be located. Transfer 25 stitches on both sides of the armhole to separate holders.
- Continue working on 19 sts of the back of the head, doing 8 sts three times each. 1 increase on both sides = 25 p.
- Continue knitting without changes until the size of the back of the hood reaches 14 cm.
- On the sides of the back of the head, pick up 26 stitches and then knit with knitting needles on all loops in a garter pattern. At the same time, knitting the outer loops, combine them with loops from the neck elastic, one on each side.
When the fabric of the cap reaches the pin on which the loops for the armhole are laid, set aside all the loops without covering them and proceed to making the lining.
Lining
This part of the accessory can be made from threads of a different color. The knitting pattern is as follows:
- Raise 70 stitches from the neck elastic band and knit with a stockinette pattern until the height of the fabric matches the size of the outer part.
It’s easier to avoid mistakes with threads of different colors
- Divide the fabric into 3 parts - 25/20/25 p.
- Continue knitting in a satin pattern on the middle section, catching the loops at the junction with the side sections in the manner of a sock heel.
The lining is smooth and exactly repeats the main part
- When the lining piece is completely formed, re-slip all the eyelets of the main part of the cap, including those left on the large pin for the armhole, and all the lining eyelets using tool No. 3.5. In this case, the loops alternate - 1 backing, 1 from the cap.
- Knit 1 p., grabbing 2 p. at once - 1 from the lining, 1 from the main part.
- Knit the front panel to a width of 2.5 cm.
Close all the loops, cut the thread and carefully hide.
This is what the finished headdress looks like, turned inside out
Dickey
Raise 74 sts from the bottom edge of the elastic and knit the bib, following this pattern:
- Divide the fabric into 4 sections: 2 by 16 points and 2 by 19. In this case, large sections should fall exactly on the chest and back, and smaller sections on the sides. Mark with markers 1 point each dividing the sections.
- Knit in a garter pattern, making 1 increase in every 2nd row on both sides of the dividing stitches - 8 stitches per row.
- When the width of the shirt-front reaches the desired size, close all the loops, cut the thread and hide.
Gently wash and steam the finished accessory for a boy using lined knitting needles, following the recommendations for yarn.
The same model, complemented by two fluffy pom-poms, will give the child a resemblance to a little teddy bear.
How to sew a hat and helmet
With the onset of cold weather, one unpleasant thing was discovered. My daughter didn’t have a suitable hat at all. All available ones are either large, thin, or not suitable for some other reason. I decided to sew a hat-helmet for my beauty. This model seemed to me the most suitable. Especially when carried in a sling. By the way, I wrote about slings HERE. If anyone is interested, read it. I will tell you and show you how to sew a helmet hat below.
The helmet-hat perfectly covers the babies' ears and covers the chest, which is very important in the winter cold. This hat allows you not to wear a scarf. The baby's neck is already covered by the bib of the hat itself.
Since everything turned out this way, I decided to try out a hat-helmet pattern from freebies from Ottobre magazine. You can download it HERE.
Now I want to share my experience on how to sew a helmet hat, and at the same time comment on the pattern. I hope that the information will be useful to you.
This hat can be made for both a boy and a girl. The color and decoration options depend only on your imagination. The authors of the hat-helmet pattern offered their own version, but I didn’t use it. If your child does not like such hats, then you can sew a scarf and a bib from fleece separately. See photo master class HERE.
Now comments on the hat pattern
Firstly, if you are sewing a winter version with a lining, then you need to take one size larger, or even 2. Take one size up only if you are sewing from thin knitwear or stretchy fleece. Secondly, the fleece and lining should be highly elastic, very stretchy, i.e. thick, dense fleece is not suitable. I think the lining should be sewn half a centimeter less. I subsequently had to sew up the lining of the cap.
If you want thick and dense material, then you need to think about the fastener, or cut the shirtfront much wider and sew an elastic band around the neck for tightening.
I originally sewed it without a fastener. The head was difficult to get through. It was very uncomfortable for the baby to put on and take off the hat and helmet. Later I had to rip it open on the chest and make a fastener.
You can also lengthen the forehead in the middle part (by 5-8 centimeters) and the side parts down by the same amount.
The edge around the face can be 5 cm, i.e. cut out a strip 10 cm wide. But you have to try it. Also, if it seems to you that the forehead is too open, then you can try to slightly lengthen the pattern in the forehead area. To do this, cut the middle part longer by the required number of centimeters and the side parts too.
Approximately as in the photo. The colored part is the extension.
For the future: this model is best sewn from knitwear. At the same time, take into account its extensibility. Most likely, the helmet cap according to this pattern is designed for knitwear with a pile on the wrong side - footer. And it was created so that it was tight. The elastic edging should, in theory, ensure a snug fit to the child’s face. The elastic should be cut only from knitwear with high stretchability - cashcorse or ribana. But the desired effect will not be obtained from a cooler or interlock, as well as from a footer. What is ribana, etc. fabrics read HERE.
Some sew from raincoat fabric with fleece and various insulation, but then you need to take more of the pattern and try how it fits. The initial version of the pattern is designed for stretchy knitwear. And then the cap should be worn like a balaclava, i.e. How to put it under another, warmer one.
If you decide to sew from thick fleece, it is best to cut out the fastener in advance. Approximately as in the photo below (photo from the Internet)
Now I’ll share my experience
(click on all photos to open in a new window). We cut out the details of the hat with a seam allowance of 1 cm. Side parts - 2 parts Middle part - 1 part
For the lining, we cut out the same parts, just do not make a seam allowance, or a minimum allowance (0.5 cm).
We chop off the middle part with the sides and sew it on a machine (if you are sewing with a lining) using a zig-zag seam or a special knitted seam. If you sew without a lining, then sew the parts on an overlocker.
We chop off the middle part of the hat-helmet from the front along the chest. This sewing option is well suited for knitted hats.
If you sew from fleece, like me, then the strips under the fastener are sewn in this place (details below). And skip this stage. Although you may have initially made changes to the hat-helmet pattern. Then skip this step anyway.
Next, measure the length along the front part of the hat-helmet (the one that will suit the baby’s face). We cut a strip of knitwear (from ribana or cashkorse is best) 5 cm wide and 2/3 of the length of the front part. We sew it into a ring and fold it in half with the seam facing inward. (If you are sewing a hat with a clasp, then you do not need to sew it into a ring)
We pin a strip of knitwear to the front part and sew it on a zig-zag machine or with an overlocker. If you are sewing a single knit hat without a fastener, then you are ready. Decorate your helmet hat and wear it with pleasure.
If you are sewing with a lining, then it needs to be assembled in the same way as the main cap. Only without sewing in a knitted strip.
Next, we fold the main cap and the one made from the lining face to face. We chop off the lining and the main part of the hat-helmet along the front part. We sew along the seam of the knitted strip. Turn it inside out. I hope that you understand how to sew a hat and helmet.
Make notches on the curves and corners.
As I wrote above, I sewed the fastener in after. I made no changes to the pattern. For the fastener, I cut out 2 strips of knitwear 4.5 cm wide. I measured the length along the cap. Be sure to glue the knitwear with dublinin.
Next, we fold the long side of the strip face to face with the main part of the hat-helmet at the fastener, sew the parts together and stitch them. We also baste them with the lining and sew them with a regular stitch on the machine.
Fold it in half face to face and sew short sections of the panel under the fastener. We do the same on the other side of the helmet.
You can put buttons, sew on buttons or Velcro - as desired. I sewed on Velcro, but it's best to put buttons. It will be more reliable. Or sew on buttons.
Along the bottom edge of the helmet cap itself, I folded the main and lining parts together and sewed them on a machine with a knitted seam (you can do it with a fine zig-zag). The edge of the fleece does not fray, so no overlock. Although it would be possible to process the edge using an overlocker.
If you have thin knitwear or thin fleece on the lining, you can fold the lining and main fabric inward and stitch along the edge. My fleece is thick and the bottom turned out very ugly with this processing option.
Now the hat-helmet is ready. We decorate and wear it with pleasure.
I hope that my experience on how to sew a hat and helmet will help you. HERE you can read about ways to decorate children's clothing,
and HERE is a master class on making fabric appliqué.
Was everything clear? It is very important for me to know your opinion about this master class. Write comments.
Options for hats can be viewed in my VKontakte group HERE. (click on the link and the post will open in a new window)
Games and activities for children HERE
If you want to learn different handicraft tricks on sewing, or need patterns, or maybe MK, then click on the buttons and go to the right place.
Happy sewing!
detishiem-odesda.ru
Video tutorials on knitting a hat and helmet
Step-by-step description of how to knit a hat-helmet for a baby
Size: 0-3 months The model is knitted in garter stitch without seams. An elastic band is tied around the face for a snug and soft fit. The width is adjustable with a cord. Yarn Pekhorka Australian merino (95% merino wool, 5% acrylic, 100g-400m). The hat-helmet is knitted in 3 threads, and the elastic band is knitted in 2 threads. Knitting needles No. 4.5 for the main fabric and knitting needles No. 4.
The video should load here, please wait or refresh the page.
Knitted hat-helmet for a girl or boy
The helmet for the child in the video is knitted from Alize Superlana Maxi for a head circumference of 54 cm.
The complete master class consists of several parts. In the first part I will look at getting started:
- we will knit a sample and take the necessary measurements;
- We will make the necessary calculations to knit a helmet of any size and from any yarn. Because I will show exactly the knitting technology, and not just the stitch description.
- Let's tie the beginning of the helmet.
The video should load here, please wait or refresh the page.
Knitted hat-helmet for a girl or boy, part 2
The video should load here, please wait or refresh the page.
Knitted hat-helmet for a girl or boy, part 3
The video should load here, please wait or refresh the page.
Tips for sewing a hat
If you do not have much experience in sewing, then try sewing a hat - a helmet made of fleece. It is very easy to work with and does not require additional processing. And the finished product will be warm and beautiful.
Also, in order not to complicate the sewing process, you can use a pattern like a woman’s bonnet. In it, the back and side parts are slightly longer and will require a fastener. But overall the difficulty level is lower.
To make the entire sewing process as clear and simple as possible, watch this video:
Knitted boots with description and photo
What to wear with ballet flats
