Knitting is a very exciting activity that develops hand motor skills, lifts your spirits and brightens up your leisure time. The most popular knitted models are hats for girls for different seasons.
Amateurs and professionals of this type of needlework have come up with many variations of knitting hats for children using additional accessories, various threads, and combined patterns. For mothers, such an activity will be an excellent opportunity to please their child with a unique and interesting thing, created with warmth and love.
Helpful tips for moms around the world
Before you start working on any model of a hat for a girl with knitting needles, you should pay attention to the advice of experienced craftsmen. Here are the most significant and useful recommendations:
- Before knitting, you should measure the circumference of the child’s head and reduce the resulting figure by 2-3 centimeters - this will help to adjust the size of the hat after washing.
- The finished product must be washed using baby washing powder (it is recommended to select the water temperature according to the characteristics of the thread material).
- During the process itself, it is not recommended to attach the product with clothespins or pins or hang it on any interior items - the threads will stretch, and the future hat will not look like the model in the picture.
Age characteristics taken into account when knitting a children's hat - height and diameter:
- up to 3 months – height 13 centimeters, diameter 9 centimeters;
- up to 6 months – height 14 centimeters, diameter 10 centimeters;
- 0.6-1.5 years old - 15.5 and 12 centimeters, respectively;
- 1.5-3 years old - 18 and 13.5 centimeters, respectively;
- 3-6 years – 19 and 14.5 cm;
- up to 8 years – 19.5 and 15.5 cm;
- up to 16 years – 21.5 and 16.5 cm;
- from 16 years and over – 22-23 centimeters and 17-18 cm.
Now is the time to choose the right model, and descriptions and diagrams will help you turn it into reality with your own hands.
Simple options: even debutants can handle it
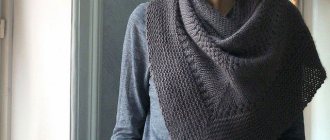
How to knit a winter hat: for beginners
This winter hat is suitable for girls of all ages, and knitting it according to the pattern and description is not complicated in any way.
We recommend high-quality yarn LANAGOLD 800 ALIZE 800m/100g 49% wool, 51% acrylic in 4 threads. It is recommended to use circular knitting needles. This is an option for the winter with a simple job description. You need to cast on the loops and knit the hat with a regular elastic band.
After a few centimeters (depending on the size), you need to start decreasing the loops. With each row there will be fewer and fewer of them. When a couple of loops remain, they need to be completed and tied. An ugly knot can be disguised with any pompom.
Another winter model in the video:
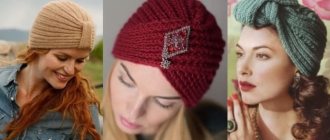
For autumn and spring
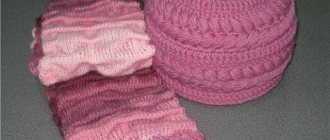
Here, novice craftswomen can use a simple method to create a very suitable model. It is perfect for teenagers too. It is recommended to use circular knitting needles, yarn with an acrylic content of up to 75-80%. Step-by-step instruction:
- Cast on the required number of loops.
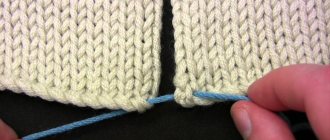
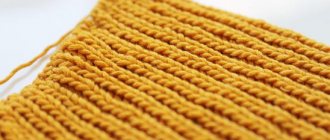
- Knit 3-4 centimeters with an ordinary elastic band (shown in the figure above).
- Then knit the front rows from the inside, and the purl rows on the face until the very end.
- Check the product against the table and start decreasing the loops.
- Finish and tie the last row.
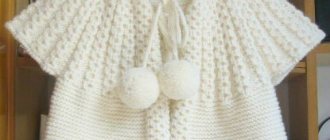
The finished product can be decorated at your own discretion. A pompom, rhinestones or beads are suitable here.
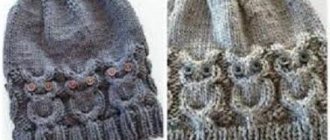
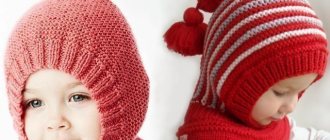
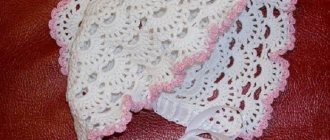
Children's hat - crochet helmet
This cap with a collar covers the child’s forehead and neck and is easy to put on and fasten. It can be knitted for both girls and boys with an interesting pattern of elongated loops.
Designations: ch - air loop, dc - double crochet, dc - single crochet, f1, f2, etc. – photo numbers.
Knitting technique
crown
It is knitted in a regular circle until its diameter is equal to the head circumference divided by pi - 3.14.
1. Make a ring, ch 3 insteps (they count as a double crochet). We knit 11 stitches into a ring. At the end we make a connecting loop in the first loop.
2. 3 ch, 1 dc at the same point. In the next loops we knit 2 dc (f2).
3. 3 ch, 1 dc in the base of the chain, 1 dc in the next loop. Then repeat *2 dc in one loop, 1 dc*.
4. In subsequent rows we add additions through 2 loops, then through 3, etc. until we get the required diameter size (f4).
Base of the cap
The pattern of the canvas is obtained by elongated loops. The number of colors can be any. Different patterns are obtained by shifting the elongated loops relative to the long loops of the previous rows. We knit 2 rows in one color.
1. We knit a row with single crochets. In the connecting loop we make the transition to yellow (f5).
2. We knit a row with yellow thread in single crochets. In the connecting loop we switch to the main color (f6).
3. Make 2 lifting loops, 1 st, 1 st. We knit the next loop long, for which we insert a hook 2 rows below the current loop (f7), pull out the thread, and knit a stitch.
We skip the current column. Next we go with rapport *3 stitches, long loop, skip a stitch under the long loop* (f8, f9).
4. The next row is done in single crochets (f10). Let's switch to red.
5. We knit a row with red yarn according to the repeat pattern *3 sts, long loop, skipping the current loop*. In this row, the pattern is shifted so that the long loop is located between the long loops of the previous color (f11, f12).
6. We knit a row in single crochets with red thread (f13).
7. Switch to another color, knit a repeat pattern of two rows. Now you can show your imagination and knit with offset long loops or without offset. You can include more colors, etc. The brightest color in this hat is red, so it was chosen as the main one. Transitions to red are made through 2 rows, and long loops are not shifted. 8. We knit a pattern to the height of the cap, taking into account the width of the elastic band for the oval of the face.
Occipital part
Fold the hat in half. Working threads show the back of the head (f14).
This part needs to be lengthened by 2-3 cm. (f15):
• divide half the cap along an arc into 4 parts,
• divide the second part in half,
• 1 part and half of the second determine the loops to the forehead, the rest belong to the back of the head,
• mark with markers the point of position of the occipital part on the second side of the cap (f16),
• we knit the lower part of the cap with a pattern from the back of the head (f17).
Bottom of the cap
We knit it with an elastic band from embossed double crochets. If you wish, you can switch to knitting needles and knit an elastic band with them.
1. Cast on 15 ch, go to the back of the hat, and knit single crochets, then another 15 ch for the second part of the fastener (f18).
2. In the reverse row, we knit all the loops of the row with double crochets (f19).
3. We knit several rows with an elastic band with embossed columns (f20).
4. We knit an elastic band along the oval of the face, for which we knit the upper loops of the fastener with embossed stitches, along the oval of the face we go with double crochets, and we also knit the last loops of the fastener with embossed stitches (f21).
5. In the reverse row we knit all the loops with relief stitches (f22). If necessary, you can knit a few more rows.
6. At the ends of the fastener we knit several rows with single crochets. Where button holes are needed, we knit a row with double crochets. To get holes, we make 1 air loop and skip one column. Depending on the gender of the child, do not forget to take into account the location of the button holes (f23).
The hat-helmet is ready. If desired, you can make a pompom (f24).
How to knit an elastic band with embossed stitches
They can be double crochet or single crochet. There are convex (front) and concave (back) ones. For elastic, alternate convex and concave relief columns.
To knit convex embossed columns, make a double crochet, insert a hook under the column from the front side (f25), pull out the thread (f26), knit a double crochet (f27).
Concave ones differ in that the hook is inserted under the post from the wrong side of the product (f28).
See also:
Crochet caps for babies
Elf hat for baby, knitted
Children's animal hats
Hats with ears
In order not to forget the page address and share with friends, add it to your social network:
More interesting:
Tags: Knitted clothes, DIY hats, Children's clothing (knitting and sewing)
Attention! It is better to write urgent questions in the comments on the website (form at the bottom of the page) or, better yet, directly by email. There are no notifications about comments from the VKontakte form! This form is more for feedback. 
Discussion: 2 comments
- Regina:
September 5, 2021 at 07:58 pmI found your MKs just in time, it’s time to knit for the kids, in our climate autumn comes early
Answer
- Galina:
September 7, 2021 at 4:04 pm
My grandmother used to knit hats like this.