- July 7, 2019
- Needlework
- Baranova Nastya
A lined vest has not gone out of fashion for many years, and it is relevant at any time of the year. Its high popularity is due to its versatility, because this item of clothing can be worn both for business and casual wear. But to maintain the shape of the product when sewing, the vest needs to be duplicated and reinforced with lining. The comfort of wearing and the beauty of appearance depend on the correct stitching of all sides and the level of matching of the parts from the main and lining fabric. But to do this you need to know how to sew a lining to a vest. Let's take a closer look at this process.
How to sew a lining to a vest: step-by-step instructions and useful tips
- July 7, 2019
- Needlework
- Baranova Nastya
A lined vest has not gone out of fashion for many years, and it is relevant at any time of the year. Its high popularity is due to its versatility, because this item of clothing can be worn both for business and casual wear. But to maintain the shape of the product when sewing, the vest needs to be duplicated and reinforced with lining. The comfort of wearing and the beauty of appearance depend on the correct stitching of all sides and the level of matching of the parts from the main and lining fabric. But to do this you need to know how to sew a lining to a vest. Let's take a closer look at this process.
What material is used for the lining?
Selecting the right fabric is no less important than knowing how to sew a lining to a vest. The material must meet the following requirements:
- abrasion resistance - 1500 cycles;
- ratio of the density of the main and lining fabric: if the density of the main vest fabric is 200-350 g/m2, then the same parameter for the lining should be 90-120 g/m2;
- breaking load - 20-30 daN;
- shrinkage should correspond to the shrinkage of the base material (usually this parameter does not exceed 2%).
To sew a vest lining, you can choose the following fabrics:
- viscose;
- viscose with the addition of cotton threads;
- viscose with the addition of acetate threads;
- viscose interspersed with nylon or polyester threads (for linen products, wool-blend vests);
- lining with elastic fibers (for stretch products).
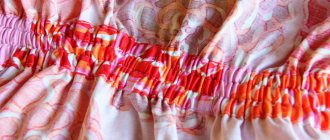
In order for the vest to keep its shape and be comfortable to wear, you need to cut out the parts of the garment with absolutely equal allowances on all sides from the main fabric of the product and from the lining. At the same time, before sewing the lining to the vest, they need to be tried on separately.
You will also need to strengthen the edges of the sides, neckline and armholes of the part made from the main fabric. For this purpose, it is recommended to use a Vlieseline gasket (the material may be marked H180 or H200). These actions are performed similarly in both women's and men's vests.
If the selected pattern does not have trims, but the finished product is supposed to have them, then you can additionally add them yourself on the sketch of the shelf. You need to cut out the edges with circular allowances. They also need to be reinforced with Vlieseline. In this case, shelves made of lining fabric should be slightly narrower than similar parts made of the main material. This is due to the fact that the trim will be cut off from these parts.
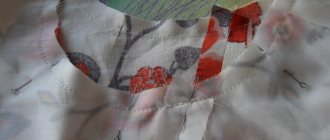
MK "Children's vest lined with imitation pockets"
Even a novice seamstress can handle sewing such a children's vest, and the new thing will bring a lot of pleasure to the child; he will happily wear it to kindergarten, school or for any occasion.
To sew a vest, you need to prepare the following materials:
- - textile
- - lining
- - snaps or buttons
- - scissors
- - chalk
- - threads
It is better to choose fabric from the costume group, with the addition of natural fibers (wool, linen). A brightly colored lining will look interesting.
The procedure for sewing a vest:
1. Before cutting, the fabric must be washed and ironed so that the finished product does not shrink or fade.
2. Print the pattern, enlarging it to the desired size, or transfer it from the pattern sheet Burda No. 5 2010, model 143
3. Fold the fabric right side inward and trace the pattern with chalk. We cut out the parts with allowances of 0.7 - 1 cm on all sides. It turns out 1 back part (one-piece back), 2 shelf parts. We cut out the same details from lining fabric. For the leaf, we cut out two strips of fabric 9cm long, 5cm wide plus allowances.
4. Fold the piece of paper right side inward and sew down the short edges, cutting off the corners next to the stitching.
5. Turn the leaf inside out and iron it.
6. On the shelves, mark the location of the pocket, place a piece of paper on top and stitch it in place; the stitching line should coincide with the line where the pocket is located.
7. We bend the leaf and secure its sides with a stitch 2-3 mm from the edges, iron it.
8. Fold the shelf and back with the right sides inward and stitch the shoulder sections at a distance of 0.7-1 cm. We also stitch the shoulder sections on the lining.
9. Finish the vest with lining. We fold the lining and vest with the right sides inward, matching the shoulder seams, fasten with pins and stitch along all sides except the side ones. In rounded places we cut the allowances with scissors.
10. Turn the vest right side out through the side cuts and straighten the corners.
11. Processing of side cuts. In order to stitch the side sections, we reach into one of them and pull them out. We sew the side sections together with the lining. On the other side we sew down the side cuts as much as possible, leaving the hole in the lining unsewn. Sew up the hole in the lining by hand.
12. We sweep the vest along all the seams, forming a small edging from the main fabric, bend it towards the lining, and iron the basted seams.
13. We install buttons on the sides using a press, or you can sew buttons and punch out loops.
14. Iron the vest and remove the basting threads.
You can sew trousers paired with a vest using this master class.
lady-master.ru
Basic method
Sewing a lined vest - master class:
- Sew all the seams that must be present, except for the shoulder seams, both on the lining and on the parts made of the main fabric. Remove basting threads.
- Place the lining and vest face to face; for convenience, you can secure them with needles along the seam line.
- After this, you need to stitch the parts along the neckline and armhole cuts, as well as along the front and bottom cuts. You need to start the stitching (and also end it) strictly along the basting line of the shoulder seam.
Now you need to cut off the seam allowances. At the resulting curves they need to be cut, and at the corners they need to be cut obliquely. Finish the edge with an overlocker.
After this, you need to turn the lining over the unstitched shoulder.
- Now the edges need to be ironed.
- At the next stage, the shelves and the back need to be connected with the right sides, then the product should be stitched along the shoulder, but the lining should not be touched during this.
- Press all seam allowances, and fold and sew by hand on the shoulders.
- You need to finish the work by stitching the vest from the front side around the entire perimeter.
Jacket with lining - master class by A. Korfiati
Processing a jacket or jacket with a lining is one of the labor-intensive final stages when sewing a product. The jacket can be partially or completely lined, it all depends on the fabric, model and designer’s ideas. When the product is completely covered with a lining, the lining parts are cut using the same patterns as the main product with allowances of 1.5 cm along all seams and at the bottom of the parts.
IMPORTANT! To ensure that the finished lining does not pull or restrict movement, an increase of 2 cm should be made along the middle seam of the back. The fold is stitched from the top and bottom edges by 2-2.5 cm and ironed.
Processing the jacket with lining
There are 2 options for processing a jacket with a lining - with and without facing the back neckline, cut from the main fabric. In the above master class, the back neck is processed using a facing from the main fabric; in this case, the back parts are cut minus the width of the facing.
Before processing the jacket with the lining to the edgings, you should sew the facing to the back neckline, sew in the collar (the sides of the jacket are processed with edgings, the back neck is treated with facings) (Fig. 1).
From the lining fabric, cut out the lining pieces with 1.5 cm allowances along all seams, including allowances at the bottom of the pieces. In the middle of the back, make an additional increase of 2 cm for a loose fit. The increase is pressed into the fold (from the top and bottom you can stitch the fold 2 cm) (Fig. 2).
Rice. 1. Jacket with stitched piping and collarsFig. 2. Lining - details
Stitch the lining parts similarly to the jacket parts, attach the sleeves and sew them in. Leave an unstitched section 15 cm long along the bottom seam of one sleeve (Fig. 3-4).
Rice. 3. Prepared liningFig. 4. Unstitched section of the sleeve
Cut out a finishing trim 3 cm wide from a contrasting fabric.
Advice! Finishing tape can be bought ready-made at a hardware store, or cut from light fabric. Typically, trim is made from silk, satin, and cotton. Cotton tape may shrink, so it should be soaked, dried and ironed before use.
Rice. 5. Sew the binding to the hem
Fold the binding in half and stitch along the hem allowance. The stitching should be at a distance of 3 mm from the fold of the binding. Iron the seam, pulling slightly (Fig. 5-6-7).
Rice. 6. The binding is stitched to the edgesFig. 7. Iron the binding, pulling slightly
Place the lining on the jacket right sides together, pin along the seams, and align the jacket and lining at the seams.
Sew the lining to the jacket, stitching exactly along the stitching line for the finishing piping. Lay the line from the hem side.
Then align the lining with the product along the bottom allowance, stitch the lining to the bottom of the product (Fig. 8-9).
Rice. 8. Place the lining on the jacket Fig. 9. Sew the lining to the seam allowances along the bottom of the jacket
Turn the lining right side out through the unstitched area in the sleeve. Insert the lining sleeves into the sleeves of the product, if necessary, trim the excess length (Fig. 10).
Rice. 10. Place the lining sleeve into the sleeves of the jacket.
Fold the allowances on the lining along the sleeves, align them at the seams with the allowances of the sleeves made of the main fabric, and pin them together. Insert your hand into the unstitched area of the lining, pull out the sleeve allowances taken together, pin along the allowances and stitch (Fig. 11-12).
Rice. 11. Aligning sleeve allowancesFig. 12. Stitch allowances
Hem the allowances of the sleeves and the bottom of the jacket by hand using blind stitches (Fig. 13).
Rice. 13. Hem seam allowances with blind stitches
Advice! There is a very simple way to fix the allowances of the sleeves and the bottom of the jacket - place a glue web under the allowances and iron, gluing the allowances.
To secure the lining in the product, sew short fastenings—pieces of fabric 1.5 cm long—to the shoulder seam allowances and to the armhole allowances at the points of the elbow and bottom seams of the sleeves (Fig. 14).
Advice! You can also secure the lining using threads; perform similar flexible fastenings by hand.
Important
Fold the open section of the sleeve, folding the seam allowances inward and stitch from the front side as close to the edge as possible (Fig. 15).
Rice. 14. Tacks on armhole allowancesFig. 15. Sew up the open section of the sleeve
Next, you can move on to making loops and sewing on buttons.
Source: https://korfiati.ru/2015/10/zhaket-na-podkladke/
| As you know, sewing a jacket yourself is not so difficult, but what to do if you have a ready-made windbreaker jacket with a thin lining, which is good for walking on windless, warm spring-autumn days, but as soon as the thermometer drops below +10, alas, You won’t be able to wear a jacket like this for long... The solution is simple - you need to insulate the jacket. This is done very simply, and I will tell you in detail how to do it. So, here is the jacket itself, the lining is a thin mesh fabric. I needed padding polyester and lining fabric as insulation for the jacket. I bought synthetic winterizer, but as a lining for the jacket I used an old lining from an autumn coat. |
Machine sewing shoulder seams
You can sew shoulder seams on a machine, but this option is only suitable if you have sufficient experience. To do this, before sewing the vest with a lining, you need to leave a hole about 15 cm long on the back or side seam. Then follow these steps:
- Place the main fabric pieces together face to face, baste the shoulder seams without touching the lining material.
- Through the hole left you need to pull the shoulder sections onto the front side of the vest. First sweep away the main part. Then sew the right side folded shoulder sections from the lining fabric.
Now the shoulder needs to be returned through the hole.
- Carry out similar work on the other side.
- Next you need to sew up the holes in the vest lining, which can only be done by hand.
History of the men's vest
- According to some sources, the vest owes its name to the comic character Gilles the Mummer, who lived in France in the 17th century. His sloppy, sleeveless clothes were very reminiscent of a noble caftan;
- According to another version, the creator of the vest was the tailor Gillet. And another version of the vest was introduced into fashion by the Spaniards, who borrowed the vest from the Turkish sleeveless vest;
- during the French Revolution, the vest became very popular among the Borjois, especially in England;
- The vest came into fashion in Russia in the 19th century. But it appeared in the 18th century and was strictly prohibited, as it caused fear among the Russian authorities for a popular revolution (as happened in France).
This is interesting!
- in the 19th century in Europe, the most daring fashionistas wore 2-3 vests at once, and ladies wore them over their clothes;
- famous fashion designer John Galliano began his career designing vests;
- in England the classic vest is called a “fullback”. Sometimes, for comfort, the fabric on the back is chosen thinner.
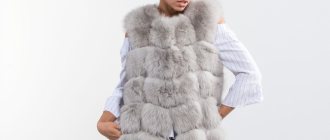
How to sew a lining to a fur vest?
This method is slightly different from those already described. The work needs to be done in the following sequence:
- Sew the side and shoulder seams of the lining, overcast them and iron.
- The base of the fur vest needs to be turned inside out, after which the lining should be spread over its surface (it is recommended to start from the back).
- Next, you need to align the centers of the necks of the two parts and pin them with a pin. They need to be fastened in the center of the bottom, while avoiding excessive tension; the lining fabric should lie freely.
- You need to fasten the parts along the armhole of the back and shelves, and then along the neck line of the shelves and along the hems.
- Next, you need to fold the seams inward, and then sew them to the facings, doing the work with a hidden seam. It is necessary to leave a distance of 1 mm between the folds of the lining and the stitching seams. Then bend the fur upward (with the index finger of your left hand), which will prevent the fur from being sewn on. You also need to add a 3 cm fold, which will allow you to avoid pulling the hem of the bottom of the vest inwards. There is no need to straighten it; it is better to sew it with hidden seams from the inside.
- After the lining is completely sewn, the bottom of the product must be placed under a press for at least 10 hours.
Features of sewing a padding polyester vest
In this case, Polartek can be used as a lining. This is a thermal fabric that will insulate the product.
You need to cut out a lining, which should be 1 cm smaller in the upper part than the parts made from the main material. The cut out elements must be sewn together (the shoulder and side seams must be left unstitched). Now you can connect the lining to the vest; you don’t need to straighten the bottom.
Next you should process the armholes:
- Their cuts need to be leveled (face to face), chipped, then stitched along the entire length.
- At the joints of the seams, cut out isosoft, and then cut the allowances.
- Next, processing of the vest lining occurs on the other side. The product must be turned inside out, swept out using oblique stitches, and in such a way that the main fabric bends to the wrong side by 5 mm.
The next step will be to sew the shoulder seams of the base and lining with one line. You need to finish the work by processing the bottom.
Quilted vest
First of all, you need to choose a comfortable pattern. For example, ready-made patterns for Burda jackets are suitable.
Let's look at each stage of sewing a vest in detail, and you will see that the process is absolutely accessible even to novice tailors.
This article will be long, get ready.
1. What materials are needed
- choose the top layer to your taste: raincoat fabric, membrane fabric, cotton - any. And even bright Pavlovo Posad shawls.
- a layer of insulating material - now there is a huge selection of lightweight insulation materials of the new generation: Alpolux, Isosoft, Wool, Thinsulate. Sintepon is also suitable, I just don’t really like it.
- a thin, light interlining for quilting, - I take loose cotton madapolam. It is inexpensive, thin, plastic. I admit that there is no third layer, but it makes quilting layers much more convenient.
- lining fabric. In my example, the lining is made of Polartec (thermal fabric). It turned out very warm...very.
-zippers for pockets and central fastener, and other accessories required by the model.
2. Cut out all the details of the vest using one pattern.
Make the top three layers a little larger (2 cm allowances). We will cut out the lining and collar (hood) later.
I baste with light stitches, without tightening, to fix the “sandwich” for the stitch: “raincoat fabric + isosoft + madapolam.” This is how I prepare all the cutting details.
We will need feet with rulers. The upper conveyor will also be very useful, which will allow you to evenly feed the top and bottom layers of the stitch set. Why feet with rulers are convenient: just select a stitch pattern, mark one or two central lines, and make subsequent lines using a ruler, focusing on the initial lines.
If you don’t have a special foot, then it’s okay: use chalk (or a pencil on the back layer) to outline the design and stitch. Stitch length 3-3.5 mm.
note
Compare the prepared stitch with the patterns and, if necessary, correct the quilted parts with scissors.
- assemble the vest for fitting using running stitches.
Get a good fit at this stage.
- make pockets in any way according to your model.
Next we begin assembling the vest. The most difficult parts are the zipper and the attachment of the lining.
By the way, the assembly sequence may be different, but it still won’t be ideally convenient.
There will definitely be places where you need to “crawl”, turn through a narrow place, stitch in “segments”, often adjust the fabric under the presser foot, etc. And align the lining with the base several times.
Do not forget to align and control the position of the layers after each stage.
Iron is contraindicated for insulating materials, so strategic knots need to be washed out and stitched away. The WTO is absent throughout the entire cycle.
I chose not the most optimal assembly method. I advise you to move point 10 to the end of the list and leave the bottom of the vest unstitched until the very last operation.
- Sew vest details (yokes, sides, etc.)
except for the shoulder seams. I insist on this point: leave the shoulder seams free for now. My vest design has a one-piece yoke (back + shelf), and I left the cut of the front yoke free.
Cut out excess isosoft at seam joints from the inside out
To straighten: fold the vest symmetrically along the middle back seam and trim any uneven edges. Of course, if the figure is noticeably asymmetrical, this point does not apply. Landing is more important.
- cut the lining according to the same patterns as the top, but optimally simplify the design.
The rule here is: the simpler the cut of the lining, the better. Pads do not require many structural parts.
Cut the lining 1 cm less than the top.
Sew the lining pieces except the shoulder seams. And be sure to leave 10 cm unstitched in one side seam.
- Carefully combine the main vest with the face + face lining.
The lining detail should be 1 cm smaller along the contour.
Don't equalize the bottom yet
We begin connecting the lining to the base from this node.
Align the cuts of the armholes (face + face), pin and stitch the armholes along the entire length.
Carve isosoft at seam joints, cut allowances
Turn the vest inside out and sew with bias stitches so that the main fabric folds 0.5 cm to the wrong side.
- Processing the bottom. This is what I did, and I don’t have another vest for the master class yet).
I advise you to complete this step last, and now move on to the next point.
In a single line – base and lining. This is easy to do, but be sure to line up the seam joints carefully.
Measure the length of the neck.
Cut out a stand-up collar: 2 parts of the main fabric, 1 or 2 parts of isosoft (decide for yourself based on the thickness of the materials).
Sew the top (outer collar) to the neckline. The cuts are open.
13 . Lightning.
I sewed the zipper in the simplest way, without a valance or a placket. The zipper was long, and it was not possible to remove extra links. Hence the choice of the stitching method followed by trimming the excess zipper.
Start pinning the zipper from the bottom, stepping back 2-3 mm from the bend.
Stitch one side.
Close the zipper, mark where the collar seams meet (here: pin)
Pin and stitch the zipper to the other side.
Let's return to the collar - we just need to sew on the bottom (inner collar).
Pin the inner face+face piece to the outer collar (top edge).
Important
Stitch: either in a single line, or sequentially - first the long side, then the short ones (as in the example). But you need to stop the stitching 1 cm before the end. This will make it more convenient to attach the lining in the neck area.
- attach the lining to the inner collar.
This is easy to do - start pinching from the middle “face of the lining + face of the collar.” Stitch on a machine.
I had to sprinkle ashes on my head, greedy for experiments.
Just look at the horror pictures of how I made this knot with the bottom stitched earlier.
- Sew the lining to the zipper.
Align the vest again, straighten the layers, make sure they are not skewed.
Stitching the lining from the inside to the seams and to the zipper is the simplest operation.
I also did it easily - through the hole in the side seam of the lining.
My vest is ready. I'm starting to sharpen the stitching.
The bottom is left unstitched. So let's execute this node. - see point 10
Align the layers of the vest. The base is 1-2 cm longer than the lining.
We turn the bottom edges inside out and fold them face to face, align them and sew them together with a single line.
Carefully turn it inside out through the hole in the side seam. We sew it up with hand blind stitches.
17 final operations
We straighten the vest and fasten it with hand stitches to prevent distortions. We sew off the armholes, zipper, hem, collar - where the design requires it.
I made an additional stitch along the yoke as a final step, thus further securing the lining.
MK is finished.
To the brave souls and optimists who read to the end: thank you for your attention.
For those who want to sew a vest: I will answer your questions with pleasure.
Source: https://angel-a-dress.ru/texnologii/palto-zhakety-zhilety/styoganyj-zhilet-polnyj-cikl-poshiva
Possible mistakes
Beginner seamstresses may make the following mistakes:
- no seam allowances;
- choosing the wrong material for the lining, cutting it incorrectly;
- stretching of the lining material, as a result of which it breaks at the seams during wear.
Even a novice seamstress can sew a vest with her own hands, but she must follow the technology of not only cutting and assembling parts from the main fabric, but also connecting the lining to the vest.
Classic women's vest with collar
A vest using this pattern can be sewn not only in a strict business style. If you use elegant fabric, decorate with beads or embroidery, we will get a very interesting version of the vest.
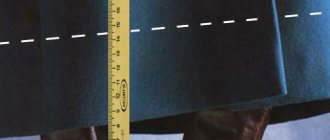
For size 48, with OG = 96 cm, OT = 76 cm and OB = 104 cm, the pattern is shown below.
For sizes 50 and 52, patterns are given on the same drawing, marked with different lines. For size 50 OG = 100 cm, OT = 78 cm, OB = 106 cm. For size 52 OG = 104 cm, OT = 82 cm, OB = 110 cm.
The patterns do not include seam allowances. As you can see from the picture, each square has a side equal to 10 cm. You need to set the appropriate scale and print each sheet.
In addition, you need to cut out pocket facings 18x2.5 cm (4 pcs.), pocket valances 18x5 cm (2 pcs.)
How to insulate a vest
Before sewing a vest, you need to decide not only on the color and pattern, but also on the materials used. Fabrics such as raincoat, membrane, fleece and other dense materials are suitable for the vest. You need to decide right away whether the vest will be insulated or not. If you decide to make the vest insulated, then as insulation you can choose synthetic winterizer, Thinsulate, Slytex, sherstepon, or purchase a padding polyester lining. The last of the listed insulation materials is good because it is already quilted and sewn to the lining and, accordingly, will not bunch up if you decide not to quilt the vest.
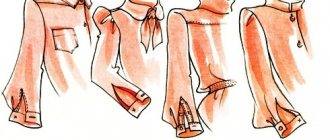
Long vest
The long vest has firmly established itself in our lives. These fashionable clothes most often have a loose fit, allowing you to hide problem areas of the figure. Resembling a sleeveless dress or coat, depending on the material chosen for tailoring, such vests can be with or without a collar, fastened with buttons or with a wrap.
To model a long vest, use a basic straight dress.
What materials should I use for the lining?
If you decide to sew an insulated vest, then you should also take care of purchasing lining fabric. You can buy special lining fabric made from synthetic fibers for sale in specialized stores, but natural fabrics such as cotton and silk are also used as lining, which are good because they are more hygroscopic and hypoallergenic. Knitwear such as viscose, stretch mesh, and oil is also used for lining. Knitwear is not as slippery as synthetic fabrics, but it does not accumulate electricity. Price plays an important role, but it is worth considering that cheap, low-quality materials are hard and thin, and this can affect the quality and comfort of wearing the vest.
What to pay attention to when cutting insulation?
When cutting insulation, you need to focus on the main patterns of the back and front, that is, if the lining needs to be cut a few millimeters smaller than the pattern, then the top fabric and insulation are cut out the same way. After cutting, the insulation is basted to the upper fabric using stitches, which subsequently, after removing the basting threads, will not leave marks.
Patchwork vest
You can sew an original patchwork vest from pieces of leather and fabric.
Size: 44-46.
To make a patchwork vest we need:
- fabric with floral print, 100% linen, width 1.4 m – 0.5 m;
- pieces of fabric of different colors;
- pieces of leather;
- decorative tape for red finishing – 0.5 m;
- decorative tape for black finishing – 2.6 m;
- jewelry stones for decoration;
- “gold-look” buttons – 10 pcs.;
- fabric for lining, width 1.4 m - 0.5 m.
Step-by-step guide to insulating a vest with your own hands
To sew a vest, you need to perform all the necessary steps step by step. First, all the parts from the base material, insulation and lining are cut out. Then the insulation is basted to the upper fabric and quilted using a special ruler foot. If such a foot is not available, then you can draw stitches on the fabric with chalk or soap, along which you can then sew the insulation to the upper fabric.
How to connect the lining to the top
Next you need to sew the shoulder seams on the top fabric together. Then do this operation with the lining parts of the back and shelf. Place the lining on the top fabric with the right side facing inward and stitch along the armhole line, making notches at the curves.
How to sew side seams
You also need to stitch the side seams - separately connect the parts of the back and shelves on the top fabric and separately on the lining.
How to process the bottom
If you want the vest to be gathered, then along the bottom you can sew an elastic band to the wrong side of the lining, while stepping back from the cut by about 2 cm.
How to process the sides
Processing the sides will be necessary if you decide to sew a vest with buttons or press studs. Fold the lining with the top fabric along the sides with the wrong side inward and stitch. The lining should be a few millimeters narrower than the material of the vest top. Then the vest is turned right side out and buttons are sewn on or buttons are nailed on. Before stitching, you can pass an edging between the main and lining materials, then the edge of the bead will look organic.
How to fasten a collar
The collar, like the vest, is cut out from the main fabric, lining fabric and insulation. When cutting the collar, the lining also needs to be cut 2-3 mm smaller than the pattern. Connect the outer fabric to the insulation with stitches, which must be removed after sewing the collar. Then place the lining on the top fabric with right sides facing inward and stitch along the top and side seams. Then turn it right side out.
Place the collar with the main fabrics on the neck line and stitch, while also capturing the insulation. Turn the vest inside out and stitch the lining of the collar and vest along the neckline. Make notches along the neckline for a comfortable fit of the product. Then turn the vest right side out.
How to sew a zipper (if you have one)
If a vest with a zipper is planned, then it is necessary to secure the left and right parts of the zipper with pins on the sides of the shelves on the main material and insulation. Then check to see if everything fits together - seams, parts, edges. If everything is correct, then grind. Next, fold the lining under the zipper inside and sew it to it. This stitching will be visible on the front side of the shelf, so it needs to be neat.
Master Class. Quilted vest
Let's sew a quilted vest! I am not saying that it is easy, and to an unprepared person it may seem like space. It was difficult for me to explain some moments, because when you just do them, you just do them, you understand them with your mind, but it’s difficult to explain them in words.
We will need:
- raincoat fabric,
- fleece,
- insulation,
- zipper,
- scissors,
- threads,
- sewing machine.
Go! We cut out the details of the front and back. I took a pattern from a jacket from Ottobre 2013-1, model 12. What can I take, two parts...
I made them with colored inserts, but this is a personal choice for everyone who wants and designs it the way they want. I did not record the process of cutting the pattern and assembling the parts. And I still didn’t record how I lined them up for stitching. It's hard to see in the photo, but there are already marked stripes there. We cut out the insulation for these parts. I have Alpolux 150 here. But it’s better to take a thinner one. We use needles to pin each piece along the perimeter and also stitch it along the perimeter, thereby connecting the raincoat fabric piece with the insulation. I quilted it right away. We cut off the excess insulation close to the edge. Cut out the pocket details. The lower burlap is made of raincoat fabric, the upper one is made of lining fabric and leaves. We duplicate half of the leaves with non-woven fabric. My finished leaves will be 2cm wide and about 9cm long, which means I cut out rectangles for them that are 6cm wide (2+2+2cm for allowances on both sides) and 11cm long (well, approximately, maybe a little more). I folded it twice inside out and secured it on the sides. I measured exactly two centimeters from the fold and drew a line along it. On the part of the shelf, you need to mark the location of the entrance to the pocket and draw a rectangle like this. 2cm wide (finished leaf width) and 9cm long (pocket entry length). Here is a visual drawing. Here I have it. On the reverse side of the raincoat burlap, we also retreat one centimeter from the edge and draw a line. Now we baste the leaf clearly along the drawn line to the drawn rectangle. We do the same with burlap. We stitch on a machine. It is important to do this very carefully, clearly along the drawn lines, and clearly 9 cm in length (the intended length of the entrance to the pocket). There should be a distance of 2cm between these two lines (the width of the finished leaf). It is important! We sew the upper burlap from the lining to the seam allowance (only to the seam allowance!). It's not difficult to do. We cut along the marked lines, as in the drawing above. Very neat. To the corners. Now we stuff all our burlap into this hole. Let's straighten it out. From the inside we align all the burlap, the leaf and the corner from the slot. We make sure that everything on our face is even. Sweep in this place (a sweep is better than a needle in this case). And we flash it. We turn it away, look... it seems like nothing is wrong... We do the same on the other side. Turn it over. We throw the burlap in different directions. And so that the lining burlap wouldn’t run away, I basted it to the seam allowance (only to the seam allowance!) Now we make a stitch from the face. For now, only one side of the frame, exactly this one, not where the entrance to the pocket is, but the opposite. We remove the threads to the wrong side and fasten. Now we connect the burlap together and pin it with needles. Make sure that they don’t turn away anywhere and lie in the place strictly designated for them while we sew the pocket. Sew along the remaining three sides of the pocket frame. We hide the threads and fasten them. Now you can sew both burlaps together. They don't match, but that's okay, this often happens in the sewing process. The excess can be trimmed off. Well, the pocket is ready. Now you need to do exactly the same canoe with the second shelf. Of course, you need to draw both pockets at once in order to immediately fit them perfectly evenly. Ready! We connect the shelves to the back along the shoulder seams. Here, by the way, you can see the collar. I drew it myself in the image and likeness of ordinary jacket collars. Two parts, one of which must be connected to the insulation. This is where she is. We pin the collar to the neck. Since I drew the collar myself, I made it a little longer than the neck itself, I’m just playing it safe. If you have a clear pattern, then such nuances should not exist. And I just cut off this excess. My collar is already sewn here. Now take the zipper of the required length. I had a long one, I cut it as I needed it, and removed the plastic teeth with tweezers. These are old ones, no problem, but it’s better not to use manicure tools for these purposes. We make a so-called windproof strip. Although mine is short and will not protect from the wind, I use it more to protect against pinching my chin and nose. I recorded every stage. There were so many photos that I collected them into collages, but still too many... But it’s clear, I hope.
1. Cut out a rectangle from the main raincoat fabric (I do it by eye, then I still cut off the excess), and a piece of insulation. 2. Fold the rectangle in half lengthwise, face inward. 3. On one side we apply a piece of insulation. Not inside, but just on top. 4. We pin them together 5. I make two lines, also by eye, one flat, the other steeper. 6. I cut off the excess to the lines. 7. I turn it inside out 8. I make a stitch, retreating 0.5-0.8 cm from the edge. Everything is by eye!
9. I make a few more lines like this 10. I attach the zipper, bending the tip 11. I bend our zipper strap 12. And I pin everything together with needles 14. I stitch it, fasten it 15. I trim off the excess to the zipper 16. I cut it off 17. The strap is ready. We pin the zipper with the strap to the shelf. We make an indent at the top, where the inside of the collar will also be sewn. The zipper at the bottom is also not all the way through, which implies a turn up. Sew close to the teeth. So that as a result, when turning the lapel, the zipper tape will not be visible. I like it this way, it looks neater... Fasten the zipper. We make marks on the zipper tape opposite the connection between the collar and the front, as well as on the connection between the flowers. This is necessary so that the second half of the front is clearly aligned with the first. We pin the second half of the zipper to the second shelf. Turn it over and see if everything matches. If everything triples, then unzip it and sew it close to the teeth. Let's fasten it and take a look. In my opinion, everything coincided well, we can move on. We pin the inner part of the collar and sew it to the main part along the upper edge. There should be no problems there, because these parts are identical. We cut out the front and back lining from fleece. In general, the lining may not be made of fleece, as you want. I usually make something like a label on the back. We connect the shelves and the back along the shoulder seams. Oh yes! Don't forget the loop! Now we connect the neck of the fleece lining to the inner collar, which we sewed earlier to the main parts. Well, here, along the neckline, the lining and the main fabric are connected. Now we connect them along the armholes. Let's lay it out like this. We chop and stitch the armholes. We make notches on the curves and curves. Turn it inside out. We sew the side seams of the main parts and the lining with one line. Here, the sides are sewn. Now I’ll show you a little trick that I do. Perhaps normal people cut everything out clearly and evenly right away, and they can skip this moment, but I always have the length to spare. So this time I needed to adjust the length of the lining. I pin the lining to the zipper. Before reaching the end, I stop. The main fabric is designed to be turned up, so now I turn it up with a zipper Like this. I pin it with a needle taking into account the seam allowance (the lining and the main fabric will be sewn at the bottom, so an allowance is required there) and bring the fleece lining to this place. Here you can see that there is a lot of lining. I align them with the hem of the main fabric, again taking into account the allowance, and make a notch. Then I take out all the needles, disconnect the lining from the zipper, I haven’t sewed it on yet. I level the lining, fold it in half. I measure along the notch to see how much excess I need to cut off. I use needles to mark the cutting line. I’m cutting This is an extra length that I cut out for some reason))) I often adjust everything during the process of work, I couldn’t help but show it. Now we connect the bottoms of the main fabric and the lining to each other face to face. and sew it together. Now, with a clear conscience, we pin and sew the lining to the zipper, we have it without extra centimeters, everything is clearly measured, so it’s not difficult. We sew it clearly along the seam line that was used to sew the zipper to the main parts. Ready! The second side too. Oh God, what is this?! We find collars in this “cocoon”. We connect them together along the neckline. There it is enough to stitch along the seam allowances from one shoulder seam to the other. You won't be able to continue... The “sandwich” turns out to be quite impressive; not everyone will be able to push it under the foot of the machine. If you are not sure, you can join it with a hand seam. There you just need to connect the allowances! This must be done, otherwise the lining will “run away” from the main fabric, and it will be impossible to grasp the loop, the lining will turn out. I don't know how else to explain. What kind of Cheburashka is this?! Find the side seam in the lining and seam it. I usually rip it open, rather than leaving a hole initially, because I always forget about it. We slowly pull out the vest into the light of God. We straighten the corners. It’s so crooked, but sewn together! Now carefully sew out the armholes, hem and collar. And we stitch along the zipper and along the basting. For me, this vest turned out to be quite dense due to the thick insulation and hard taslan; stitching was difficult. But if you take a thin raincoat fabric, for example, a damper, and thinner insulation, then everything will go with a bang! That's it, the vest is ready! We sew up the side seam on the lining through which we turned it inside out by hand. This is very easy to do on fleece and completely unnoticeable afterwards. All!
How to sew insulation under the lining?
Insulation under the lining is a layer of fabric between the product and the lining that makes the product warmer. These are fluffy, lightweight fabrics, such as combed cotton and flannelette, that are not very bulky and breathe easily. If you need very dense insulation under the lining, the product itself will have to be made one size larger. Sleeves are not insulated very often, as they become too puffy. This type of insulation is usually hand-sewn onto the garment, but some can be sewn to the lining by machine. Below you will learn how to sew insulation under the lining.
How to sew insulation under the lining?
The insulation under the lining is sewn to the wrong side of the finished product, but before sewing on the lining. Only the front and back of the product are subject to insulation to avoid unnecessary bulkiness. The insulation pieces are sewn together at the side and shoulder seams, then sewn to the product or to the seam line.
Sew the insulation using the rolled darts and rolled seams. Trim the seam allowances around the front and neck at the edges of the insulation to avoid tightness. Trim the bottom edge of the insulation, making sure it is flush with the edge of the piece.
Place the insulation on the wrong side of the product, threading the sleeves through the armholes on the insulation. Align all seams and pin crosswise. Baste the tape to the garment in the seam allowance area around the armholes and on the side seams using a long diagonal stitch.
Fold the facing over the edge of the seal. Pin, then attach the caulking to the facing using a loose catch stitch or hidden hem. The stitches should not be visible on the front side. Finish the product by covering the insulation with a lining.
Attaching the insulation to the lining
The insulation is sewn to the lining pieces by machine before they are sewn together. If the back side of the lining has a fold, then there should be no fold when cutting out the insulation. The lower edge of the insulation is cut off at the level of the lining.
Make darts and a fold on the wrong side of the lining. Make wrapped darts on the insulation and pin all the pieces to the lining. Trim the insulation to the fold of the lining hem.
Pin and sew the lining together with the insulation and lining already sewn on. Trim the insulation close to the seam to avoid unwanted density and ensure a finished product with a professional finish.
Machine stitch the insulation to the lining at the front, neck and armhole area directly to the seam allowances and align the edges of the allowances if necessary. Finish the item.
How to sew a lining to a vest: step-by-step instructions and useful tips
- July 7, 2019
- Needlework
- Baranova Nastya
A lined vest has not gone out of fashion for many years, and it is relevant at any time of the year. Its high popularity is due to its versatility, because this item of clothing can be worn both for business and casual wear. But to maintain the shape of the product when sewing, the vest needs to be duplicated and reinforced with lining. The comfort of wearing and the beauty of appearance depend on the correct stitching of all sides and the level of matching of the parts from the main and lining fabric. But to do this you need to know how to sew a lining to a vest. Let's take a closer look at this process.
What material is used for the lining?
Selecting the right fabric is no less important than knowing how to sew a lining to a vest. The material must meet the following requirements:
- abrasion resistance - 1500 cycles;
- ratio of the density of the main and lining fabric: if the density of the main vest fabric is 200-350 g/m2, then the same parameter for the lining should be 90-120 g/m2;
- breaking load - 20-30 daN;
- shrinkage should correspond to the shrinkage of the base material (usually this parameter does not exceed 2%).
To sew a vest lining, you can choose the following fabrics:
- viscose;
- viscose with the addition of cotton threads;
- viscose with the addition of acetate threads;
- viscose interspersed with nylon or polyester threads (for linen products, wool-blend vests);
- lining with elastic fibers (for stretch products).
In order for the vest to keep its shape and be comfortable to wear, you need to cut out the parts of the garment with absolutely equal allowances on all sides from the main fabric of the product and from the lining. At the same time, before sewing the lining to the vest, they need to be tried on separately.
You will also need to strengthen the edges of the sides, neckline and armholes of the part made from the main fabric. For this purpose, it is recommended to use a Vlieseline gasket (the material may be marked H180 or H200). These actions are performed similarly in both women's and men's vests.
If the selected pattern does not have trims, but the finished product is supposed to have them, then you can additionally add them yourself on the sketch of the shelf. You need to cut out the edges with circular allowances. They also need to be reinforced with Vlieseline. In this case, shelves made of lining fabric should be slightly narrower than similar parts made of the main material. This is due to the fact that the trim will be cut off from these parts.
Basic method
Sewing a lined vest - master class:
- Sew all the seams that must be present, except for the shoulder seams, both on the lining and on the parts made of the main fabric. Remove basting threads.
- Place the lining and vest face to face; for convenience, you can secure them with needles along the seam line.
- After this, you need to stitch the parts along the neckline and armhole cuts, as well as along the front and bottom cuts. You need to start the stitching (and also end it) strictly along the basting line of the shoulder seam.
Now you need to cut off the seam allowances. At the resulting curves they need to be cut, and at the corners they need to be cut obliquely. Finish the edge with an overlocker.
After this, you need to turn the lining over the unstitched shoulder.
- Now the edges need to be ironed.
- At the next stage, the shelves and the back need to be connected with the right sides, then the product should be stitched along the shoulder, but the lining should not be touched during this.
- Press all seam allowances, and fold and sew by hand on the shoulders.
- You need to finish the work by stitching the vest from the front side around the entire perimeter.
How I sew a lined vest - Babyki
Good evening, dear readers and viewers!
I want to share with you some of my thoughts on sewing a lined vest. I hope it will be useful and interesting. (lots of photos and words)
There are several ways to clean the lining of a vest, but most often this is what I use. Convenient for any format from Yo-SD (26 cm) to 70+.
1.Preparation of patterns.
1.1 To make a vest pattern, you need a shoulder base of the appropriate size. I build the base on graph paper, check the fit on the model and then use it to make any necessary patterns of this size. 1.2 Copy the contours onto tracing paper. Usually I do this with a thin pencil, but for the photo I had to do it with a pen; the pencil lines are not visible well enough. To prevent the tracing paper from curling, you can iron it with a warm iron. 1.3 We model the necessary changes on tracing paper. Modeling lines are shown in red for clarity. I lowered the armhole line by 1cm, shortened the shoulder line by 0.5cm, and increased the neckline by 0.25cm. In addition, I marked the desired neck line. The shape of the neck depends on the model and your own desire. If the vest is planned to be double-breasted, then it is necessary to increase the width of the front part (front part) accordingly. I also reduced the length of the product according to the model. In order for the underline to be smooth, it is necessary that the side line and the underline form a right angle. 1.4 Cut out the resulting pattern from tracing paper. 1.5 My patterns are reusable, so for durability I make them from whatman paper. I paste the pattern from tracing paper onto whatman paper using stationery glue. I place 0.5 cm seam allowances directly in the paper patterns because this allows for greater cutting accuracy than marking seam allowances on the fabric. 1.6 Patterns from whatman paper with allowances included, ready for work. 2. Cutting out 2.1 We cut out one back piece with a fold and two symmetrical shelf pieces. Since the patterns contain allowances, you just need to circle them. The model assumes the back and shelves are made of different fabrics, this allows you to more clearly understand the assembly order. 2.2 Similarly, we cut out the details of the lining 3. Sewing 3.1 We chop off (baste) the shoulder sections of the lining and the main fabric and stitch them with an allowance of 0.5 cm. The parts are placed with the front side inward. 3.2 Iron the shoulder seam allowances symmetrically in different directions on the main fabric and lining. 3.3 Place the assembled parts of the lining and main fabric face to face. 3.4 We chop and sweep the armholes and neckline with the transition to the sides of the shelves (front halves). 3.5 We line up the armholes and neckline with sides with an allowance of 0.5 cm wide. 3.6 Remove the basting. We notch the allowances without cutting to the seam of 1 mm, at a distance of 1-1.5 cm. Carefully cut off excess allowances at the intersections of seams and corners. The notches of the allowances allow the seams to maintain their smoothness and shape after turning out. The operation must be performed very carefully so as not to damage the stitching seam. 3.7 Turn the product inside out, through the gap of the shoulder seam. 3.8 Piece turned inside out 3.9 We combine the side sections face to face with the lining and the main fabric 3.10 We pin and baste the side sections, lay out the armhole allowances flat. 3.11 We get this picture 3.12 We sew with an allowance width of 0.5 cm 3.13 We remove the basting, notch the allowances, cut out the excess at the junction of the side seams and the armhole seam. 3.14 We sew on the edge of the armhole and neckline. Fold the part so that the top of the vest is inside. 3.15 We chop off (sweep away) the bottom edge 3.16 We sew it down, leaving a gap of about 2.5 cm in the middle of the seam We cut off the excess in the corners. 3.17 We turn the vest through it and sew up the gap with hidden stitches. We sweep the sides and the bottom cut onto the edge. 3.18 We line up the armholes and edges of the product according to the model. We remove the basting. 3.19 Decorate the vest as you wish. Thank you for watching) Do-it-yourself clothing patterns for dolls - look at Beibiki
babiki.ru
Machine sewing shoulder seams
You can sew shoulder seams on a machine, but this option is only suitable if you have sufficient experience. To do this, before sewing the vest with a lining, you need to leave a hole about 15 cm long on the back or side seam. Then follow these steps:
- Place the main fabric pieces together face to face, baste the shoulder seams without touching the lining material.
- Through the hole left you need to pull the shoulder sections onto the front side of the vest. First sweep away the main part. Then sew the right side folded shoulder sections from the lining fabric.
Model description
Men's lined vest with a classic collar and trimmed side. The vest fastens at the front with 4 buttons. On the shelves there are pockets in undercuts, the bottom is figured with pointed corners “on the toe”. If a man has a tummy, then this design of the bottom advantageously hides this defect and gives the figure a slender outline.
The vest was designed for a Jane Austen themed wedding (based on the novel Pride and Prejudice) for a 19th century groom's suit.
In the 53th - 19th centuries, men's vests had a stand-up collar and sometimes reached the middle of the face.
To make the vest look modern and at the same time adhere to the style of the time, a classic collar was chosen.
The design of the collar itself was developed on the basis of a stand-up collar, so that it could be raised to give the desired look, without touching the lapels.
How to sew a lining to a fur vest?
This method is slightly different from those already described. The work needs to be done in the following sequence:
- Sew the side and shoulder seams of the lining, overcast them and iron.
- The base of the fur vest needs to be turned inside out, after which the lining should be spread over its surface (it is recommended to start from the back).
- Next, you need to align the centers of the necks of the two parts and pin them with a pin. They need to be fastened in the center of the bottom, while avoiding excessive tension; the lining fabric should lie freely.
- You need to fasten the parts along the armhole of the back and shelves, and then along the neck line of the shelves and along the hems.
- Next, you need to fold the seams inward, and then sew them to the facings, doing the work with a hidden seam. It is necessary to leave a distance of 1 mm between the folds of the lining and the stitching seams. Then bend the fur upward (with the index finger of your left hand), which will prevent the fur from being sewn on. You also need to add a 3 cm fold, which will allow you to avoid pulling the hem of the bottom of the vest inwards. There is no need to straighten it; it is better to sew it with hidden seams from the inside.
- After the lining is completely sewn, the bottom of the product must be placed under a press for at least 10 hours.
Features of sewing a padding polyester vest
In this case, Polartek can be used as a lining. This is a thermal fabric that will insulate the product.
You need to cut out a lining, which should be 1 cm smaller in the upper part than the parts made from the main material. The cut out elements must be sewn together (the shoulder and side seams must be left unstitched). Now you can connect the lining to the vest; you don’t need to straighten the bottom.
Next you should process the armholes:
- Their cuts need to be leveled (face to face), chipped, then stitched along the entire length.
- At the joints of the seams, cut out isosoft, and then cut the allowances.
- Next, processing of the vest lining occurs on the other side. The product must be turned inside out, swept out using oblique stitches, and in such a way that the main fabric bends to the wrong side by 5 mm.
The next step will be to sew the shoulder seams of the base and lining with one line. You need to finish the work by processing the bottom.
Possible mistakes
Beginner seamstresses may make the following mistakes:
- no seam allowances;
- choosing the wrong material for the lining, cutting it incorrectly;
- stretching of the lining material, as a result of which it breaks at the seams during wear.
Even a novice seamstress can sew a vest with her own hands, but she must follow the technology of not only cutting and assembling parts from the main fabric, but also connecting the lining to the vest.
How to sew a quilted vest for a child
How to sew a warm vest for a child using padding polyester? The padded quilted vest is a stunning piece to have in every wardrobe. Sewing a children's vest with your own hands is very simple and quick. My master class will help you sew a puffy vest for a boy with welt pockets in a clear and accessible way.
As you remember from the previous article on how to sew a fleece jacket, I told you where I used the unspent material from sewing children's overalls and a children's parka jacket. I made a warm jacket from fleece, and from jacket fabric and insulation I decided to sew a children's insulated vest or, in other words, a quilted vest.