The neckline and armhole of the dress can be processed in different ways, for example, by sewing facings from the same fabric as the dress. But, more often than not, you have to edge it with factory-made trim or made with your own hands from cut strips of fabric. Bias trim cut from the same fabric as the dress always looks elegant and stylish. Using factory bias tape to finish the neckline or armhole of a dress is not advisable. Finished bias tape is most often sewn along the cut edge of curtains, tulle, etc. In this article I will show you how to make bias tape yourself and the technology for processing curved lines of the neckline, armhole of a dress, blouse without using a special foot.
How to cut strips of bias tape from fabric
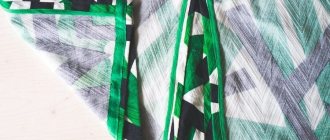
Processing curves and rounded cutout lines differs from straight sections. Smooth laying out of the trim strips is possible only if they were cut along an oblique line in relation to the grain thread, at an angle of 45 degrees. By the way, please note that for this master class I used the most complex type of fabric - chiffon. If you have never worked on the neckline or armhole of a dress made from thin fabrics such as chiffon, practice on other, thicker types of fabric.
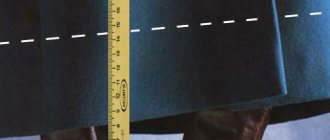
Before cutting the bias tape, calculate the width of the fabric strip. According to my calculations, to process the neckline of a chiffon dress, I needed to cut a strip 5.5 cm wide.
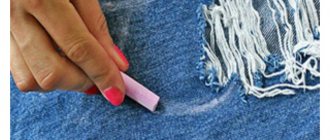
The easiest way to mark stripes on fabric is to use a washable fabric pencil.
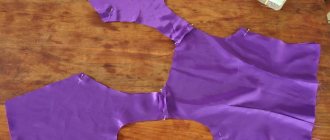
For this master class on processing the neckline of a dress, I used a small piece of fabric to imitate the neckline. Therefore, one length of strip, cut along an oblique line, was enough for me. To process the neck of a dress, you most often have to join two or three strips together. For information on how to properly cut the edges of strips of bias tape and sew them together, see another article on the site: Processing the neckline with bias tape.
Now the cut and sewn strips of bias tape need to be folded with the wrong sides together and ironed.
The bias tape is now ready for stitching. But before you start sewing, set up your sewing machine for sewing thin fabrics. Adjust the pressure of the presser foot on the fabric, the tension of the upper thread, etc.
Place the bias tape along the neckline and check that it is long enough for the edging.
How to trim armholes and necklines
Cutouts in the armpit area on open clothing must be done carefully, as they bear a significant load from the constant movement of the arms, putting on and taking off.
Progress
- Seams are made on the shoulders - on the item and the element.
- Overcast and press seam allowances.
- Sew the armhole facing along the inner edge.
- They pin the product and the part with pins facing each other and grind it down, cutting off the allowances close to the stitching.
- Notches are made in the places of curvature, and ironed onto the facing.
- Sew down the side cuts and facings with a common stitch, and overcast the seam allowances.
- Turn the part to the wrong side and sweep out the edges.
All that remains is to sew the element to the seam allowances on the shoulders and sides. After this, it is worth trying on the product to make sure that nothing is pressing on the owner and that the armpit line looks aesthetically pleasing.
Round or oval cutouts are designed in a similar way. If there is a fastener or a cut on the back of the product, they are processed first, and then the facing. After connecting its parts, iron and sweep away the allowances.
Progress
- Stitch the cut of the part along the inside.
- Sew the part to the cutout with right sides facing each other.
- The allowances are trimmed. They do this closer to the line, notching where the curves are.
- Sew the part to the seam allowances and turn it to the wrong side.
- Sweep out the edges. The seam should be located close to the fold on the wrong side and be invisible on the front side.
Stitching on parts is done as desired. If the item has sides, one-piece borders, first turn them away, then pin the facing to the neck.
minova-fm.com.ua
Technology for processing the neck of a chiffon dress
Place the folded strip of fabric to the edge of the neckline along the right side of the dress and begin sewing. If you don't have enough experience, you can pin or even sweep.
Please note that the seam divides the strip into three parts, two of which will be used for hems.
Now you need to iron the sewn bias tape, as shown in this photo.
Now you are ready to perform the most difficult operation of processing the neckline of a dress.
Combining facings on the armhole and neckline
In clothes with narrow open shoulders, on summer dresses and vests, a single facing is often performed, shaping both the neckline and armholes at once. This allows you to reduce the number of parts and waste of time on sequential design of all parts separately. The fabric of the product being processed can be any. It is permissible to follow the instructions for making products with lining on solid or split parts of the back and front.
A special feature of the method is working with open shoulder seams. They are ground down after the facing has been completed, since it cannot be turned out if the circular cuts are closed.
Nuances of uniform design of upper parts
- Mark the direction of the grain thread on the elements in advance - its location affects the processing.
- If the dart on the chest begins with a cut on the front (in the side), it can not be transferred.
- To reduce errors when transferring a part onto tracing paper, it is worth cutting it off from the main parts of the product.
- Allowances when processing the neckline and armholes are 7 mm on the product and 5 mm on the facing.
- If there is no lining on the item, the lower edge of the facing is cut out without an allowance, making flying edges.
- The part and the product must be equal in cuts at the sides and shoulders, and at the edges of the armholes and neckline, the facing is reduced by 2 mm to make a transitional edging.
So that the parts do not overlap each other, and the product does not thicken in the places of cuts, you need to know how to process the neckline and armhole as a single whole.
chudomama.com
The finishing stitch should run along the bias tape seam.
First, you will have to fold the tape sewn to the neckline, as shown in the photo, and be sure to baste with contrasting threads. No need to iron.
To ensure that nothing interferes with folding the edging in half, be sure to cut off any excess sections of fabric.
During basting, the needle and thread should pass along the connecting seam along the front side of the neckline.
And with a slight overlap on the wrong side.
This is what the bias tape edging will look like from the wrong side.
On the front side, the basting thread is almost invisible, so you need to use a contrasting thread color.
The last securing and finishing stitch should be laid along the front side of the neckline so that the needle runs along the connecting seam, as shown in this photo.
How to handle corners
Bias tape is often used to process shaped trims for Roman blinds, tiebacks, decorative elements for curtains, and lambrequins. Beautifully designed external and internal corners of the product are of great importance. There are two main ways to handle outside corners.
The first method involves doing the following:
- the binding is unrolled and applied to the wrong side of the product and a stitch is laid along the bend of the strip;
- the stitching is brought to the corner and a bartack is formed;
- the corner is unfolded, the resulting bag is placed in the corner and a line is laid along it, starting from the outside of the corner;
- after stitching the product, the binding is turned right side out;
- the final stitch is laid on the front side.
The second method involves the following sequential actions:
- the strip is folded in half and inserted tightly into the edge of the product;
- the stitching is laid to the corner and a tack is made;
- the corner of the product is wrapped around the tape and wrapped around it, thereby forming a fold;
- the sewing line is laid.
Processing internal corners involves performing the following actions:
- a small notch is made in the corner;
- the binding is applied to the wrong side of the product and a stitch is formed along the bend of the strip to the notch;
- when reaching the place of the notch, the product moves apart to allow further stitching in a straight line;
- The stitching is done in the same way on the front side;
- at the place of the notch, the excess overlap is stitched from the wrong side.
Kant
Edging is a strip of fabric cut diagonally and encircling the cut of the collar. This is the most time-consuming way to process a neck, requiring maximum precision - if you want the perfect option, of course.
How to sew a piping beautifully:
- Either cut out the edging from the main fabric, or take a ready-made one so that it becomes a decorative element.
- Fold the edge in half along the long edge and iron it well, it is advisable to even steam it so that the fold does not get lost.
- Place the piping on the neckline so that it touches the fold inside the piping.
- Be sure to baste, otherwise the part will move out and the cut will not be caught by the stitching.
- Sew the edging on the wrong side of the main product, bending the edging cut by 3-5 mm.
- Repeat the procedure on the front side. Fold the edge so that the edge barely covers the already laid line.
The method is not technological, as taught in sewing schools, but proven and error-free. The main thing is accuracy.
According to the rules, the edging is sewn first from the face (folding 2-4 mm), and then from the wrong side, and the wrong edge is folded in such a way that the second line lies exactly on the first or runs along the lower edge of the left side of the edging. This requires skill, accuracy and no haste.
Story
Variations of modern cutouts have emerged not so long ago. Until the beginning of the 20th century, clothing was multi-layered and closed, its combinations were subject to the rules of good manners. Voluminous underwear could not be seen by strangers. The necklines were covered with inner shirts and bows.
A sharp change in the vision of European women's dress took place in Europe in the 14th century, when fashion for the neckline appeared in high society. The men's suit also underwent changes. Gradually, the fasteners for men's and women's clothing were moved to the middle of the shelf. However, until the 20s of the 20th century, necklines remained fairly closed. Ladies were allowed to reveal their necklines in evening dresses. The men's suit was complemented by a shirt with a stand-up collar and a tie.
In the post-war years of the 20th century, a modern wardrobe was formed. Silhouettes were simplified, shapes and volumes became more modest, layers of blouses and full skirts disappeared. Technological progress and emancipation, the economic boom, and subsequent crises also influenced clothing design. Mass production and the need to optimize costs have led to the fact that modern casual clothing mainly has a utilitarian function. A V-shaped neckline, along with a simple round one, gives a minimum of costs in its production. It is easy to manufacture and well received by customers. Basic wardrobe items and clothes in a minimalist style have such a calm neck design.
How to process the neckline along with the armholes
When combining facings, their total width is left unchanged. One element is cut out of paper for the shelf (a fold is made) and two for the back, if you need to insert a zipper. Four parts are required for processing, and two of them have bends.
Progress
- Lay out the parts of the product on the fabric. Align the lines along the cuts. Trace the outlines.
- Cut out all the elements, including the duplicate gasket. Allowances are made for her.
- Stitch the edges along the bottom of the facings. Fold the parts with the product elements along the corresponding lines facing each other.
- Pin the sections on the combined parts with pins. Stitch so that the seam begins and ends 3 centimeters from the shoulder line.
- Make bartacks at the ends of the seam.
Shoulder allowances are ironed. For convenience, you can use a spoon with a long handle. Next, open sections are cut along the neckline and armholes and ground down. Allowances are cut close to the lines. To fold the front part of the product, the back and facings, you need to stretch the sections on the shoulders between the details of the design and the product. When you pull the front out of the edges on the back, the facing turns itself inside out.
vigostore.ru
Processing of necklines and armholes on products with narrowed cuts (up to 3 centimeters)
- Pin the facing to the edges facing each other and stitch down to the seams on the shoulders (they need to be marked).
- Seal the ends of the seam.
- Trim the seam allowance close to the stitch line and notch along the curves.
- Turn the facing to the wrong side, threading the shoulder sections between the part and the item.
- Iron and stitch the edges from the face without catching the facing elements.
- Lay out the seam allowances, tuck them in and secure them with end-to-end stitches.
By carefully performing all operations, you will receive a product that will not be inferior to ready-made clothes sewn in a factory. A dress, vest or sundress will be a beautiful addition to your wardrobe.