Stitched seams
They are used to connect side, shoulder and other sections of product parts. Stitched seams can be pressed, pressed and ribbed.
Pressed seam
To make a seam, fold the two parts right sides inward, aligning the reference lines and aligning the cuts. We sew the parts along the reference line or with a seam equal to:
- 10 mm – when sewing the main parts (shelf, back)
- 12 mm - when sewing the main parts for products made from fraying fabrics in outerwear and non-fraying fabrics - in light clothing
- 15 mm - when sewing the main parts for products made from fraying fabrics in light clothing
- 5 mm - when sewing extensions for items made of non-fraying fabrics in outerwear
- 7mm - when attaching extensions for items made of fraying fabrics in outerwear and non-fraying ones - in light clothing
- 10 mm - when sewing extensions for items made of fraying fabrics in light clothing
We spread the seam allowances in different directions and secure the seam in this position with an iron, that is, iron it out.
Pressed stitch seam
It is performed in the same way as an open-iron seam. The difference is that we bend the seam sections to one side and secure them in this position with an iron.
Stitch seam on edge
It is performed in the same way as a pressed seam. Only iron the seam sections away from the fold.
Adjustment seams
They are used for connecting and fastening seams in products with difficult-to-fit WTO, as well as for finishing. There are two types of adjustment seams: with open cuts and with one closed cut.
Closed bevel adjustment seams
Such seams are made in the same way as topstitched ones, but the allowances are folded to one side, that is, ironed. A finishing stitch is laid on the front side.
Adjustment seams with one closed cut
To make a seam, fold the parts with their right sides inward, releasing the cut of the bottom part to the width of the finishing stitch.
Edging
Edging seam with an open cut - used to decorate the sections of outerwear parts (bottom of the product, internal sections of the hems...), as well as edging the seams (in products without lining). The width of the edging is according to the model. The distance from the edge cut to the edge line is 0.3 - 0.7 cm.
Edging with a closed cut - used for edging sections of parts (neckline, armhole, bottom of a product in light clothing...) The width of the edging is also according to the model. The distance from the closed edge of the edging to the stitching is 0.1 - 0.3 cm.
Overlay seams
They are used to connect the components of cushioning parts, to connect straight and figured yokes and pockets.
Overlay seams with open edges
To make a seam, we place a cut of one part on the cut of another so that the cuts are 6-10 mm on top of each other, and connect them with machine stitching at a distance of 3-5 mm from the cuts.
Overlay seam with 1m closed cut
We bend the cut of one part towards the wrong side to the width of the finishing stitch and sweep it. Iron the fold. Place the piece with the folded cut on the front side of the other piece, right side up, aligning the cuts. We baste one part onto another and adjust it at a distance from the edge equal to the width of the finishing stitch.
Work performed during repair and refacing
Edge seams , widely used in clothing repair, are structurally different from each other (Fig. 18).
The overcast edge seam (Fig. 18, I) is used when decorating sides, valves, straps, etc.
Rice. 18. Edge seams : I - overcast seam. II - seam with an open cut, III - seam with a closed cut, IV - edging seam: a, b - details; c - part from the main fabric, d - strip of lining fabric; 1 and 3 lines; 2 - edging of the part; 4 - note line; 5 — finishing line; 6 - note line; 7 — finishing line; 8 and 9 - machine stitches.
To make an overcast seam, parts a and b are folded with their right sides inward and fastened with line 1, 0.5-0.7 cm from the edge. At the same time, the base material is planted. The width of the seam depends on the type of part and the fraying of the fabrics. After fastening, the parts are turned out onto the front side and their edges are carefully straightened so that an edge 2 1-3 mm wide is formed from the base material. The size of the edging is made depending on the thickness of the fabric.
The prepared edge of the part is secured with a manual or machine stitch 3, which is placed 7-10 mm from the edge (Fig. 18, I).
Edge seams in the hem (Fig. 18, II, III) are divided into seams with an open and closed cut. The former are widely used when decorating the lower edges of products made with lining, for example, the bottom of jackets, cardigans, coat sleeves, etc.
Seams with a closed cut, that is, with a double hem at the edge (Fig. 18, III), are used to decorate items sewn without lining, for example, tunics, summer jackets, linen and dress items, etc.
A seam with an open cut is made simply: the edge of the part is folded towards the wrong side by a set amount and secured with a stitch stitch 4 (Fig. 18, II), and then ironed tightly. Finally, the edge is secured with a machine stitch 5 or by hand or left without stitching, depending on the style of the product.
A seam with a closed cut (Fig. 18, III) is performed as follows: the cut of the part is folded towards the wrong side by 5-7 mm and secured with a stitch stitch 6; then the edge of the part is folded again to the required amount and basted with hand stitches or machine stitched 7.
If the edge of the part was noticeable, it is sewn to the part using hand hemming stitches or machine stitch 7 (Fig. 18, III).
The edge edge seam (Fig. 18, IV) is used to secure the cut and finish it.
These seams are usually used to finish the edges of the hems, the side edges of the floor and the bottom edge of coats, sports jackets, jackets and other products with a lining to the waist.
Sections of products are edged with strips of lining fabric, cut along the weft threads, or with a special braid. The strip of fabric is 2.5-3 cm wide.
To make a seam, a strip of fabric d is placed on part c so that their cuts are exactly aligned, and line 8 is laid along the edge of the parts at a distance of 0.3-0.7 cm from the cuts (Fig. 18, IV). When applying a stitch, strip g needs to be pulled tight.
After this, the edge of strip d is moved towards the wrong side of part c, tightly bending around its cut. The prepared edge of the strip is sewn with line 9 to part c. Line 9 is laid as close as possible to the fold of the edging, due to which line 9 becomes inconspicuous.
- Back
- Forward
Butt seam
Used for joining parts made of cushioning fabrics where a minimum seam thickness is required. To make the seam, we cut out an additional strip of cotton fabric with a width of at least 20 mm and a length equal to the length of the parts being joined. We place the sections of the parts end-to-end on a strip of fabric and adjust them onto the strip at a distance of 5 mm from the sections. We connect the sections with a zigzag machine stitch.
Covering seam
We fold the two parts with their right sides inward, cutting out the bottom part by 8 mm. We bend the cut of the lower part with the lower part and grind them down at a distance of 2 mm from the cut. Iron the seam on the side of the top part and stitch the parts with a second machine stitch at a distance of 2 mm from the seam. Note: the sewing seam is used in the manufacture of bed linen and workwear. When cutting, the seam allowance on the side of the top part is equal to the width of the finished seam. That is, 6mm, on the side of the lower part - double the width of the finished seam + 2mm.
Types of connecting seams
They are used when processing cuts of the neck, sides, bottoms of the product, sleeves in order to protect the cuts from shedding. Edge seams include hem seams, overcast seams, and edge seams.
You can't stop sewing beautifully!
Recommendations, Sewing techniques, Sewing machine
In previous articles you got acquainted with the terminology and main types of manual work. Shall we continue?
High demands are placed on machine seams . The quality and appearance of the product depends on how the machine seam is made.
Depending on the purpose, machine seams are divided into connecting (for fastening parts of the product), edge (for processing edges and cuts, as well as for protecting them from fraying) and finishing.
In connecting seams, the product parts lie on both sides of the seam. For example, seams connecting sections of shelves and back, shoulder sections, sleeve sections, etc.
Types of connecting seams:
– stitching ones are used when connecting shoulder and side sections, a bodice with a skirt, stitching sections of sleeves, as well as when sewing sleeves into an armhole, sewing extensions, etc. There are: without stitching sections (1), with stitching sections (2), ironed (3.4), ironed (5.6), stitched (7.8);
– adjustment seams, like stitch seams, are used to connect parts of a product (mainly from thick fabric), using for sewing yokes, other parts along different shaped lines, etc. There are: with an open cut (9), with a closed cut (10 );
– patch seams are used to connect yokes, patch pockets, etc., they can be with an open cut (11), with a closed cut (12,13), with two closed cuts (14-18);
– double seam (19) is used in the manufacture of blouses from transparent fabrics, any products made from cotton fabrics and bed linen;
– the sewing seam (20) is used mainly in the manufacture of underwear, men's shirts, sports and industrial clothing.
Edge seams are used to process the edges of parts and cuts. The parts are located on one side of the seam. For example, seams for processing the bottom of the product and sleeves, seams for processing sides, collars, etc.
Types of edge seams:
- the overcast seam is used to connect such parts of the product, as a result of turning them out, the seam will be located along the edge, and its reserves are inside, between the parts, there are in an edging (1,2), in a split (3), in a simple frame (4), in a complex frame (5,6,7);
– edging seams are used when processing necklines, armholes, sleeve bottoms, parts cut from bulk materials, etc., they can be with an open cut (8), with a closed cut (9), etc..;
– a hem seam is used for hemming the bottom of the product and sleeves in the manufacture of linen. It comes with an open cut (10), with a closed cut (11), with an edge cut, with a stitched lining, etc...
Finishing seams are intended for finishing parts and the product as a whole. These seams are also used to create a specific silhouette (raised lines on the front and back, various folds, etc.).
Finishing seams include:
– raised seams – stitched (1), stitched (2), stitched with cord (3), tucked (4), stitched;
– with edging – stitching (5), overhead (6), facing, edging;
– folds – simple finishing (7,8), simple connecting (9), complex.
The quality of all seams depends on compliance with the following conditions: the width of the seam, the number of lines and the distance between them, the frequency of stitches, their tightening in the line, the number of threads and needles . The width of the seam depends on the design of the product.
As you can see there are a lot of machine seams.
Some of them you may never use, and some you will use often.
In any case, before you start sewing a product, I recommend making several types of seams on scraps of fabric in order to easily use the acquired skills.
The next article covers the terminology of machine work. Good luck!
This is interesting:
- Processing of shoulder and side seams in the product
- Methods for processing parts slices
- Rules for stitching on a sewing machine. Sewing lessons
- Rules for sweeping parts and mistakes of beginners
- How to process the bottom of the product and sleeves. 18…
- Typical processing sequence...
Hem seams
They are used when processing internal cuts of hems, neck and armhole facings, as well as when processing the bottom of the sleeves of a product. There are two types: closed and open cut.
Hem seams with open cut
To make a seam, bend the section of the part to the wrong side by 5-7 mm and stitch it at a distance of 1-3 mm from the fold.
Closed hem seams
We bend the parts to the wrong side by 7-10 mm and sweep them. Then we bend it a second time by the amount provided by the model (along the control line), cover it with a second line and stitch it at a distance of 1-3 mm from the fold.
Almost no garment is created without the use of machine stitches. Hand stitches mainly perform a temporary function of connecting parts, etc., but the final stage in the work is often the laying of machine stitches, which can also have a decorative and finishing purpose.
Machine seams are divided into groups depending on the amount of seam allowance, the number of machine stitches, as well as the bonded layers of materials being joined - that is, on the overall design. There is no clear boundary between groups of machine seams. For example, a connecting seam can also be a finishing seam, etc. In addition, a combination of various seams is not excluded. The classification of stitches, lines and seams can be considered in more detail in “GOST 12807-2003 - Sewing products. Classification of stitches, lines and seams." Below are the most popular and frequently used machine stitches and stitches, depending on their purpose.
Connecting machine seams
- Ironed connecting seam
- ironing
- setting open cuts
- open cut label
- linen sewing machine
Edge machine seams
- Hem-to-hem edge seam with open cut
- hem with closed cut
- hem with edged cut
- overturned in frame
- edging with open cut
Connecting machine seams (for fastening parts)
Connecting seam
Connecting stitch seam - for stitching sections, attaching small parts to larger ones, grinding strips, etc. There is a difference between a stitched ironing and a stitched ironing. With a backstitching, the seam allowances (cuts) are ironed in one direction, and with a backstitching - in different directions. They come with or without overcast edges.
Stitch ironing
Stachny ironing
Connecting seam
Connecting stitch - for connecting parts overlapping one another, connecting and securing seam allowances and folds directed in one direction. It is also often used to join parts of a product made of dense fabrics in order to obtain a thinner seam thickness. There are adjustment seams with open cuts and adjustment seams with closed cuts.
Set-up with open cuts
Adjustment with closed cut
Connecting overlay seam
Connecting patch seam - for connecting interlining parts when sewing yokes and patch pockets. There are overlay seams with open cuts and overlays with closed cuts.
Open cut label
Closed cut invoice
Connecting topstitch
Connecting topstitch - for finishing, as well as connecting parts of the product without allowing the seams to be ironed (specific materials - leather, etc.).
Connecting linen seam
Connecting linen seam - to ensure the strength and aesthetics of bedding, shirts, blouses, as well as sports equipment, industrial clothing, linen, products made from fine fabrics. There are three types of linen seams: linen closed, linen lock and double linen (French).
Linen sewing
Linen castle
Linen double (French)
Edge machine seams (for processing edges and cuts from fraying)
Hem edge seam
Hem edge seam - for processing the bottom of products, sleeves and other parts made of easily fraying fabrics (when sewing linen, outerwear, etc.). There are edge hems with an open cut, hems with a closed cuts, and hems with an edged cut.
Hem with open cut
Hem with closed cut
Hem with edged edge
Edge overstitch
Edge facing seam - for processing facing parts from thin fabrics - collars, cuffs, etc., to prevent displacement of the connection and increase the stability of the contour of the parts during clothing wear. They mainly use edge edging into a frame, edging into a complex frame, and edging overturning.
Overstitched in frame
Stitched into a complex frame
Welt in edging
Edge edging seam
Edge edging seam - for processing the edges of products, for decorating collars, side edges, etc. There are edge edging with an open cut, edging with a closed cut and edging with braid.
Edging with open cut
Edging with closed cuts
Edging with braid
Compliance of material, thread and needles for sewing machines
Conducting the WTO correctly
How to learn to make straight stitches on a sewing machine (tips)
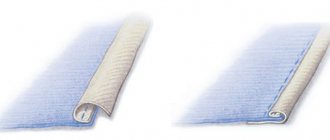
Overlock seams
They are used for processing sections to protect them from shedding. There are three types: edged, framed, split.
Overcast seam in piping
We fold the two parts right sides inward, aligning the cuts. We connect them with machine stitching at a distance of 5-7 mm from the cuts. We turn the parts right side out and sew out the resulting edging measuring 1-3 mm.
Overlock stitch in frame
Performed in the same way as in edging. When basting the hemmed edge, we form a frame measuring 4-6 mm.
Split overcast seam
Performed in the same way as in edging. When basting the hemmed edge, place it on the fold.
Edge seams
Odessitochka Technology of machine works
The use of edge seams is used to protect the cuts from shedding, most often used when processing collars with necks, sides, cuts, armholes,
Overcast seam with edge formation.
The two parts are folded with their right sides inward, the cuts are aligned and joined by machine stitching at a distance of 0. - 0.7 cm from the edge, then the parts are turned right side out, straightened and swept out, forming an edge on one side, 0.1 - 0.2 wide cm or a frame, 0.4 - 0.6 cm wide, or placing the seam exactly on the fold.
Overcast seam with fastening of the seam on the front side (in the frame). To perform turning, two parts are folded with their right sides inward, the sections are aligned and joined by machine stitching at a distance of 0.5 - 0.7 cm. Then the seam is trimmed, this is done in order to reduce the thickness of the fabric, the parts are turned right side out, straightened or basted , forming an edge 0.1 - 0.3 cm wide from one piece,
or a frame, 0.4 - 0.6 cm wide; if you place the seam exactly on the fold (split). It looks like a double seam.
A hem seam with an open cut is used when processing the inner edges of hems, facings, necklines, armholes, hems and sleeves, as well as the edges of finishing details in dresses and blouses (ruffles, frills, ruffles).
The cut of the part is folded to the wrong side by 0.5 - 0.7 cm, secured with a stitch at a distance of 0.1 - 0.3 cm from the fold on a stitching machine or at a distance of 0.2 - 0.4 cm on a special machine.
Seam with closed cut. Used for processing the bottom of dresses, blouses, shirts and sleeves in products made of silk and cotton fabrics.
The section of the part is bent to the wrong side, by 0.7 - 1 cm, then bent a second time by the amount according to the model and stitched on a sewing machine at a distance of 0.1 - 0.2 cm from the edge of the hem or hemmed using a special blind stitch machine or machine with a zigzag stitch.
Open cut edge stitch. Used for finishing sections of parts and protecting them from shedding. A strip of fabric is placed on the front side of the main part, face down, the width of the strip is 2 - 2.5 cm, which is cut along the transverse or oblique direction of the grain of the fabric. The sections are aligned and a stitch is laid at a distance of 0.3 - 0.4 cm from the edge. Then the sections are wrapped around a strip of fabric, forming an edging equal in width to the turning seam.
The edging is secured with machine stitching to the stitching seam of the strip or at a distance of 0.1 cm from it.
Edge seam with closed cut. The edging strip is placed on the wrong side of the main piece, face down. The cuts are leveled and sharpened. Then the strip is turned onto the front side of the part, then the strip is wrapped around the seam.
The cut of the strip is folded inward so that the folded edge overlaps the stitching line of the strip and is adjusted at a distance of 0.1 - 0.2 cm from the folded edge of the strip.
The edging seam is made with a special braid. Used in the group of light dresses and children's clothing. The braid is folded along its length, so that the lower edge extends 0.1 - 0.2 cm relative to the upper edge, and irons it.
A cut is placed inside the prepared braid and a stitch is laid along the upper edge of the braid at a distance of 0.1 cm from the edge, while the second edge of the braid must fall into the stitch.
For convenience, use the table
Did you like this post? Share!
Edge seams
They are used to finish sections of parts and to protect them from falling off. There are three types: with open cut strips, with closed cut strips and edging tape.
Edge stitch with open cut strip
To make a seam, a strip of fabric is cut out from the main or finishing material with a width equal to the edging width of 3-5 mm. We place it on the front side of the part, aligning the cuts, and stitch it with a seam equal to the width of the edging. We bend the seam sections with a strip, forming an edging, and secure it with a machine stitch, placing it in the stitching seam of the strip.
Edge seam with closed strip sections
To make a seam, a strip of fabric is cut out from the main or finishing material with a width equal to the width of the edging (3-5) * 2 mm. Fold the strip in half lengthwise, inside out, and iron it. We place it on the front side of the part, aligning the cuts, and sew it with a seam equal to the width of the edging. We bend the seam sections with a strip, forming an edging, and secure it with a machine stitch into the stitching seam of the strip.
Edging seam with braid
We fold the braid lengthwise in the middle so that the lower edge of the braid extends 1-2 mm relative to the top. Iron the braid. Inside the prepared braid we put a cut of the part that needs to be edged and machine stitch it along the upper edge of the braid at a distance of 1 mm from the edge of the braid.
Types of edge seams
Used for finishing and decorating products. These include reliefs, edging seams and folds.
MACHINE WORK: Edge seams
The procedure for describing edge seams will be the same as for connecting seams: name, diagram or section, example of application, description of the execution process and possible technical conditions (TS). Forward.. Edge stitching in edging Area of application: processing the edges of products - edges of beads, collars, flaps.
Description of the execution process with possible specifications:
- The parts are folded with the right sides inward, the cuts are aligned and the edges are turned. 5-7 mm
- The parts are turned out relative to the connection line. A 0.5-3 mm edge is straightened from one part and fixed using a VTO.
- The edging requires fastening with finishing stitching, feathering or the “clean edge” method.
Edge stitching into a split Scope of application: processing the edges of products - the edges of the bead, collar, in double-sided products.
Description of the execution process with possible specifications:
- The parts are folded with the right sides inward, the cuts are aligned and the edges are turned. 5-7 mm
- The parts are turned out relative to the connection line. The seam is straightened and the VTO is fixed.
- The seam requires fastening with finishing stitching, feathering, or the “clean edge” method.
Edge stitching into a simple frame Area of application: processing of welt pockets in products made of thin and medium thickness fabrics, stitching loops, slots for hidden fasteners.
Description of the execution process with possible specifications:
- The strip of fabric for the facing is ironed, bending it in half along the inside out.
- On the front side of the part, mark the orientation line for the fold of the facing.
- The facing is laid with a fold along the intended line and stitched sh.sh. 4-10 mm
- The facing is deployed relative to the stitching line, the allowances are bent towards the part and fixed using a VTO
Edge stitching into a complex frame Scope of application: processing of welt pockets in products made of thick fabrics, processing of welt pockets with a curved welt line
Description of the execution process with possible specifications:
- The part and the facing are folded with the right sides inward, the cuts are aligned and the facing is stitched sh.sh. 4-10
- Seam allowances for sewing facings are ironed out
- The facing is used to bend around the seam allowance for its stitching and lay the line sh.sh. 1 mm or into the facing seam
Edge hem with open cut Area of application: processing the bottom of products and sleeves - dresses, skirts, trousers.
Description of the execution process with possible specifications:
- The part is folded to the wrong side by 10-30 mm, swept or ironed.
- Lay a line (usually on the front side) so that there is at least 5 mm from the line to the cut
Edge hem with closed cut Area of application: processing the bottom of products and sleeves - dresses, skirts, trousers, blouses, shirts.
Description of the execution process with possible specifications:
- The part is folded to the wrong side by 10 mm, then another 10-30 mm, swept or ironed.
- Lay the line so that w.w. from the stitching to the top edge of the hem was 1-2 mm.
Edge hem with stitched lining Area of application: processing the bottom of sleeves and items with stitched lining
Description of the execution process with possible specifications:
- The lining is stitched to the product sh.sh. 10 mm, folding the parts right sides inward.
- The allowance for processing the bottom is ironed to an amount of 30-40 mm, a fold of 10 mm is formed from the lining
Edge hem with edged cut Area of application: processing the bottom of men's coats, women's items without lining made of expensive fabrics or items with a quilted lining with insulation.
Description of the execution process with possible specifications:
- A strip of fabric for edging is folded with an allowance for finishing the bottom with the right sides inward, the sections are aligned, and the width is stitched 7-10 mm
- The edging goes around the lower cut. The allowance for processing the bottom is folded back by 30-40 mm, swept or ironed.
- To secure the seam allowance, a stitch is placed in the stitching seam of the edging.
- Line 3 can be laid with only the allowance for processing the bottom and the free allowance for the edging. The allowance can be secured with a hidden hem stitch.
Edge edging with open cut Area of application: processing of cut parts to prevent fraying and for finishing
Description of the execution process with possible specifications:
- The edging strip is applied to the front side of the part, the cuts are aligned and the sh.sh is sharpened. 3-10 mm
- The strip goes around the cuts, forming an edge 3-10 mm wide, and the free edge of the strip is secured with a stitch into the stitching seam of the strip.
Edge edging with closed cut Area of application: processing of cut parts to prevent fraying and for finishing
Description of the execution process with possible specifications:
- The edging strip is applied to the front side of the part, the cuts are aligned and the sh.sh is sharpened. 5-10 mm
- A strip goes around the cuts, forming an edge 5-10 mm wide. The free edge of the strip is folded inside out by 4-9 mm and secured with a stitch sh.sh. 1 mm, overlapping the stitching seam of the strip to the part.
- When using an edging stitch, the seam is made with one line (see diagram below)
Edge edging tape Area of application: processing of sections of parts to prevent fraying and for finishing
Description of the execution process with possible specifications: The tape goes around the cut of the part and fixes it with a stitch sh.sh. 1 mm from the edge of the tape. The width of the edging is 3-10 mm.
Reliefs
There are stitched ones and with a cord.
Progressive reliefs
We outline the location line of the relief on the front side of the part. We bend the part along the marked line with the wrong side inward and stitch it at a distance of 1-3 mm from the fold.
Reliefs with cord
To make the seam, we cut out an additional strip of fabric, the width of which is equal to the thickness of the cord + 10-15 mm. On the front side of the part we mark the location of the relief with 2 lines, the distance between which is equal to the thickness of the cord. Next, we transfer the lines to the wrong side. Then, on the wrong side of the part, we apply a strip of fabric so that the sections of the strip extend beyond the marked lines at the same distance (5-7 mm).
We chop off the strip and the part in several places with pins. We adjust the part to the strip, laying finishing lines on the front side of the part along the marked lines. We thread the cord with a pin between the two lines.
Finishing seams with edging
They are used in the manufacture of uniforms, as well as for decoration. These include a topstitch with edging, a facing seam with edging, and an overlay seam with edging.
Stitched seam with edging
To make a seam, we cut out a strip of fabric with a finishing material of width (edge width + L) * 2, where L is the width of the seam for stitching the parts (10, 12, 15 mm). We bend the strip along the middle with the wrong side inward and iron it. We apply a strip to the front side of one of the parts, aligning the cuts. We sew the strip to the part with a seam of width L from the side of the strip. We fold the two parts with the right sides inward, aligning the cuts, and grind the parts, placing a machine stitch in the stitching line of the strip. Iron the stitching seam.
Overlock seam with edging
The seam is made in the same way as a stitched one, with the only difference being that after joining, we turn the parts right side out, placing the seam on the fold.
Overlay seam with edging
This type of seam is performed in the same way as a stitched one, with the only difference being that after joining, we turn the parts right side out, ironing the media in one direction. We adjust the cuts on one side.